
Short Description
Ghost Inspector is a cloud-based UI testing and monitoring service. It allows you to build or record a browser test to check specific functionality in your website and alerts you if anything breaks. Ghost Inspector can notify you with details when your test fails. You can record a test on any website that can be reached in your web browser. Also, there are available scheduling options for individual tests or whole test suites.
Chrome Recorder
To get started, first, you need to Sign up for a free Ghost Inspector account. In order to create tests, you can use the test editor, or add Chrome Recorder extension. This extension is available on the Chrome Web Store. After installing the extension, a Ghost Inspector icon will appear in your Chrome toolbar. The first time you access the tool you will have to log into your Ghost Inspector account (this will be required only the first time). After you are successfully logged in, you will see the “Start Recording” button.
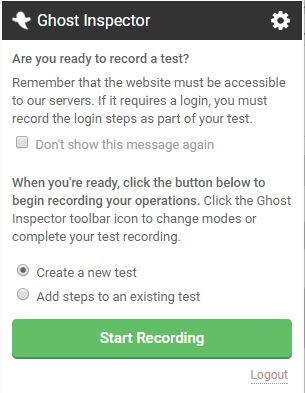
Once you click on Start recording button Ghost Inspector starts to track your actions.
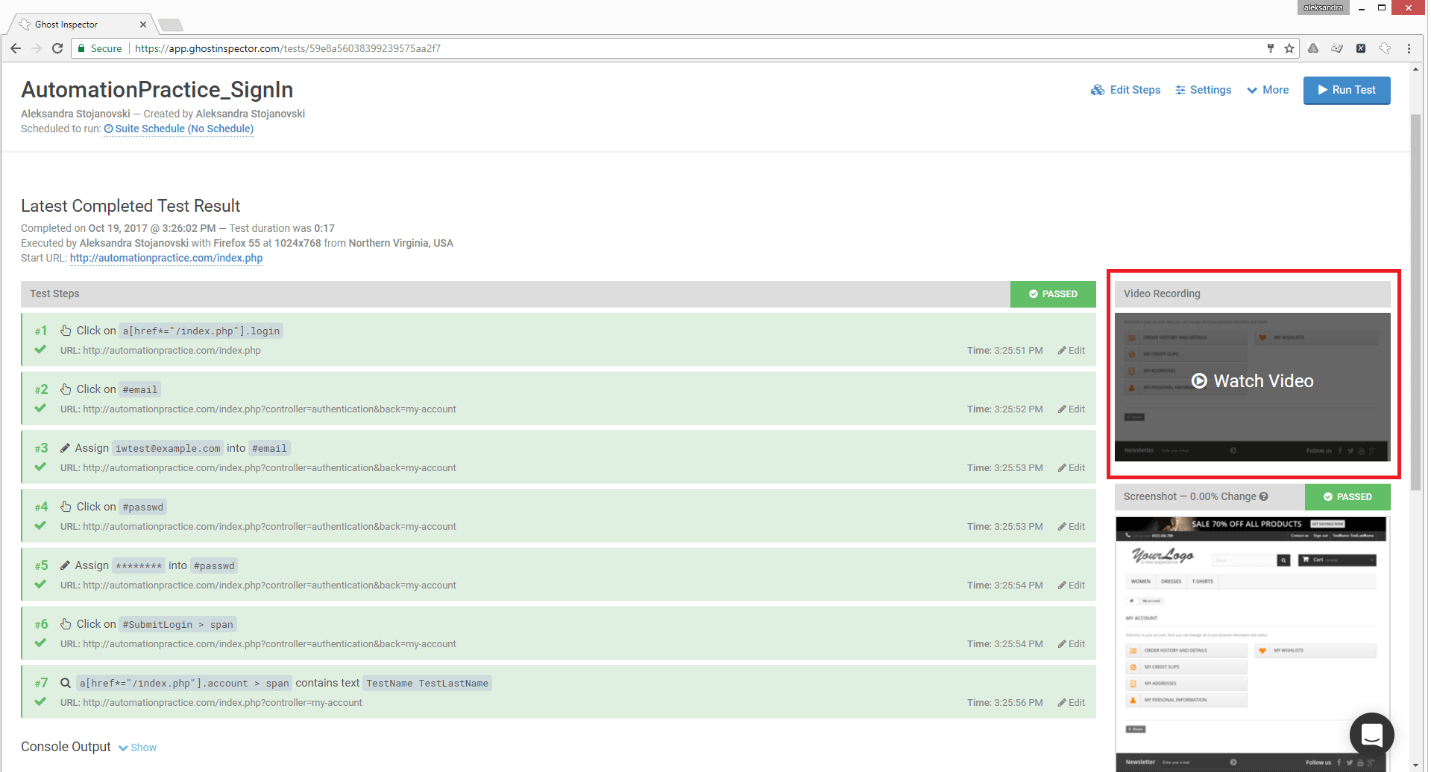
When you finish recording you can save the test under appropriate Test Suite. At that moment the test is in processing state. That means that the test will go through an initial test run, retracing your actions in a web browser. Once the initial test run completes, you can edit the steps, set various options and watch a video from your test. In the picture below you can see how the Test Results looks like.
Ghost Inspector – Test Editor
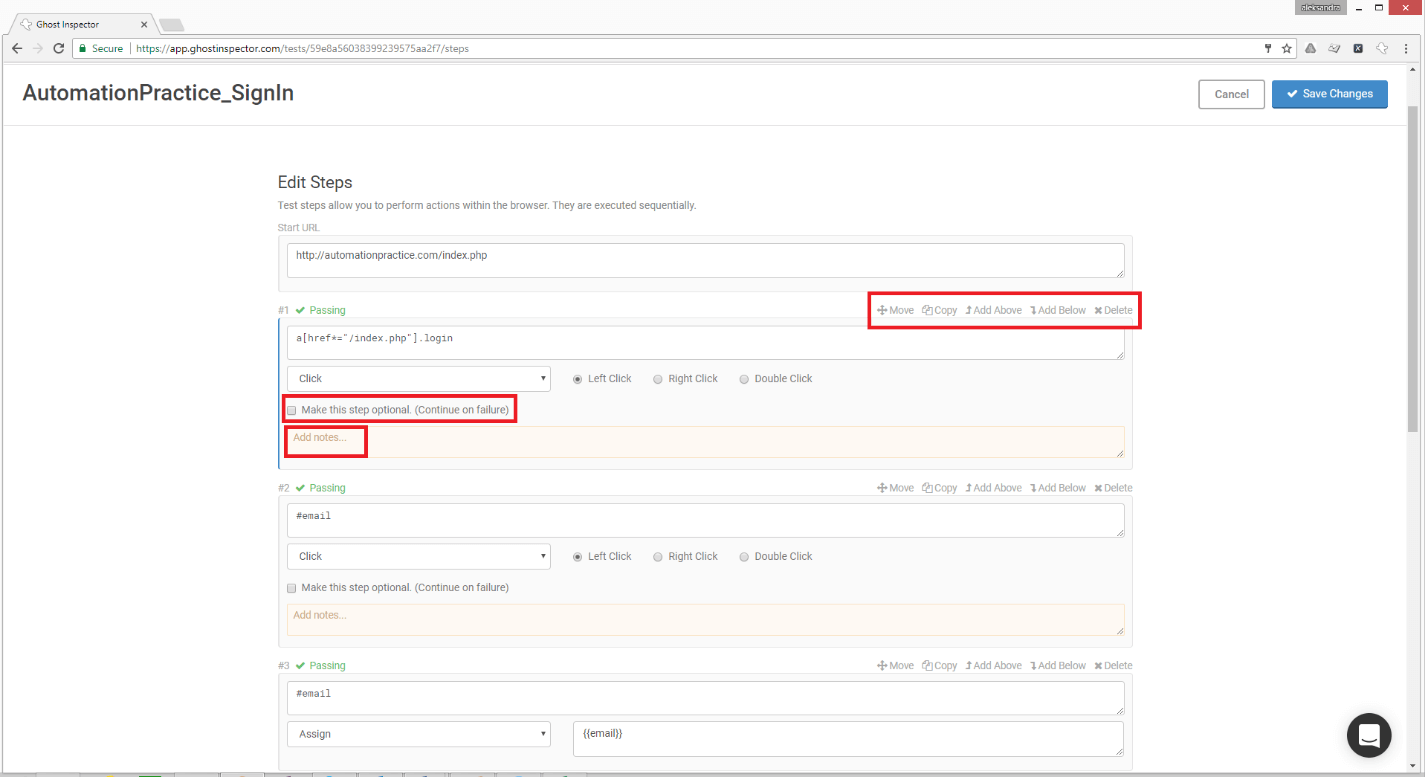
By clicking on “Edit Steps” link you can modify the steps in the recorded test. There are options for: Add Step, Move, Copy and Delete. In this way you can modify your test however you like. In every step you have actions menu with different options. Each step can be made optional, this means that the test will continue execution, even if the step fails. Also each step has a field for adding notes so that you can add comments (Notes are displayed within the test results).
By default Ghost inspector targets the elements in the steps using CSS selectors.
Step Actions
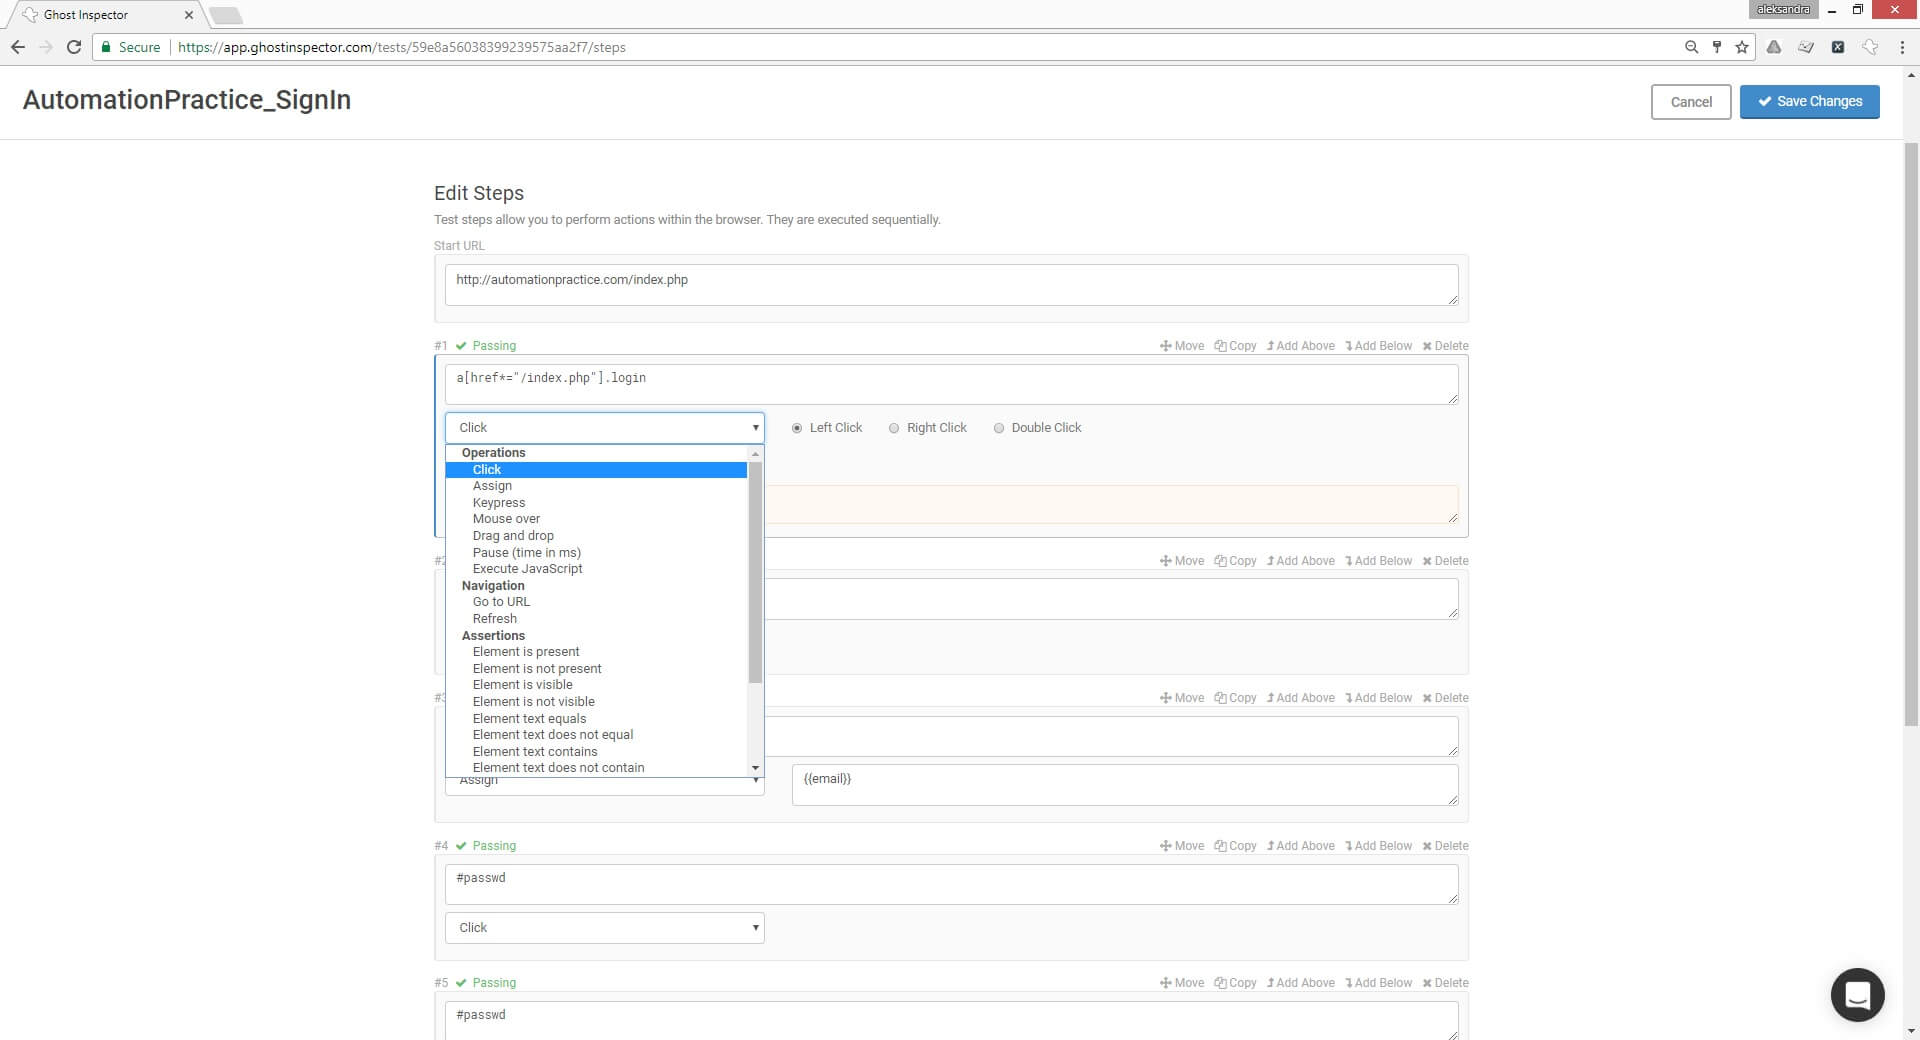
Ghost Inspector offers the following Step Actions that simulate user actions
Operations:
- Click – We can use this option to click on a button
- Assign – Is used for assigning values eg. In field username we like to send value “example@gmail.com”. Also this option can be used for Upload files
- Keypress – Is used for pushing Enter, Backspace, Escape tab etc.
- Mouse Over – Is used for triggering mouseover events
- Drag and Drop – Is used for drag an element and drop it to another element
- Pause – Is used for pause, you can enter some value in milliseconds
- Execute JavaScript – This option lets you to run JavaScripts
Navigation:
- Go to URL – Is used for URL navigation
- Refresh – This option refreshes the current page
Assertions:
- Element is Present – Is used to make sure that some element is present on the page
- Element is not present – Is used to make sure that the element is not present on the page
- Element is visible – Is used to check whether the element is showing up
- Element is not visible – Is used to check whether element is not showing up. In this case the element exists but is hidden
- Element text equals – Checks for exact text within an element (this assertion is a little bit tricky because it checks with the exact string, which means that if there is an extra white space or line break within the element this assertion will fail, so generally is recommended to go with “Element text contains” option)
- Element text does not equals – Checks if exact text is not contained in the element
- Element text contains – Checks the text within the element
- Element text does not contain – Checks if the text is not contained within the element
- JavaScript returns true- It returns a value, so if I return false the step will fail and opposite if I return true the step will pass
Store Variables:
- Set Variable – With this option you can define a variable within the test
- Extract from element – This option is useful when you need to pull a value out of the page and store it into a variable
- Extract from JavaScript – With this option returned value from JavaScript can be stored into a variable
Import:
Import steps from test – You can import another tests from your account as a step in your current test.
Test Settings
Test Settings can be accessed by clicking on the “Settings” button on test level. Here you can modify various options for your test.
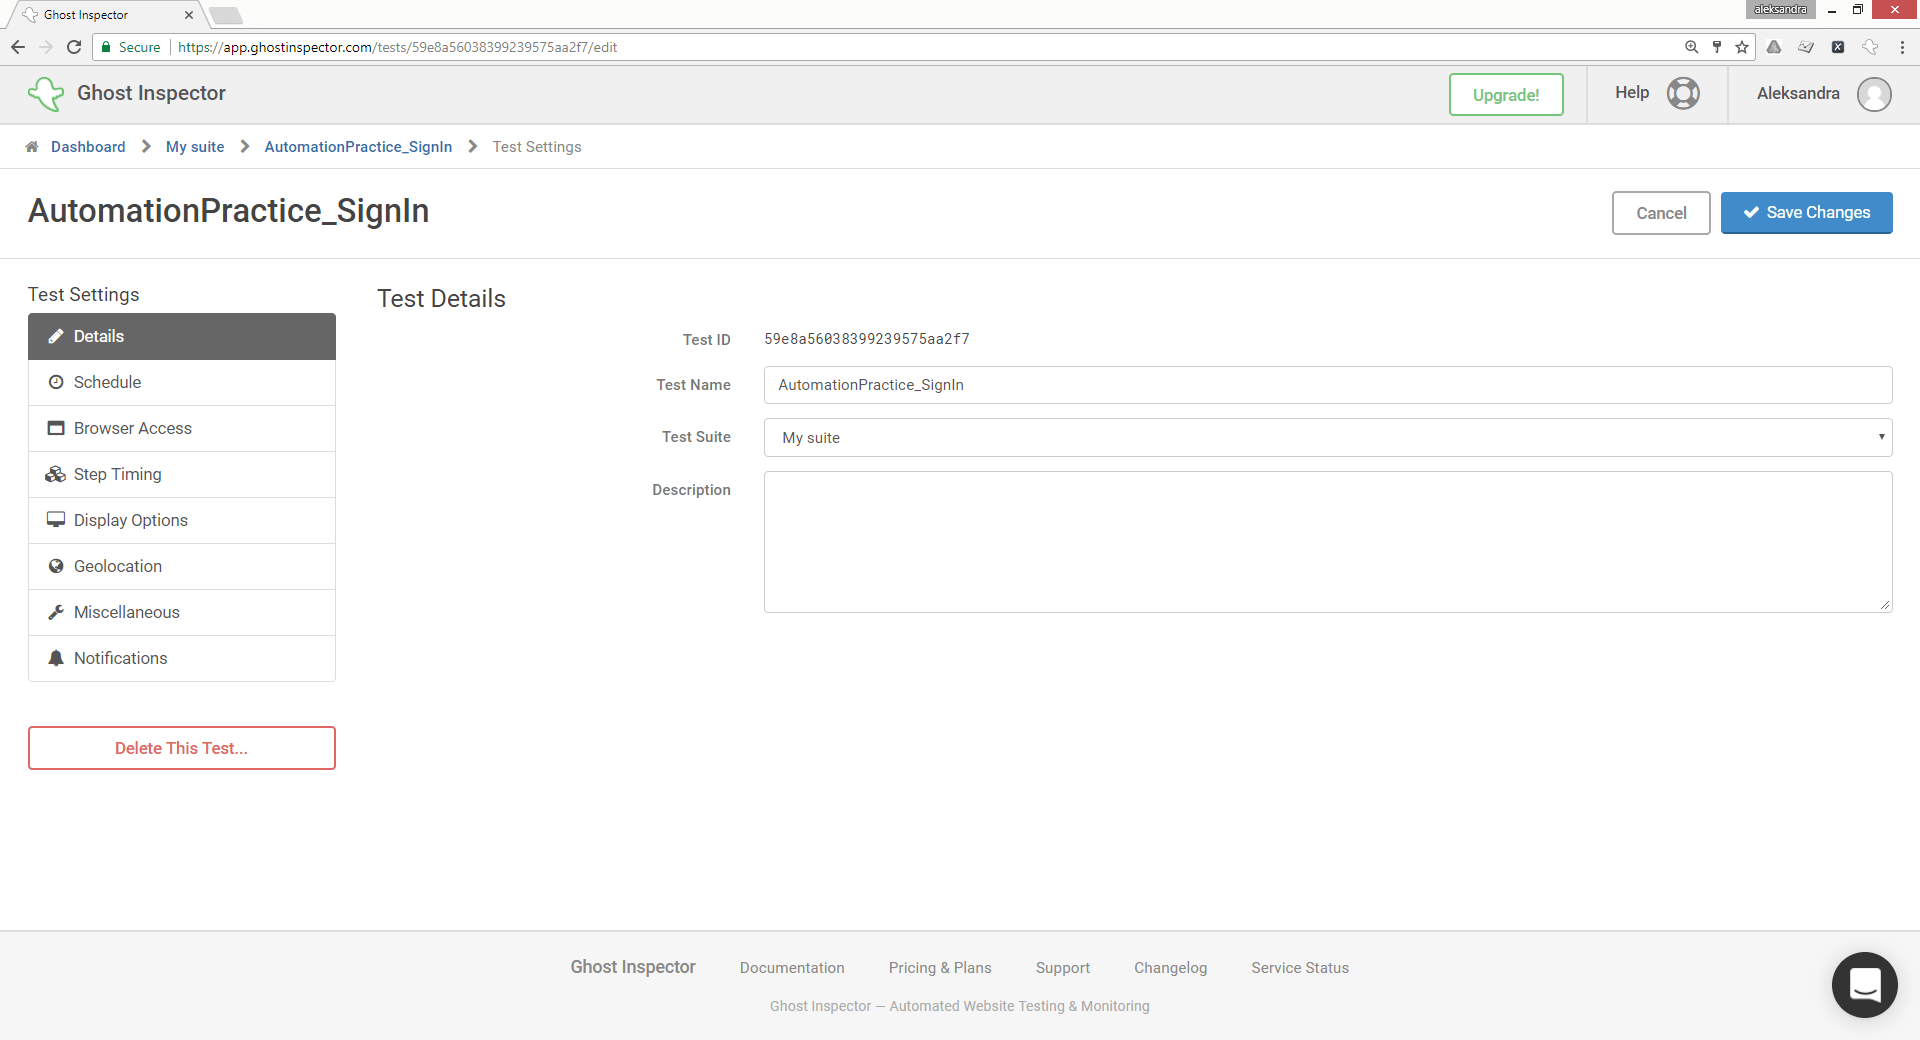
- Details – Under test Details section you can make changes of your Test Name, Test suite and also you can write description about your test.
- Schedule – Here you can set specific schedule for test run like: Daily, Hourly, Every 30 minutes etc.
- Browser access – In browser access settings you can set Start URL, Browser Version, Custom User Agent, HTTP Auth credentials and Custom HTTP Headers.
- Step Timing – Here you can adjust the timing delays between different situations in the test (eg. Pause between each step).
- Display Options – If you want to change the size of the screen used in the test or to configure screenshot comparison, you can do it here.
- Geolocation – You can run the tests from specific regions around the world.
- Miscellaneous – This section includes miscellaneous settings for the test. Test can be automatically retried when they fail to prevent false-positives and can also be set to fail if a JavaScript error is encountered.
- Notifications – Under this section you can configure Email Alerts and their frequency.
Variables in Ghost Inspector
In Ghost Inspector variables can be defined at the Suite-Level, Organization level, there are also Built-in Variables, and you can store values into variables from “Extract from Element” and “Extract from JavaScript” Step Actions. Below is described how to store variables and use them in tests, on a simple example of login form.
After test is recorded for Sign in form on example web application: http://automationpractice.com, following Test Steps are generated:
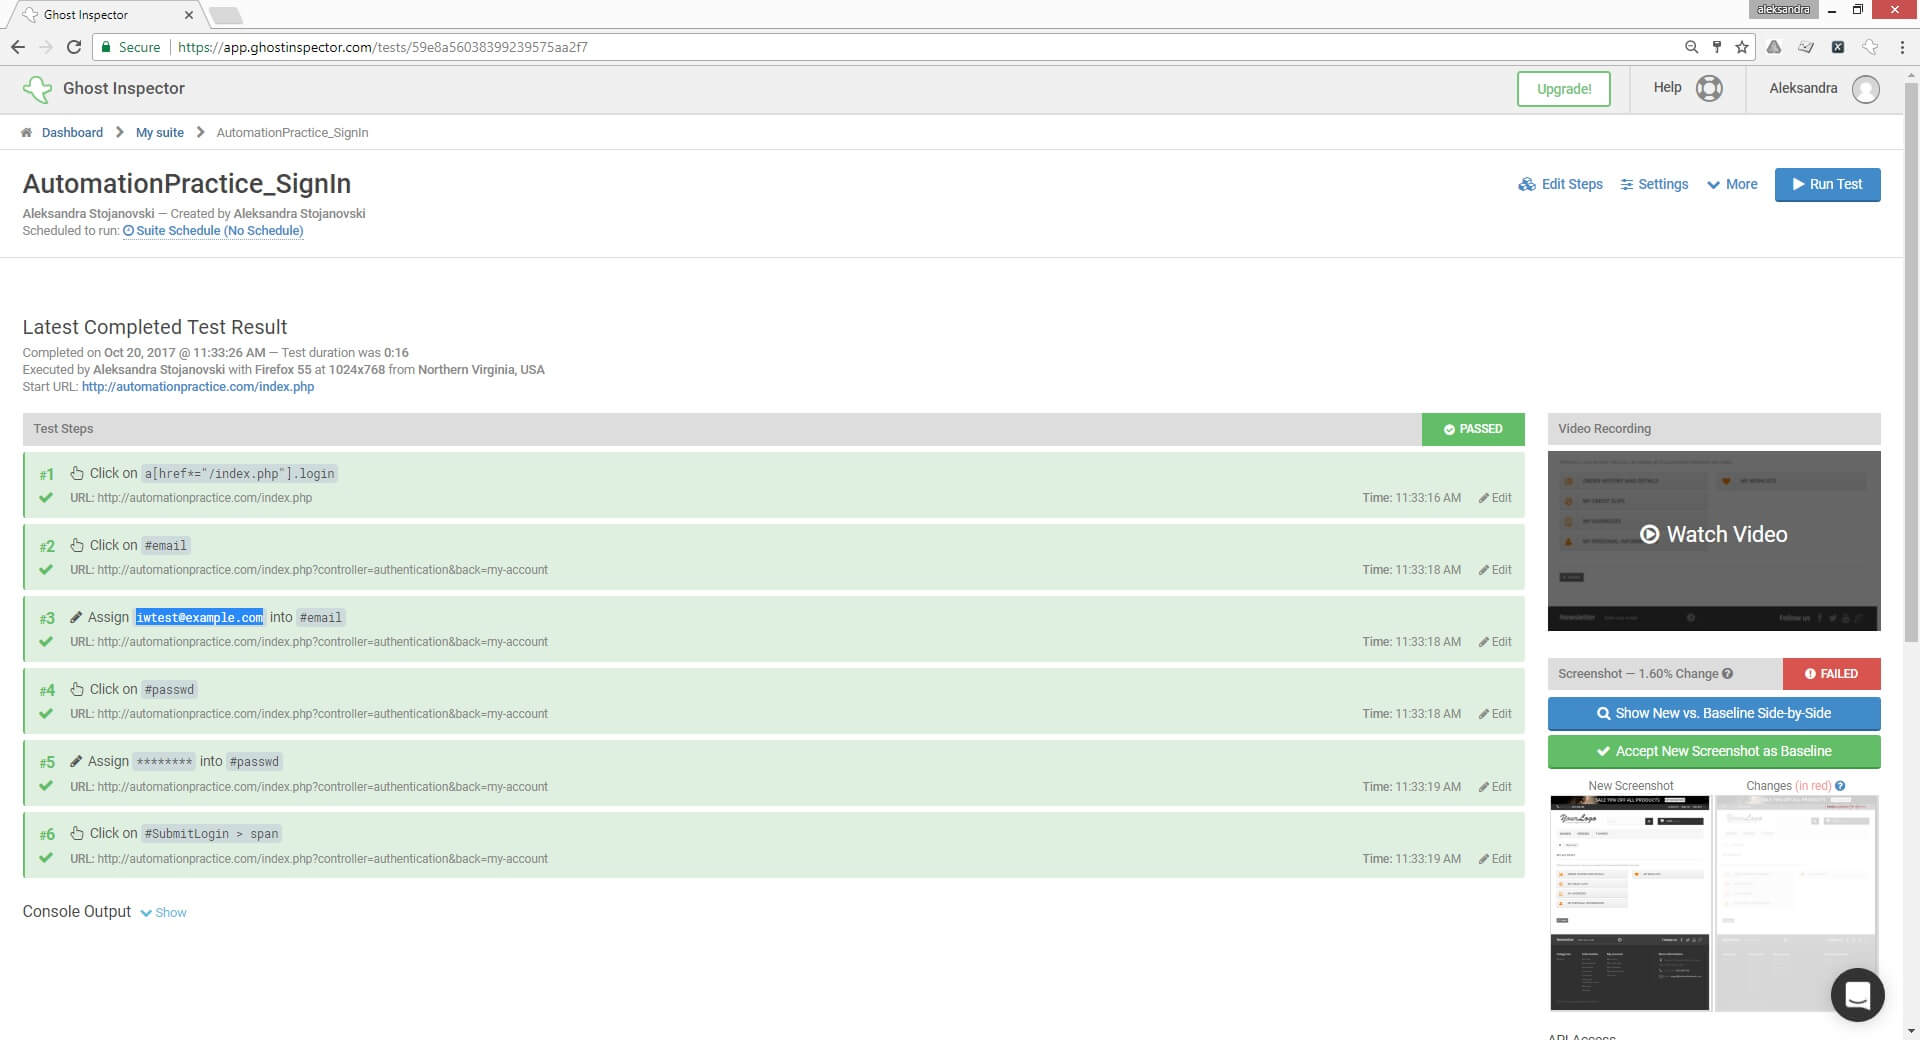
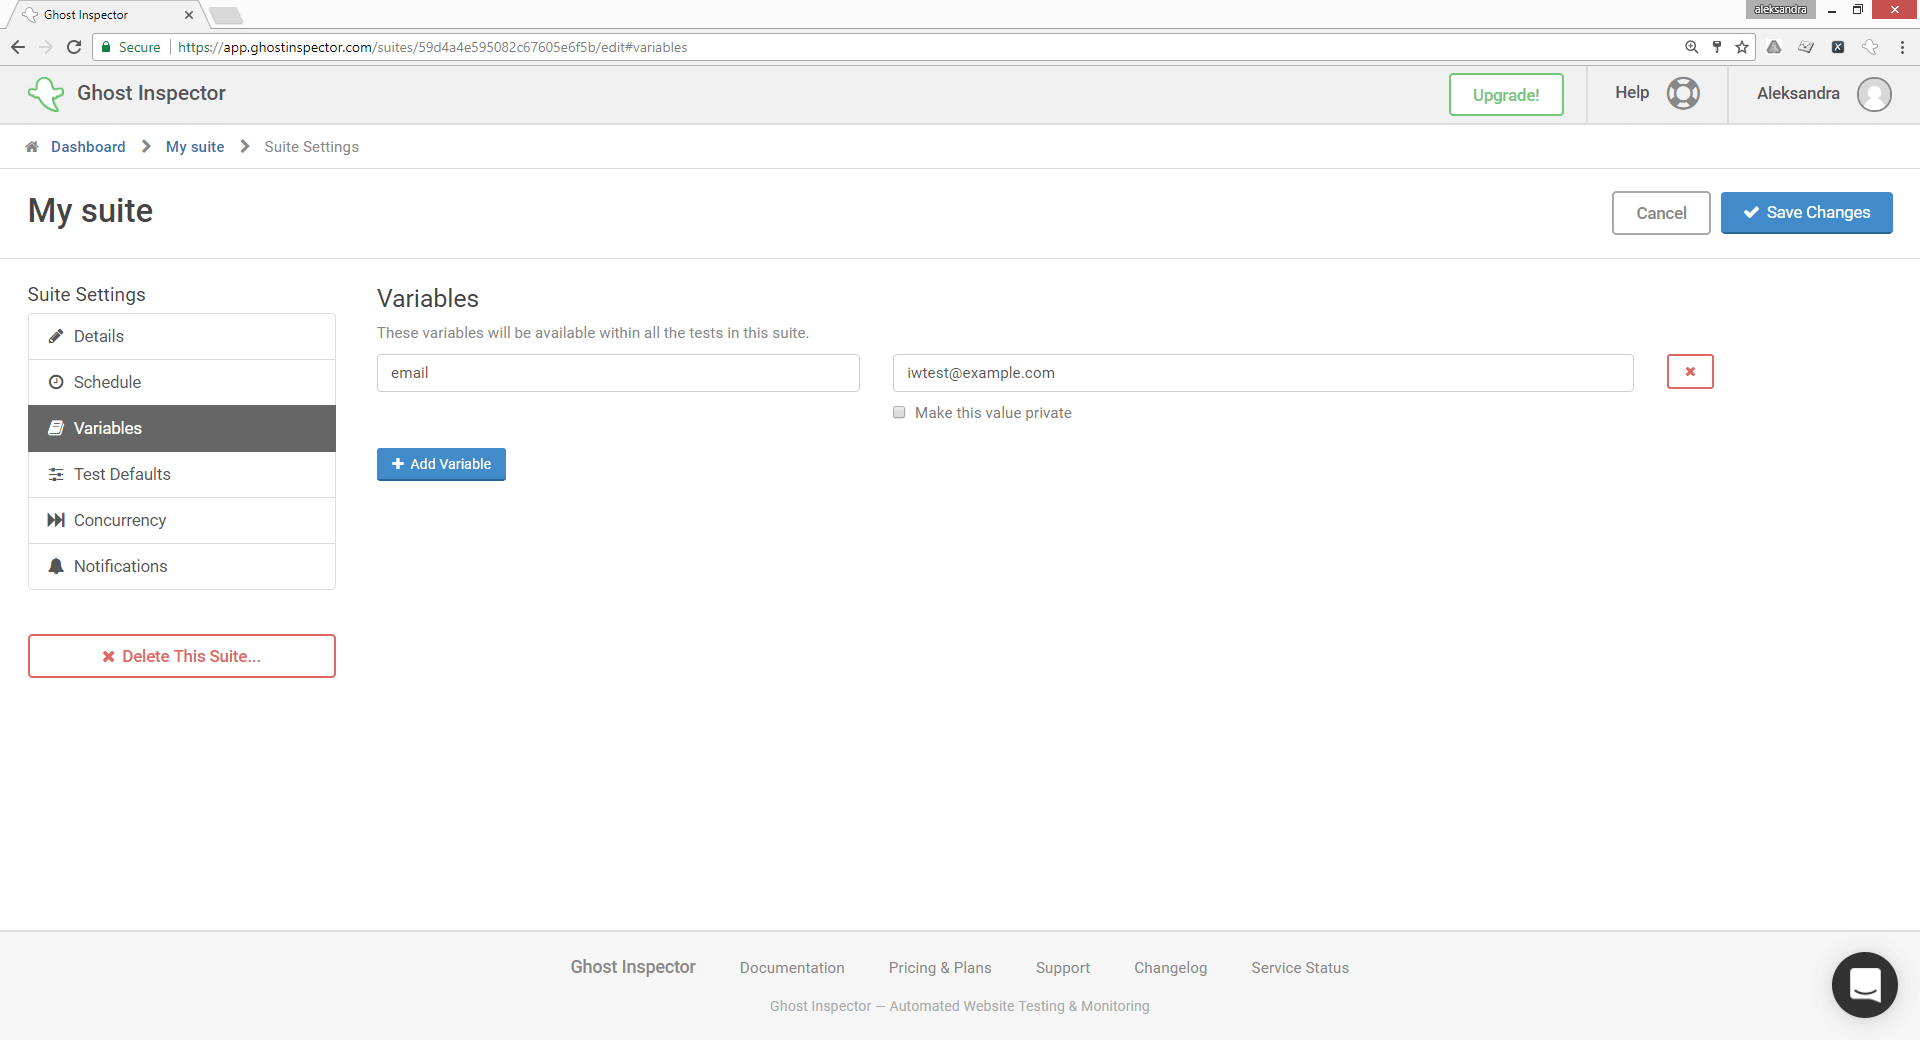
As you can see, in the third step I’m sending iwtest@example.com as a “hardcoded” value for the email address field. Now I want to put the email address into a variable. For that purpose, you have to navigate back on the suite level and click on “Settings”. In the Suite Settings, you have the option Variables, there you can store all your variables.
Click on the “Add Variable” button to populate the variable name (in this case I will use “email” for my variable name) after that add an email address for the Variable value and save the changes.
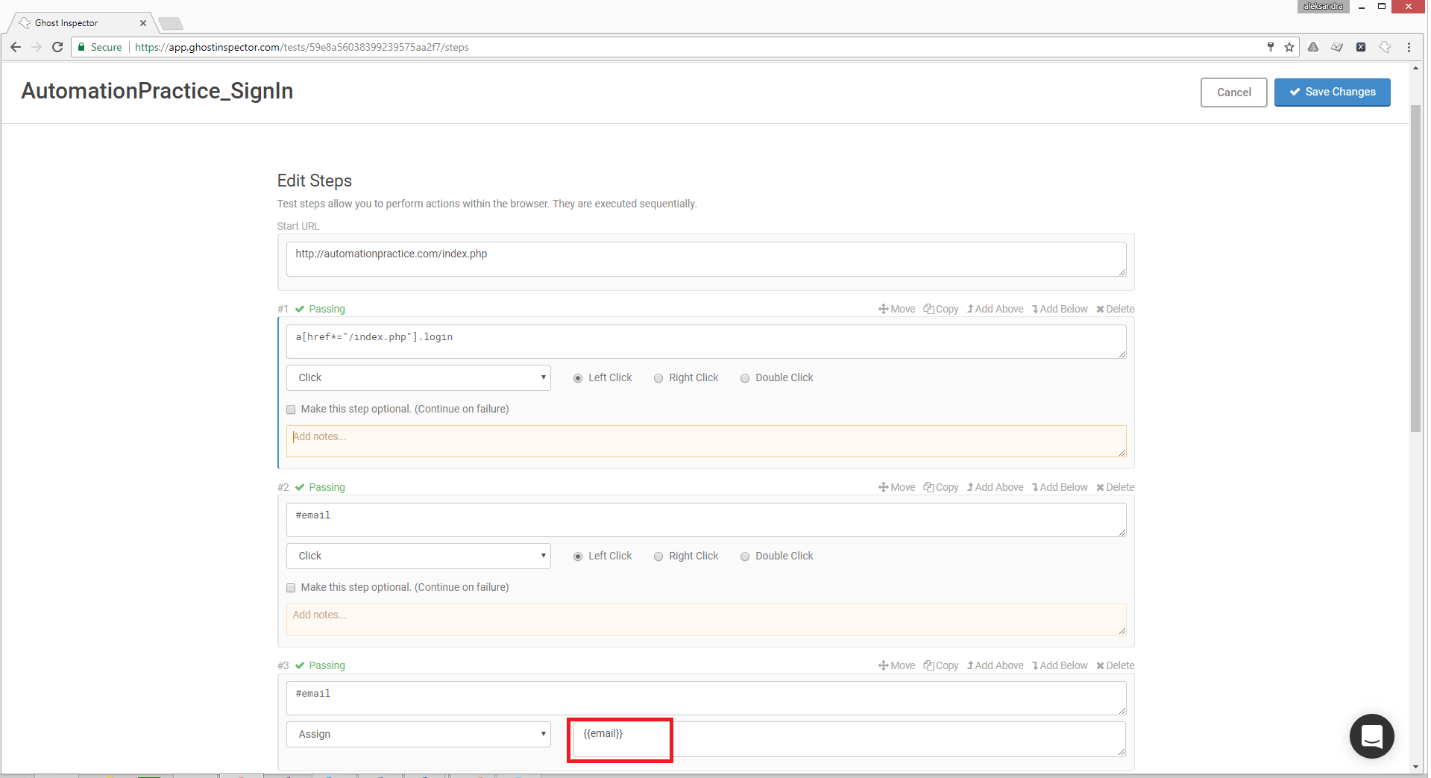
The next step is to go back to my Test where I want to use this variable. On the Edit Steps screen, in the third step instead of my email address, I will add variable name ({{email}}).
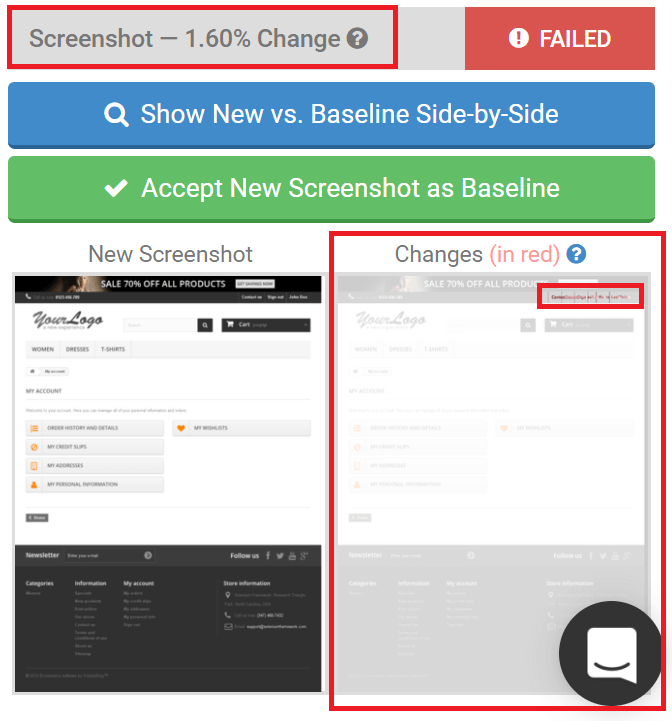
Screenshot Comparison
Another powerful feature of Ghost Inspector is that it can make a screenshot comparisons by taking a screenshot at the end of every test run and doing a pixel-by-pixel comparison to the last passing screenshot to look for differences. You can set the amount of change that‘s allowable from 0% to 90%.If the screenshot has changed for more than that amount, it will flag it as a failure and notify you.
Data-Driven Testing
Ghost Inspector has a built-in option for data-driven testing that allows you to upload a CSV comma-separated file with rows of values corresponding to variables in your tests. In order to try this you will have to swap several variables into your test step values.
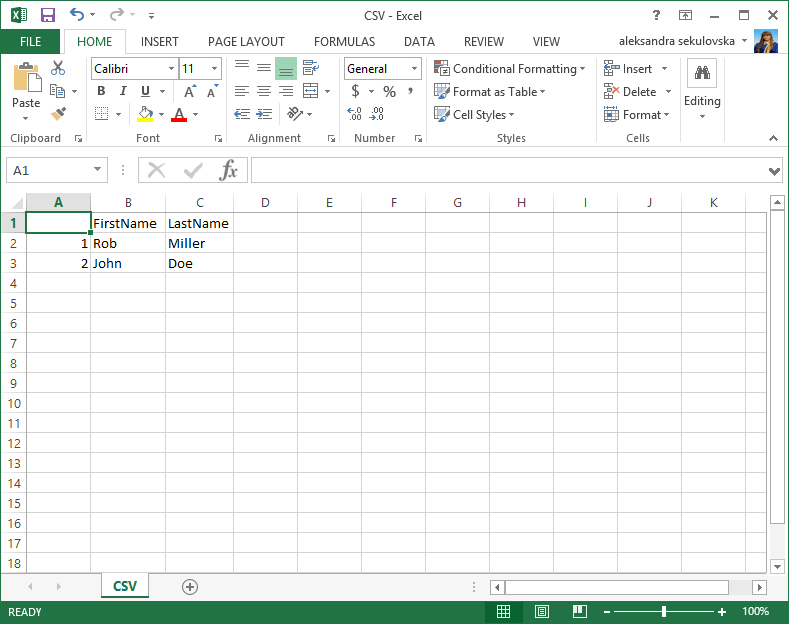
In the example below, I will use test for simple Sign Up form, where same test need to be run but for different First Name and Last Name. In this example, CSV file contains two columns: FirstName and LastName.
Note that column names actually will be variable names, so in order to use values from the CSV file, in Test Steps that are populating text boxes for first name and last name on the application Sign Up form, corresponding variables need to be assigned.
After test is recorded navigate to Edit Steps screen. The first row of the CSV file contains FirstName and LastName column names, so I need to put these values as variable names into my test steps (see the picture from below).
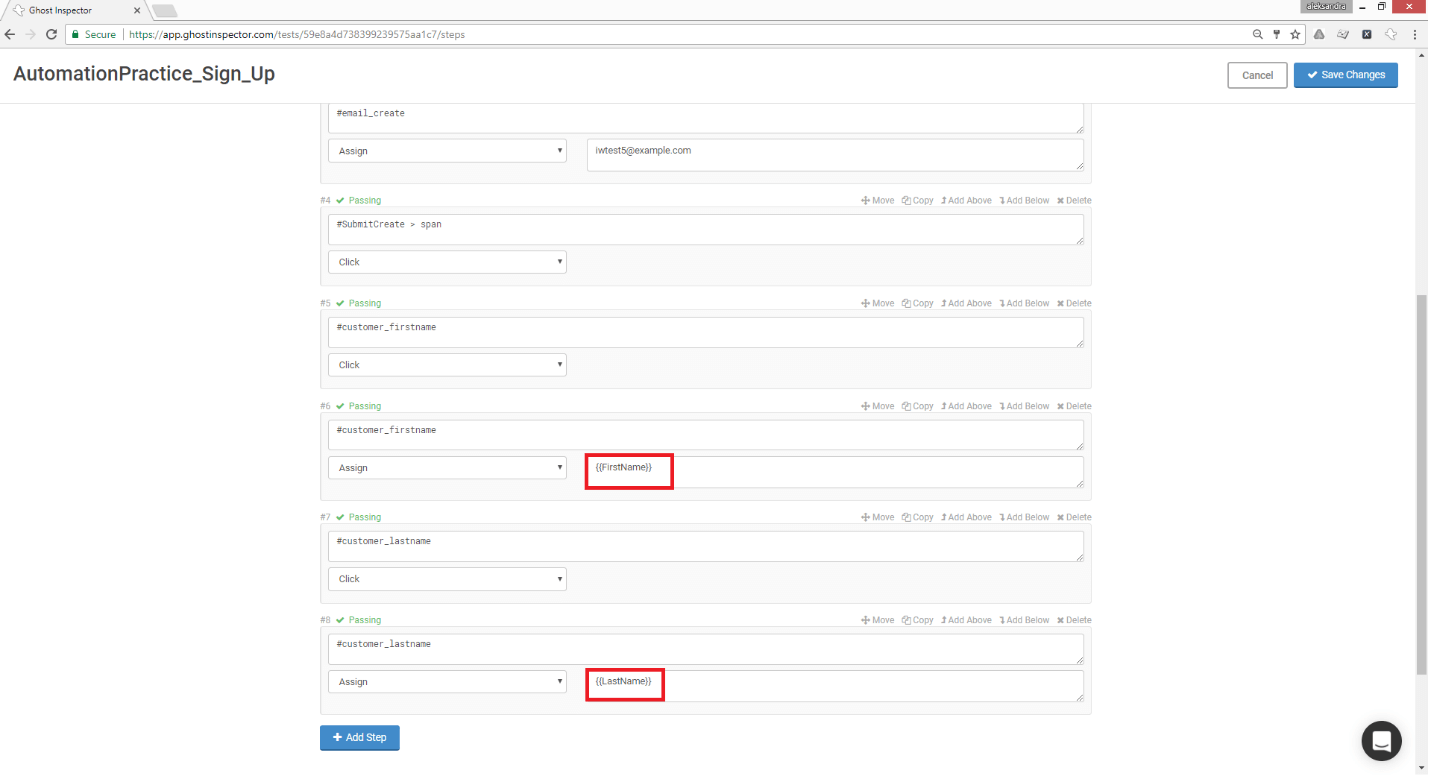
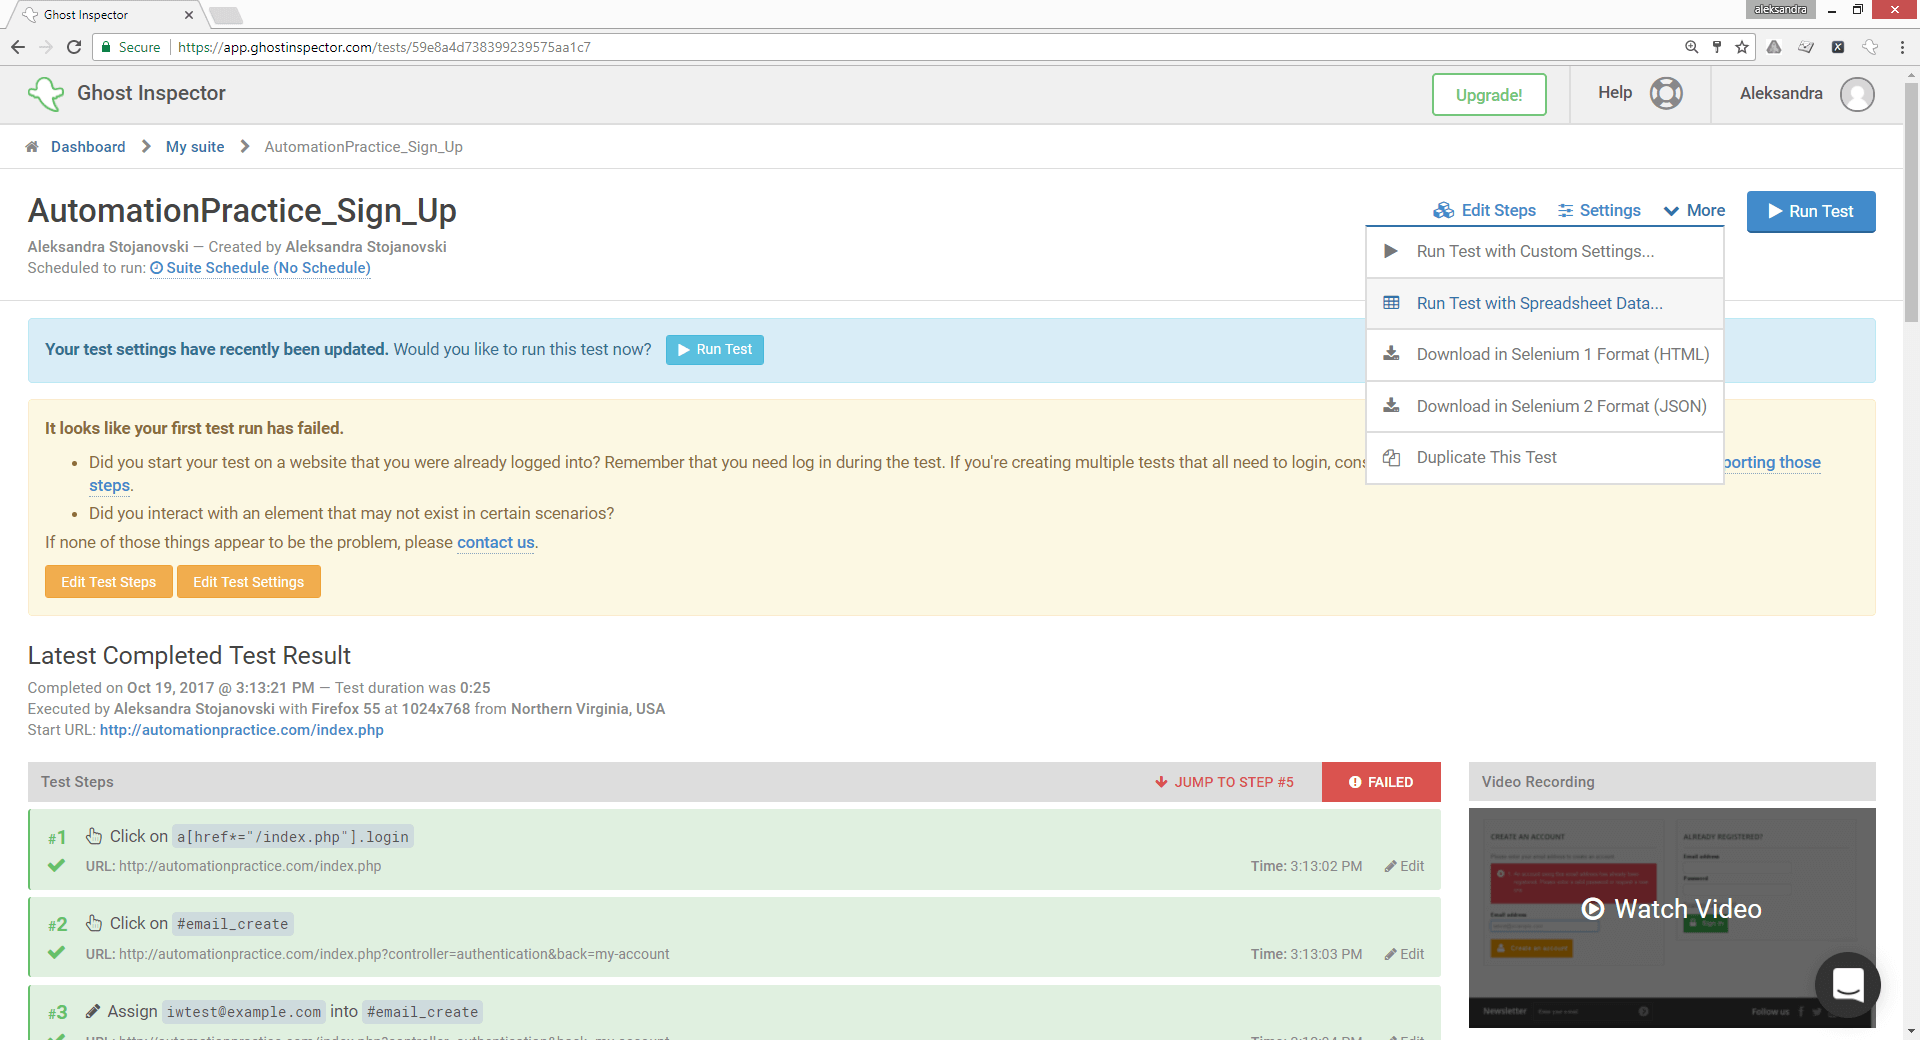
For each row in the uploaded spreadsheet, a test or suite run will be triggered using those variable values. In order to trigger tests for each row from the uploaded CSV file, save the changes in “Edit Steps” screen and from “More” drop-down menu select “Run with Spreadsheet Data”.
After CSV file is uploaded preview of the uploaded CSV file is displayed, and tests can be triggered for all rows in the file.
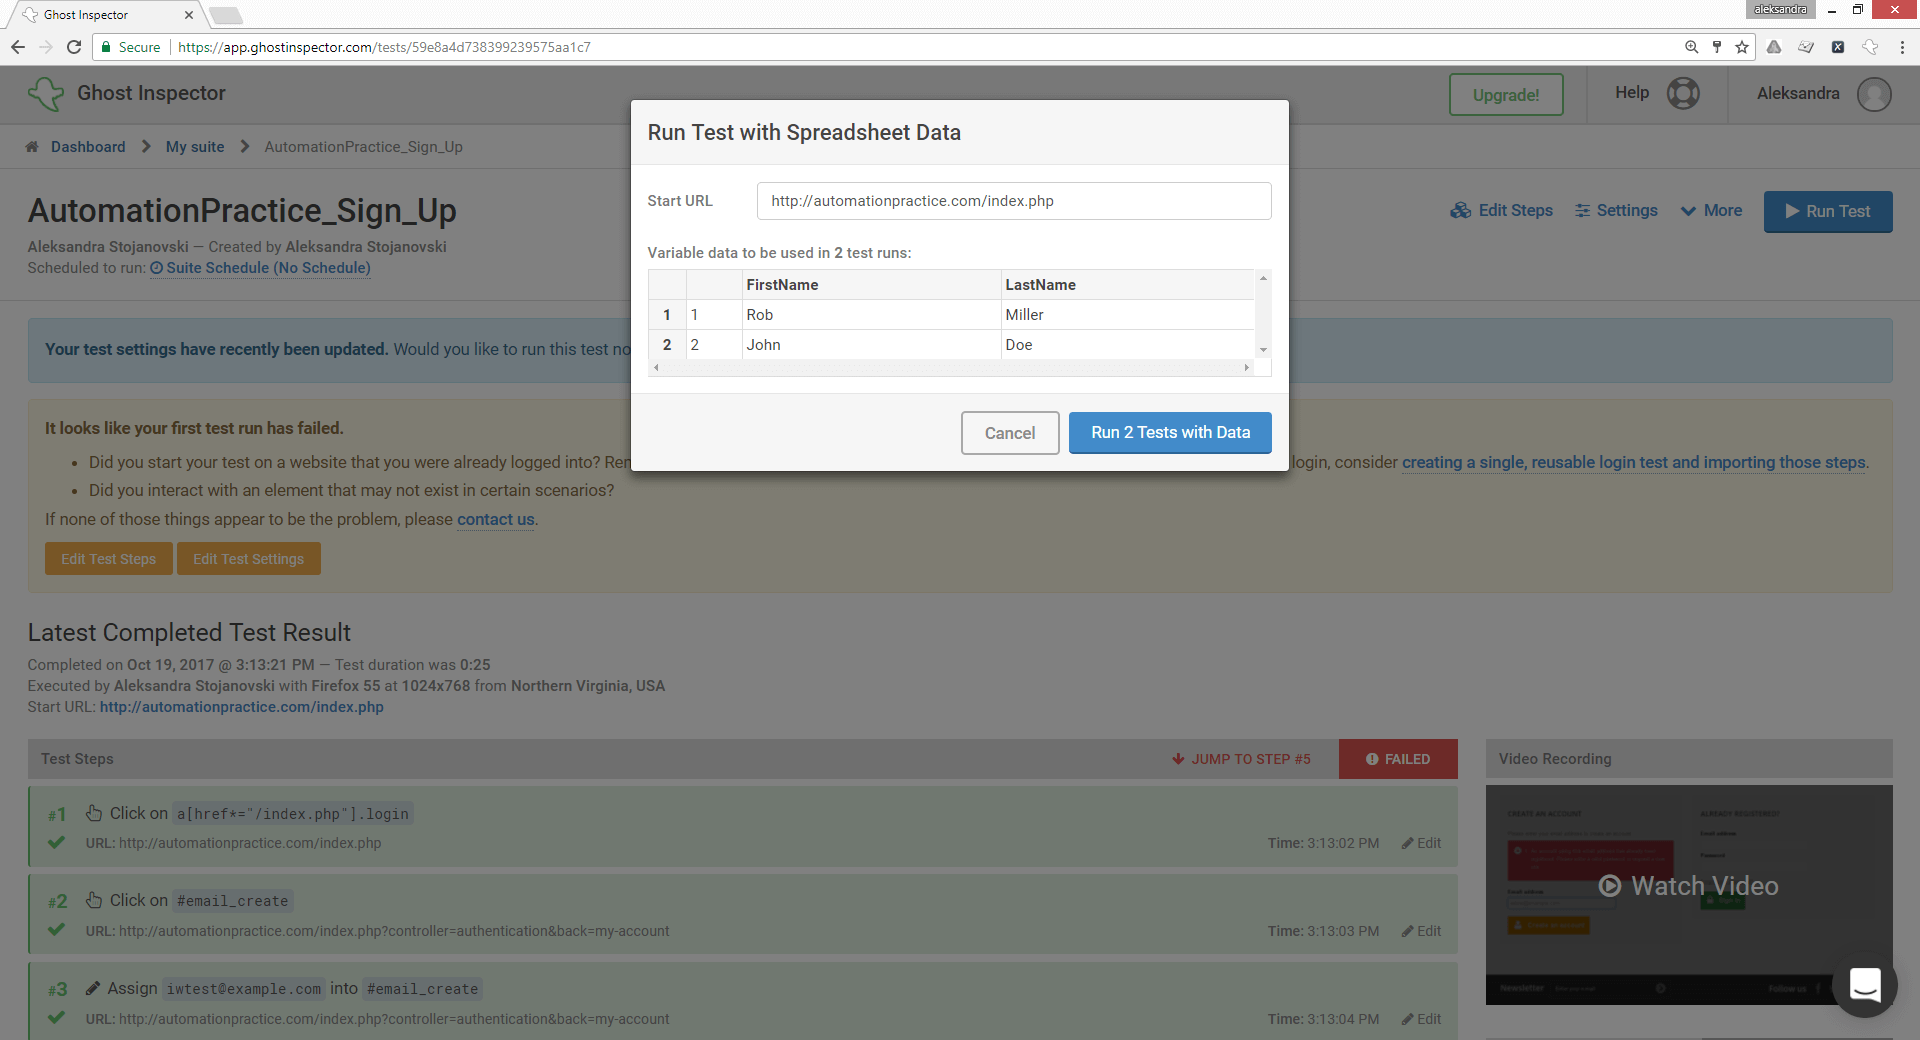
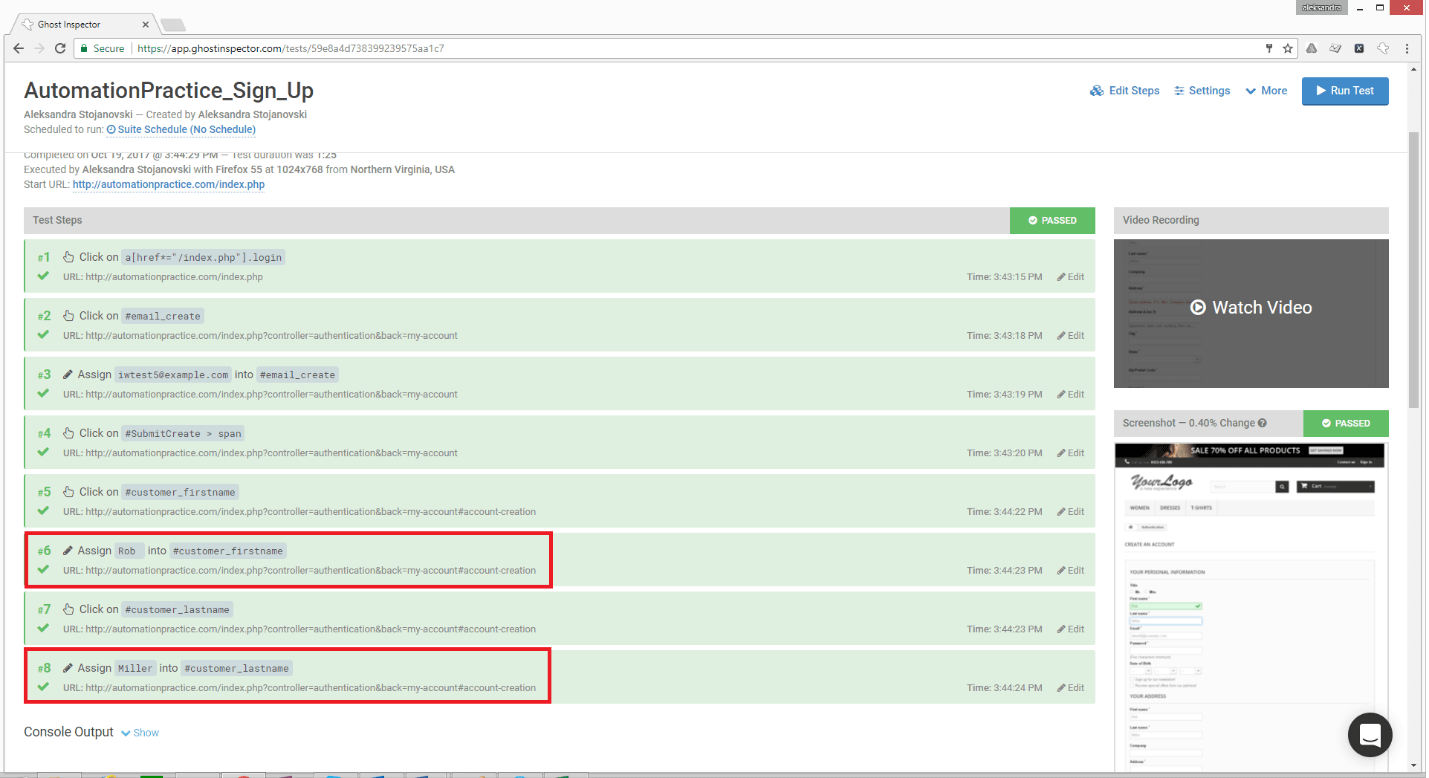
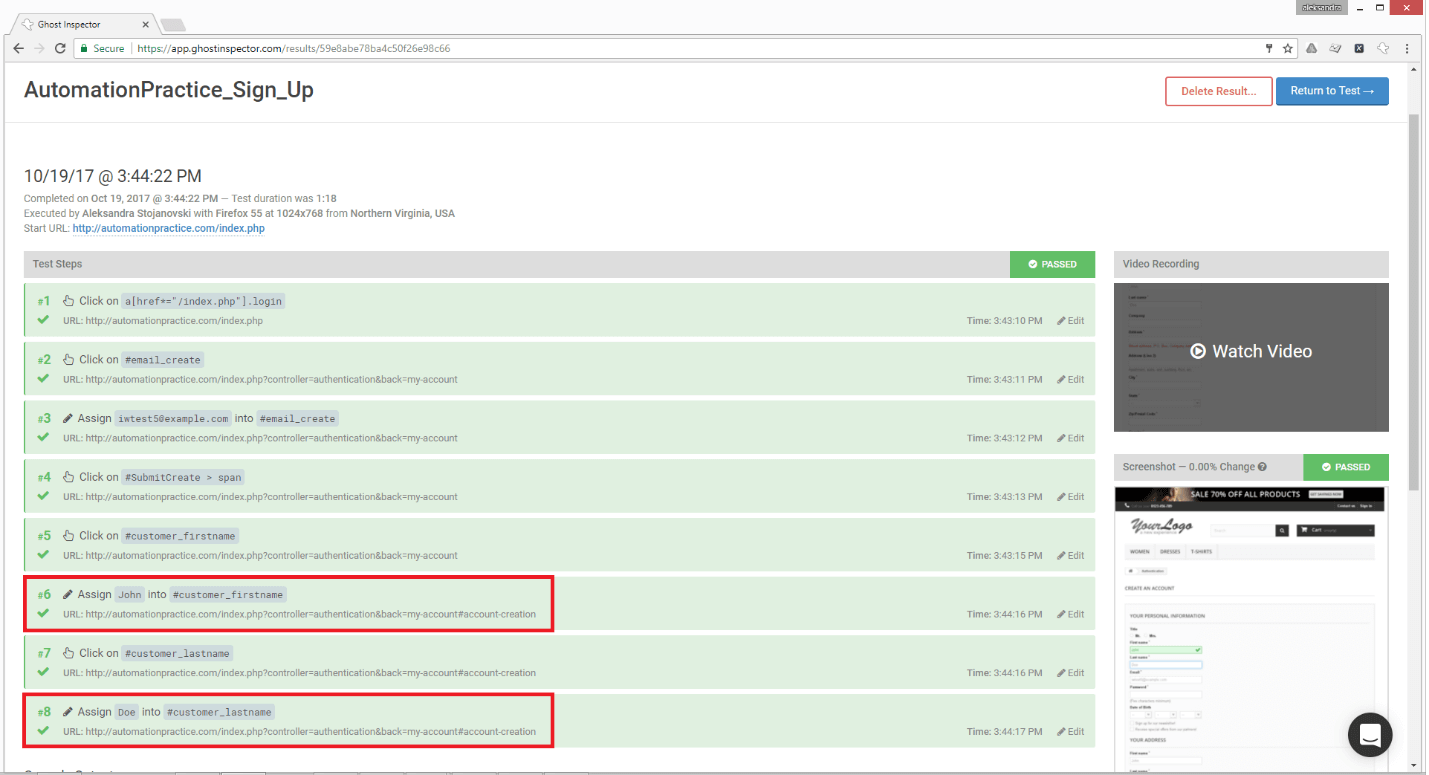
For each row in the file, a separate test will be executed with values from the corresponding row:
Conclusion
In short, Ghost Inspector is a very solid cloud-based solution for functional web automated testing, very easy to learn, with many out-of-the-box built-in features. The main drawback is its browser support. In my next blog, I’ll describe available reporting options, as well as, the integration of Ghost Inspector with Jenkins for achieving Continues Delivery and Continuous Testing paradigm.