

Introduction
By definition, Web Accessibility Testing is the practice of ensuring that web/mobile applications are accessible for people who have disabilities such as blindness, hearing problems, and motor or cognitive impairments. Testing web accessibility is important to senior developers since it ensures that the web content is reachable to anyone without any barriers. It is often categorized under usability testing and should be included in the software testing life cycle. [Source: TestProject]
Axe is an accessibility testing engine for websites and other HTML-based user interfaces. It’s fast, secure, lightweight, and was built to seamlessly integrate with any existing test environment so you can automate accessibility testing alongside your regular functional testing. [Source: GitHub] To understand this article, you need to have basic knowledge of Robot Framework.
More details about the AXE-Core engine can be found on the following links:
- Official site: https://www.deque.com/axe/
- GitHub repository: https://github.com/dequelabs/axe-core
Short description
In this article, we describe the process of implementing AXE-Core with Robot Framework. This process takes a few steps:
- Installing all needed libraries to create tests
- Creating a folder structure for our test
- Write test and generate accessibility test results
We will explain only the steps that we need to install and implement AXE-Core with the Robot framework. We have already installed:
- Python
- pip (python package installer)
- Robot Framework
- Jenkins – the CI/CD platform where we run the automated accessibility tests and generate HTML results.
Installing AXE-Core
To start writing AXE accessibility tests we need to install the axe-core python library: axe-selenium-python
In this example, we are using the 2.1.6 version (current latest). To install this library, we need to execute the following command in a terminal:
pip install axe-selenium-python
Folder structure
For this demonstration, we will create a simple folder structure with 3 folders
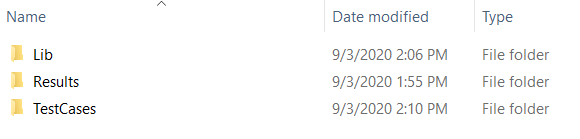
- Lib folder that is holding our libraries.
- Results folder that keeps the generated results
- TestCases folder where we keep the created tests.
Writing our own keywords
After installing the AXE-Core library we will write our own Robot Framework keywords that we are going to use in our test development. In our case we are going to write two keywords:
- Open Chrome Browser – a keyword that will start our browser with preset arguments
- Check for Accessibility Issues – a keyword that will check the current site for accessibility issues and generate a JSON report in the given path
The code for these two keywords is:
from selenium import webdriver
from selenium.webdriver.chrome.options import Options
from robot.libraries.BuiltIn import BuiltIn
import json
from axe_selenium_python import Axe
class ExternalKeywords:
	def Open_Chrome_Browser(self):
		seleniumlib = BuiltIn().get_library_instance('SeleniumLibrary')
		chrome_options = webdriver.ChromeOptions()
		chrome_options.add_argument('--disable-gpu')
		chrome_options.add_argument('--no-sandbox')
		chrome_options.add_argument('--start-maximized')
		chrome_options.add_argument('--disable-dev-shm-usage')
		chrome_options.add_argument('--ignore-certificate-errors')
		chrome_options.add_experimental_option("excludeSwitches", ['enable-automation']);
		global driver
		driver = webdriver.Chrome(desired_capabilities = chrome_options.to_capabilities())
		return seleniumlib.register_driver(driver, "Remote")
	def Check_for_accessibility_issues(self, page):
		axe = Axe(driver)
		axe.inject()
		results = axe.run()
		axe.write_results(results, page)
In this code, we are using the Selenium framework and the AXE-Core library to write our own keywords to simplify our future test development. In the first function, Open Chrome Browser, we are starting the Chrome Web Driver by giving custom options/arguments. With the Check for accessibility issues method, we run an accessibility test against the page we are on at the moment when this method is called and generate a JSON file with the results.
Since the file contains keywords that we will use in our suite, we save this file in the Lib folder with .py extension. We will call it ExternalKeywords.py.
Writing tests using prepared keywords
After we have set up our keywords and saved them in our Lib folder, we can finally start creating tests that will use these two really important keywords. First, we need to add the libraries that we are going to use in our test in our Settings section.
*** Settings ***
Library           SeleniumLibrary
Library           ../Lib/ExternalKeywords.py
The first library is the Selenium Library which is required for interaction with the web elements. The second library is the library that we created with the custom keywords (our ExternalKeywords.py file) for opening the browser and performing accessibility checks via the AXE-Core engine.
The next step is to write the test itself. In our case, we ran an accessibility test against the ‘My Account’ page. Before getting to that page, we first need to open the website and log in to the application. Then we perform the accessibility test and generate the report.
The test would look something like this:
*** Test Cases ***
Account Page
    [Setup]    Open Chrome Browser
    Go To    http://automationpractice.com/
    Click Element    ${HeaderLoginLink}
    Wait Until Page Contains Element    ${LoginButton}
    Input Text    ${EmailField_LoginForm}    ${EMAILACCOUNT}
    Input Text    ${PasswordFIeld_LoginForm}    ${PASSWORD}
    Click Element    ${LoginButton}
    Wait Until Page Contains Element    ${MyAccountLink}
    Check For Accessibility Issues    myaccount.json
    [Teardown]    Close All Browsers
Here we first open the Chrome browser in the Setup section (the first keyword that we wrote in the ExternalKeywords.py file). Then we navigate to the page we want to test, perform user login, and navigate to the account page, all via the SeleniumLibrary. Lastly, we need to perform the accessibility test and we do this by calling the ‘Check for Accessibility Issues’ keyword (the second keyword from our ExternalKeywrods.py file). It will run an accessibility test against the current page and generate a JSON report in the Results folder with a name that we give as an argument – in our case, it would be myaccount.json. In the last section, the teardown, we close the opened browser to finish with the test.
Using Jenkins to run the tests
Jenkins is one of the most popular CI/CD tools. In our example, we are using Jenkins to run our automated tests. After running the test, we will generate an HTML report with all the needed information that we can later send via email to inform the concerned parties.
With this in mind, our Jenkins configuration will have 3 important configuration steps:
- The command for running the automated Robot framework tests
- The command for generating the HTML results.
- Sending the email.
In the Build section of Jenkins, we need to add an Execute Windows batch command step that will execute the commands for running the automated test and generate the results.
The first command is the command that navigates from the project root folder to the TestCases folder and executes the test suite: Accessibility Test Suite.robot
robot "TestCases/Accessibility Test Suite.robot"
The second command is the one that will navigate to the results folder and generate results from the JSON file. With this command, we are executing our own written .jar file where we are translating the JSON formatted results in well and good-looking, HTML formatted results. We are also sending one argument to the .jar file, the name of the JSON results file that was generated by the ‘Check for accessibility Issues’ keyword (in our case myaccount.json)
java -jar axe-report.jar myaccount.json
After the test is executed and the results are generated, the only thing left is to send these HTML results via e-mail. This way we will receive an email notification with the results after running the tests.
Using this configuration, we send email notifications to all given recipients with the subject ‘Accessibility test for Account page’, and in the email body, we send the generated HTML results.
Generated JSON results
The generated JSON results are very detailed. They contain 4 main attributes:
- Violations – keep track of all the failed tests, along with detailed information about each one.
- Passes – keeps track of all the passed tests, along with detailed information about each one.
- Incomplete – indicates which nodes could neither be determined to definitively pass or definitively fail, so manual verification should be done.
- Inapplicable – array lists of all the rules for which no matching elements were found on the page.
For our company’s needs, we have created a Java code that will parse the JSON results and generate a beautiful HTML report, ready for email presentation.
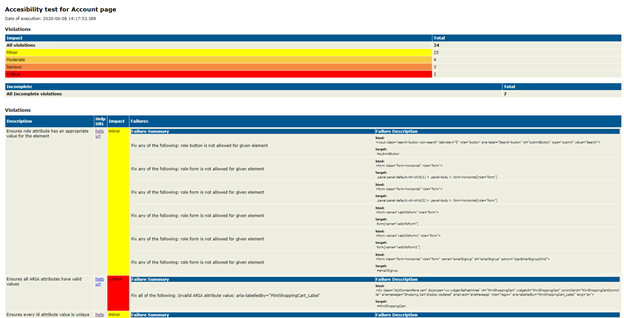
Picture 4: HTML report generated from JSON results
Conclusion
There are a lot of Accessibility testing tools on the market, but AXE-Core is free and very simple to use. Alongside Robot Framework, it allows us to even create complex test scenarios with a lot of steps to reach the needed sites, that should be tested for accessibility issues. On top of it, the AXE-Core report is very detailed and easy to understand by testers.