

Introduction
Being a quality assurance engineer testing JSON APIs you will encounter a lot of open-source tools that are useful on your way to find the one that suits you. You have probably heard about Postman, Robot Framework SoapUI, JMeter, Rest-Assured and several others that you have read about in the top 10 lists when you Google “JSON API testing tools”.
In this article, we are giving you an introduction to the RESTinstace library that is part of the Robot framework and it is the tool that I chose and we have been using it lately to test RESTful APIs. So, let’s begin with the process of rest API testing using Robot Framework.
About Robot Framework
Before we start with the API testing using Robot Framework, I will just whip up a short introduction about Robot Framework and provide some useful links on how to install it and focus on the RESTinstance library and how to implement it.
Robot Framework is a generic test automation framework for acceptance testing and acceptance test-driven development (ATDD), so there’s also API automation using Robot Framework. It has easy-to-use tabular test data syntax and it utilizes the keyword-driven testing approach. Its testing capabilities can be extended by test libraries implemented either with Robot Framework Python API testing or Java, and users can create new higher-level keywords from existing ones using the same syntax that is used for creating test cases.
Robot Framework is hosted on GitHub where you can find further documentation, source code, and issue tracker. Also you can find an excellent introduction to Robot Framework API testing from my colleague Stefan by clicking here and visiting his blog post.
Testing JSON APIs with RESTinstace library
RESTinstance library relies on Robot Framework’s language-agnostic, natural language syntax for API tests. It is neither tied to any particular programming language nor development framework. Using RESTinstance requires little, if any, programming knowledge. It builds on long-term technologies with well-established communities, such as HTTP, JSON (Schema), OpenAPI and Robot Framework. (Source: https://pypi.org/project/RESTinstance/)
The RESTinstance library is really simple to use. When we open RIDE (which is the IDE that Robot Framework commonly uses) and create a new test suite we just have to import the RESTinstance library in the settings section.

The only specific thing here is that we write the endpoint in the arguments section. In our case we will be using a test endpoint which is a fake online Robot Framework rest API for testing and prototyping.
So enough with the setup, let’s make some requests. The first Robot Framework API testing example that we are going to create is a simple GET request to the endpoint where we get a specific user ID:
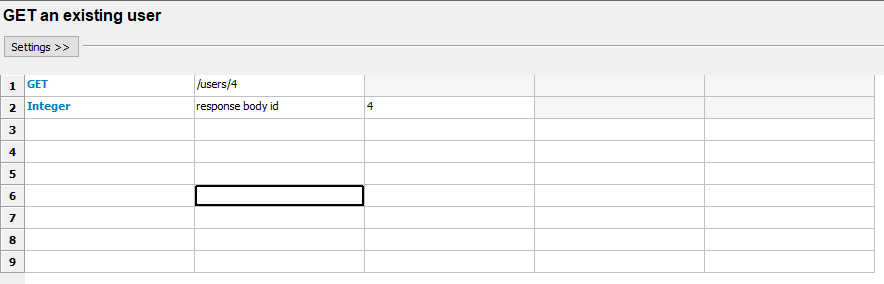
When we click the start button, we contact the server and issue a GET request for information about a user with and ID of 4, and with the INTEGER keyword we are validating that we will get a user with an ID 4 present in the body of the response. The response is an HTML file that is saved locally in a folder called Results that can be found in the root of our project and looks like this:
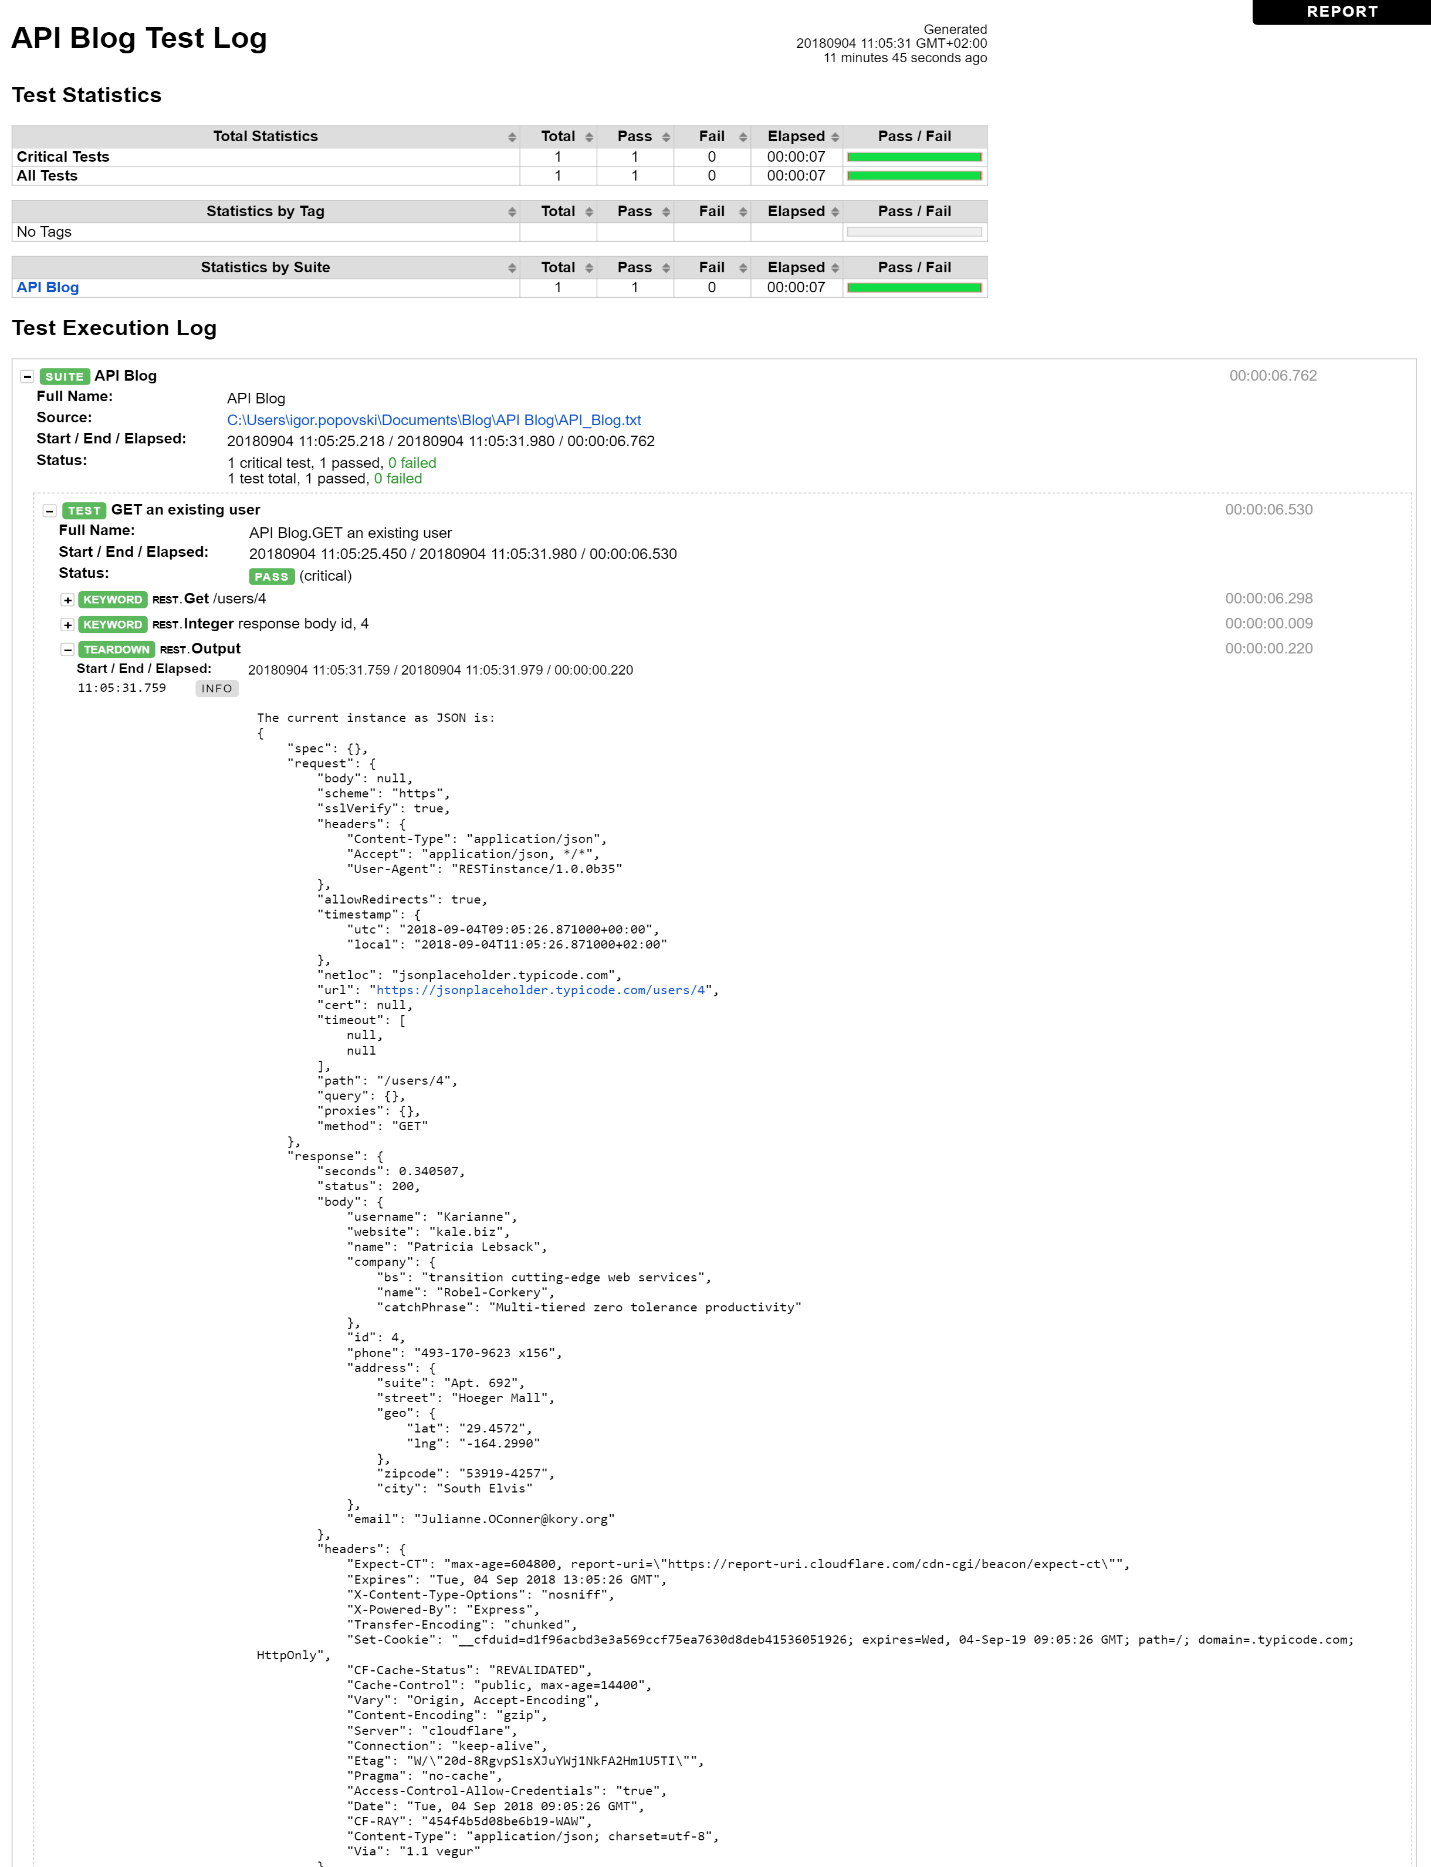
(Figure 3 – Test log from the GET request)
As we can see in the body of the response we have an ID section with the number 4 as value. As our test was a success we can confirm that we got the information from the server about the user with the ID of 4. Let’s move on with the Robot Framework API test process.
Next we are going to make a couple GET requests where we get all the users that have information on the server and where we limit them to a certain number:

(Figure 4 – GET request for all users)
This is what the code looks like when it is not in the edit mode (tabular view) of the RIDE editor. The Teardown keyword with the argument Output tells the framework to output the response in the logs. If that command is not present our test will be a success but we will not be able to see the response. So without further ado here is the response of this GET request:
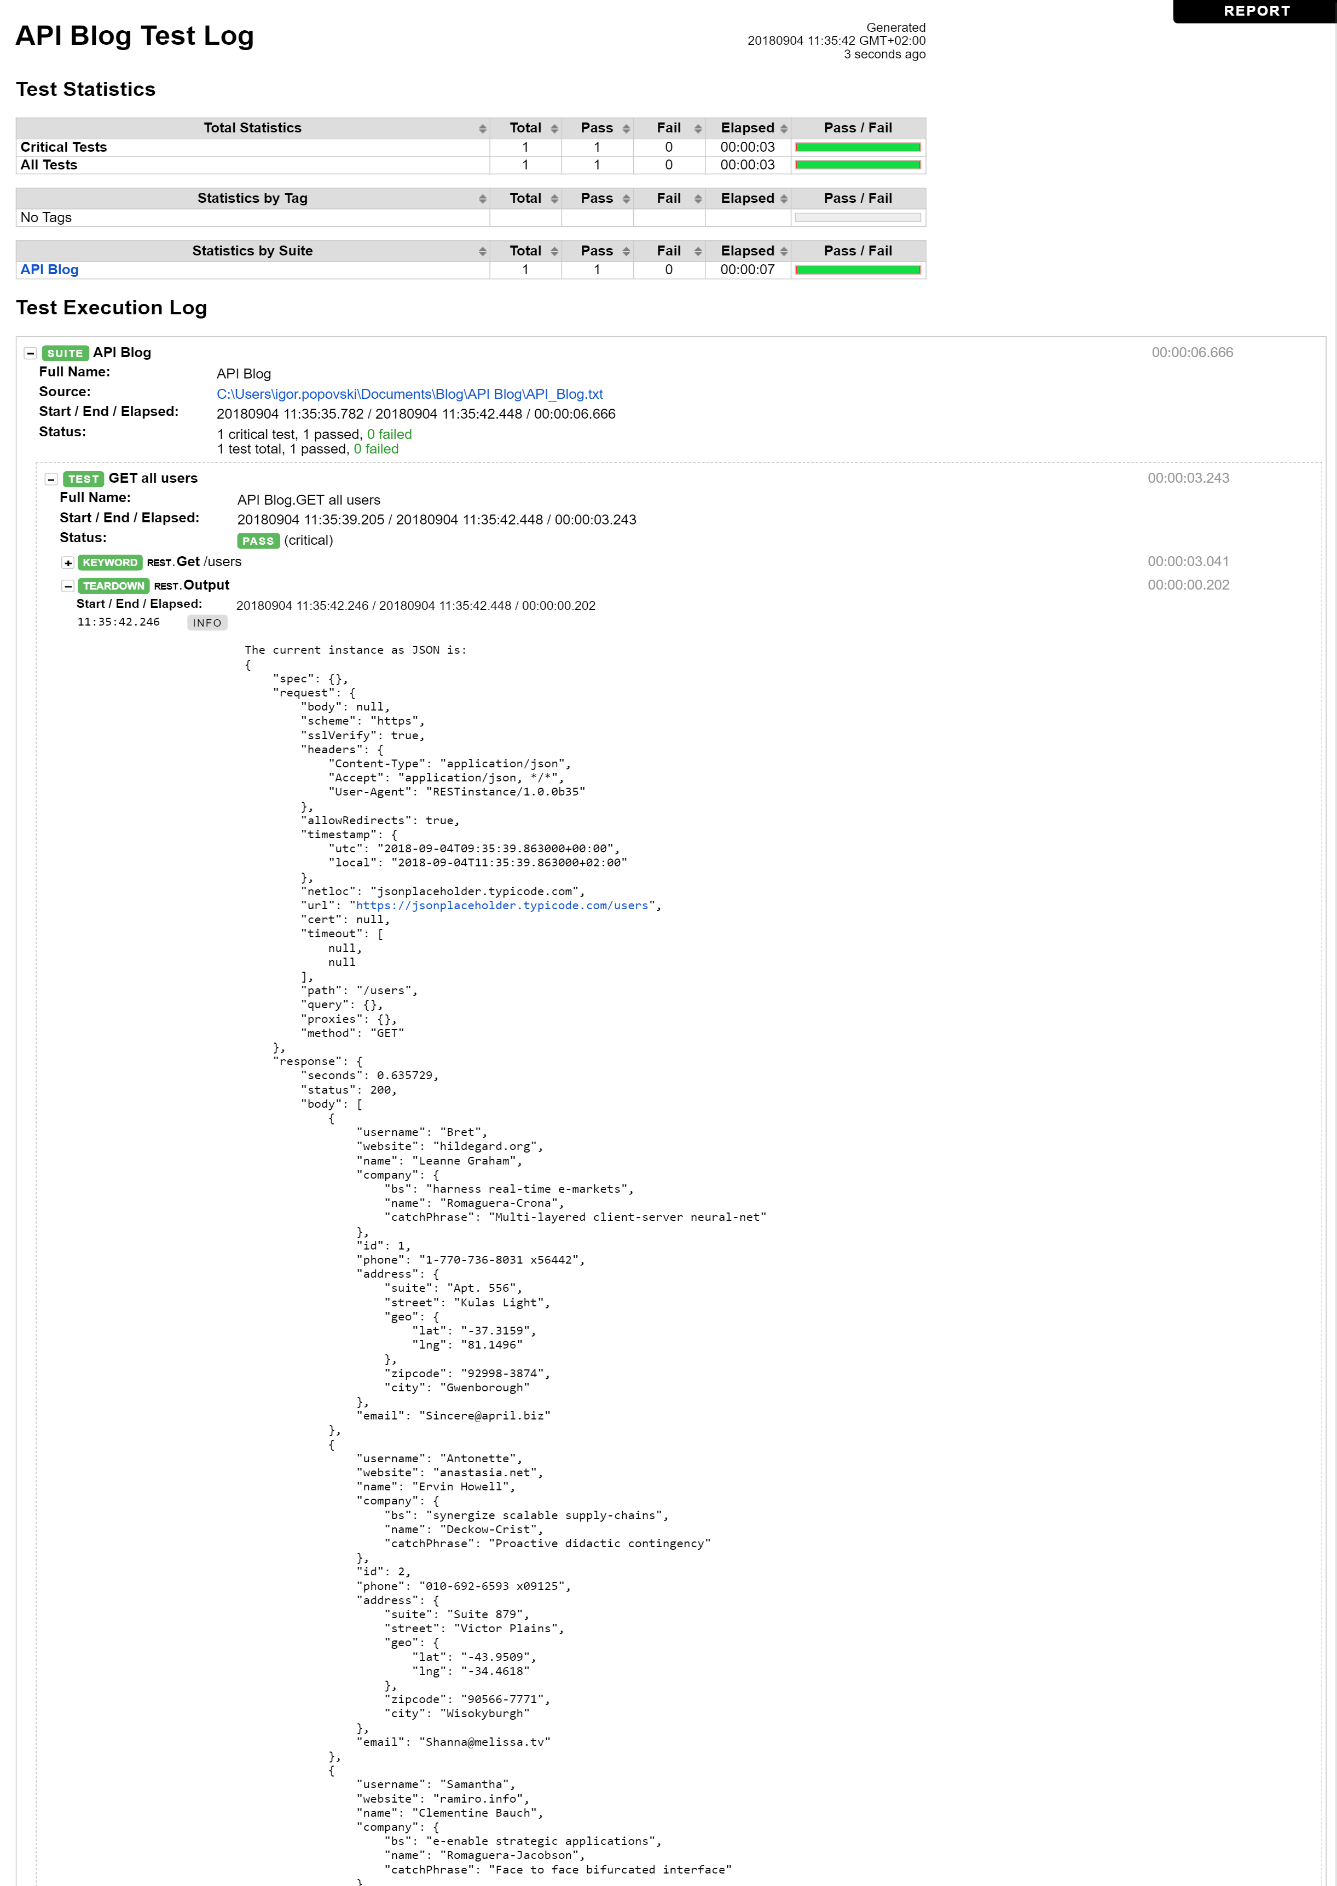
(Figure 5 – Test log of the GET request for all users)
As we can see from the test log the request was successful. The test API that we are using has 10 users in its database, and with this request we pulled the information for all of them. In the output section of the test log we have the information for all ten users, but we displayed an example of two out of those ten.
In the next example we are going to limit the users we want to get to 5, get their IDs and put them in a JSON array for better visibility:

(Figure 6 – GET request for users ids’ with a limit of 5)
With the /users?_limit=5 argument to the GET keyword we are limiting the number of users we want to get information from the server to 5. And with the argument in the Output keyword we are commanding the framework to get only the IDs of the users and insert them in a JSON array which looks like this:
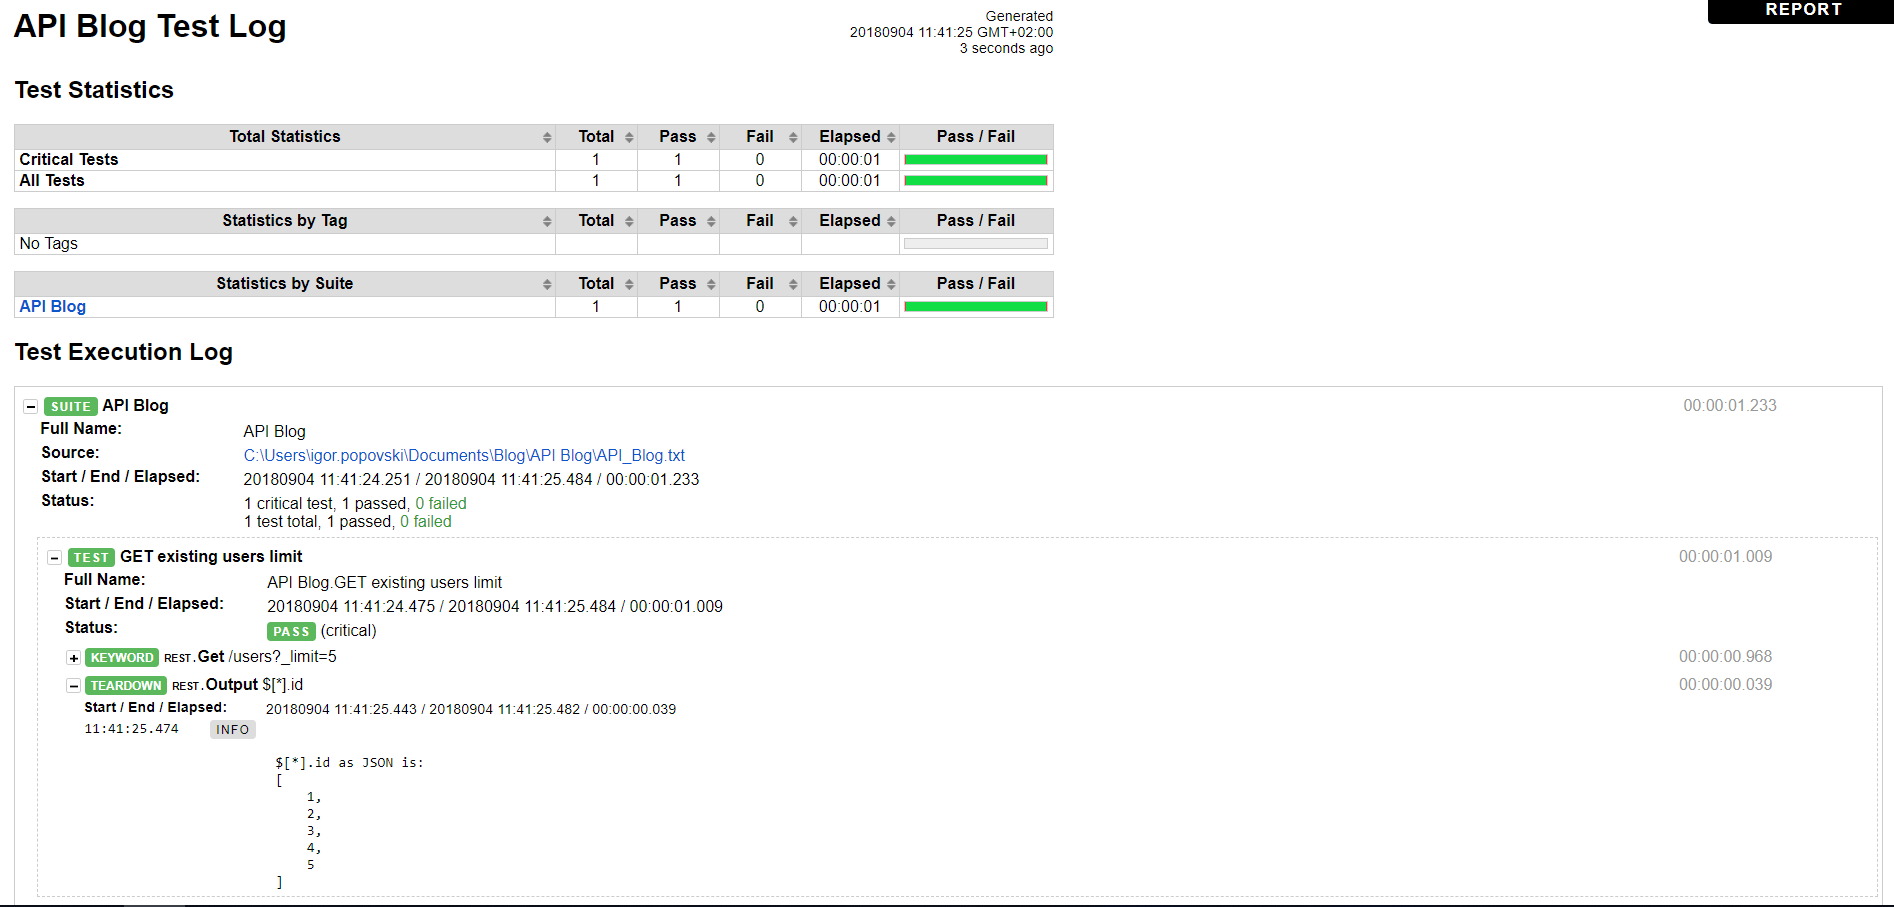
(Figure 7 – Test log from the GET request for users ids’ with a limit of 5 users)
As we can see our test was successful and the output (response) we got from the server is the IDs of the users sorted in a JSON array.
For the next example, we are going to make a POST request to the server. As we mentioned before the system under test has a total of 10 users. That is why we are going to post a new user with an ID of 11 and all of the necessary information:
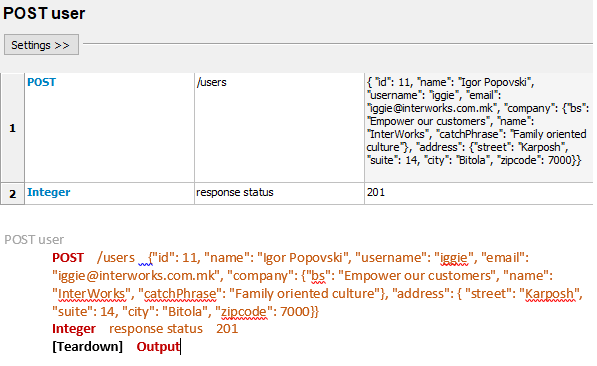
(Figure 8 – POST request for user with ID of 11)
This is the information that we want to be posted to the server under the user with ID 11, we add an INTEGER keyword verification with the response status 201 which means success. After execution, the response that we will get is the following:
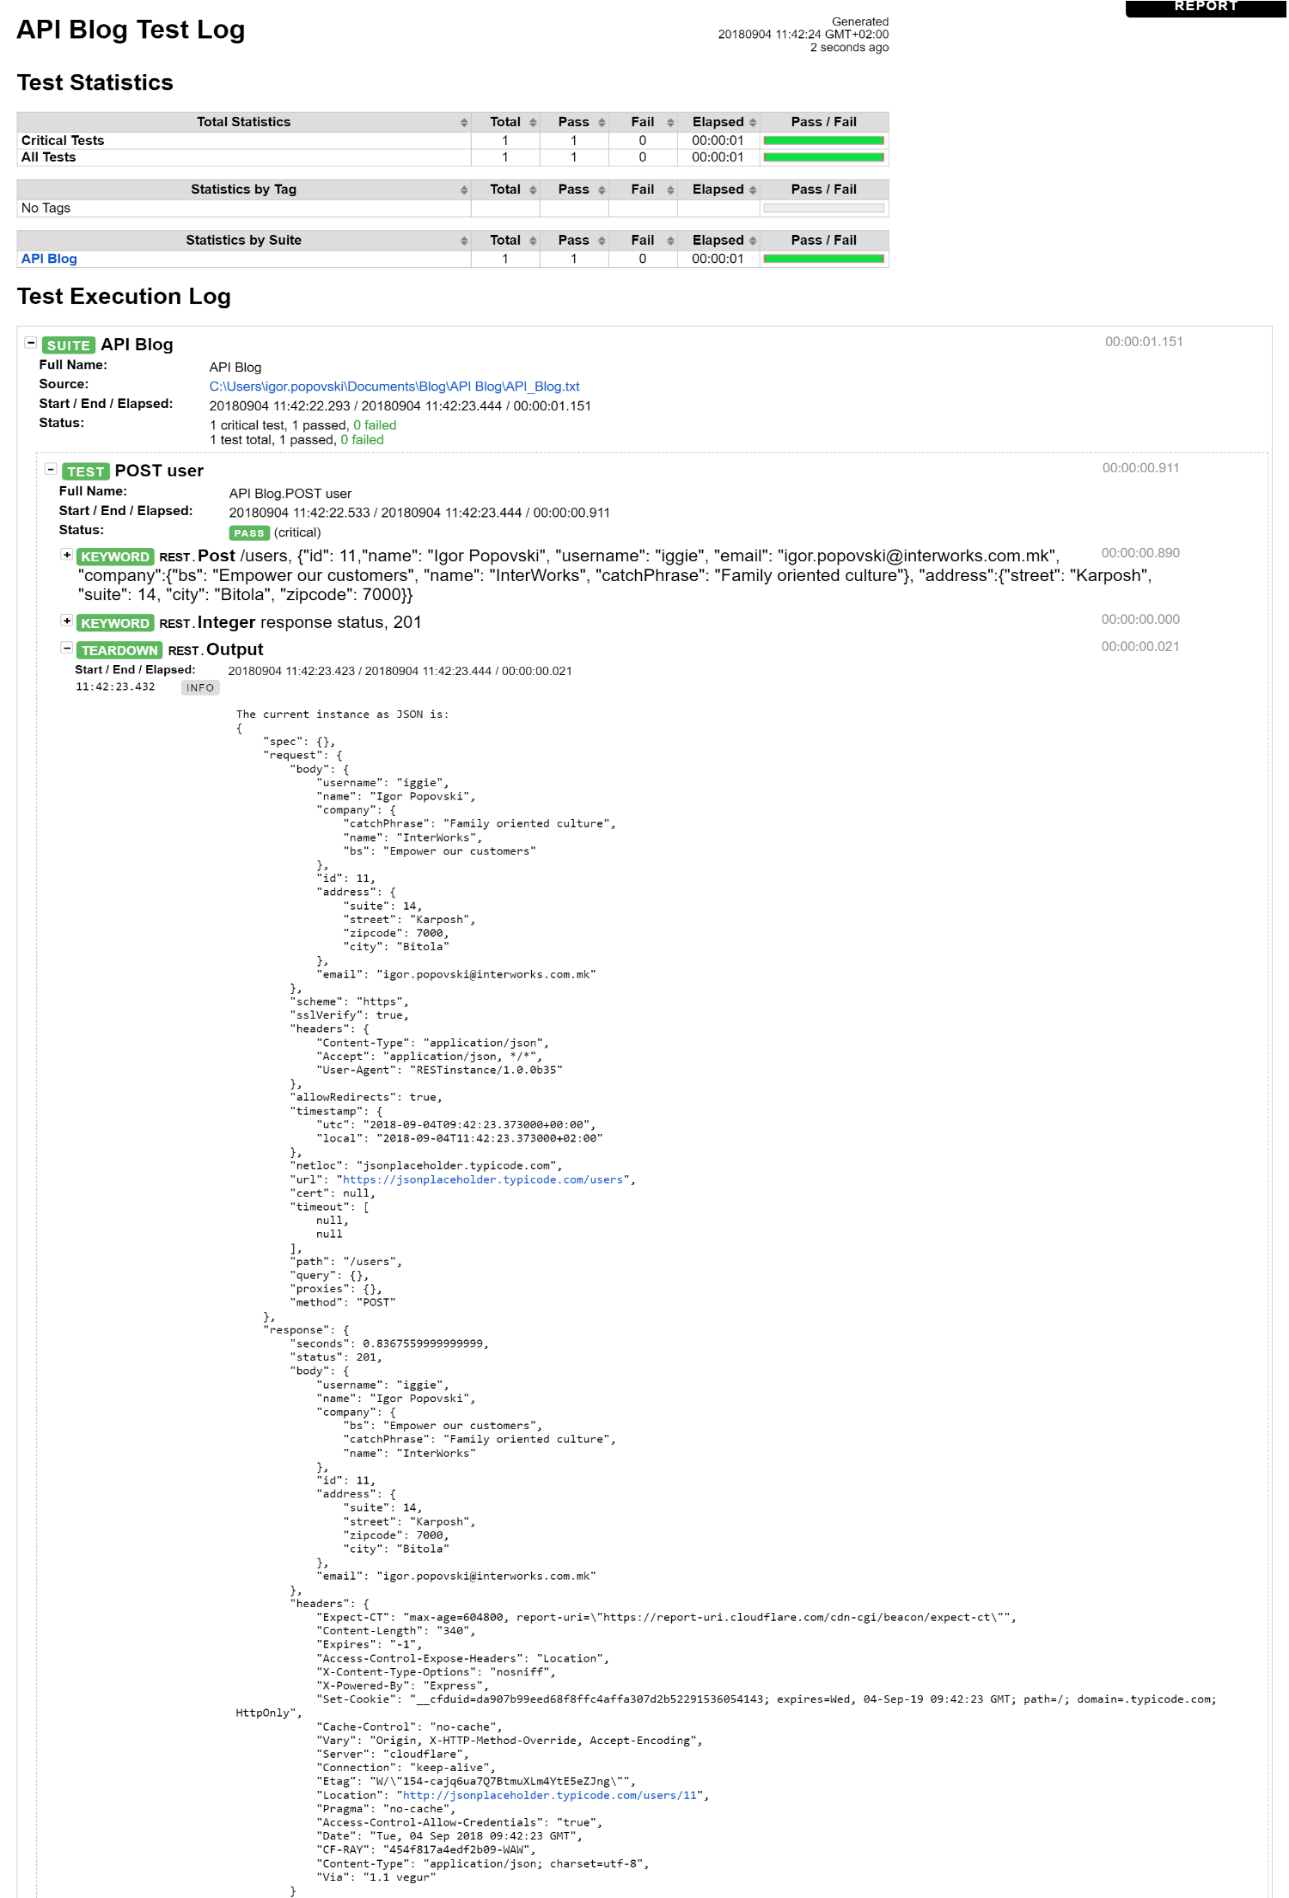
(Figure 9 – Test log for the POST request of user with an ID of 11)
As we can see we get the response with status 201 which means that our test was successful and all of the information we requested are posted to the server under the user with an ID of 11.
Beside these simple requests we can also perform PUT, PATCH and DELETE requests, which you can find how to execute on the Robot Framework API testing GitHub site for the RESTinstance library.
With the simple requests out of the way we can focus on a particularly interesting area of the RESTinstance Robot Framework which is testing APIs and validating requests or responses against a JSON schema. The RESTinstance validates JSON using JSON Schema, guiding you to write API tests to base on constraints rather than on specific values (e.g. “email must be valid” vs “email is foo@bar.com”). This approach reduces test maintenance when the values responded by the API are prone to change. Although values are not required, you can still test them whenever they make sense (e.g. GET response body from one endpoint, then POST some of its values to another endpoint).
In our particular case we whipped up a JSON schema that validates the responses of our requests which can be found on the following link. In the JSON schema we specify the status we expect from the response and the type and validation of each field. When we want to verify a response with a JSON schema in the setup section of our test we specify the EXPECT RESPONSE keyword and we give the schema path as an argument which looks like this:

(Figure 10 – GET request validated against a JSON schema)
The log after the test execution is as follows:
(Figure 11 – Success response when validating against a JSON schema)
But if we make changes in our schema, for example, if we change the minimum length of the name of the response from 2 characters to 20 characters, our test will fail because we are validating against a scheme where the requirement for the name length is 20 characters:
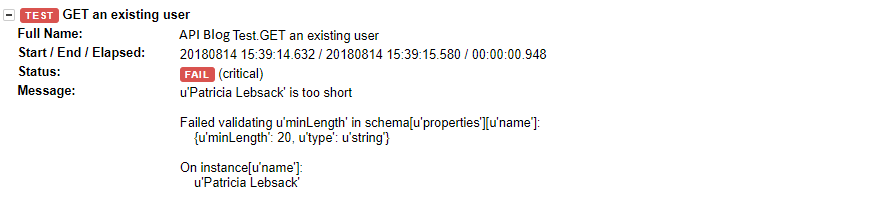
(Figure 12 – Fail response when validating against a JSON schema)
In our case the length of the user name is 16 characters, thus the response reported an error because the minimum length required for the name parameter is 20 characters. We can also make JSON schemas that will validate our requests and expand even further and make JSON schemas that will validate invalid requests and responses (negative test scenarios).
And last but not least, using a simple example we are going to demonstrate how to set up header parameters using RESTinstance. The following code demonstrates how to sign in as a user, retrieve the JWT (JSON Web Token) and make a GET request for the users on the server:

(Figure 13 – Setting header parameters)
With the POST request we sign in as a user into the application, take the JWT token and store it in a variable. Then we set that variable as an authorization header and we submit a GET request which will get all the users from the server as in the previous examples we showed.
Conclusion
From the examples of API testing in Robot Framework, we can conclude that Robot Framework is a very helpful and simple tool for automated testing which can speed up your process of testing and comply with the demands of your clients. Besides the ease of use, the extensibility with a vast number of libraries can make it a “complete” package. On this occasion we focused on the RESTinstance library which enables the framework to test RESTful JSON APIs. It is very similar to Postman, SoapUI, JMeter and other common open source API testing tools, but if you already use Robot Framework for API testing and for your every day automated testing why not just import a library and test your APIs with it.