

In this tutorial, we will explain the easiest and cleanest way to make your blog posts URL’s with unique slugs created from the title of the particular post. For the purposes of this tutorial, the PHP based Laravel framework will be used.
For more information about the framework, please visit the official documentation of the framework website, by clicking the following link.
Also, you can refer to Laravel skeleton application created in my previous post.
Unique slug
While creating a website or web application, you will find yourself in a situation where you don’t want to display the posts with the id in the url anymore. For example, it’s not professional for a Laravel developer to display a post like this: ‘yourwebsite.com/blog/1’. It would be better if you access the post by typing this url: ‘yourwebsite.com/blog/my-blog-post’.
If you are already reading this tutorial, you probably know how to return a post by its slug. It is a simple query done by the beautiful ORM Eloquent (Laravel uses it), where the only check is if the slug column’s value in the database is equal to the value of the slug in the request.
Something like this:
<?php
/**
     * Show single post
     *
     * @param  string $slug
     * @return \Illuminate\Http\Response
     */
    public function show($slug)
    {
        $post = Post::where('slug', $slug)->first();

        return view('blog.single_post', compact('post'));
    }
?>
It’s simple Eloquent stuff and I am sure you are ok with this.
But, the main purpose of this tutorial is to resolve the situation when there is be an attempt from the user to create another post with the same title like any other post’s title created before. Because the slug column in the database needs to be unique, you will face a conflict and the application will fail.
Because of this, some actions will be taken to prevent this from happening, in the simplest way with the cleanest code.
Code!
As you already know from the previous blog post, a sample, skeleton application was created for these tutorials. It is a simple blog, where a user can login/register, publish posts and add comments to the posts.
However, the attention will be put to the form for creating a new post. It is a simple form, created with Bootstrap 4.
Here is the form in real life:
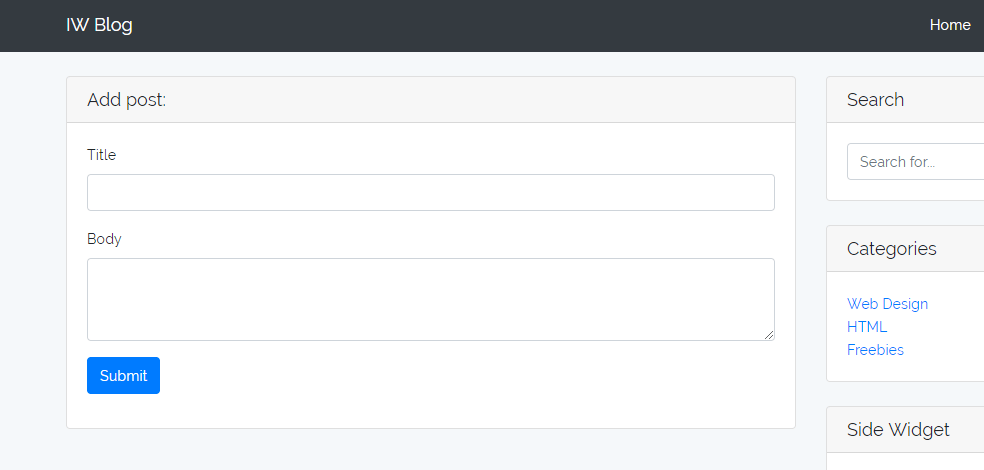
And the html code:
<form action="/blog/post/store" method="POST">
   {{ csrf_field() }}
   <div class="form-group">
   	<label for="title">Title</label>
        <input class="form-control" type="text" name="title">
   </div>
   <div class="form-group">
   	<label for="body">Body</label>
        <textarea class="form-control" name="body" rows="3"></textarea>
    </div>
    <button class="btn btn-primary" type="submit">
    	Submit
    </button>
</form>
On submission, the action of the form is set up to post the request to the given route. The post method is handled like this in the web.php file:
<?php
Route::post('/blog/post/store', 'PostsController@store');
?>
The action is handled in the PostsController, the store() method.
The store() method looks like this:
<?php
/**
     * Store new post
     *
     * @return Illuminate\Http\RedirectResponse
     **/
    public function store()
    {
        try {
            Post::create([
                'title' => request('title'),
                'body' => request('body'),
                'user_id' => auth()->id(),
            ]);

            return redirect("/blog/post/create")->with([
                'status' => 'success',
                'message' => 'Your post was published successfully',
            ]);
        } catch (Exception $e) {
            return redirect("/blog/post/create")->with([
                'status' => 'danger',
                'message' => $e->getMessage(),
            ]);
        }
    }
?>
Explanation of the code above:
- Create a post with the requested data;
- Redirect to the created post page with status and message.
So now, you wonder where is the logic for the slug and what makes it unique for each post? All the logic is done in the Post model, and that’s a great feature provided by Laravel.
In Laravel, you can use and override the boot method, that is fired on each instantiation of the model (something like constructors). In this example, exactly this method will be used.
Eloquent models fire several events, allowing you to hook into various points in the model’s lifecycle. One of the methods is the “created” method, that fires after the record is created in the database. That event will be used and overridden in the model’s boot method.
Here is the code:
<?php
/**
     * Boot the model.
     */
    protected static function boot()
    {
        parent::boot();

        static::created(function ($post) {
            $post->update(['slug' => $post->title]);
        });
    }
?>
Explanation:
- Once the record is created in the database table, the “created” event fires, gets the created record’s data and updates it. In this case, the slug column is updated once the post is created.
*Note – To make this work, you have to make the slug column nullable because firstly, the record is created without a slug value and after that the slug column is populated with proper data. If the column is not null, the code will fail while executing the query.
We are one more step away from the final code.
Actually, two techniques will be shown for dealing with the creation of a unique slug for a post.
In both cases, Eloquent Mutators will be used. The mutator will be automatically called when we attempt to set the value of the, in our case, “slug” attribute of the model. For more info about Eloquent Mutators, please visit the following link.
First technique
Here is the mutator for the slug attribute:
<?php
/**
     * Set the proper slug attribute.
     *
     * @param string $value
     */
    public function setSlugAttribute($value)
    {
        if (static::whereSlug($slug = str_slug($value))->exists()) {
            $slug = $this->incrementSlug($slug);
        }
        $this->attributes['slug'] = $slug;
    }
?>
Explanation:
- Check if the record with the requested slug exists in the database, if so, call the method incrementSlug(), if not, only assign the given slug to the model’s internal attributes property.
And the custom incrementSlug() method:
<?php
/**
     * Increment slug
     *
     * @param   string $slug
     * @return  string
     **/
    public function incrementSlug($slug)
    {
        // get the slug of the latest created post
        $max = static::whereTitle($this->title)->latest('id')->skip(1)->value('slug');

        if (is_numeric($max[-1])) {
            return pred_replace_callback('/(\d+)$/', function ($mathces) {
                return $mathces[1] + 1;
            }, $max);
        }

        return "{$slug}-2";
    }
?>
Explanation:
- Firstly, get the slug of the latest created post, by skipping the last created record, because the slug column value of it is null before updating;
- In PHP 7, you can take a string and interact with it as an array. So, -1 means, get the last character of the slug. Also, there is a check if the last character of the slug is numeric.
- With the preg_replace_callback() function, with the regex, look for one or more number/s that need/s to occur at the end of the string. If there is one, trigger the callback and increment the value found with 1;
- If the last character of the slug is not numeric, it’s the first occurrence of the slug, for example, “lorem-ipsum”, so just return the slug with a number at the end. For example: “lorem-ipsum-2”.
With this technique, a solution is created for setting a unique slug by incrementing its last character. So, with this, there is a situation where the following slugs for the posts with the same titles are saved:
- lorem-ipsum
- lorem-ipsum-2
- lorem-ipsum-3
- lorem-ipsum-4
- lorem-ipsum-5 etc.
Second technique
This technique has less code than the first one and the result is a little bit different.
In this technique, only a mutator is used and all the logic is there.
Here is the code:
<?php
/**
     * Set the proper slug attribute
     *
     * @param string $value
     */
    public function setSlugAttribute($value)
    {
        if (static::whereSlug($slug = str_slug($value))->exists()) {
            $slug = "{$slug}-{$this->id}";
        }
        $this->attributes['slug'] = $slug;
    }
?>
Explanation:
- Check if the record with the given slug exists in the database, if so, append the id of the record to the slug, if not, only assign the given slug to the model’s internal attributes property.
With this technique, the slugs of the posts with the same titles will look like this, based on the record’s id in the database:
- lorem-ipsum-8
- lorem-ipsum-17
- lorem-ipsum-18
- lorem-ipsum-32
- lorem-ipsum-39 etc.
Both techniques are useful and correct. Always prefer less code and because of that, maybe, the second technique is a little bit better. But, it is up to you to choose the technique you will use, based on your or your client’s needs.
*Note – In the form for adding a post, there is an input for the title and a text area for the body of the post. In some of the previous blog posts, there are some tips for spam detection on your inputs. It could be useful in a lot of cases, so if you are interested, be sure to visit the blog post.
Conclusion
In this tutorial, the functionality explained is very basic, but important thing for every project. The techniques explained in the examples are done by following the best practices for the framework, and using less code with good refactoring. You can easily apply the code in your current or next project and promote your elegant way of solving this task.
Please feel free to comment below and share your thoughts.