What is one of the main challenges for each integration developer?
On a daily basis, each integration developer encounters the challenge of successfully transforming the data from one data type to another. Mulesoft as an integration platform is giving excellent opportunities for achieving that by using the DataWeave transformations. In that regard in this article, we will explain the transformation from JSON to XML.
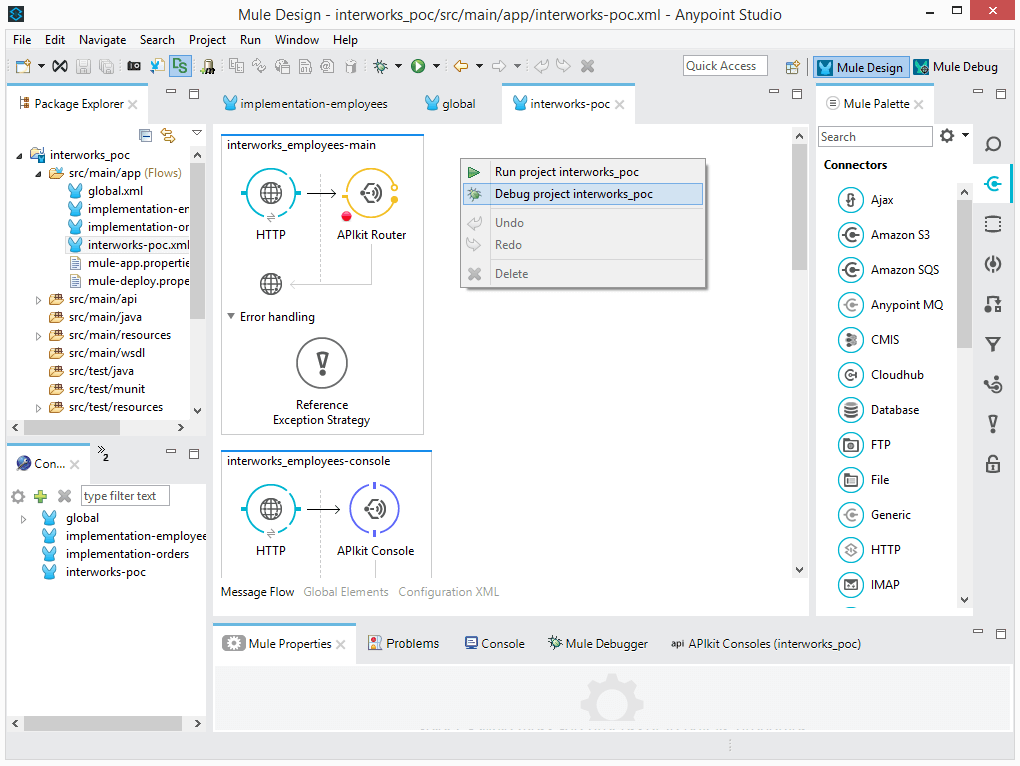
In general, we have an application that has three flows. The main flow is named “interworks-poc.xml” where we have implemented APIKit router. There we receive a JSON request and based on the url path the request is routed to call the implementation flow accordingly. Then we have the implementation flow named “implementation-employees.xml” where we are making the transformation and we have one flow named “global.xml” where all global references used in the flows which we have mentioned previously are stored.
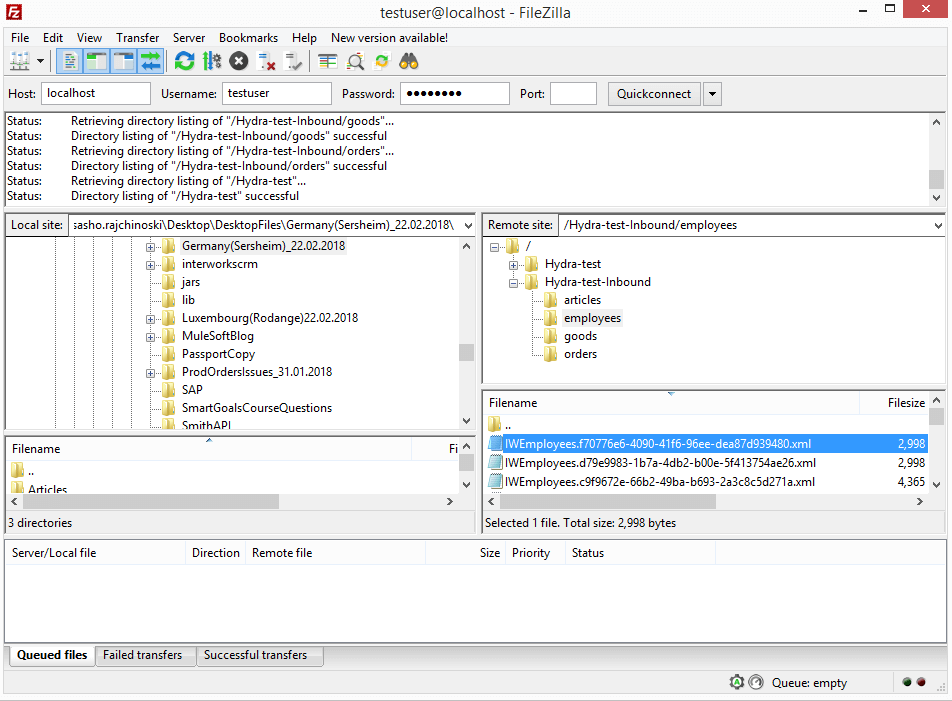
Transforming a JSON request to an XML file stored on the FTP server
As mentioned above we will use this flow as an example to explain how in Mulesoft Anypoint Studio with DataWeave transformation a JSON request into the XML file will be transformed and later, store that file on the FTP server location which is our main topic of this article. In order to start the application, we will use the Postman tool to send the HTTP request. Before sending the request using the Postman tool we need to set up properly some parameters.
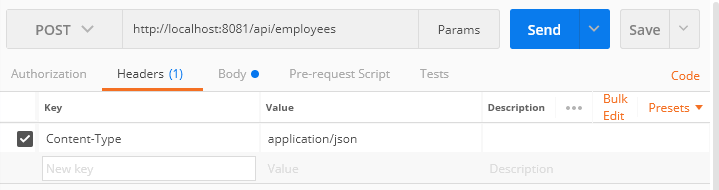
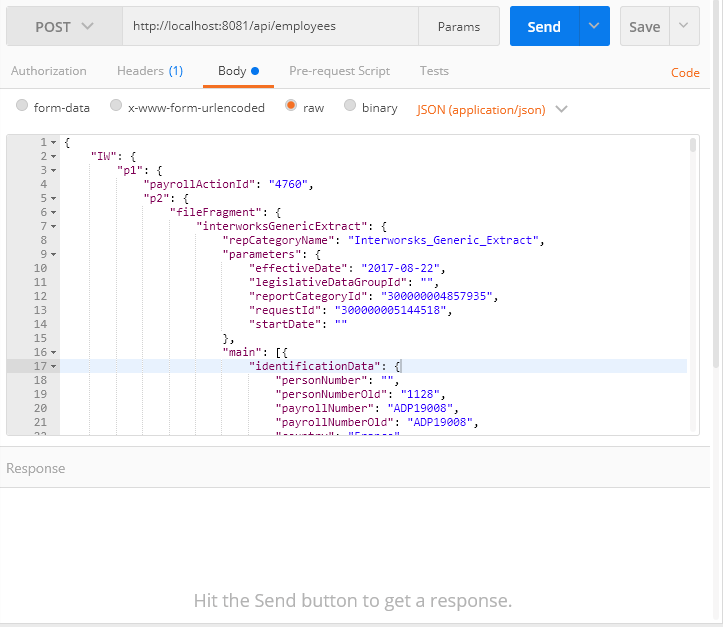
First, we need to specify the HTTP method which will be in our case POST since we want to post JSON request. Second, we need to specify the correct URL to trigger the application which is in our case http://localhost:8081/api/employees”. Third, we need to specify in the Headers tab the Content-type which is “application/json”. Fourth and last thing is the Body tab where we are choosing the “raw” button from the radio buttons and in the request area, we are posting the request.
What we need to do now is start the application in the debug mode in Mulesoft Anypoint Studio. We are opening the main flow – “interworks-poc.xml” and by performing a right click from the given options we are choosing “Debug project interworks_poc”.
Once the application is started in the debug mode we pass through all the activities set before the JSON to XML transformer activity. That is achieved by pressing “Next processor” button located in the right upper corner of the screen or “F6”.
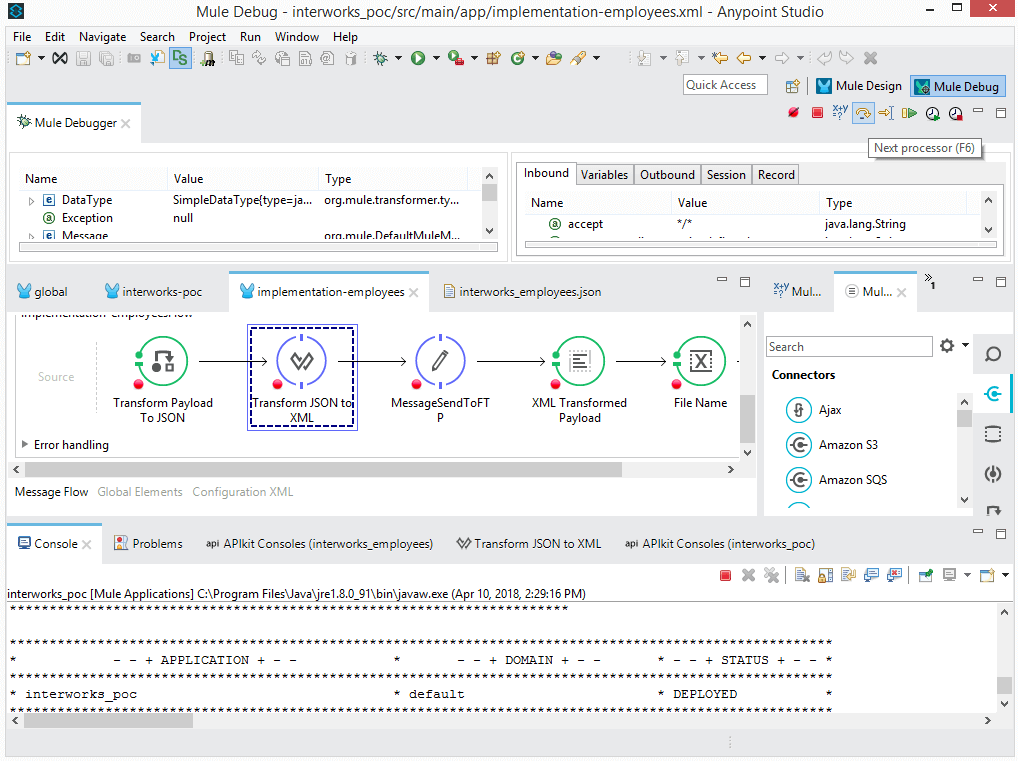
With the implementation of “Transform Message” activity named “Transform JSON to XML” in our case we will cover a few of the many powerful possibilities for payload transformations by using Dataweave. How to use variables, functions, iterations, formatting options, filtering etc will be explained.
DataWeave files are divided into two main sections:
- The Header, which defines directives (optional)
- The Body, which describes the output structure
The two sections are delimited by a separator, which is not required if there is no header. The separator consists of three dashes: “—“
In the Dataweave header, we could define the input and output payload. In our case that will be:
%input payload application/json
%output application/xml skipNullOn = “everywhere”
One interesting function here is skipNullOn = “everywhere”, which is used to skip all empty tags in the XML output.
The second thing that is defined in our header is the variables. That looks like:
%var employees=payload.IW.p1.p2.fileFragment.interworksGenericExtract
As we can see above we have set “payload.IW.p1.p2.fileFragment.interworksGenericExtract” for the value of the variable named “employees” which means that by using the variable later on in the mapping transformations we could replace the whole json path “IW.p1.p2.fileFragment.interworksGenericExtract”.
The third thing which is defined in the header are the functions. We will give explanations for two of them since we have multiple functions defined but the purpose of using them is similar. In order to define a function in a header we need to write %function then the name of the function, after that the equal sign and then we are setting the value for that particular function, the same like defining a variable.
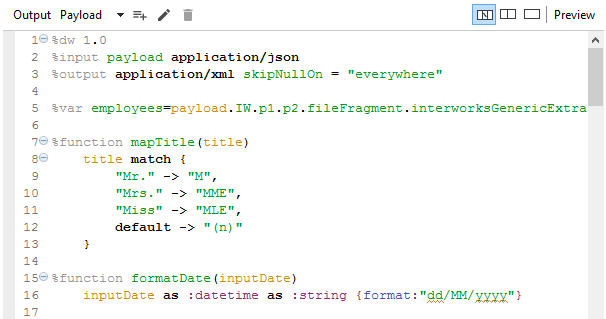
As we can see from the picture above we have defined two different functions, the first one is named “mapTitle” and the second one is named “formatDate”. In the first one, the purpose is the particular values which are coming a JSON payload to be matched and translated accordingly, the reason why we are using match keyword. The arrow between the values is used to define how the input values will be translated and presented in the output XML and is giving us the possibility to define multiple input and output combination of values which is very useful.
In the second function, the purpose is the input dateTime to be transformed in the format presented in the function above. We are using the as keyword in order to transform the input value from one data type to another like :datetime and :string. What is important to be mentioned here is the format function which is used for creating custom formats, and it is used above for creating custom date format but it can also be used for creating other custom formats of different data types.
After finishing the explanation regarding the Header part we will continue with our explanation related to the Body part of the Dataweave.
We will start with the iterating and creating repeating elements in the XML output in a case when we have repeating elements which are coming in the JSON input. We have a complex structure in the JSON input $.callAssignmentData.empOrgData[0].callImputationData.imputationInformation and by using the map operator and {} brackets after the map operator we will create two different XML complex elements. There are many interesting functions and things, and one of them here is empOrgData[0] and with adding [0] after the empOrgData element we will always get the values from the first repetition of the empOrgData element.
The whole code looks like:
(($.callAssignmentData.empOrgData[0].callImputationData.imputationInformation map {
OBJECTIMEX @(name: “Imputation”):{
ITEMIMEX @(name: “Imputation”, value: $.imputation when $.imputation != null otherwise “(n)”):{},
ITEMIMEX @(name: “Percentage”, value: $.imputationPercentage when $.imputationPercentage != null otherwise “(n)”):{}
}
Next, we will explain the use of the variable created in the header and filtering data.
(employees.main filter ($.identificationData.personNumberOld == “” or ($.identificationData.Action_Name ==’Employee’ or $.identificationData.Action_Name ==’Add Contingent Work Relationship’))
As we can see from the statement above we are using the “employees” variable and we are creating filter of the data. Based on the created filter we want to fulfill some required conditions in order to take further actions in the Datawave transformations.
The third thing is creating the XML structure, where we are defining the XML nodes and elements. We need to note here that all the values are defined in the XML attributes. The name of one node with one element and the attribute values in it, for example, should look like:
OBJECTIMEX @(name: “Identity”): {
ITEMIMEX @(name: “Department”, value: $.identificationData.payrollNumber when $.identificationData.payrollNumber != null otherwise “(n)”)
}
The fourth thing is using the functions created in the Header within the Body. We will cover usage of both functions created in the header. The “mapTitle” function is used for transforming value for the attribute named “Title”:
ITEMIMEX @(name: “Title”, value: (mapTitle($.callPersonalData.persons[0].personalData.title)) when $.callPersonalData.persons[0].personalData.title != null otherwise “(n)”)
If we check the JSON input which is in our case “title”: “Mr.” and the XML output which is <ITEMIMEX name=”Title” value=”M”/> we can see that the transformation is done properly and our function is working as expected.
The “formatDate” function is used for transforming value for the attribute named “DateOfBirth”:
ITEMIMEX @(name: “DateOfBirth”, value: (formatDate($.callPersonalData.persons[0].personalData.dateOfBirth)) when $.callPersonalData.persons[0].personalData.dateOfBirth != null otherwise “(n)”)
If we check the JSON input which is in our case “dateOfBirth”: “1991-01-28T00:00:00.000Z”, and the XML output which is <ITEMIMEX name=”DateOfBirth” value=”28/01/1991″/> we can see that the transformation is done properly and our function is working as expected. We are receiving the XML output date formatted as per the defined format in the “formatDate” function.
After completing all the transformations explained above the flow ends by storing the XML file on the FTP server.