

Agile software development and DevOps are gaining more popularity day by day and the demand for tools to deliver service virtualization is growing rapidly as well. As a result, service virtualization is becoming an important concept in software development and QA/testing.
In this article we will talk about service virtualization and a tool that enables us to do the virtualization – Parasoft Virtualize CE (Community Edition).
What is service virtualization and why is it important?
Usually, QA teams had to wait for application deployment before the test for function, integration or performance were conducted. They were waiting for the different project teams to finish different components of the application and later to assemble those pieces into a single working product before they were given green light. This method of developing and testing an application is logical, correct, but very slow and very impractical. Testing needs to follow development and start as soon as possible, especially when producing heterogeneous systems with multiple interdependent components, APIs and third-party apps. Most of the time, these components become available for testing in a very late stage and that’s what service virtualization aims to change.
Service virtualization relates to reproduction of the behavior of the specific dependent components that developers or testers need to do in order to complete their end-to-end transactions. It presents a simulation of interfaces, not a virtualization of systems. It should be noted that service virtualization doesn’t virtualize entire systems, but only specific slices of dependent behavior which is critical for the execution of development and testing tasks. The application logic that is provided with this virtualization is enough for the developers and testers, meaning that they get what they need and do not have to wait for the actual service to be completed and readily available.
People usually confuse service virtualization with server virtualization, but they also confuse it with with mocking and creation of stubs. But, what is the difference? Mocks and stubs are fake software components that imitate real components as well, but they are very context-specific. This means that mocks and stubs are created to simulate a specific behavior that a certain component needs to fulfill at a certain time in the development process.
So, mocks and stubs are used at a certain time of the development process, and here comes the difference with the virtual services. The virtual services can be used throughout the entire production cycle, delivering the same behavior and functionality for every tester and developer at any time during the SDLC. With the rise of the Agile software development, the manual development and management of stubs and mocks for modern enterprise applications have become increasingly difficult.
Software tools vendors have since shifted focus from stubbing to service virtualization and now what is known as service virtualization can be achieved by using some of the available commercial off the shelf (COTS) service virtualization technologies as a platform for the development and deployment of various service virtualization assets. One such tool is Parasoft’s Virtualize.
Parasoft Virtualize Community Edition – Software Installation and Basics
Parasoft (or Parasoft Corporation) is an independent software vendor specializing in automated software testing and application security. They have been active for over 30 years, developing tools for runtime error detection static code analysis, unit testing, and ultimately expanded to include application security, functional testing, and service virtualization.
Parasoft Virtualize is a service virtualization tool, sometimes also called API simulation, that provides users with the ability to create, deploy, and manage simulated test environments, as well as simplify test data management. This is primarily to facilitate testing earlier, as well as improve access to systems that may have scheduling constraints or be too expensive to maintain dedicated versions of. (For more information on Parasoft visit: https://en.wikipedia.org/wiki/Parasoft)
Virtualize integrates with the Parasoft Continuous Testing Platform which allows users to create, manage, and deploy virtual test assets and environments through a web interface as well as integrated them with their continuous integration system. (For more information about Parasoft Continuous Testing Platform visit: https://docs.parasoft.com/display/SOAVIRT9103CTP310/Continuous+Testing+Platform)
To get a better picture about what we’ve talked so far, we are going to move on to Virtualize installation and operation. In this article we are going to use Virtualize CE (Community Edition) which can be obtained from Parasoft’s product download page. The installation is pretty straight-forward and upon successful installation and launch, we are presented with the Virtualize interface.
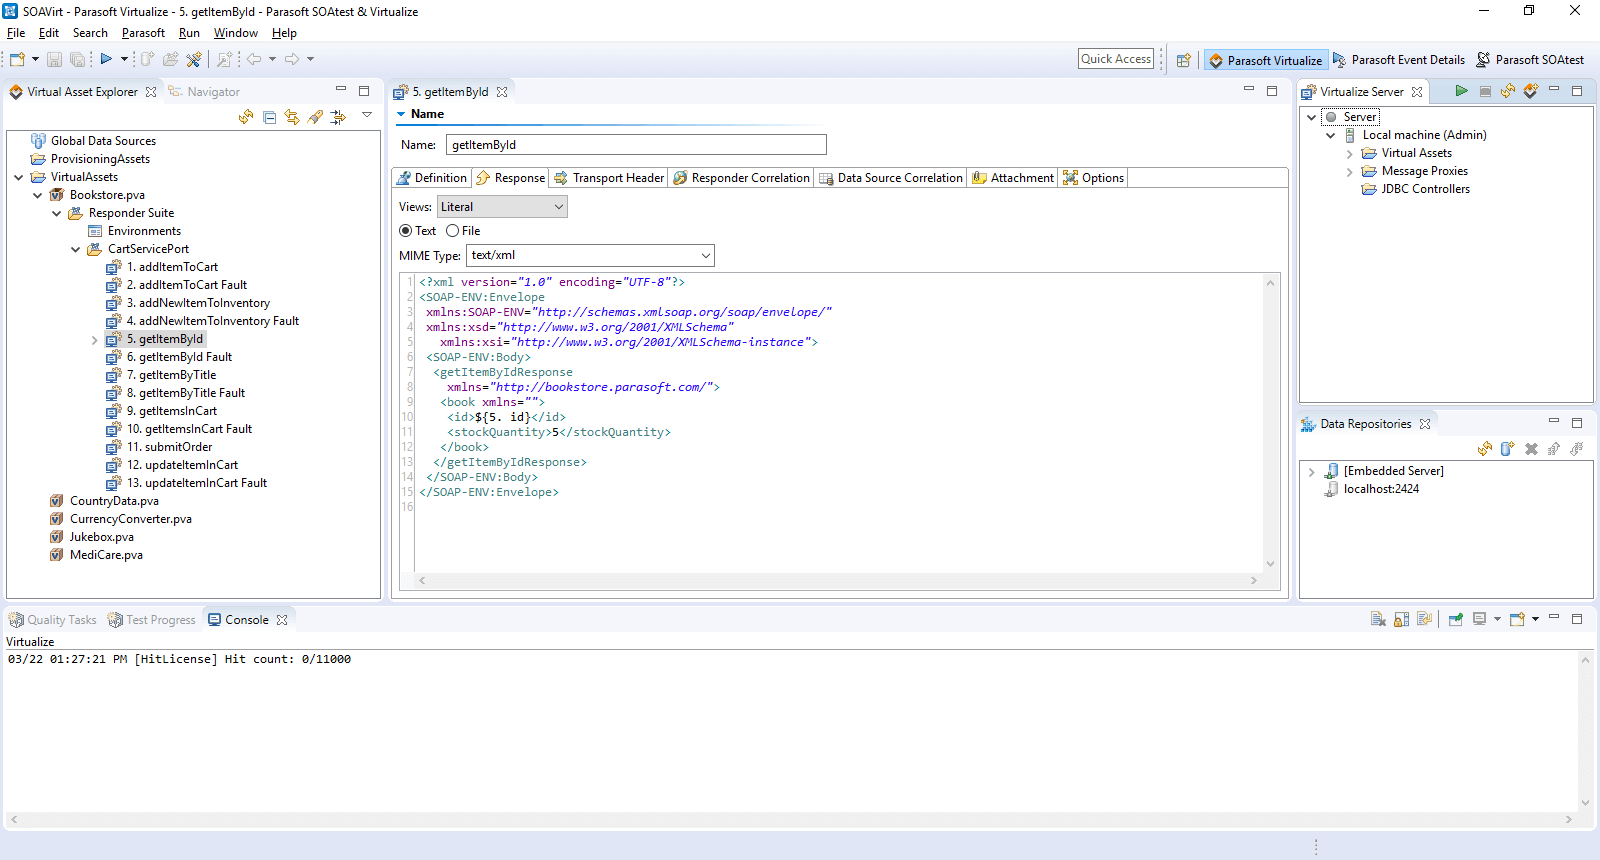
The left pane shows all of our virtual assets. They can be opened, closed, deleted or modified. If we decide to open a specific component from our virtual asset, its contents are displayed in the main panel in the middle. And on the right pane you can find the virtual server and the virtual data repository server settings.
In order to generate these virtual assets and gather some data, we can use different methods. In this articlewe will present two methods for creating virtual assets:
The first method is using Virtualize to generate appropriate code from a standard service description file such as WSDL, XML Shema, OpenAPI/Swagger or RAML. Creating a virtual asset like this might need some work and refinement but each virtual component only needs to be created once and can be used continuously (and repeatedly) in the development and testing process.
The second method is somewhat simpler as it involves creating a virtual asset from live traffic recordings. By recording real system traffic, Virtualize can generate simulated responses between applications or any type of dependent components. What makes Virtualize incredible is its ability to perfectly simulate key system behaviors, learning only from the previously recorded request/response exchanges.
Creating a virtual asset from service-description document
In order to create a virtual asset, we need to right-click on the ‘VirtualAssets’ folder in the Virtual Asset Explorer and ‘Add new’ -> ‘Virtual Asset .pva file’. First, we give a name to our VA and then the Virtual Asset Creation Wizard pops up asking how we want our virtual asset to be created.
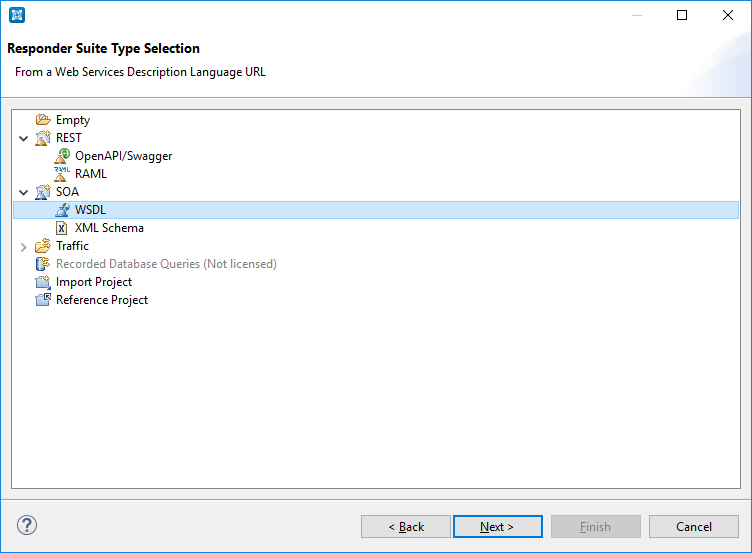
Since we are going to use a publicly available WSDL file for a GeoIP service (a service that is able to locate us according to our IP address) for this example, we select SOA -> WSDL and then we click next. The service’s WSDL is available at: http://www.webservicex.net/geoipservice.asmx?WSDL and that’s what we put in the next window where we are asked for a WSDL URL. All that’s left now is to click finish and let Parasoft Virtualize create our virtual asset.
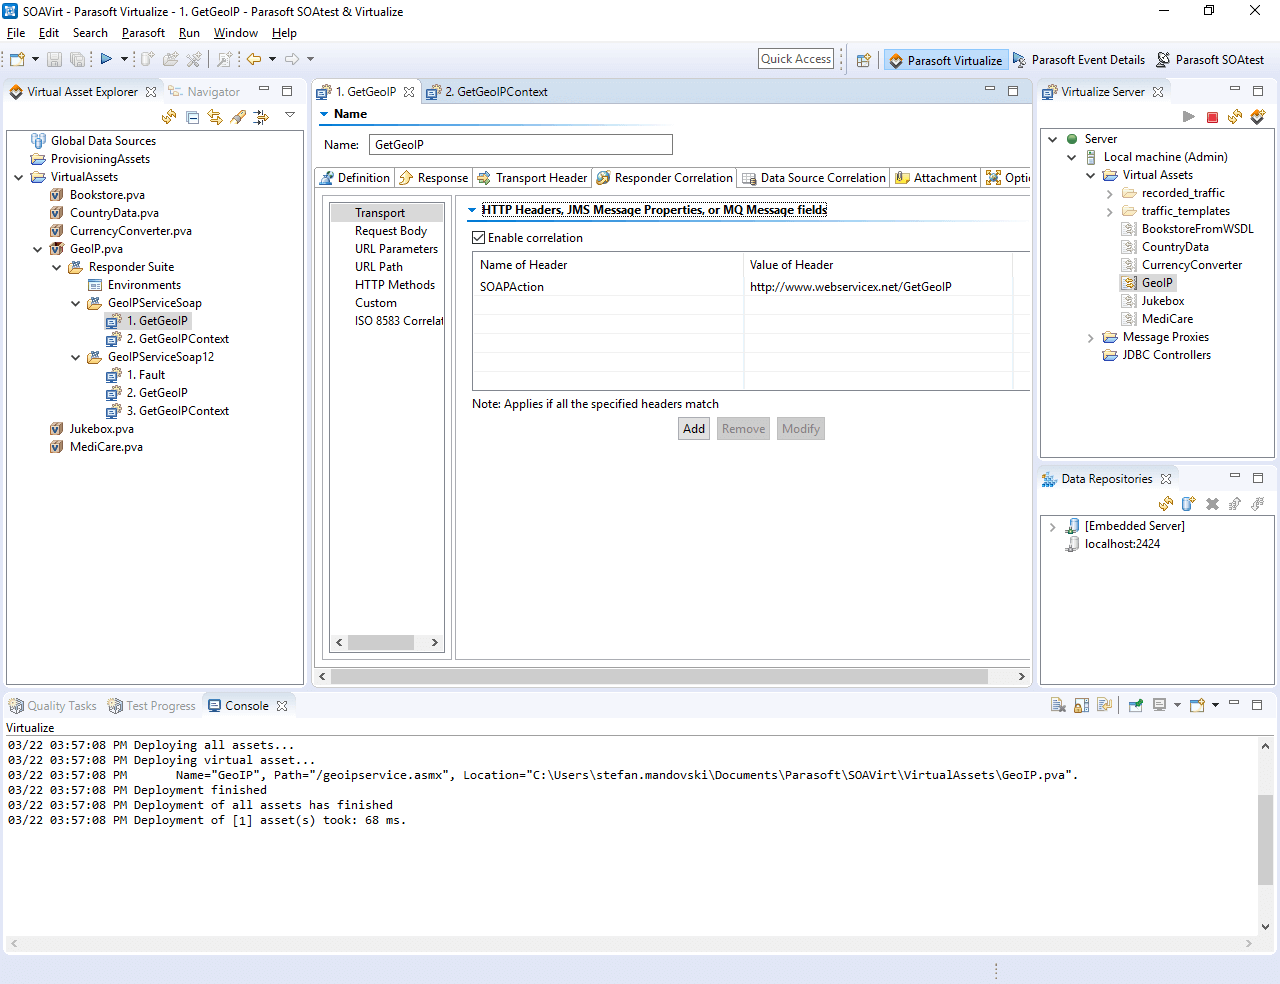
Upon creation of the Virtual Asset, the .pva file will be created directly in the VirtualAssets folder and our virtual asset will be deployed automatically. We can start the Virtualize server from the Server pane on the right, simply by pressing the green ‘Start’ button. We can check the console for the deployment message or check at the default virtualize server URL at http://localhost:9080 for servers or proxies status.
Now we need to check if everything is working as it is expected to. That means sending a sample request to our virtual asset and expecting it to receive it and respond accordingly. For that purpose, we will use Postman. But first, it is a good idea to enable monitoring on our virtual asset server in order to see the traffic directly in Parasoft Virtualize.
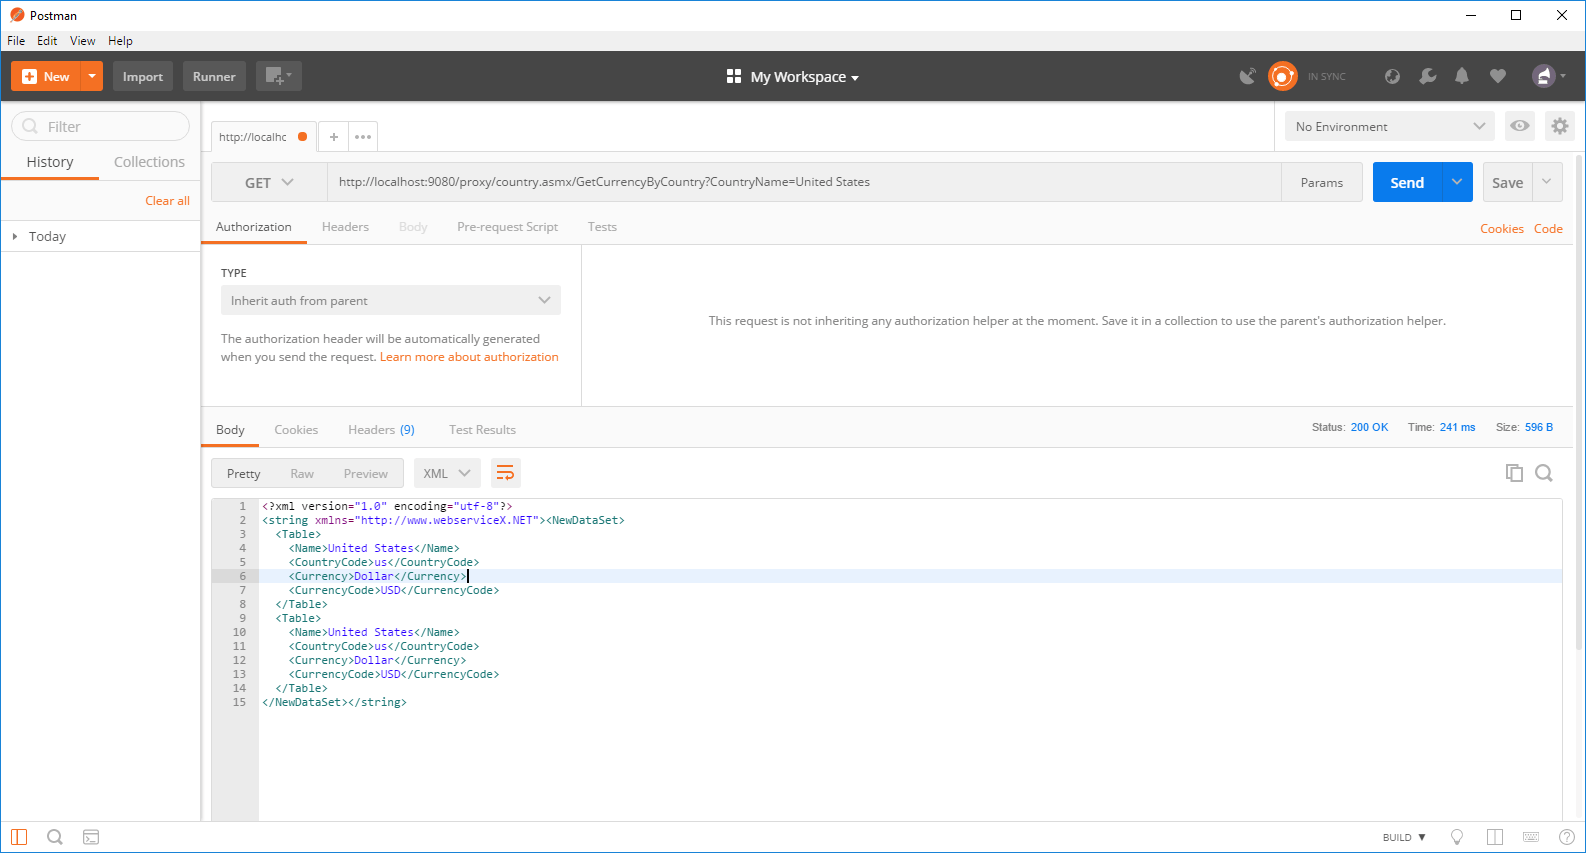
Start up Postman and create a simple POST request to our Virtual Asset. Populate the URL field, add the sample request in the ‘body’ tab, and click ‘SEND’.
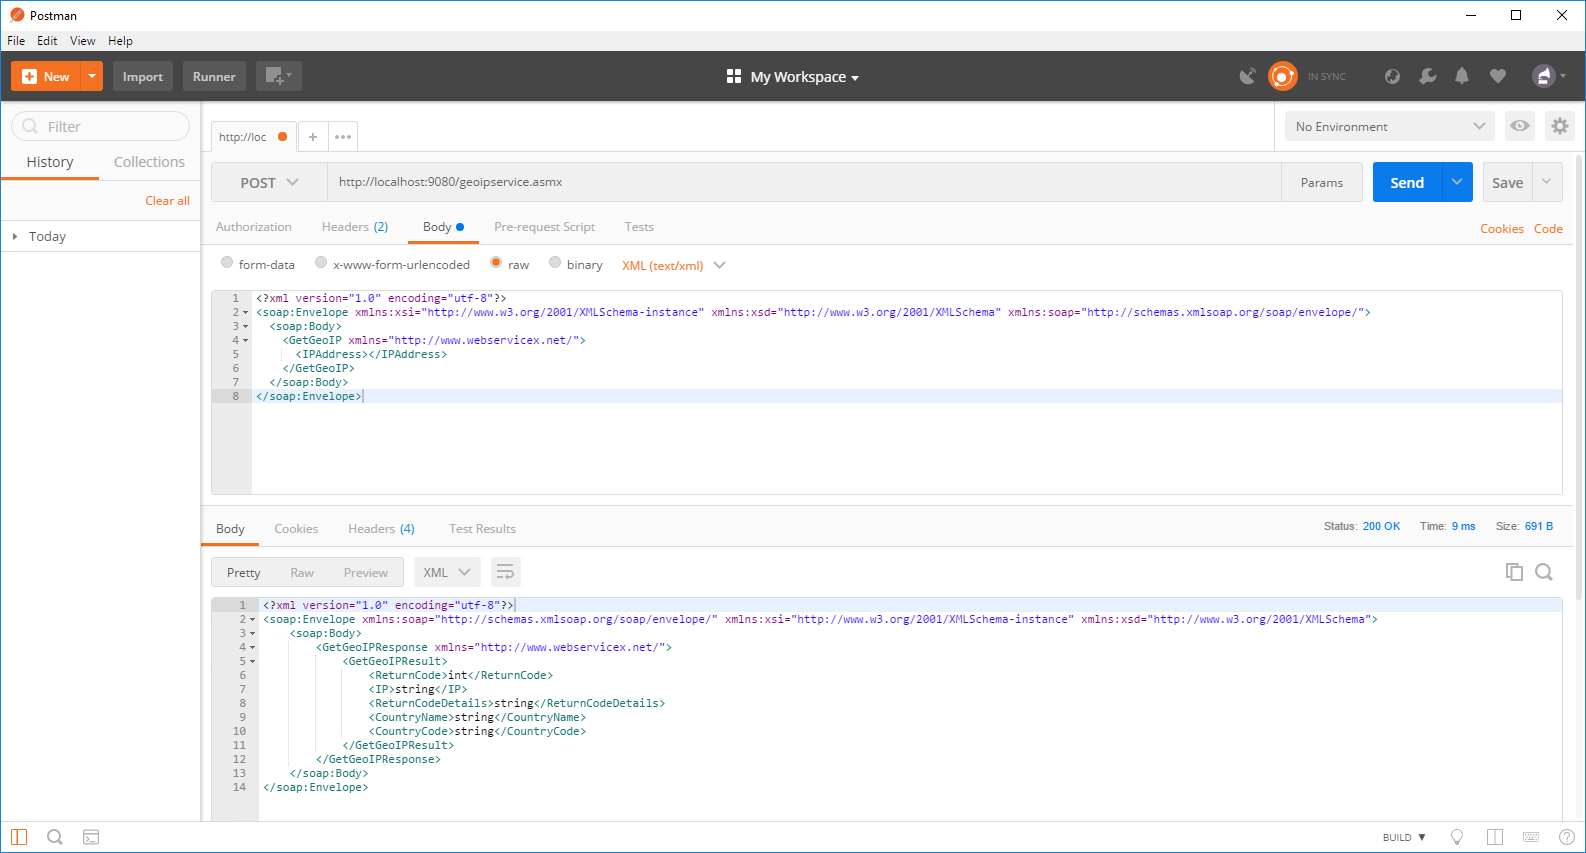
If everything is done right, we should get a Status ‘200’ response, meaning everything went well – we sent a request and got a response, which will be displayed under our request. This can also be verified in the Parasoft Event Monitor, right above the server pane. Upon clicking on Parasoft Event Details, we get all the traffic that was created to and from our virtual asset.
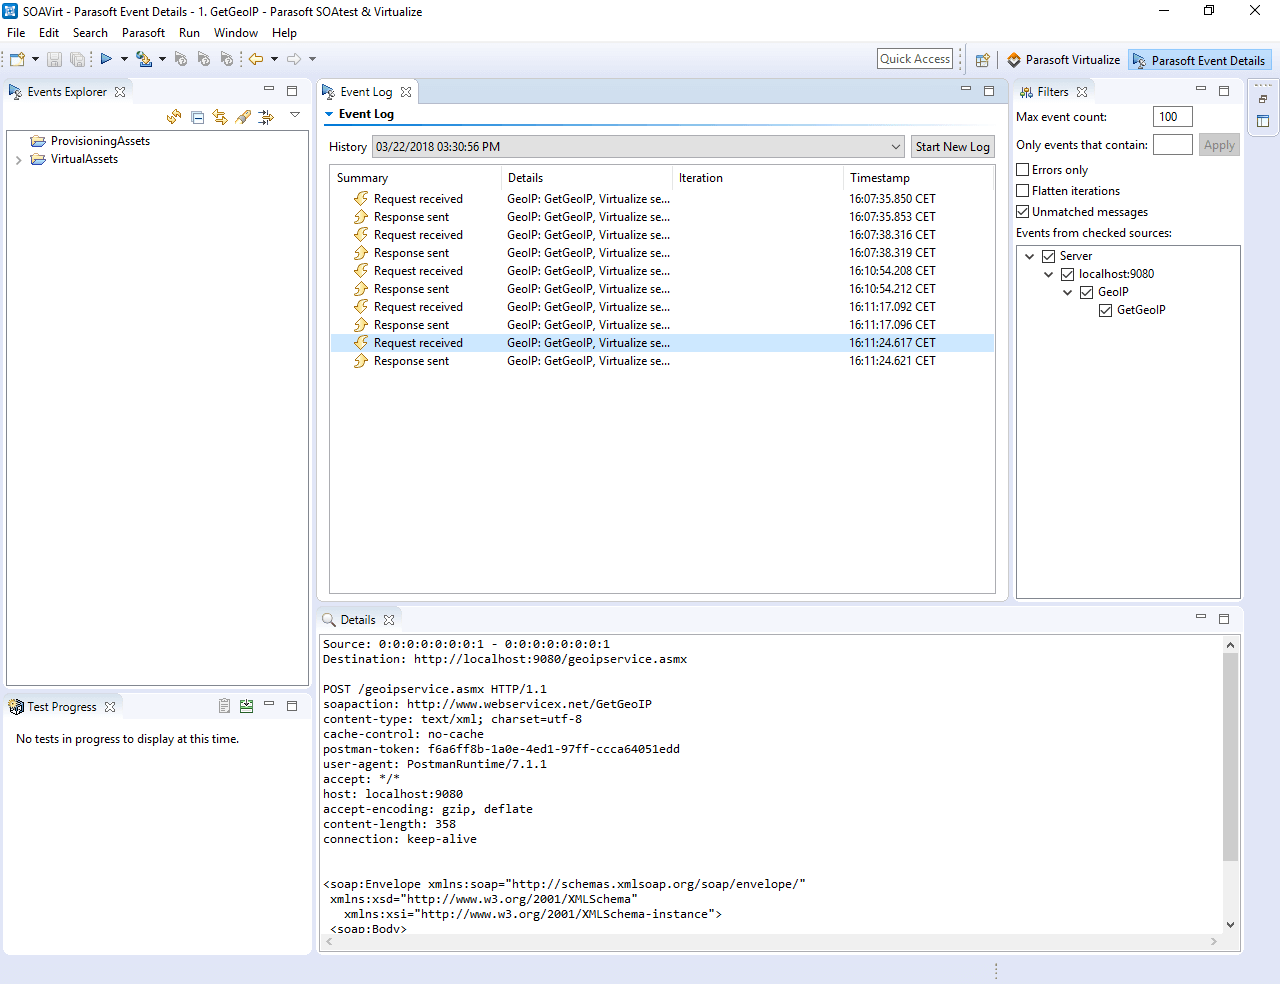
These requests and responses values can be modified from the main panel to suit our needs but we will leave that to you now. We will move on to the second method of creating a virtual asset that we have mentioned above and that is – creating a virtual asset from live traffic recordings.
Creating virtual asset from live traffic recordings
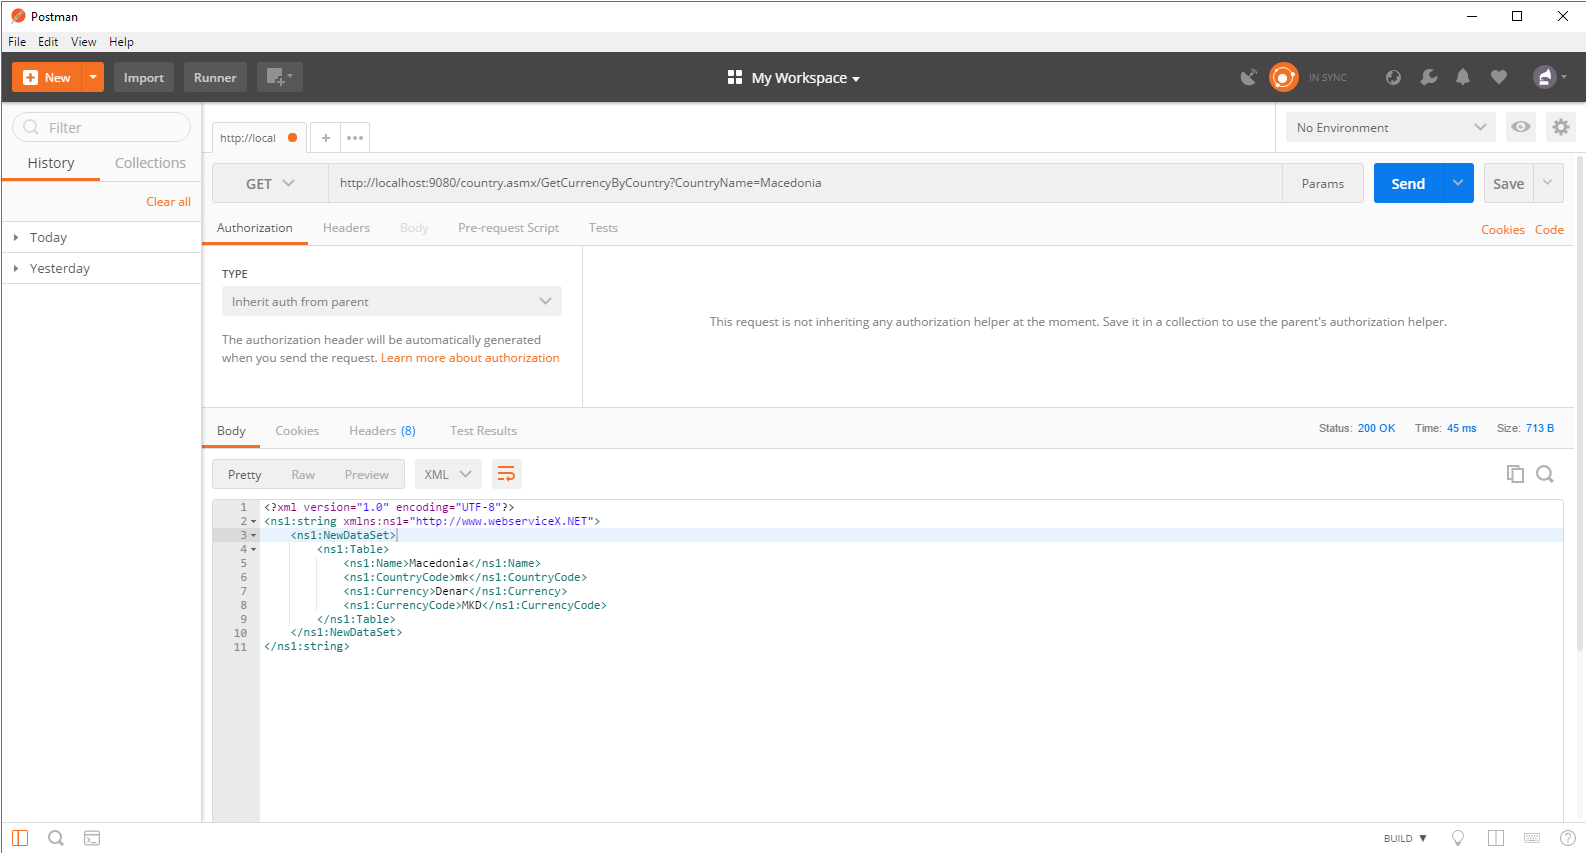
This method contains three main steps. The first step is sending a request to our proxy. Second, the proxy receives the request and redirects it to the live service. Then the service receives the request and sends a response to our proxy. The service that we will monitor is a publicly available service that receives a request containing a country name and responds with the country’s currency. It is available at: http://webservicex.net/country.asmx**
Once we configure the proxy to listen to the incoming requests on the Virtualize server and to redirect them to the live service, we right-click it and select ‘Start Recording’. When a message proxy is in record mode, it can monitor traffic over the specified transport as the application is exercised.
Now back to Postman, we will send a simple GET request that will trigger the service to send a response back to us.
We can send a few more requests through Postman in order to get more data. All the traffic can be monitored through Virtualize Event Monitor.
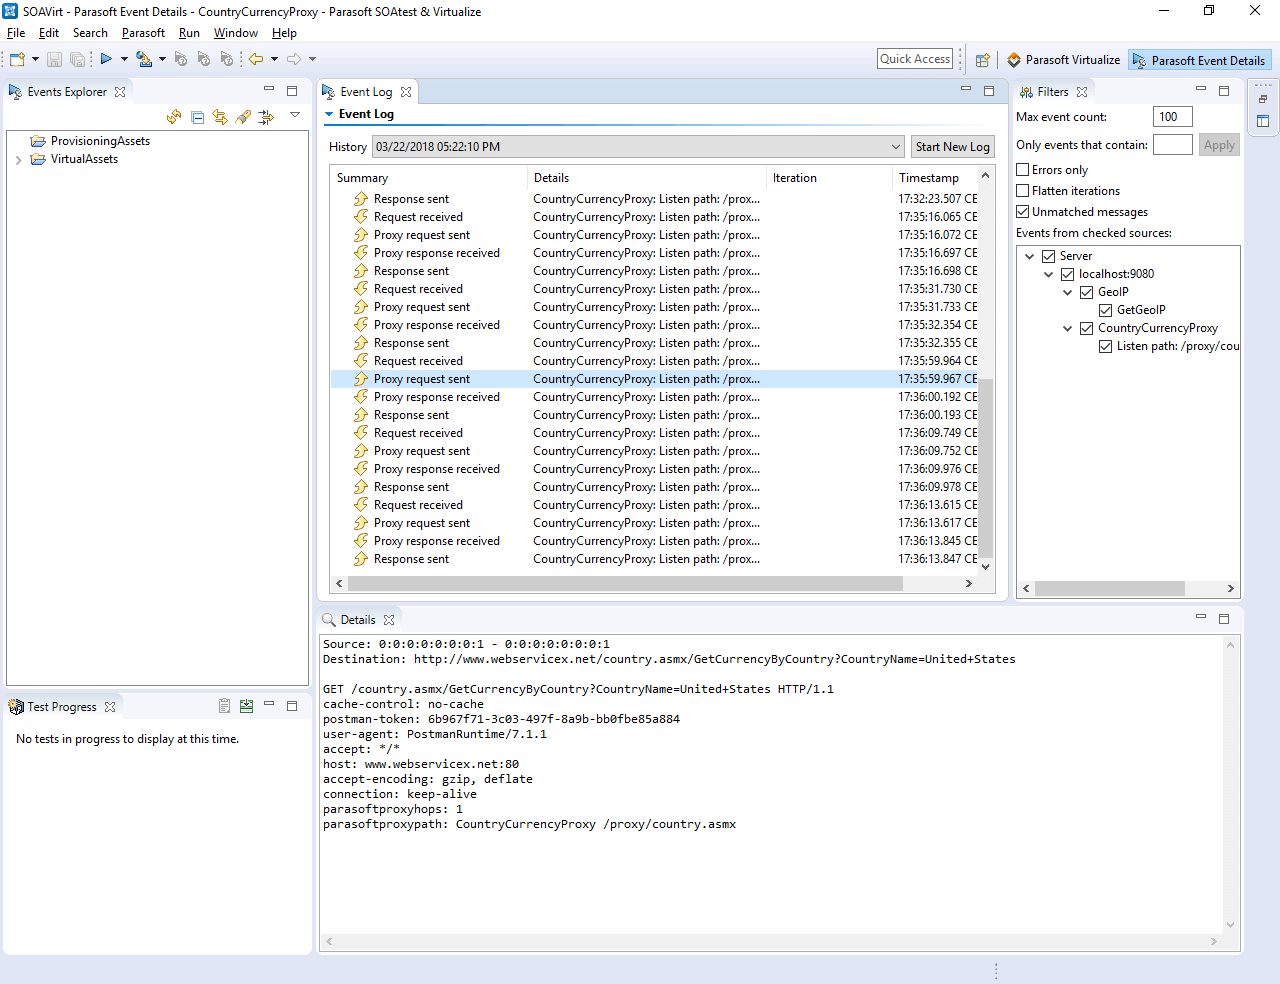
Parasoft Virtualize listens and collects these traffic requests and responses and upon clicking ‘Stop Recording’ it builds a traffic file of legitimate request/response pairs. We will use this traffic to create our virtual asset that will virtualize the behavior from the captured live requests and responses. To create this virtual asset, right-click on the ‘VirtualAssets’ folder on the left pane and ‘Add New’ -> ‘Virtual Asset .pva file’. When the next window appears, select Traffic > Generate Parameterized Messages.
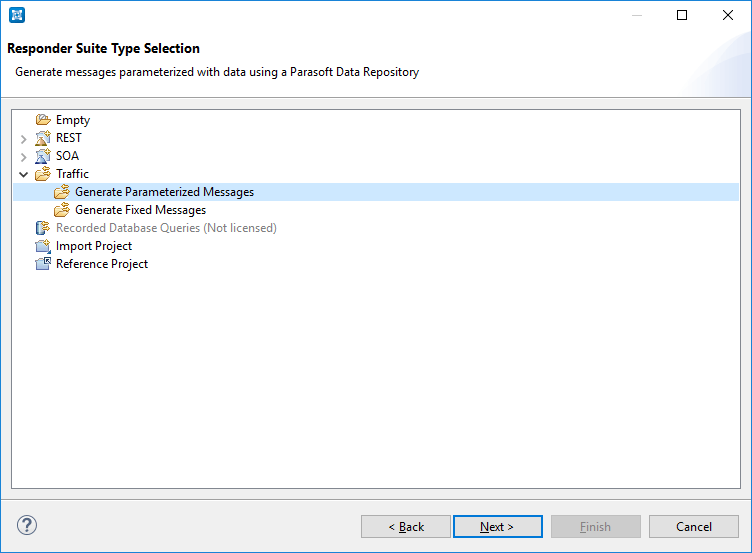
On the next window, point out to the traffic file (the location of this file was printed in the console when we click ‘Stop Recording’ – it is located in the active Virtualize Workspace). Since we wanted to generate parameterized messages, responders are automatically parameterized with values from a Parasoft Data Repository, which is also automatically created when you use this option. If we go with ‘Generate Fixed Messages’, we will get message responders that specify each response literally via Multiple Response format. All response message data is stored and manipulated within the Message Responder (no data repository here). Once all the steps in the wizard are completed, we are ready to deploy our newly created virtual asset. The deployment steps are the same from the first method. Press the green ‘Start’ button and check on http://localhost:9080 for status. Now the time has come to send a sample request from Postman and wait for the response.
And that’s it. We have successfully created two simple virtual assets, one from a service-specification document and one by recording traffic from a live service. We are ready to start testing and save money by catching development bugs and error early in the production stage.
Conclusion
Service virtualization holds a very bright future. Since the main reason for using service virtualization is to reduce cost and save time, it won’t go out of fashion anytime soon. It provides flexibility and agility and enables changes and upgrades to applications and services to be carried out in a short amount of time and without disrupting access to the end-users. It helps developers shift focus from communication mechanisms to service logic and functionality and enables testers to start testing from day one. The unification of development and QA teams as early as possible is a key factor in the engineering of an efficient, functional, reliable and flexible software and staying one step ahead of your competition.
Note:
**As of the 9th of May, the public webservices used in this project from webservicex.net are no longer available