
When it comes to databases and AWS VPC, best practice is to place your database in private subnet. By definition, private subnet in AWS is not reachable from the Internet because no Internet gateway is attached to private subnet. This is the way you protect your data.
This kind of configuration is good for security for the data engineer, but bad for data management. How can you easily access and manage your secured data? This question came up several time from my colleagues, so let’s write down the process step by step, for future use.
You can connect form your SQL client using bastion host (jump box) for acting as intermediate server that connects you to your database instance. Here is a quick overview:
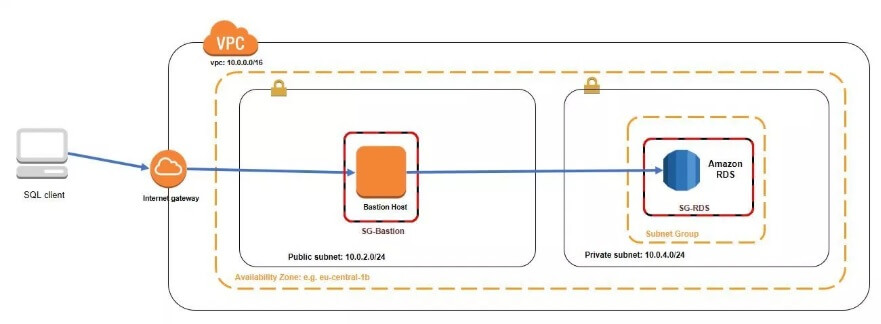
If you use your EC2 instance only for accessing the RDS instance, you can choose the smallest one (e.g. t2.nano) and place it in public subnet of the VPC. When you create the bastion host, save the .pem file. You’ll use it further for generating private key.
Also, note that the security group of the bastion host should allow only access to SSH TCP port 22 for your IP address. The security group for the RDS instance will allow inbound access for port 5432 (for PostgreSQL) with restrictions to the security groups that need access to the database server (in our case the bastion host).
We will use a tunnel in order to connect our local client to the RDS instance. That tunnel will go from our computer, through the bastion host to the RDS instance. I’ll use Putty and the command line.
Configure Putty
Before we start, make sure you have Putty and Puttygen:
https://www.ssh.com/ssh/putty/download
https://www.ssh.com/ssh/putty/windows/puttygen
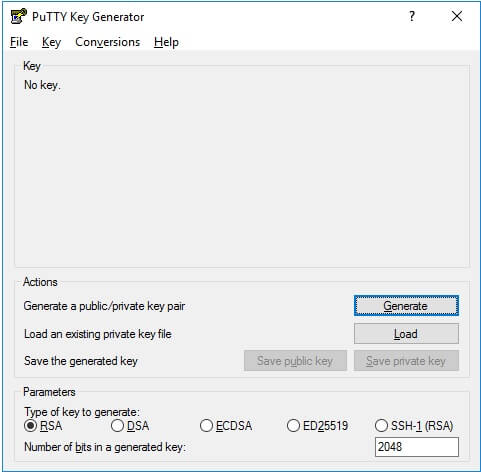
First, we need to generate .ppk key from our .pem key. Run PuttyGen and load your .pem file. Then click Generate:
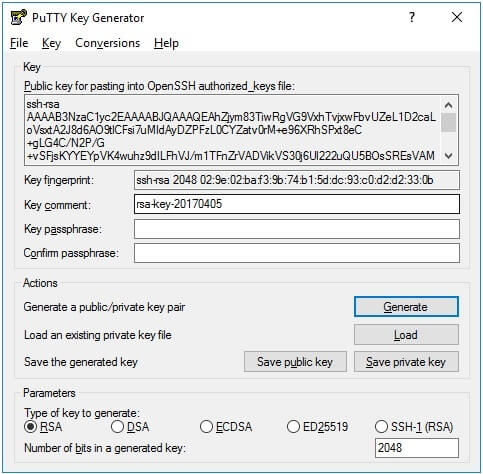
And then Save the Private Key. Now, you have .ppk.
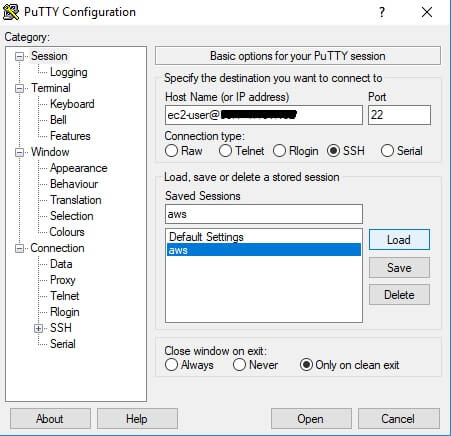
We are ready to create a tunnel. Run Putty, and enter the Hostname (or IP address) and port of the bastion host where you want to connect. In the case of Ec2 instance, it will be ec2-user@<ip address> port 22. Because, you use this configuration for the first time, enter your name in Saved sessions and click Save. This will allow you just to load the session from memory the next time you visit:
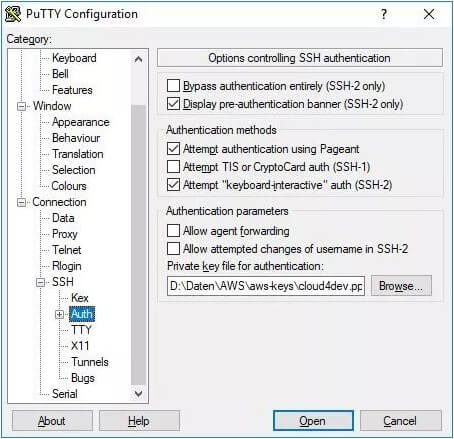
Next, load your .ppk key. Navigate to Connection -> SSH -> Auth and browse to .ppk location.
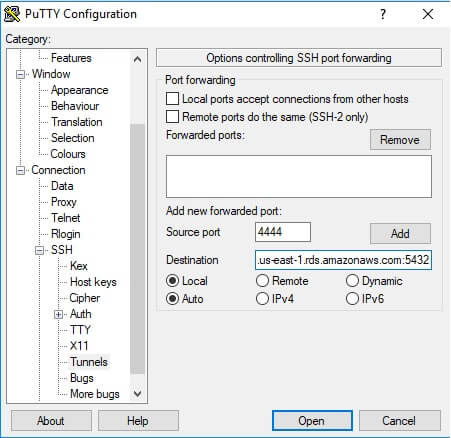
The last thing, let’s create the tunnel. Navigate to Tunnels and enter your free Local port and RDS endpoint with the port as Destination.
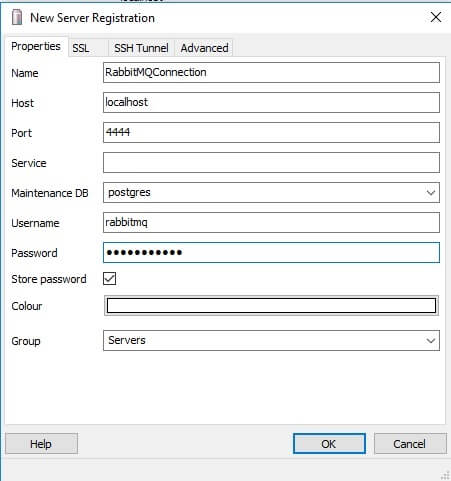
NOTE: If you have a problem with name resolution, you can use the private IP address of the destination (RDS instance). Click Open – your tunnel is set and you’re ready to go. In my case, I’ll connect to PostgreSQL using pgAdmin:
Note: Here you use localhost and your local port. The tunnel will do the rest for you.
Using CLI
In order to create a tunnel, you can use the command line. Open Command Line Prompt in the folder where your .pem file is and enter the following command:
ssh -i “RabbitMQKey.pem” -NL 4444:rabbitmq.cpypigm0kth7.us-east-1.rds.amazonaws.com:5432 ec2-user@<ip address> -v
or using RDS private IP address:
ssh -i “RabbitMQKey.pem” -NL 4444:10.0.2.210:5432 ec2-user@<ip address> -v
Where the -i option will inform the ssh which key will be used to connect.
NL — N will not open a session with the server. It will set up the tunnel. L will set up the port forwarding.
-v : Is optional. With this you will print the ssh log on your terminal.
And, you are done. Now, you can connect to the instance from your local client.