
When working on PC, in the right, bottom corner, or right-left, depending on the device that you use as well as the settings that you have set, we see the abbreviations for the language being used. Each of the OS has the option of switching between languages, and according to the preferences as well as our knowledge we shift from one language to another.
When you open a certain website, you can notice the same functionality – switching languages according to your preferences. Though English is widely used, most of the websites have also German, and the language of their homeland, or others.
How can you create a multilingual website using Laravel Localization as a PHP Laravel developer?
Laravel Localization is in fact a feature of Laravel, which developers can use to create a multilingual website. In this post, I will show you how to create one by using Laravel Localization – step by step.
If you want to only configure your website with the multilanguage option, you should choose localization. This option allows customers to view the website in their local language. But, localization doesn’t happen by itself. There are two methods which can be used to implement the localization in an application:
- Short keys
- Translation Strings as keys
Laravel Localization website
After creating the new Laravel project we can start step by step with our Laravel localization. Language strings are stored in files within the resources/lang directory. By default, we have only EN folder and all English related translations are stored here. In this directory, we need to create folders for other languages.
For example: We will create a folder for all Dutch related translations and folder for all Macedonian related translations. After that, we will define files for the localization messages.php.
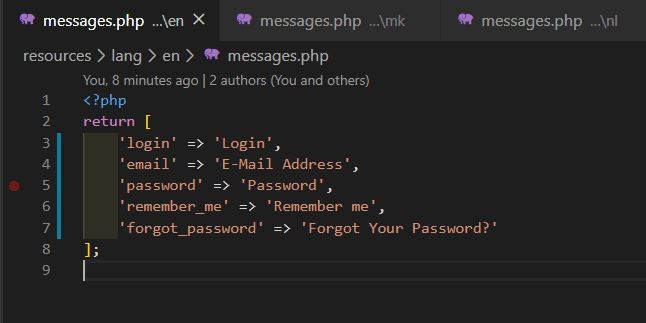
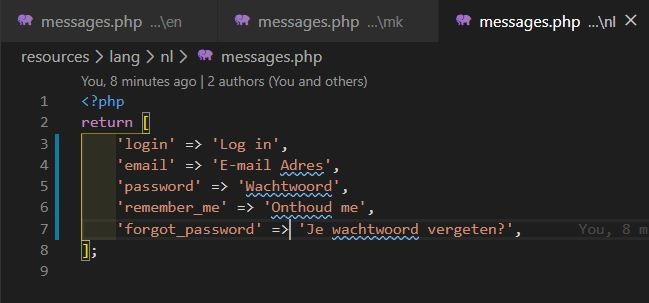
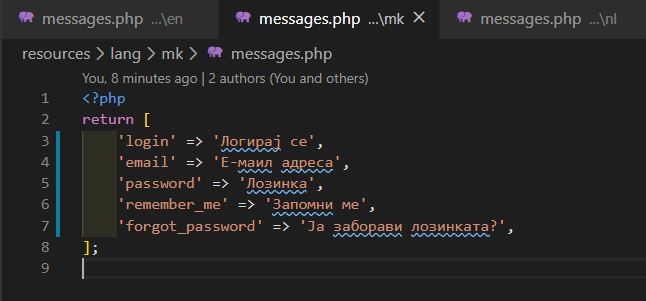
All language files return an array of keyed strings. For example:
en/messages.php
nl/messages.php
mk/messages.php
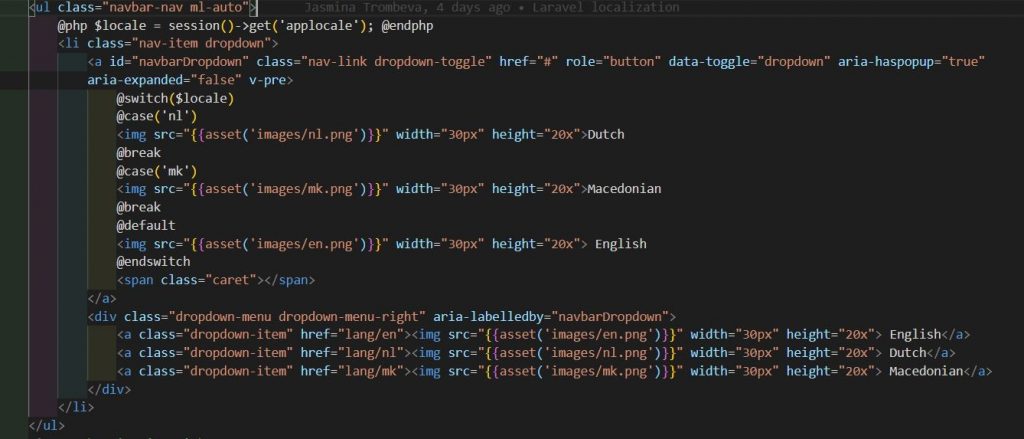
In app.blade.php file, we will write code which is a markup just for the language’s dropdown.
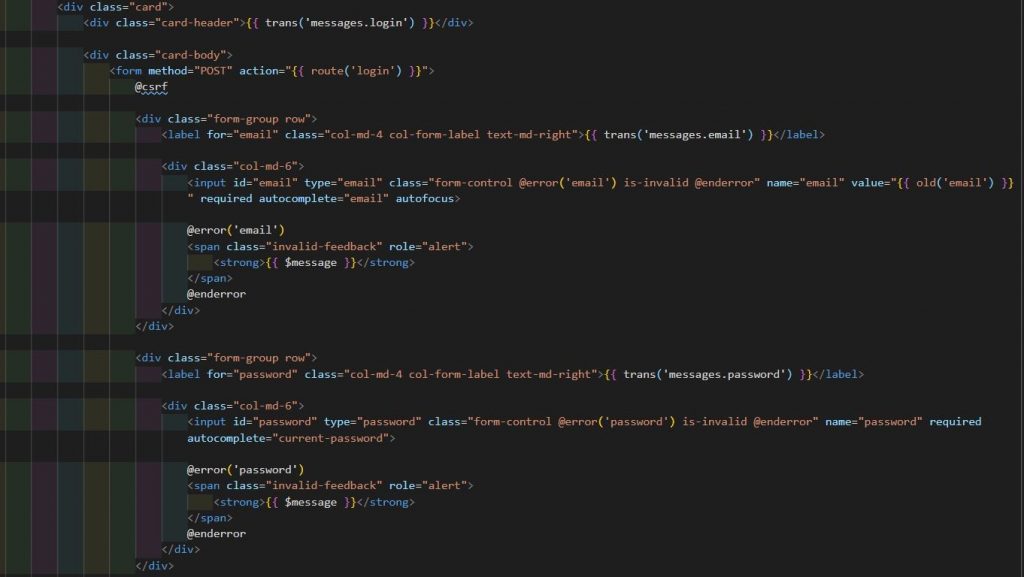
We will change the code in login.blade.php file using trans(), @lang and _() methods to retrieve the translation of the given text.
Laravel takes the text from theses methods and finds the translation in above-created transaction files.
login.blade.php
Setting up route controller and middleware
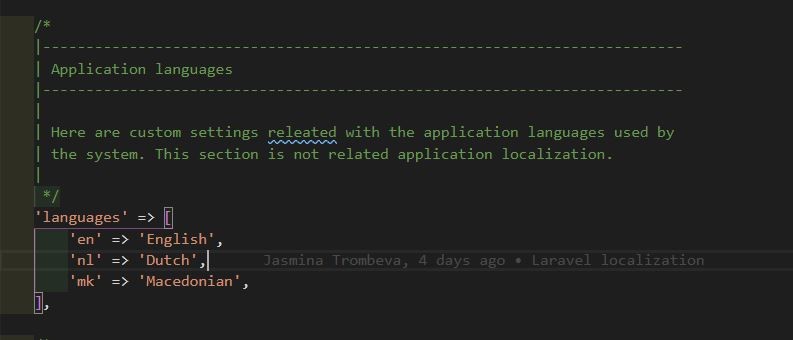
In the config\app.php file insert the following code:
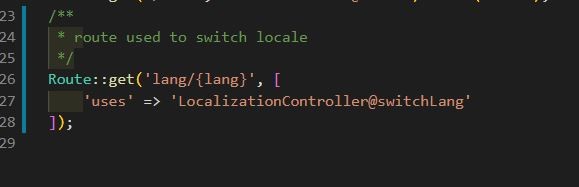
We will create a route in web.php file. Using the following commands in our terminal we will also create a controller to control our language and middleware for changing the language dynamically.
- Command for creating LocalizationController:
– php artisan make:controller LocalizationCotroller - Command for creating Localization middleware
– php artisan make:middleware Localization
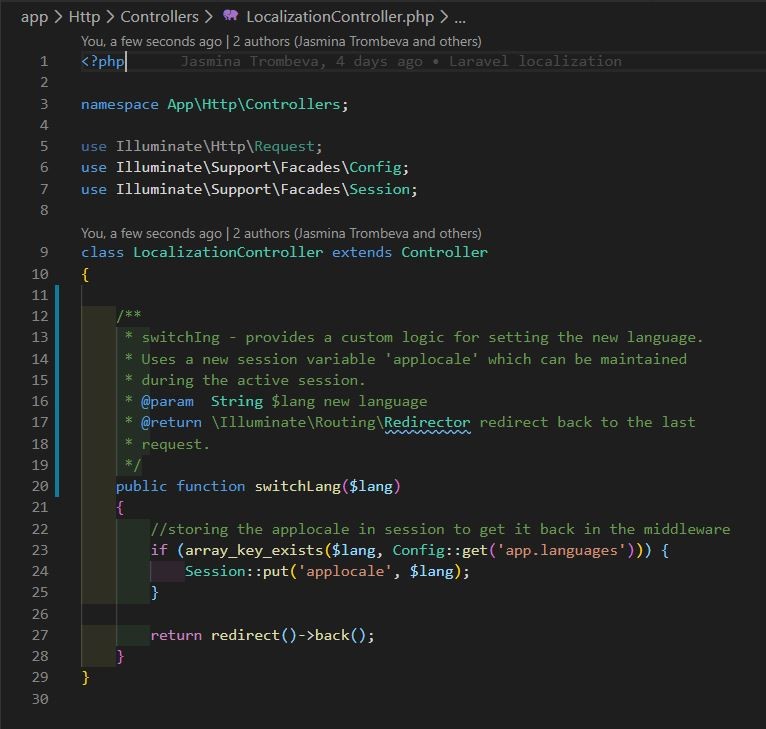
LocalizationCotroller.php
Middleware\Localization.php
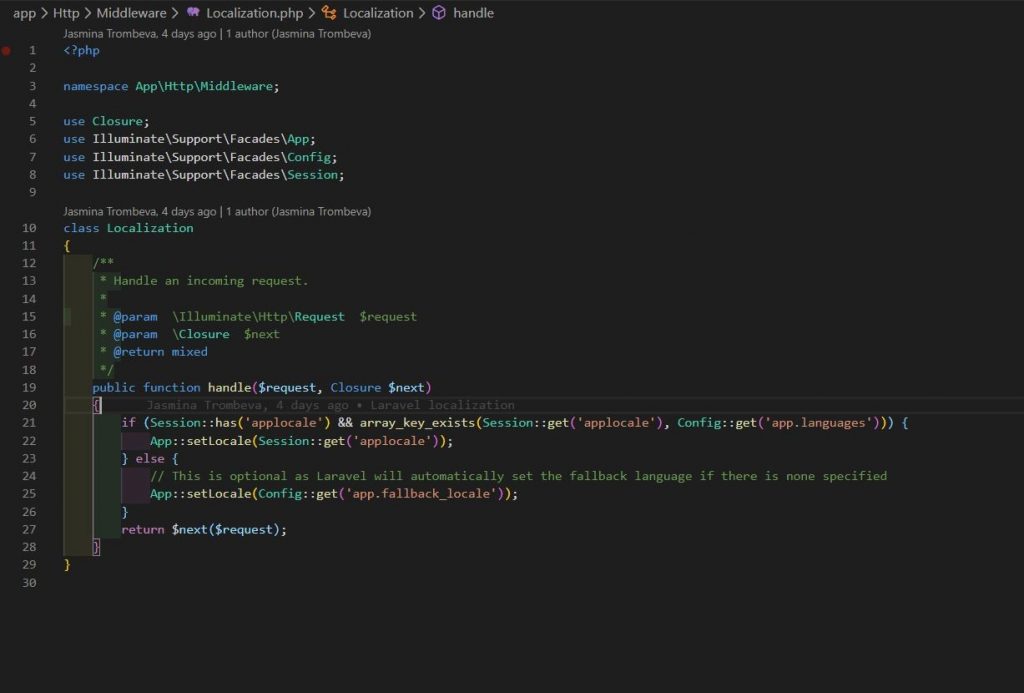
In our middleware, we are checking if a session value exists with name applocale and whether that value is in array in our app.language. If so we are setting the applocale of our application whatever is in that session.
Registering localization middleware
The last step for finishing our Laravel localization implementation is to add the middleware in Kernel.php file.

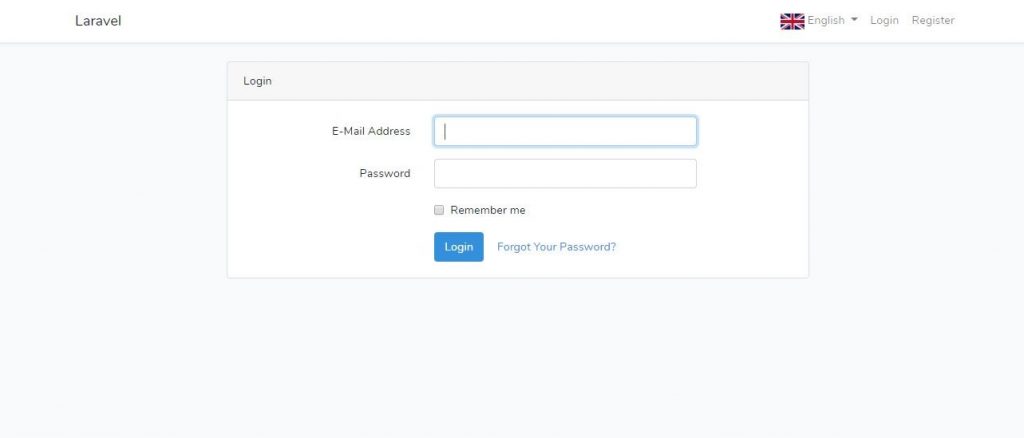
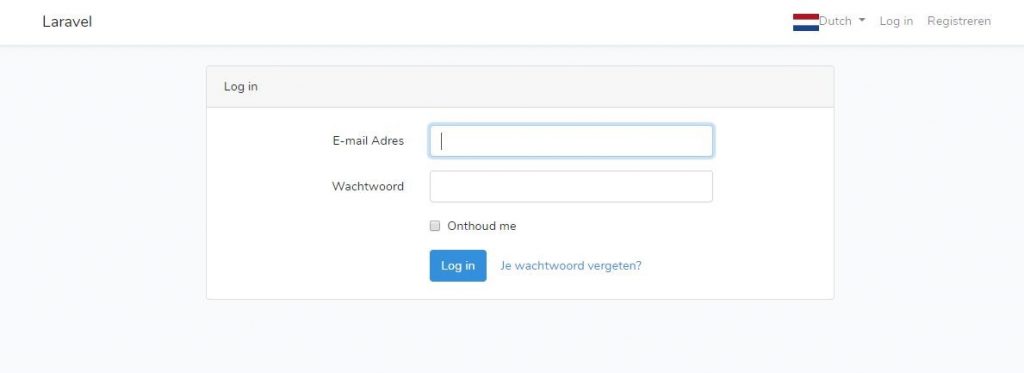
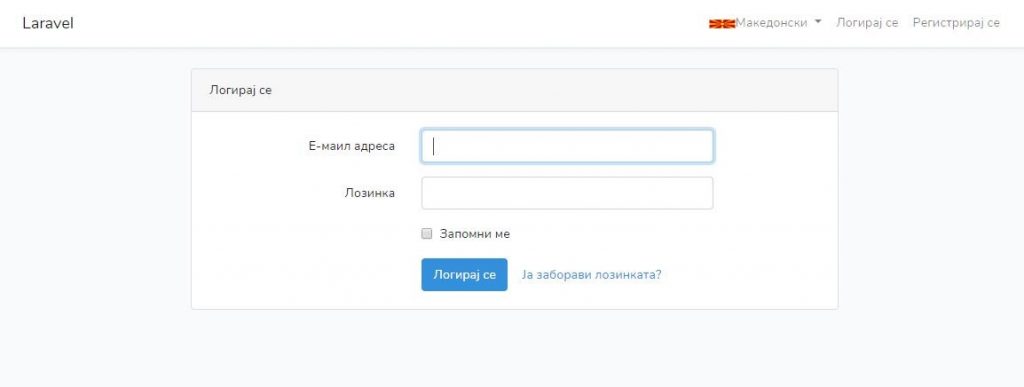
Now, the Laravel localization example is completed and we can see it in three languages.
English
Dutch
Macedonian
If you are interested in Laravel localization and want to share your experience with it, you can contact us.