
AWS Cognito User pools are for mobile and web app developers who want to handle user registration and sign directly into their apps. As an AWS engineer, User Pool allows you to create and maintain a user directory, add sign-up and sign-in to your mobile app or web application, and scale to hundreds of millions of users very simple, secure, and low-cost.
You can use user pools to add user registration and sign-in features to your apps. A Cognito register user can register with or sign in to an app using an email address, phone number, or a user name. You can also create custom registration fields and store that metadata in your user directory. You can verify email addresses and phone numbers, recover passwords, and enable multi-factor authentication (MFA) with just a few lines of code.
Amazon Cognito user pools are PCI- and HIPAA-compliant.
You can get started with user pools by using the AWS Management Console, the AWS Command Line Interface, or the APIs provided in one of our SDKs.
Using Node.js we want to see the steps of user registration and how tokens are exchanged with the AWS Cognito User pool. Next, we will use the generated token for making secure log Cognito API calls.
Create a Cognito User Pool
Navigate to ‘AWS Cognito’ -> ‘Manage your User Pools’ and choose ‘Create a User pool’:
- Add user pool name
- Choose Step through settings
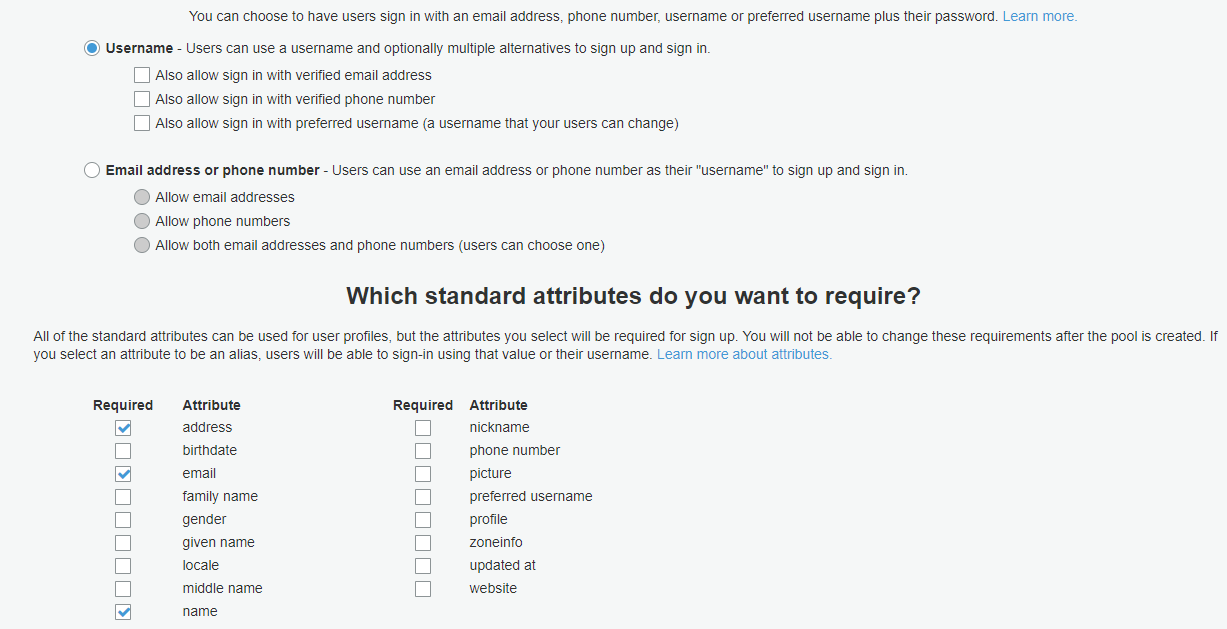
- Leave the first section “How do you want your end users to sign in?” by default. Users will sign in only by providing a username.
- From standard attributes choose email, address, and name.
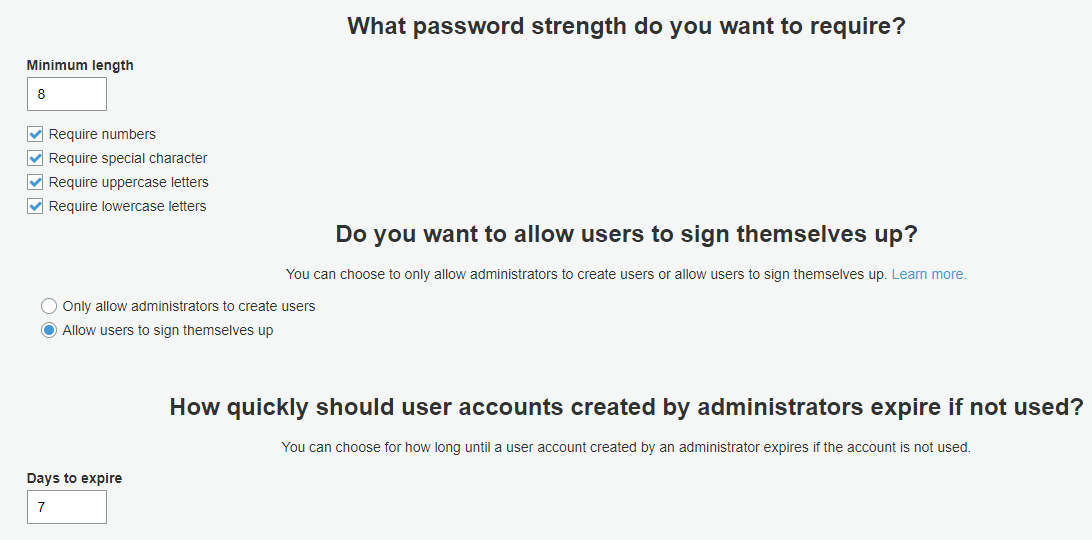
- Leave next screen by default:
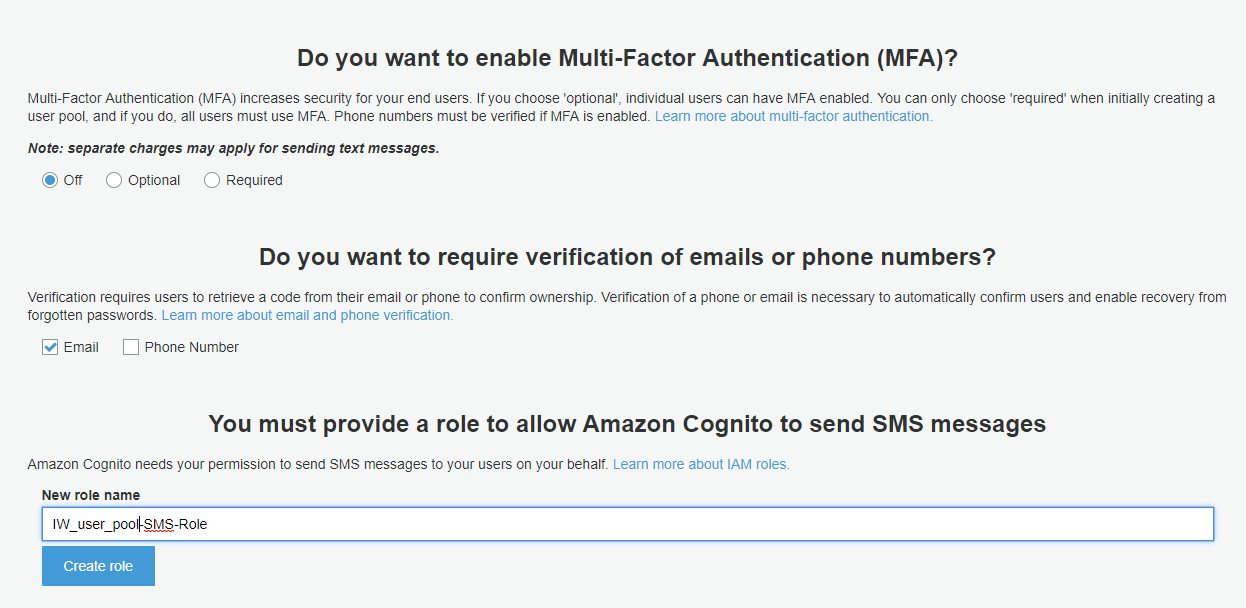
- The next screen will ask you to create a Role for sending SMS messages. But, because in this scenario we will send only e-mail, do not create the role and just click Next:
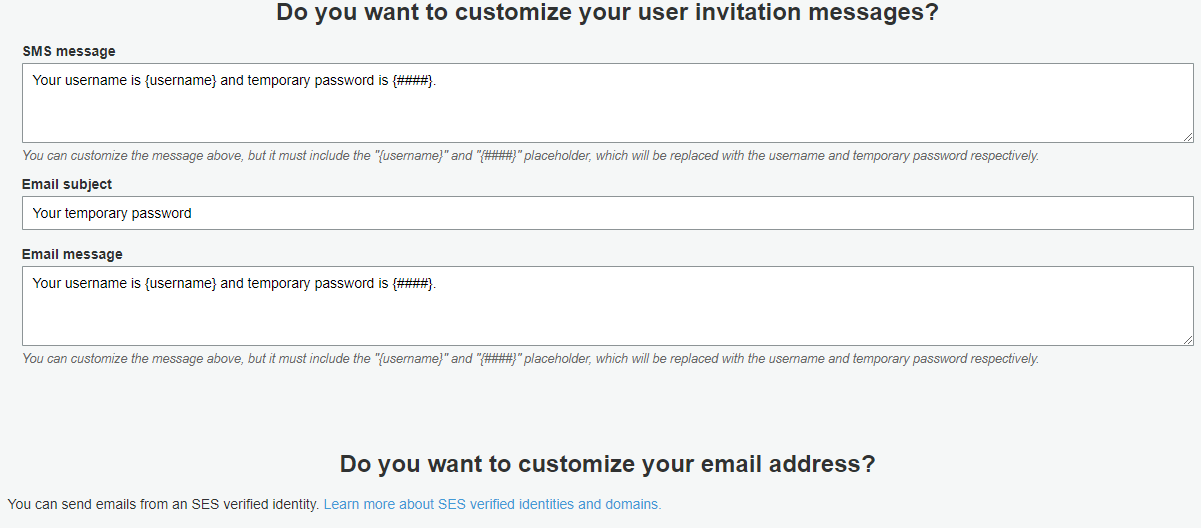
- On the next screen you can customize SMS and e-mail messages:
- Leave by default several screens that ask for tags, devices, actions, and ‘Register Application’. Create your pool.
- After the user pool is created you will get “Pool Id”. You can find this number under the pool’s General setting -> Pool ID. Value is in format <region_unique code>.
- From the “General settings” menu navigate to “App clients” and register one. The number for “App client id” that is generated after registration will be included in all Web or Mobile apps that are going to use this pool. Of course, you can register different App clients for different applications.
Create API
Navigate to AWS API Gateway and create one Cognito signup API that will have Authorizer. Authorizers enable you to control access to your APIs using Amazon Cognito User Pools or a Lambda function.
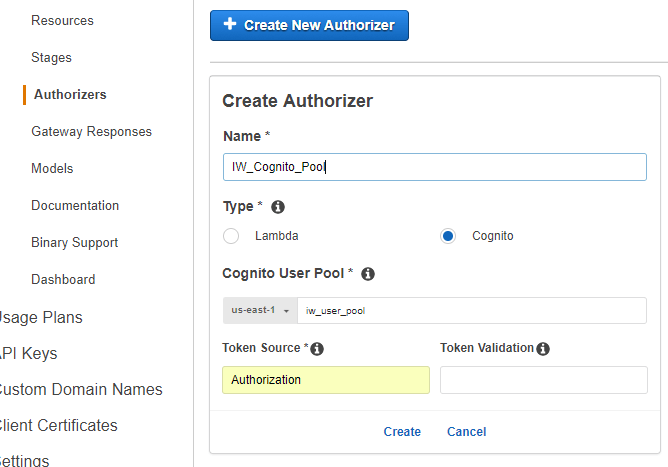
Choose your Cognito User Pool signup and for Token Source add Authorization. That will be the request header parameter that will hold user’s JWT Token ID value.
For the target API backend, you can add a Lambda function that will decode the JWT Token ID in order to get user information.
The code snippet for the Lambda function can be the following one:
var jwt_decode = require('jwt-decode');
exports.handler = (event, context, callback) => {
  var decoded = jwt_decode(event.params.header.Authorization);
  callback(null, decoded);
};
A sign-up user via a custom application
In Node.js for user authentication, we are using the following libraries:
The following snippet defines the Cognito User Pool and Application that are used for new user registration:
const poolData = {
    UserPoolId: '<region_unique number',
    ClientId: 'application id'
};
const userPool = new AWS.CognitoIdentityServiceProvider.CognitoUserPool(poolData);
In order to make the Cognito register user API, the user must provide all required attributes, username, and password. That information is used in the Cognito sign-up process. The following snippet populates the attributes list and Cognito signup user:
var attributeList = [];
var attributeName = new AWS.CognitoIdentityServiceProvider.CognitoUserAttribute('name','John Smith');
var attributeAddress =new AWS.CognitoIdentityServiceProvider.CognitoUserAttribute('address','Sunshine street 123');
var attributeEmail =new AWS.CognitoIdentityServiceProvider.CognitoUserAttribute('email','john.smith@mail.com');
attributeList.push(attributeName);
attributeList.push(attributeAddress);
attributeList.push(attributeEmail);
var cognitoUser;
userPool.signUp('johns', 'P@ssw0rd', attributeList, null, function(err, result){
    if (err) {
        console.log(err);
        return;
    }
    cognitoUser = result.user;
    console.log('user name is ' + cognitoUser.getUsername());
});
Remember, the email must be a valid email address in order to receive the verification code and finish the sign-up process. Now, if you navigate to Cognito Users and Group, under Users you will see a new user with username ‘johns’ and user status ‘Enabled/UNCONFIRMED’ and ‘email_verified = false’.
After several minutes the user will get a Verification code within an e-mail message:
“Your verification code is 123456.”
Let’s verify the user.
Verify user via verification code
The following snippet defines the Cognito User Pool and Application that are used for user verification. Additionally, we define Cognito users by providing the username.
const poolData = {
    UserPoolId: '<region_unique number',
    ClientId: 'application id'
};
const userPool = new AWS.CognitoIdentityServiceProvider.CognitoUserPool(poolData);
var userData = {
    Username: 'johns',
    Pool: userPool
};
var cognitoUser = new AWS.CognitoIdentityServiceProvider.CognitoUser(userData);
When user has the Verification code, it is passed to Cognito in order to confirm the registration:
cognitoUser.confirmRegistration('096146', true, function(err, result) {
    if (err) {
        console.log(err);
        return;
    }
    console.log('call result: ' + result);
});
After the SUCCESS message, you can navigate to the AWS Cognito User Pool and see the user status as CONFIRMED and email_verified = true. Now, the user can sign in using Cognito and access the API.
Sign-in
The user is verified and enabled to use his/her credentials in order to authenticate. From user credentials, Cognito generates the JWT Token ID, Access token, and Refresh token.
Here is Sign in code snippet:
const poolData = {
    UserPoolId: '<region_unique number',
    ClientId: 'application id'
};
const userPool = new AWS.CognitoIdentityServiceProvider.CognitoUserPool(poolData);
var authenticationData = {
    Username: 'johns',
    Password: 'P@ssw0rd'
};
var userData = {
    Username: 'johns',
    Pool: userPool
};
var authenticationDetails = new AWS.CognitoIdentityServiceProvider.AuthenticationDetails(authenticationData);
var cognitoUser = new AWS.CognitoIdentityServiceProvider.CognitoUser(userData);
cognitoUser.authenticateUser(authenticationDetails, {
    onSuccess: function(result) {
        console.log('Access Token:' + JSON.stringify(jwt_decode(result.getAccessToken().getJwtToken())));
        console.log('Id Token + ' + JSON.stringify(jwt_decode(result.getIdToken().getJwtToken())));
        console.log('Refresh Token + ' + JSON.stringify(result.getRefreshToken().getToken()));
    },
    onFailure: function(err) {
        console.error(err);
    }
});
Now, from the App, we can make calls to the API. The API Cognito Authorizer authenticates and authorizes this user to access Lambda in the background. At the Request Header, we can also send Token ID so at the Lambda level we can have info about the user who has accessed the resource, his attribute values, etc.
Just decode the JWT token and the information is there:
var decoded = jwt_decode(event.params.header.Authorization);
{"sub":"<GUID>","cognito:groups":["AppUser"],"email_verified":true,"address":{"formatted":"Sunshine street 123"},"iss":"https://cognito-idp.<region>.amazonaws.com/<user pool id>","cognito:username":"johns","aud":"<number>","token_use":"id","auth_time":1509103712,"name":"John Smith","exp":1509107312,"iat":1509103712,"email":" john.smith@mail.com"}
If you want to learn more how to add custom access permissions, read following article: Amazon Cognito and API Gateway AWS IAM Authorization
Conclusion
Cognito User Pool allows a quick and easy way to register and authenticate your users and provide secured access to your APIs. This is only a glace of the capabilities that Cognito provides.
Using Node.js libraries you can manage user information like update attributes and password change.
More info can be found at: http://docs.aws.amazon.com/cognito/latest/developerguide/using-amazon-cognito-user-identity-pools-javascript-examples.html