
Everything you need to know to get started with Azure OpenAI Chat Playground.
As I announced in the previous post, here I will continue with a general overview of the functionalities currently offered by the Azure OpenAI Studio, explicitly covering the Chat Playground part. I say currently offered because new features and options are continuously being added as Microsoft Azure’s response to the dynamics that characterize this field.
In principle, Azure offers a very intuitive environment for interacting with the Large Language Models (LLMs) exposed while allowing us to use them out of the box or through the prism of the Retrieval Augmented Generation (RAG) principle by applying the functionality to add our business specific data.
Note: I will dedicate separate posts to share more details about my practical experience with the RAG approach and the deployment part of the RAG-based solutions.
First things first, the main view or dashboard comprises three separate panels: Assistant Setup, Chat Session and Configuration.
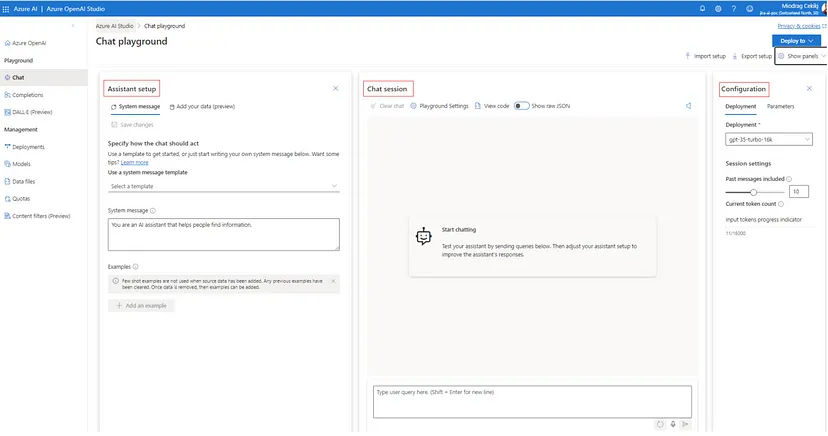
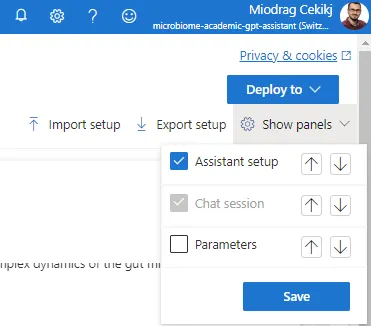
The Assistant Setup and Configuration panels can be managed to be visible, while the Chat Session panel is always visible on the screen. We can manage and toggle this visibility through the ‘Show panels’ option available on the top right of the screen.
Assistant Setup panel
This panel contains two tabs: ‘System message’ and ‘Add your data (preview)’. The ‘System message’ tab is where we can specify how the chat bot should act or write down a prompt injection message (system prompt) that will determine the model behavior and improve the system performance. There is a default message placeholder already configured. Still, there are some system message templates so we can select and tweak one based on our specific scenario. It is worth mentioning here that the selection of any system message template is also affecting the model parameters part of the Configuration panel.
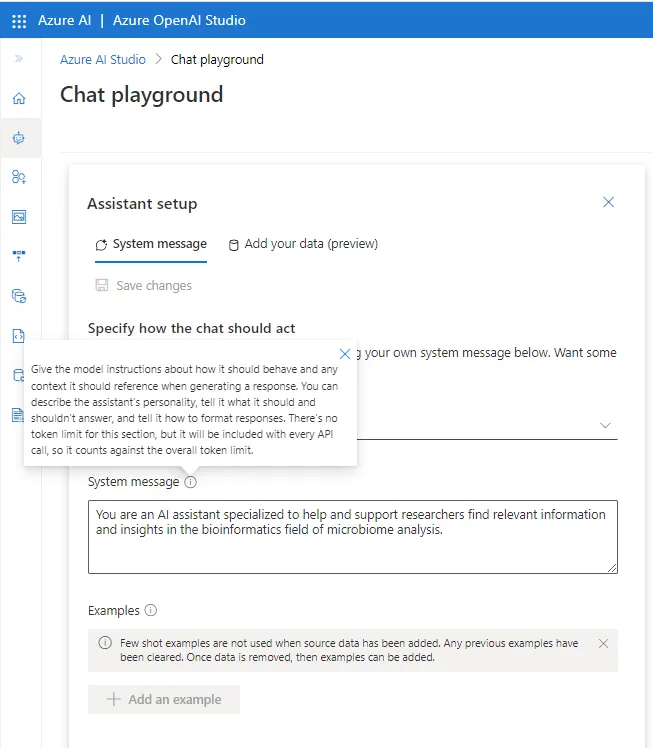
Additionally, we have the option to add one or multiple few-shot examples, a technique to enable in-context model learning where we provide demonstrations in the prompt to govern the model to better performance. It is essential to consider that the few-shot examples are not applied if we import our custom data. In that case, any previous examples will be cleared and not included in the chat configuration (they are currently disabled since we have imported some custom data).
For more information about the System message framework and template recommendations, I recommend referring to the Microsoft Learn official documentation for this topic.
On the other hand, we have the ‘Add your data’ tab spot where we import our business-tailored data, which is stored securely within the Azure subscription. We have already imported the PDF file in the previous introductory article about Azure OpenAI Service.
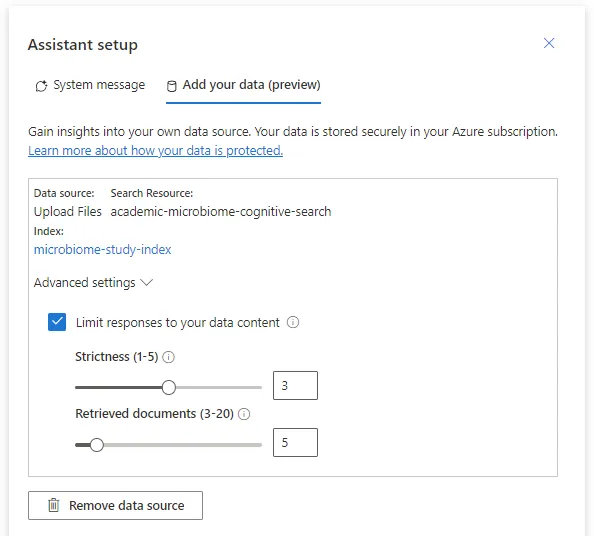
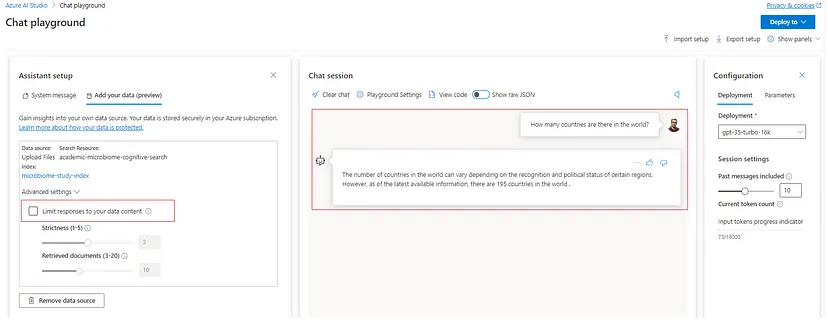
I want to emphasize the ‘Limit responses to your data content’ configuration option, which makes the solution RAG-based without needing to train or fine-tune any models. Behind the scenes is data augmentation, where the extracted data is forwarded as a prompt to the OpenAI model, being appended to the original user prompt.
In some of the upcoming articles, we will discuss RAG and how it is working under the hood. The imported source data is actually stored in a separate index within the cognitive search instance.

Let`s give it a try by asking a general knowledge question we all know gpt-3.5-turbo model is aware of.
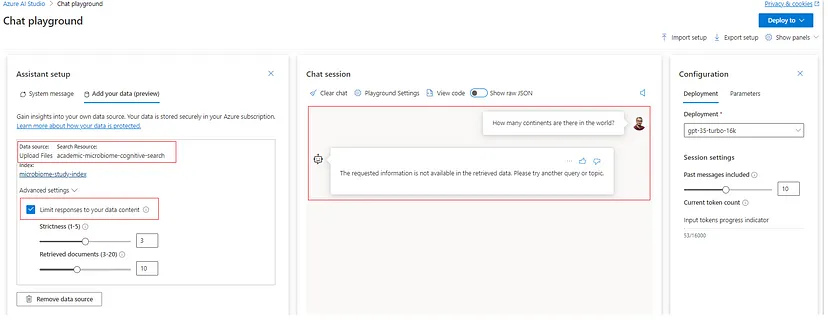
In the corresponding advanced settings, we can configure two very important parameters, ‘Strictness’ and ‘Retrieved Documents’. The ‘Strictness’ sets the threshold for categorizing the relevant documents per the user query. Therefore, raising strictness means a higher threshold for relevance. We have to consider here that very high strictness values could cause the failure of the model to generate any responses. On the other hand, the ‘Retrieved Documents’ parameter is self-explainable. It specifies the number of top-scoring or similar documents from the index that must be used to construct the responses.
For more information about the Azure Open AI on your data feature, refer to the Microsoft Learn official documentation.
Chat Session panel
This panel is reserved for the interaction with the model or the prompting experience. It consists of a few different options we are going to mention below:

Clear chat — clearing the current conversation (including the conversation history) and reinitializing the chat placeholder for new interactions.
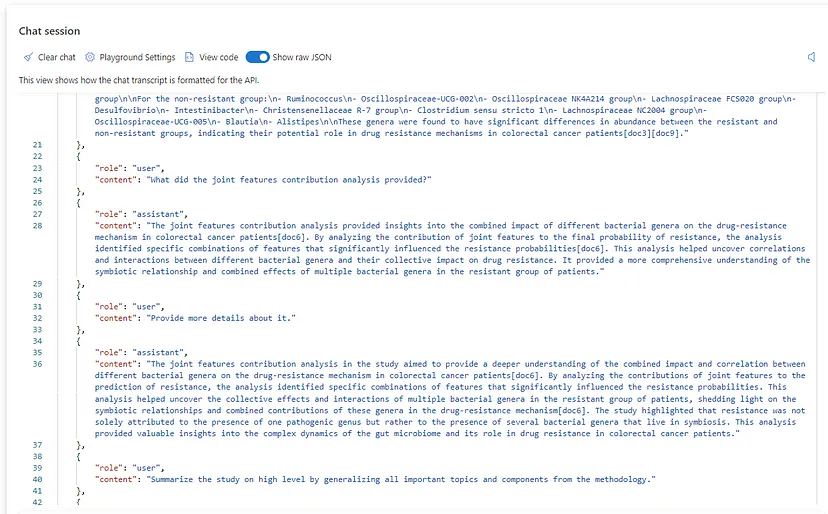
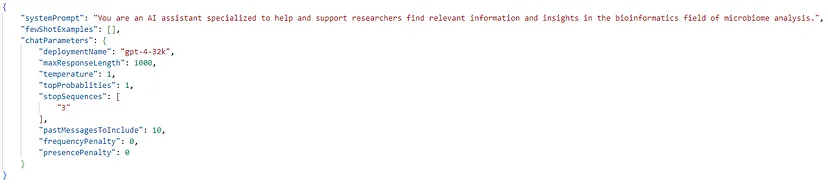
Show raw JSON — this is where the chat transcript is formatted from the API or the raw JSON representation of the communication. It is reinitialized when the chat communication is cleared. For instance, please find below one segment of the JSON transcript for our previous communication related to the microbiome study we described in the introductory article.
Playground Settings — another cool feature providing speech-to-text and text-to-speech functionalities when interacting with the model. It requires creating Azure AI Speech services, though. More information and pricing options are available on the official page.
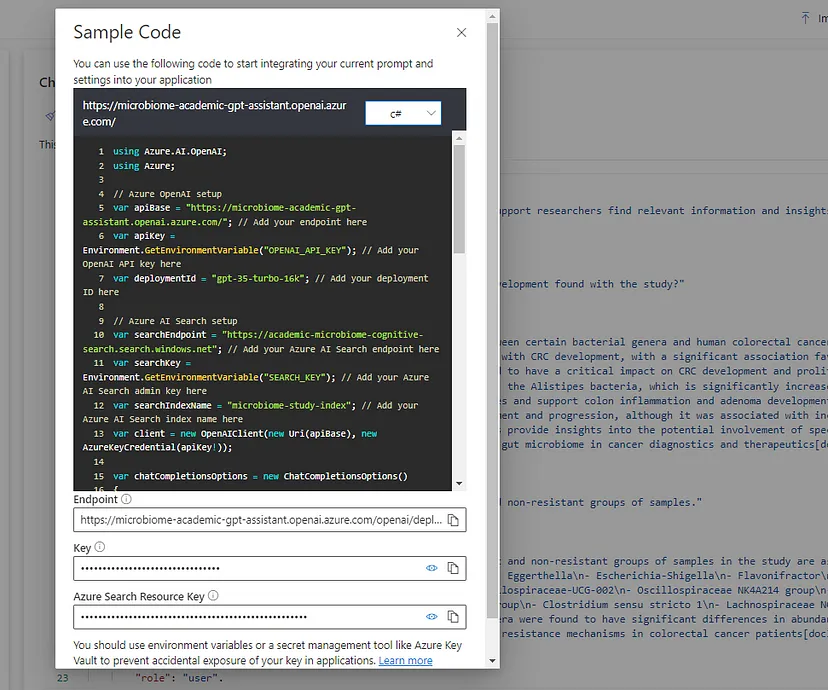
View Code — this tab introduces the first code blocks within this series, and we will explore it in more detail when presenting the solution deployment process. It is worth mentioning that it provides sample code snippets for integrating the model`s API within different technology lines and programming languages, like C#, JavaScript, and Python. More information and support for more languages are available on the official Quick Start documentation page.
Configuration panel
And the time for deployments and parameters has finally arrived. They are configurable through this panel, where we can easily select, adjust, and prototype them with different model deployments.
First, let me create a new model deployment (default settings) using the get-4 32K token context model to interact with different implementations and parameters.
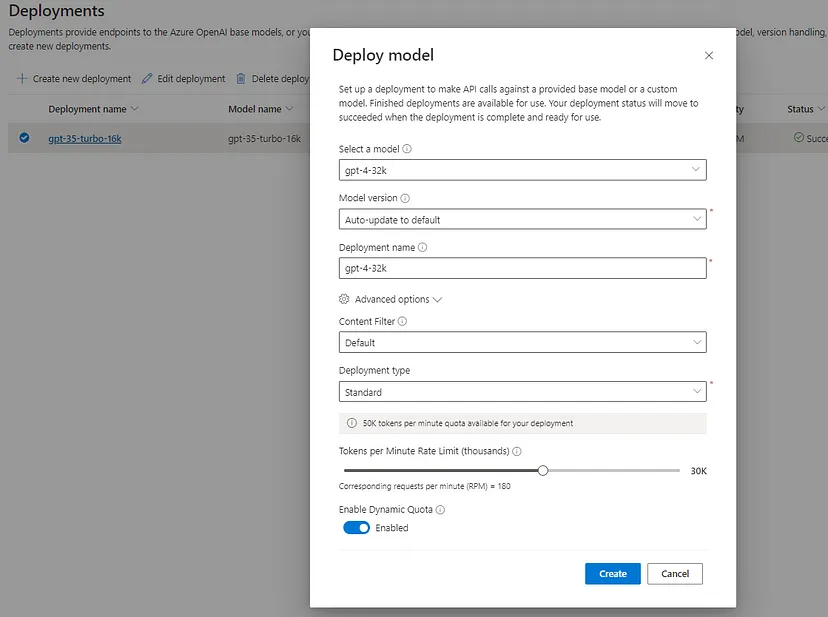
These models can now be managed in the Deployment tab, where we can select the specific deployment configuration. The deployment provides configuration for content filtering, deployment type, tokens per minute rate limit, dynamic quota and the particular model version.

We can also set the Number of past messages to be considered within the conversation context. The number of statements in each new API request helps the model context associated with the new user prompts. As explicitly mentioned, configuring this number to ten will include five user queries and five system responses.
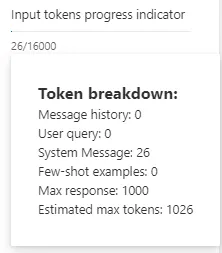
The last thing and part of the Parameters tab is the Input tokens progress indicator, which is responsible for calculating the tokens coming from the input prompts. It is beneficial information since the token frame is limited and, at the same time, directly correlated to the pricing. In the example below, the indicator shows 26 tokens coming from the system message after updating the assistant setup.

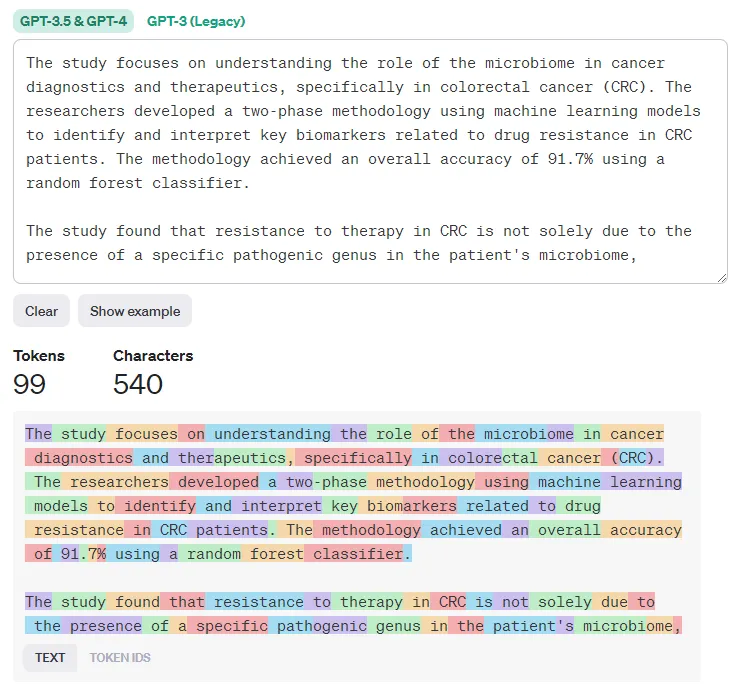
This can also be calculated using the OpenAI Tokenizer, where we can also see the number of tokens coming from the only message present in the system — the system message itself.
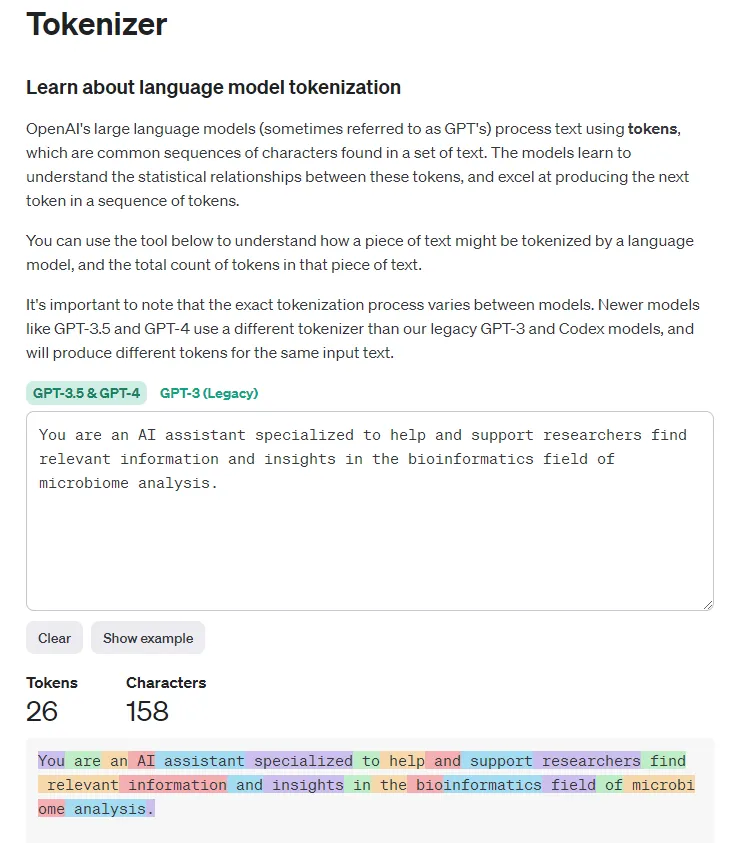
We will see how it calculates the tokens for different input prompts when we try interacting with the other models.
Next are the configurable options part of the Parameters tab. Let’s explore each of them in more detail.
Max response is the maximum number of tokens or the limit the model has to respond. It directly affects the model’s expression or the ability to provide more concise or detailed responses for the required topic. No strict way of how much one token is regarding characters or words exists. By documentation, we can assume that one token is roughly four characters for typical English text, or one token ~= ¾ words, meaning 100 tokens ~= 75 words. But it depends anyway. Let’s play around with this parameter a bit.
Let’s see how the gpt-3.5-turbo 16K model works along with different max response limits of 100 and 800 tokens.
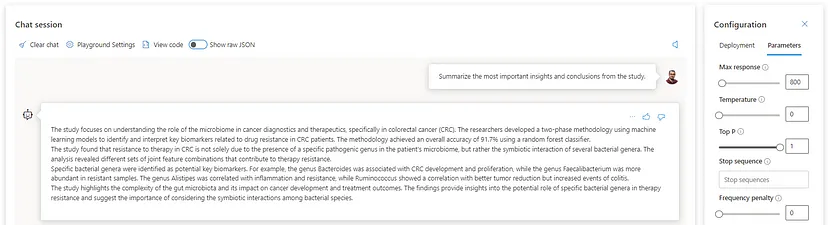
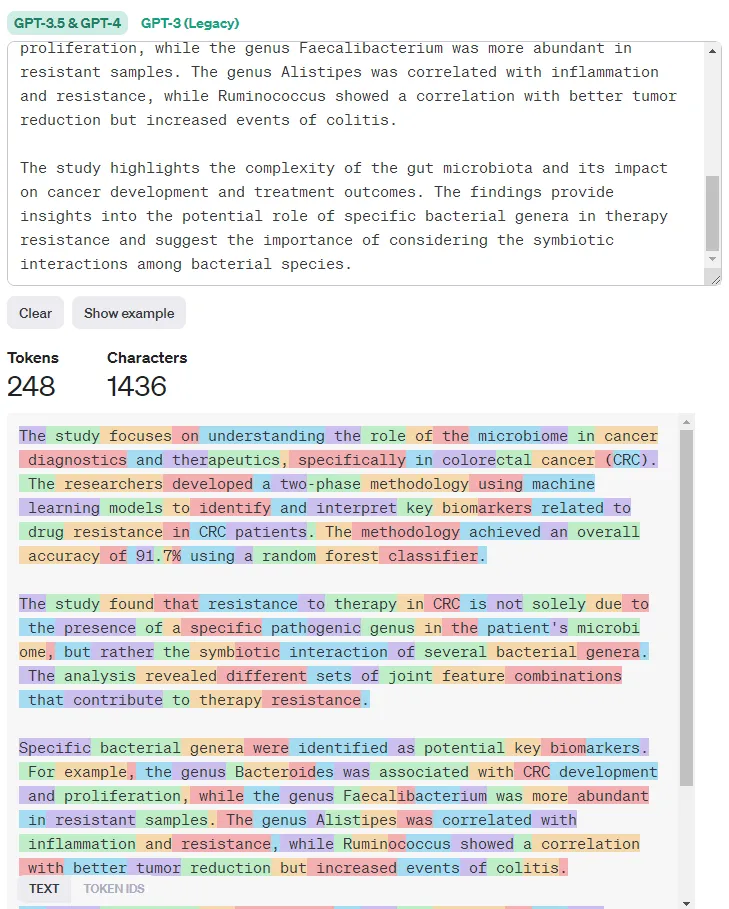
Even though the data source is minimal (only one PDF file was imported), we can still observe the model`s behavior for expressiveness in cases more or less limited to the response length. The model will only sometimes use the entire content limit but will try to fulfill it when intentionally lower. One catch here. Someone will argue, but how should I know what is the best response limit? Indeed, it is something we need to try, prototype, benchmark, and apply. The playground helps us do the process in just a few clicks, so we do not need to reinitialize different environments or API calls repeatedly.
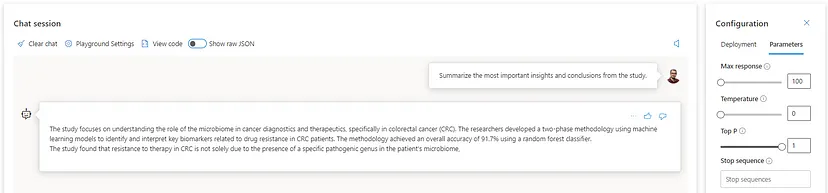
Let`s see now how the gpt-4 32K model will deal with the same prompt.
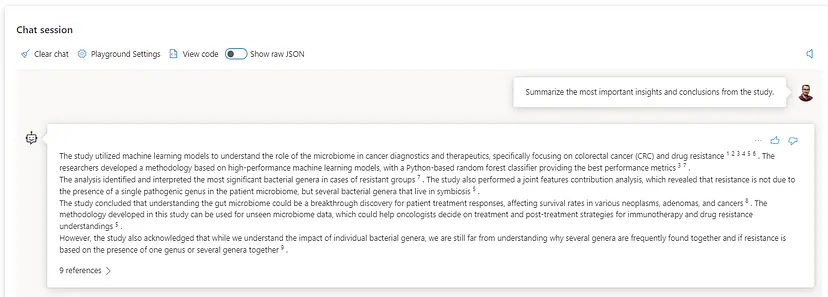
I will not go deeper into the differences between both models or execute more related scenarios since that is beyond the scope of the article. However, both models take a slightly different approach, even though the main difference can be determined when we have more diverse data.
Temperature — my favorite one since it is directly associated with the model`s creativity or output randomness. By definition, lowering the temperature means the model produces more repetitive and deterministic responses. Increasing the temperature will result in more unexpected or creative responses. Based on this, I recommend setting this parameter to 0 for cases where we want to minimize the potential for AI hallucination. Let`s see the 0 versus one difference with the gpt-4 32K model asking for action points from the study of interest.
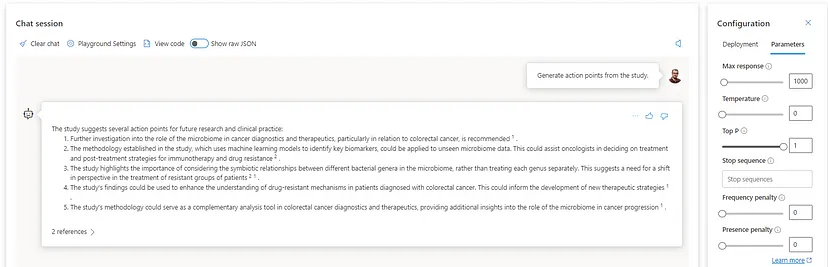

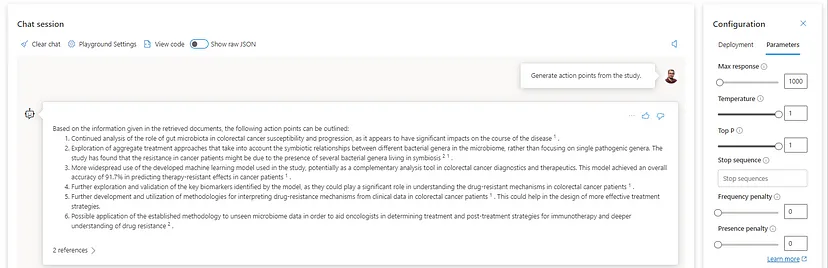
As we can see, the temperature set to 1 makes the model more flexible and generates deductive answers based on its cognitive power for reasoning. Remember that we are dealing with limited data; in this case, even setting the model in entirely random mode will still provide reasonable outputs.
Top P — this parameter also deals with the randomness but takes a different approach. It may not sound obvious, but here is the deal. The temperature controls the randomness so that higher values increase diversity. At the same time, the top-p cut off the token selection, or for lower values doing the sampling from a smaller, more top-weighted nucleus. Explained more naturally, the Temperature determines how randomly the model predicts the next words, while Top P determines how long that list of words would be. This is why it is not advisable to play or change the values of both parameters simultaneously.
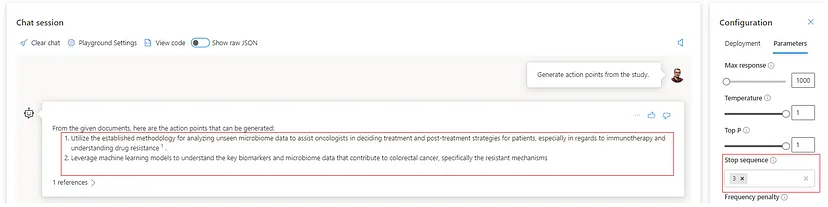
Stop sequence — this parameter tells the model to end the response and content generation before one explicitly specified sequence occurs. At the moment, there is a possibility of creating up to four stop sequences. The idea this feature provides is controlling the length and structure of the model’s generated content. For instance, we can ask the model to create a list of action points and prevent returning more than two — referring to the previous image where we have six action items, the following stop sequence configuration provides only two.
Frequency penalty — this parameter, by definition, decreases the likelihood of repeating the exact same text in a response or penalizes tokens based on how many times they’ve already appeared in the text. OpenAI says that this decreases the likelihood of the output repeating itself verbatim.
Presence penalty — on the other hand, this parameter, by definition, increases the likelihood of introducing new topics in a response or penalizes tokens based on whether they have already appeared in the text.
Therefore, the Frequency penalty helps us avoid using the exact words too often, while the Presence penalty encourages using different words, providing diverse context meanings.
Wrap up notes
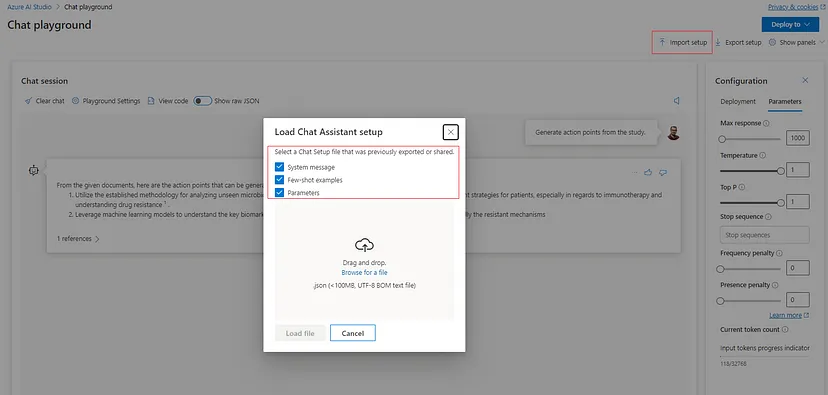
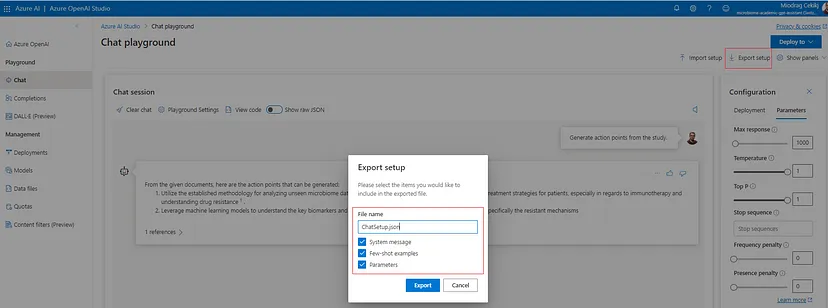
Azure OpenAI Chat Playground provides a very intuitive interface for interacting with GPT models. Also, it simplifies configuring the parameters and tuning the models behavior and way of reasoning. The configuration can be easily exported and saved for further import and benchmarking in scenarios where we want to preserve and replicate the model(s) interaction. This can be done by leveraging the ‘Import setup’ and ‘Export setup’ buttons on the top right of the playground.
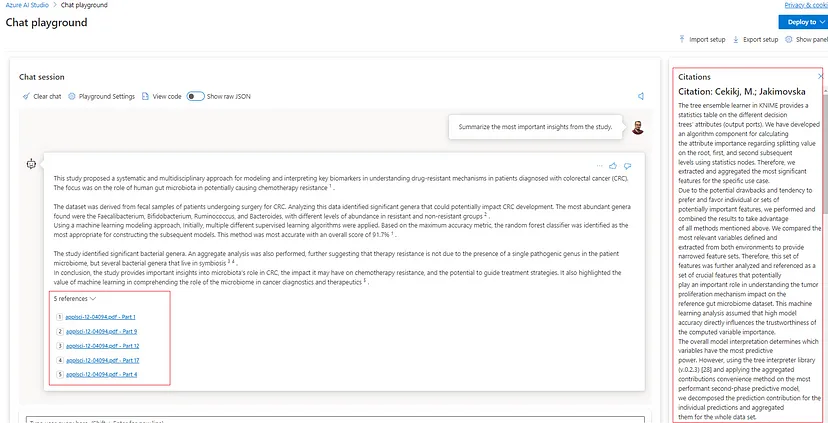
Additionally, one very important thing to note is the built-in reference ability for checking which data source documents/chunks were used for constructing and generating the model response. This makes the RAG-based solution more legitimate and flexible since there is the possibility to cross-check the data relevance (think of this in cases where we rely on a significant amount of data retrieved from different sources, for instance).
Thank you for reading this step-by-step Azure OpenAI Chat Playground guide, I sincerely hope you liked it and captured the practicality of the studio. The next article from this series will be dedicated to deploying and integrating such a solution in the technological stack and environment of interest. Stay tuned, it will get more exciting and more challenging.