
Infrastructure as code allows us to manage Microsoft Azure cloud environments with the same ease as we manage application code. By defining Azure infrastructure through configuration scripts, we gain the superpower of managing resources like virtual machines, compute, and cloud services rapidly, reliably, and repeatably.
In this article, we’ll explore how Terraform’s robust configuration language integrates with GitHub Actions to automate infrastructure deployments across hybrid cloud and Azure environments.
Terraform, a tool by the HashiCorp, empowers us to define and automate our cloud architecture as code. Concurrently, GitHub Actions, a platform for continuous integration and continuous delivery (CI/CD) seamlessly integrated with GitHub, facilitates the automation of our build, test, and deployment pipelines.
Follow along as we discover how these tools can help you implement infrastructure as code on Microsoft Azure and step closer to DevOps heaven. The journey begins now…
Prerequisites
- Azure CLI configured on your local machine
- A valid Azure subscription
- Azure Remote Backend for Terraform
- GitHub Account and GitHub Repository
Our initial step will be to create an Azure Service Principal. To do so, we must first authenticate with Azure. Enter the following command to authenticate using Azure CLI:
az login
After authentication, the process will launch the browser, and we will be ready to proceed. To obtain a list of Azure subscriptions, execute the following command:
az account list --output table
Next, use the following command to select the subscription — you should find the subscription ID from the previous prompt where you logged in.
az account set --subscription <Azure-SubscriptionId>
Then, to create the service principal account, execute the following command:
az ad sp create-for-rbac --role="Contributor" --scopes="/subscriptions/SUBSCRIPTION_ID" --name="GitHub-Actions"
If needed you can change the name “GitHub-Actions” to something more descriptive.
The output will provide us with the following values for our Terraform variables:
- Azure `appId` corresponds to Terraform `client_id`.
- Azure `password` corresponds to Terraform `client_secret`.
- Azure `tenant` corresponds to Terraform `tenant_id`.
Our Terraform state file must be stored in a remote backend. To achieve this, you can use either Azure CLI or Terraform to perform the following steps in order to create a remote backend for Terraform state.
Using Azure CLI
First, create a Resource Group
az group create -n tfstates -l eastus2
Next, create a Storage Account
az storage account create -n iwtfstateaccount -g tfstates -l eastus2 --sku Standard_LRS
Finally, create a Storage Account Container
az storage container create -n tfstate --account-name iwtfstateaccount
These commands create the Azure resources required to manage your Terraform state.
Using Terraform
Alternatively, you can configure Terraform’s remote backend using Terraform itself. Here’s a Terraform configuration example for configuring Azure Storage as a remote backend:
Create `main.tf` to Configure the Azure Resources
# Azure Resource Management Configuration
provider "azurerm" {
  features {}
}

# Create an Azure Resource Group
resource "azurerm_resource_group" "tfstates" {
  name     = "tfstates"
  location = "East US 2"
}

# Create an Azure Storage Account
resource "azurerm_storage_account" "iwtfstateaccount" {
  name                     = "iwtfstateaccount"
  resource_group_name      = azurerm_resource_group.tfstates.name
  location                 = azurerm_resource_group.tfstates.location
  account_tier             = "Standard"
  account_replication_type = "LRS"
}

# Create an Azure Storage Container
resource "azurerm_storage_container" "tfstate" {
  name                  = "tfstate"
  storage_account_name  = azurerm_storage_account.iwtfstateaccount.name
  container_access_type = "private"
}

# Output the login server for the Azure Storage Account
output "storage_account_name" {
  value = azurerm_storage_account.iwtfstateaccount.name
}

# Output the name of the Storage Container
output "storage_container_name" {
  value = azurerm_storage_container.tfstate.name
}
In the code snippet above, we have already created a main.tf file to define the Azure resources we intend to manage with Terraform.
Configure the Terraform Backend in `backend-tf`
Now, in a separate ‘backend-tf’ file, we’ll configure the Terraform backend. This ensures that the Terraform state is stored in Azure Storage.
# Azure Terraform Backend Configuration
terraform {
  backend "azurerm" {
    resource_group_name  = "tfstates"
    storage_account_name = "iwtfstateaccount"
    container_name       = "tfstate"
    key                  = "terraform.tfstate"
  }
}
Following this, let’s create a private GitHub repository. Afterward, clone the repository and add your Terraform code to it. The next crucial step is to create secrets for Azure, which will be securely stored in our repository. To do this, go to the Settings menu, expand the Secrets section, and then select Actions.
This will redirect you to the page where you may properly manage the secrets of your repository. You will then be prompted to enter a Name and a Secret. It’s important to avoid including any spaces or pressing the enter key after inputting the Secret, as doing so could result in pipeline issues.
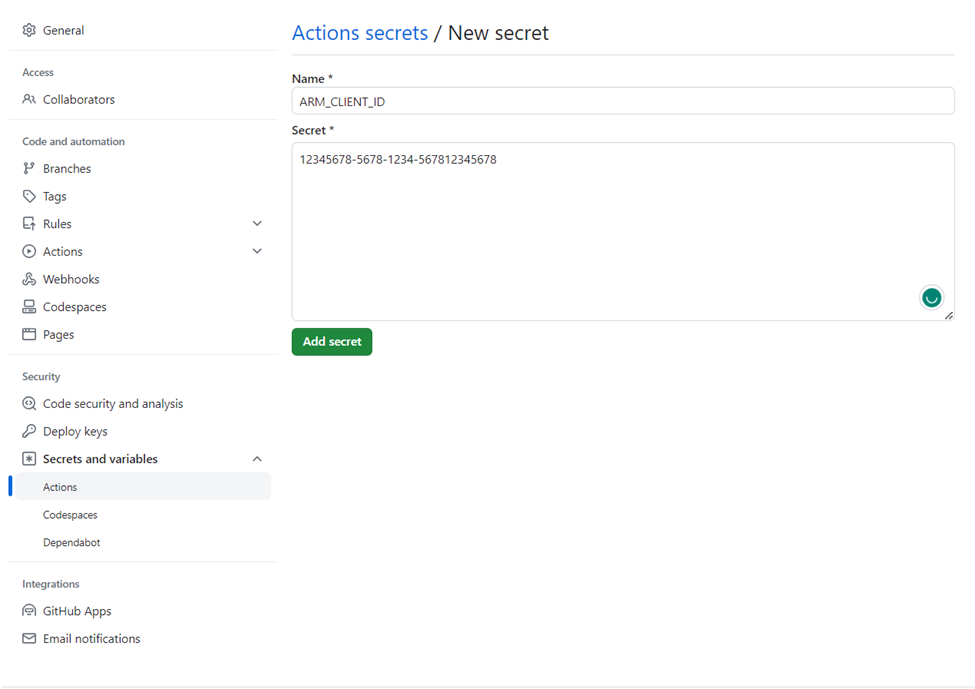
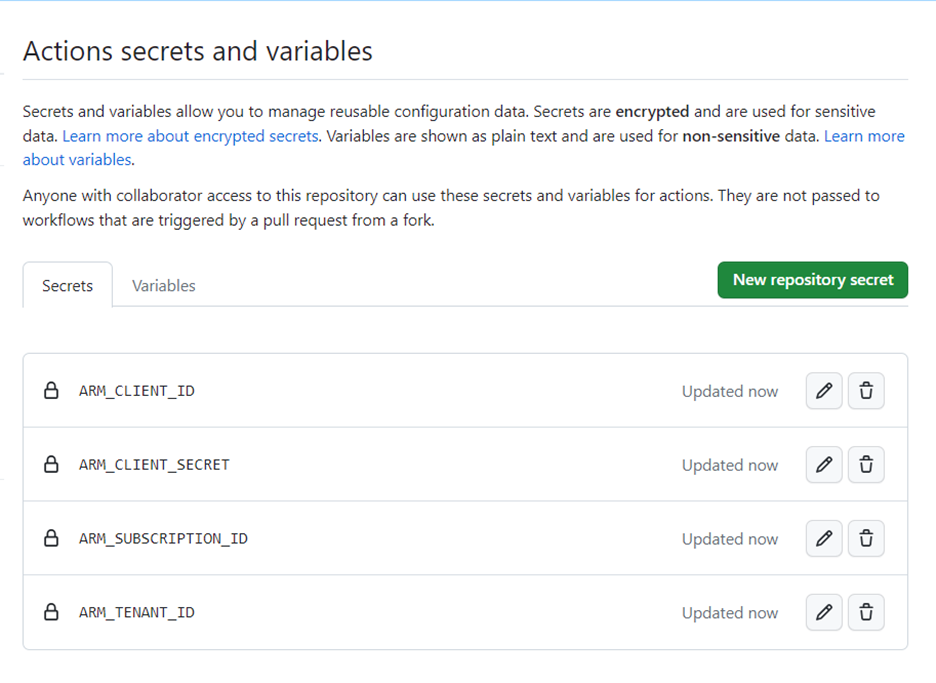
Your setup is complete and ready to begin once you’ve successfully entered all of the essential secrets. This secures sensitive information while maintaining the smooth execution of the project’s workflow.
In the following Terraform code snippet, we demonstrate how to build an Azure provider, create the necessary Azure resources, and configure a Terraform backend to securely store state files. This setup ensures that Terraform can efficiently manage your infrastructure.
# Azure Resource Management Configuration
provider "azurerm" {
  features {}
}

# Create an Azure Resource Group
resource "azurerm_resource_group" "tfstates" {
  name     = "tfstates"
  location = "East US 2"
}

# Create an Azure Storage Account
resource "azurerm_storage_account" "iwtfstateaccount" {
  name                     = "iwtfstateaccount"
  resource_group_name      = azurerm_resource_group.tfstates.name
  location                 = azurerm_resource_group.tfstates.location
  account_tier             = "Standard"
  account_replication_type = "LRS"
}

# Create an Azure Storage Container
resource "azurerm_storage_container" "tfstate" {
  name                  = "tfstate"
  storage_account_name  = azurerm_storage_account.iwtfstateaccount.name
  container_access_type = "private"
}

# Output the login server for the Azure Storage Account
output "storage_account_name" {
  value = azurerm_storage_account.iwtfstateaccount.name
}

# Output the name of the Storage Container
output "storage_container_name" {
  value = azurerm_storage_container.tfstate.name
}

# Azure Terraform Backend Configuration
terraform {
  backend "azurerm" {
    resource_group_name  = azurerm_resource_group.tfstates.name
    storage_account_name = azurerm_storage_account.iwtfstateaccount.name
    container_name       = azurerm_storage_container.tfstate.name
    key                  = "terraform.tfstate"
  }
}
In this configuration, we:
- Configure the Azure provider to manage Azure cloud resources;
- Create a “tfstates” Azure Resource Group in the “East US 2” region;
- Create an Azure Storage Account named “iwtfstateaccount” within the same resource group, ensuring it uses Standard tier storage with LRS replication;
- Create an Azure Storage Container called “tfstate” in the storage account, with private access;
- Utilize Terraform outputs to specify the names of the Azure Storage Account and Storage Container;
- Set the Terraform backend to save state files in the specified Azure Storage Container, using the key “terraform.tfstate” for state file storage;
You can securely maintain your infrastructure’s Terraform state files within an Azure Storage Account using this configuration, enabling collaborative and consistent infrastructure management. Now, let’s move on to GitHub Actions.
We have the option of using pre-made Terraform templates through the Terraform by HashiCorp template or creating a custom workflow using a YAML file to configure our GitHub Action Workflow for Terraform.
For the purpose of this guide, we’ll be creating our custom script by choosing the “Set up a workflow yourself” option. Use the provided code snippet, name the workflow “terraform-plan-apply.yml,” and then proceed to Start Commit.
name: Terraform Plan/Apply Workflow

on:
  push:
    branches:
      - main
  pull_request:
  workflow_dispatch:

permissions:
  contents: read

jobs:
  terraform:
    name: Terraform
    env:
      ARM_CLIENT_ID: ${{ secrets.ARM_CLIENT_ID }}
      ARM_CLIENT_SECRET: ${{ secrets.ARM_CLIENT_SECRET }}
      ARM_SUBSCRIPTION_ID: ${{ secrets.ARM_SUBSCRIPTION_ID }}
      ARM_TENANT_ID: ${{ secrets.ARM_TENANT_ID }}
    runs-on: ubuntu-latest
    environment: production

    defaults:
      run:
        shell: bash

    steps:
      - name: Checkout
        uses: actions/checkout@v3

      - name: Setup Terraform
        uses: hashicorp/setup-terraform@v2

      - name: Terraform Init
        run: terraform init

      - name: Terraform Plan
        run: terraform plan -input=false

      - name: Terraform Apply
        run: terraform apply -auto-approve -input=false
This script automates the use of Terraform to manage Azure infrastructure by initializing, planning, and applying changes whenever there’s a code update to the main branch or when manually triggered.
After creating this file and committing it, you will find it in the `.github/workflows` directory of your repository. In contrast, we’re going to create a “terraform-destroy.yml” file that serves as a GitHub workflow script to destroy our infrastructure whenever our tasks are completed.
name: Terraform Destroy

on:
  workflow_dispatch: # This workflow is manually triggered

permissions:
  contents: read

jobs:
  terraform_destroy:
    name: Terraform Destroy
    env:
      ARM_CLIENT_ID: ${{ secrets. ARM_CLIENT_ID }}
      ARM_CLIENT_SECRET: ${{ secrets. ARM_CLIENT_SECRET }}
      ARM_SUBSCRIPTION_ID: ${{ secrets. ARM_SUBSCRIPTION_ID }}
      ARM_TENANT_ID: ${{ secrets. ARM_TENANT_ID }}
    runs-on: ubuntu-latest
    environment: production

    defaults:
      run:
        shell: bash

    steps:
      - name: Checkout
        uses: actions/checkout@v2

      - name: Setup Terraform
        uses: hashicorp/setup-terraform@v1

      - name: Terraform Init
        run: terraform init

      - name: Terraform Destroy
        run: terraform destroy -auto-approve -input=false
In this manually triggered script, we use Azure credentials saved in secrets to destroy our Terraform infrastructure when necessary.
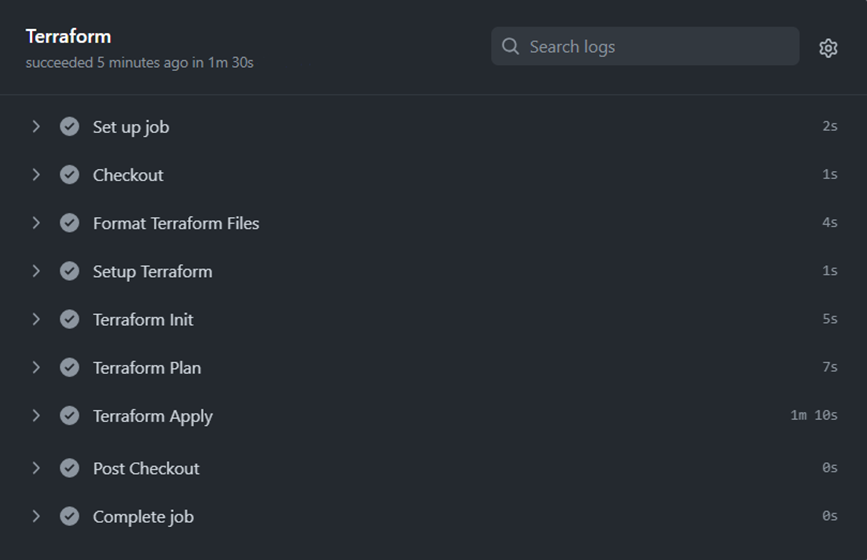
After committing the GitHub Actions Workflow file, it will be executed, and you can inspect its execution by clicking on the Workflow’s output, as shown below:
Conclusion
In summary, with the seamless integration of Azure, Terraform, and GitHub Actions, we empower our teams to streamline development processes effortlessly. This enables us to confidently verify and deploy changes onto Azure with remarkable ease. This dynamic technological synergy propels us towards a more efficient and agile DevOps ecosystem.