
Nowadays Laravel is one of the leading PHP MVC frameworks, and there is a huge demand for Laravel developers on the global market.
Laravel is the most used PHP framework in 2017 and 2018, and it is still growing … On the other side, Amazon is the best cloud computing platform. So when you combine Laravel and AWS J, you are getting something really powerful.
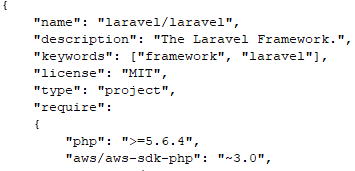
Let’s assume the following. We have our Laravel application. The application is hosted on Amazon. An upload functionality is implemented into the application. Hence the application is hosted on Amazon, we’ve also chosen to use Amazon S3, and to upload/save the files on S3. Starting with AWS SDK for PHP version 2.6.2 we can use the AWS credentials file to specify our credentials. So in order to upload something into the S3 we need to use the AWS SDK as shown in the picture below (aws/aws-sdk-php).
After adding this to our composer.json file we need to run the following command: composer install. The composer will download the AWS SDK and put it into the vendor folder. After this the AWS SDK is ready to use and we can start uploading files on S3. So let’s take a look in the code below. The code below is used to upload/save something on S3 bucket:
use Illuminate\Support\Facades\Storage;
$s3 = Storage::disk('s3');
$s3->put($filePath, $file);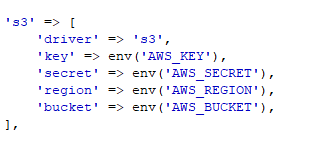
In the above code on line 1 we are setting the disk to s3. This means that we will upload something on the s3 bucket. Laravel has a configuration, located in the following file: config/filesystems.php file. In this file all the necessary configuration parameters are specified. In our case we are telling to the system, that we are going to upload something on s3. As shown on the image below the driver is set to s3, and we need to specify some additional parameters like the region of the bucket and the bucket name, and of course the credentials (key and secret). The key and secret are needed so the code to be aware on which AWS account we are going to upload on.
On the line 2 we are simply uploading the given file at the given path. We are specifying the path on which we would like the file to be uploaded, and the actual file. After executing this the upload process will be completed.
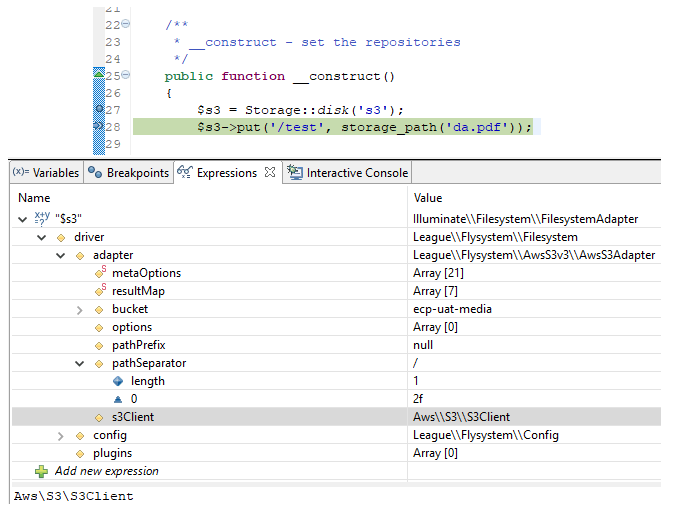
Let’s go deeper into the code. If we start debugging the code, we can see that the S3 Adapter is set to AwsS3Adapter, and the S3 Client is set to AWS\S3\S3Client. Hence the disk is set to S3 and this is working as excepted. Please take into account the picture below.
So probably you are asking how the Illuminate\Support\Facades\Storage is aware of this, and how it is fetching the credentials. By looking at Picture 2 we can see that the credentials are fetched from the .env. But …. this is not entirely correct …
So how Illuminate\Support\Facades\Storage is working (fetching the credentials)?
By executing the above code, the Storage will try to upload the file. In order for this action to be executed, the storage needs to be aware about the Amazon key and secret. The Storage will try to fetch the credentials from different locations in the following order:
- Look into the .evn file. It will look for the AWS_KEY and AWS_SECRET. If not found go to step 2
- Look for the credentials in the credentials file. If not found go to step 3
- Try to fetch the credentials from the instance metadata
Let’s explain a little bit about the above steps. So as you can see there are three locations from which the AWS credentials can be fetched. The first one is .env file. The credentials can be put directly into the .env file. If the credentials are present into the .env file, they will be fetch from the env file, if not we are going to step 2.
Step 2 will look for the credentials into the credentials file. The location of the credentials file is different on Windows and Linux. Regarding this step, we need to take into account the following:
- If we are developing under Windows (maybe, we are using WAMP). In this case we need to put the credentials into the credentials file C:\Users\{{ user }}\.aws\credentials. In my case user == stefan.sidorovski
- If we are using Laravel Homestead and vagrant, we are actually in the background running under Ubuntu. In this case the code will look for the credentials in the Ubuntu (path = /home/vagrant/.aws/credentials)
If the credentials are not found into the credentials file explained into the step 2 we are going to step 3. The storage will try to fetch the credentials form the Amazon EC2 instance metadata server. This credentials can be fetched, and will be available only when running on Amazon EC2 instances that have been configured with an IAM role.
So now we are aware of how and in what order Illuminate\Support\Facades\Storage is handling the upload on the S3 bucket. In order to fully understand the upload functionality using the Storage, it is of essential importance to be aware what Illuminate\Support\Facades\Storage is doing behind the curtain.
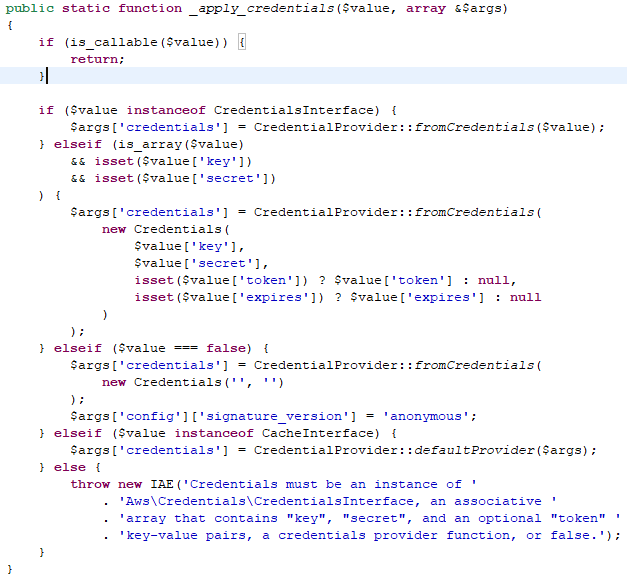
All of the above actions are executed by the ClientResolver. The ClientResolver is part of the aws/aws-sdk-php, and it is responsible for fetching the credentials, and if you are using the S3 bucket, please be aware how the credentials are fetched. If we are going deeper into the code, we will end up in the function _apply_credentials, which is responsible for fetching the credentials (Picture 4).
Maybe you are probably asking, what if I like to test the upload functionality from my local machine. Well … in that case you have two working ways:
- Put the UAT credentials in your local .env file
- Put the credential into the credentials file on your local machine
Conclusion
It is not wise to put the credentials into the .env file. As explained in this article Laravel is smart, it will fetch the credentials either by using step 2 or step 3, so you don’t need to specify the credentials in the .env file. Step 2 can be used when you are using only the s3 bucket, but if your system is fully hosted on the AWS, then step 3 is the right way to go.