
- Do you have a problem with strange logins and doing some changes on your server?
- Do you have multiple users and you are not sure what they are doing on your server?
- Do you have a single user that multiple people are using?
With this guide you can be sure who, when and what command has been used based on time stamp.
By default, the history command is available for all users but the time stamp needs to be added into the settings. NOTE: the history command is only available for the user that is logged into the system, it will not show information for other users. We will cover this part a little later.
First let’s add the time stamp information for each user. This is an easy part you just need to be logged in as root and you will be able to edit everything into the specific user folder.
For our guide we will use the user: interworks
$ cd /home/interworks/
If we list the files into the home folder of the user we will not be able to see anything because some of the files are hidden for security reasons.
$ ls
total 0
To list hidden files and folders you must use ls –a OR ll –a (description for the option list all files including hidden file starting with ‘.’)
For our guide I am going to use the ls –a command
$ ls –a
.bash_history .bash_logout .bash_profile .bashrc .ssh
As you can see now the hidden folders and files are shown.
The next step is editing the .bashrc file (use a text editor of your choice)
$ nano .bashrc
When you are inside the file at the bottom add the following export information:
export HISTTIMEFORMAT=”%d/%m/%y %T “
For our guide the time format is based on day/month/year/time you can change it as you like.
To make the changes instantly use the following command:
$ source /home/interworks/.bashrc
Let’s make an audit on the history of the commands used for the interworks user. That can be done if you go back to the home folder of the user and list the hidden files as before. You need to open the file .bash_history because this is the default file where the history of the commands is written. Yes, this can be changed you can write the history of the commands elsewhere but that is not what we are doing today.
There are many ways to open the file or just to list what’s stored inside we just need the last 10 lines, so we will use the tail command.
$ tail -10 .bash_history
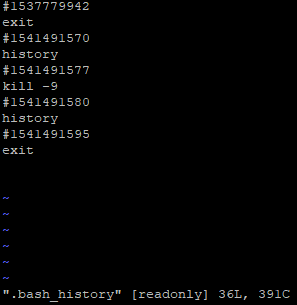
Output:
#1537779942
exit
#1541491570
history
#1541491577
kill -9
#1541491580
history
#1541491595
exit
For our guide we will convert the hashtag for the kill -9 command used. Use the following command to convert the hashtag timestamp. Time Format can be defined as you want to see the output.
$ echo 1541491577 | awk ‘{print strftime(“%d/%m/%y %T”)}’
Output:
06/11/18 09:06:17
The next part is protecting the file because now it is easy to edit and remove the desired command to cover its own tracks.
$ chattr +i /home/interworks/.bash_history
Description:
chattr (Change Attribute) is a command line Linux utility that is used to set/unset certain attributes to a file in a Linux system to secure accidental deletion or modification of important files and folders, even though you are logged in as a root user.
+i A file that is set with ‘i‘ attribute, cannot be modified (immutable). Means no renaming, no symbolic link creation, no execution, no writable, only a superuser can unset the attribute.
Now we will test with two text editors:
$ vi .bash_history
$ nano .bash_history
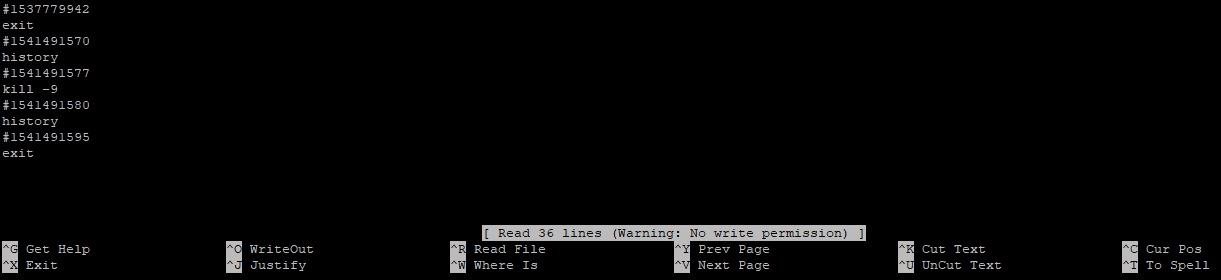
As you can see from the pictures above we don’t have permissions to edit the file.
We will now test how to delete the file:
$ rm .bash_history
rm: remove regular file ‘.bash_history’? y
rm: cannot remove ‘.bash_history’: Operation not permitted
$ sudo rm .bash_history
rm: cannot remove ‘.bash_history’: Operation not permitted
With this we are covered with everything, the file is protected and the user cannot tamper with the file.
The second part is listing for a specific user when logged into the system. There are several ways to list and we will cover only two commands.
The first command is last. Description: The last command reads listing of last logged in users from the system file called /var/log/wtmp
$ last interworks
Output:
interworks pts/2 192.168.2.254 Tue Nov 06 09:05 – 09:15 (00:10)
interworks pts/1 192.168.2.254 Mon Oct 22 16:50 – 20:17 (03:26)
interworks pts/2 192.168.2.254 Mon Oct 22 16:43 – 16:50 (00:06)
interworks pts/1 192.168.2.254 Mon Oct 22 16:40 – 16:50 (00:10)
From the above information we are able to see that the user interworks was logged in from 192.168.2.254 with time period of Tue Nov 06 09:05 – 09:15 and the last information is that the user was logged in for about 10 minutes.
Other command to list the specific user login is utmpdump. Description: utmpdump is a simple program to dump UTMP and WTMP files in a raw format, so they can be examined. utmpdump reads from stdin unless a filename is passed.
$ utmpdump /var/log/wtmp* | awk ‘$4~”interworks” {print}’
Output:
[7] [17037] [ts/1] [interworks ] [pts/1 ] [192.168.2.254 ] [192.168.2.254 ] [2018-11-06T09:05:00,966391+0000]
[7] [17677] [ts/2] [interworks ] [pts/2 ] [192.168.2.254 ] [192.168.2.254 ] [2018-10-22T16:50:56,680901+0000]
[7] [17871] [ts/1] [interworks ] [pts/1 ] [192.168.2.254 ] [192.168.2.254 ] [2018-10-22T16:43:38,413020+0000]
[7] [17900] [ts/2] [interworks ] [pts/2 ] [192.168.2.254 ] [192.168.2.254 ] [2018-10-22T16:40:51,850744+0000]
The difference between last and utmdump is that in last there is information for how long the user is connected and from my experience that command is better to use. Because it is Linux that means there are many ways to do the checks. So we are not going to cover all commands.
NOTE: If you have one user that is used by multiple people the difference will be that the IP address will be different.