
In the ever-evolving world of IT, we are constantly bombed with new methodologies, practices and terminologies. Some are here for the short-term but others pass the test of time and stay here for a long time.
One such practice is Continuous Integration or CI. The main goal of CI is to prevent integration issues on big projects by integrating early and very often, sometimes even multiple times a day. That way, by not keeping the changes to the code locally for a prolonged time we are able to build and test it with every minor change and discover potential issues or conflicts. Upon every change, no matter how small, the programmer commits the new code and it must pass all tests or otherwise, the changes made will be reverted. This keeps the rework to a minimum and significantly reduces costs and time.
Other tool that emerged from the growing popularity of CI practice is Docker. Docker was designed to make it easier to create, build and deploy applications to the market by using containers. Containers are allowing the senior developers to pack only the necessary stuff needed to run the application, such as libraries and other dependencies in one package that will run on any machine regardless of the customization settings on that machine. With this, we are eliminating the age-old problem ‘It worked on my machine’ and significantly reduce the risk and costs while speeding up the development and delivery process.
Docker’s what and why
Motivated by the growing popularity of Docker, we decided to implement it in our testing process and start running Docker containers on our Jenkins server where our tests would be executed. This would simplify the setup because Docker containers are easily shareable and portable so the results can be easily reproduced and free of any outer machine dependencies.
At the moment, we are mostly running Robot Framework test cases on web apps, so we will build a Robot framework Docker image where we will install all of the dependencies needed to run our tests so we can later do it hustle-free on any machine.
While we are here, I think we need to differentiate between an image and a container. An image is basically the setup of our virtual computer (environment) while a container is an instance of the image. We can have multiple running containers of the same image at the same time. But in order to run a container, we must first create an image. So let’s get started.
Creating a Docker image from a Dockerfile
An image in Docker Robotframewrok is built by the instructions set in a Dockerfile. These are universal rules and by sharing the Dockerfile, anyone can build the exact same image with the exact same dependencies. In our case, we will be building an image capable of running our Robot Framework test cases. That means that our Docker image must have Python installed, Robot Framework Docker and all of the libraries we use in our test cases. Finally, since we will need to run these Docker automation test cases in a browser, we will need a browser and a web driver installed.
We will start building up our Docker image from the base Ubuntu image. That means our first line in the Dockerfile would be:
This tells Docker to start with Ubuntu base image. Every Dockerfile must start with FROM, telling Docker what the first layer of our image will be.
Next, we will be installing our main dependencies and we do that with the RUN command.
This would install the latest version of Python and pip (Python package manager). Once completed, we need to install Robot Framework and the needed libraries, a process that we can do with a single line and a requirements file. We can put all of our packages that we want to install through pip in a text file called requirement.txt. A sample of our requirements.txt is:
We can install these dependencies with adding the following lines in the Dockerfile:
All that is left now is to install the browsers. For this article we will only add Chrome but other browsers and webdrivers can be added with the same method. To install the latest version of Chrome we need to add:
Followed by the installation of the latest chromedriver by adding:
Once we have all the necessary installations done, all that is left now is to define an ENTRYPOINT – a script that will be executed when the build is complete and the container is running. We do that by adding the following line in the Robotframewrok Docker file.
with our run_tests.sh containing
telling Robot Framework to run the scripts under the /tests against chrome browser and put the report under the /results folder.
With this, we are completing the Dockerfile and will be able to build an image based on the instructions that we’ve put in so far. This image will contain everything we need to run our Robot Framework scripts.
Building an image and running a Docker container
To actually run the scripts, we need to build the Docker image first and then run an instance of it – a container. We can build the image with the following command:
and then create an instance of it with:
Here we add the flags -t and -d to keep the container running (and in the background) while also giving root (admin) capabilities to the user.
Now to run the tests inside the newly created container, we use:
Since our run_tests.sh contains only one line, we can eliminate using bash and directly call the native robot execution command with:
This will come handier in the next paragraph where we will implement this in a Jenkins pipeline and build and execute everything automatically.
For here, all that’s left is to get the contents of the results folder after the test execution by copying them from the container to a location on the local machine via:
Once we are satisfied with our Dockerfile and managed to test it out locally, we can automate the build process using Docker Hub (or any other Docker registry like AWS, GitLab etc.). We can commit our Dockerfile in our repository and connect the registry with the repository to watch for any changes made to the Dockerfile. Once the registry detects that a new (or modified) version of the Dockerfile has been committed to the repository, it will automatically build a new image from it that will be available for us to use. This is a screenshot from that functionality on Docker Hub, building an image from a newly committed Dockerfile in our GitHub repository: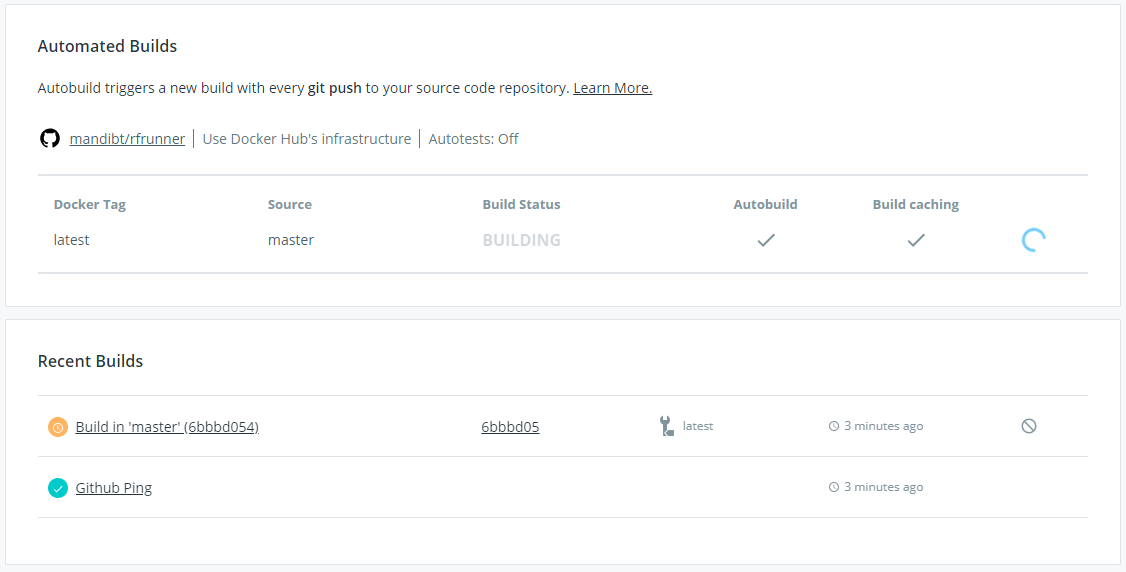
Once the build of the new image version is complete, we will get a notification on Docker Hub and we can start using the new version of our image in our projects. This is a nice feature that automates the image building process so we can cross it off from our to-do list.
Integrating test execution in Docker into a Jenkins Pipeline
We come to the main point of this article, integrating Jenkins Docker containers where tests will be executed into Robot Framework Jenkins pipeline model.
That means we would have to split our job into smaller stages or steps.
A step in Jenkins pipeline Robot Framework example is exactly that – one step that does only the one thing it is created for.
A stage is (can be) a collection of steps that define a bigger process.
We will first define three main stages in our pipeline and those would be:
- Checkout code – in this stage we will clean the workspace and checkout the code from the repository
- Execute tests- in this stage the test cases will be executed inside the robot framework docker container
- Process Results – In this stage we will process the results and send them via email to any concerned parties. Read more about the email customization and the RF Jenkins plugin in my previous blog. Make use of the Jenkins Pipeline Syntax editor to customize the steps and values to suite your needs.
A sample pipeline file would look something like this:
Upon executing this pipeline in Robot Framework Jenkins, we should get something like this: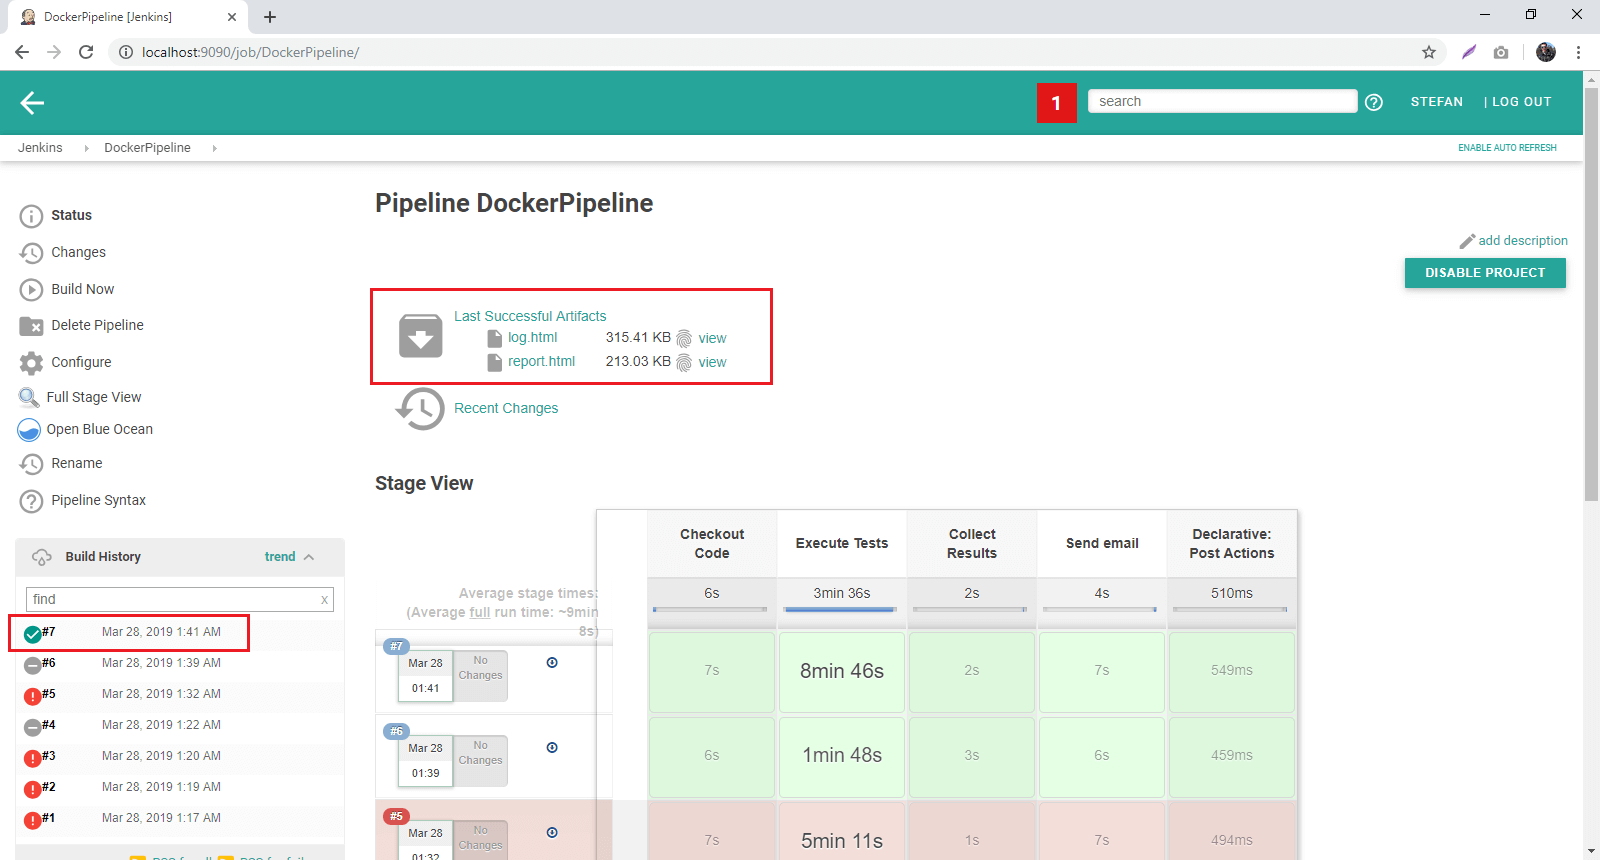
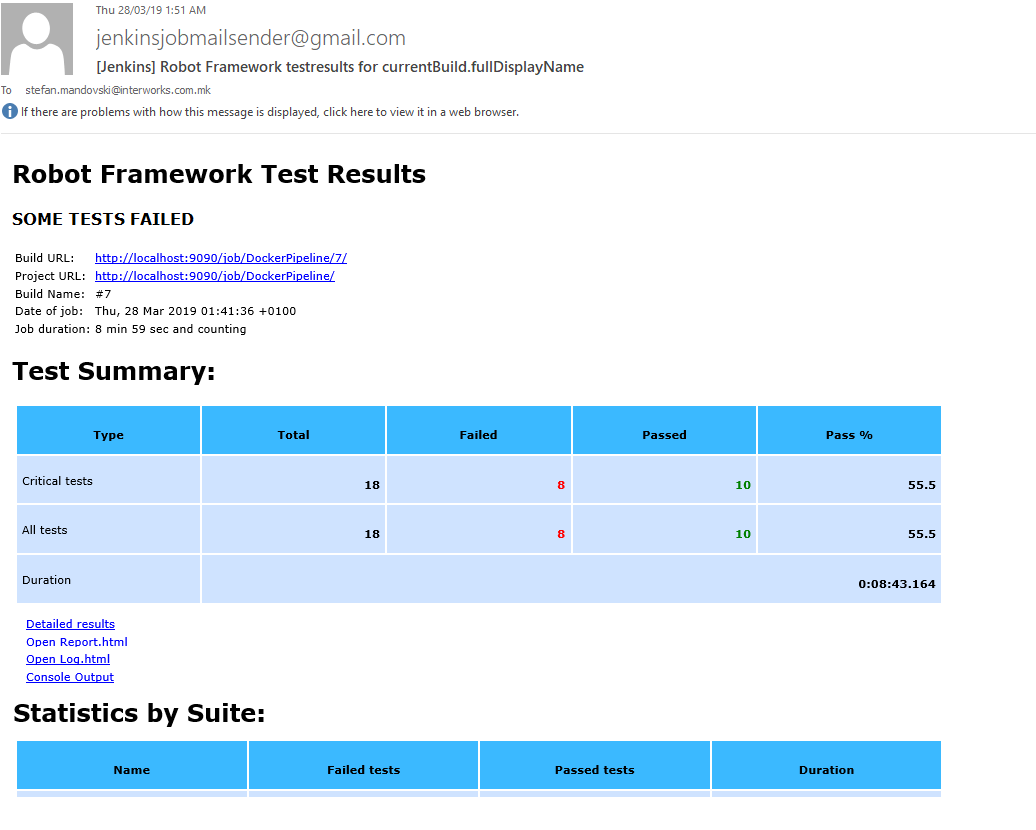
This is how the email looks like, we have all the details about the test cases that were executed, tests status, duration and direct links to our Jenkins build along with direct links to the report and log files.
That means that the pipeline was completed successfully and the execution results can be viewed directly from Jenkins Robot Framework. We got a few failures here and there, but the tests were executed and we can open the results and analyze the failures. With this final step, we have completed the whole process from 0 to hero about building a customized Docker image and running our existing test scripts inside an instance of that image, in an isolated environment. Hope you find this article helpful and challenging. Have fun playing with Docker Robot Framework combination and implementing it in your CI solution.