
As one of the biggest practices in our company, our Quality Assurance practice has tried a lot of testing tools, one of which is Xray as well. We have been working on a case where we were supposed to use Xray for Risk-Based Testing and led by that we have decided to create a material that will introduce you to Risk-Based Testing (RBT) in Software Testing and will help you understand the purpose and process of the same. A special emphasis will be put on performing Risk Analysis by defining impact, probability, and risk level. And finally, we will guide you in setting up and configuring your Risk-Based Testing strategy using Xray.
Introduction:
What is Risk-Based Testing?
We can simply define Risk-Based Testing as a strategy that focuses on the defined risks, and furthermore, it uses them for adequate testing. This kind of testing maximizes the testing goals that you have. Like in everyday life, so in projects, risks come from internal and/or external sources and they may affect the quality, cost and time to market. Risk-Based Testing can diminish these effects, but in order for it to be fully effective, it should be started in the initial stage of product development. When leveraging Risk-Based Testing, you should have the following things in mind:
- Identify and define all the possible risks for all the functional modules of the Application Under Test (AUT) and assign them to the responsible stakeholders.
- Prioritize the tests based on the criticality of the risk associated. Come to an agreement on the prioritization, and update the functional requirement document shared with the stakeholders.
- Plan and define tests according to requirement prioritization.
- Execute tests according to the accepted functional document.
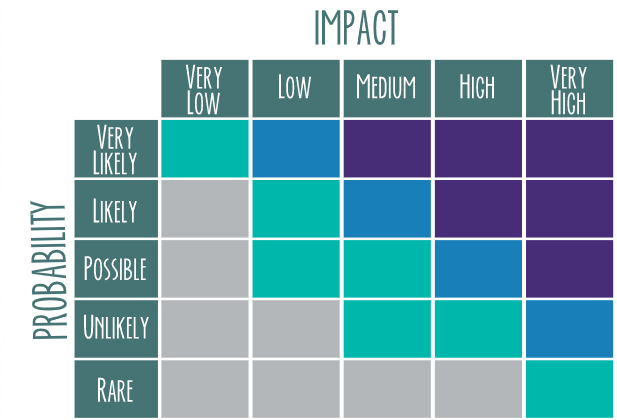
There are as many methodologies for defining risk, and creating an RBT strategy, as there are industries practicing risk management. The following one is the favorite in the Software Quality Assurance (SQA) industry and it is called Risk Matrix.
Risk Matrix
Depending on your analysis and priorities Risk-Based Testing can be a very complex or a very simple process. RBT is very adaptable to different workflows and project organization processes such as Waterfall, Agile, Scrum, Kanban or any other Hybrid models.
What is Xray?
Xray is the number one Test Management tool for Jira, who does not need any other software to run. What is important about Xray is that it supports the entire testing life cycle starting from test planning to test reporting, this is done thanks to the special Jira issue types introduced by Xray. What you should know about Xray is that it doesn’t provide risk management capabilities, meaning that you are the one that should define risks and manage them.(Read more about Xray here: https://www.getxray.app/)
How to Use Xray for Risk-Based Testing:
Let’s delve now into using the Xray tool for successful implementation of Risk-Based Testing.
- The First Step is the definition of what is a key point and where to set all the risks. Risks can be set on:
- Project level
- Requirements level (if your project is organized with requirements)
- Story level (if your project is organized with stories, not with requirements)
- Tests level
- The second step is to define how you will create and identify your Risks, whether you will use the appropriate application for Risk Management, or you will use other custom apps for risk identification and analysis. There are a lot of free and business Risk Management Softwares in the market so you will need to select which one is suitable for you and your company’s needs. You should make sure that your risk management software is not too complex to use or old-fashioned because instead of simplifying the process of risk management you will only get troubles in tracking and assessing harmful risks.
- The third step is the proper configuration of Xray and its entities to support Risk-Based Testing such as Impact, Probability and Risk level.
Configuring Risk, Probability, and Impact in Xray:
We will explain how to configure Risk on Test level, and this approach is used for configuration to all other levels. AS mentioned before with Xray you do not have a definition for configuration of risk, probability, and impact, meaning that you should configure all these things related to RBT.
You can create these fields from two possible screens, one of them is directly in your project from the Test (Issue) screen by clicking on the Admin button and selecting the Add field.
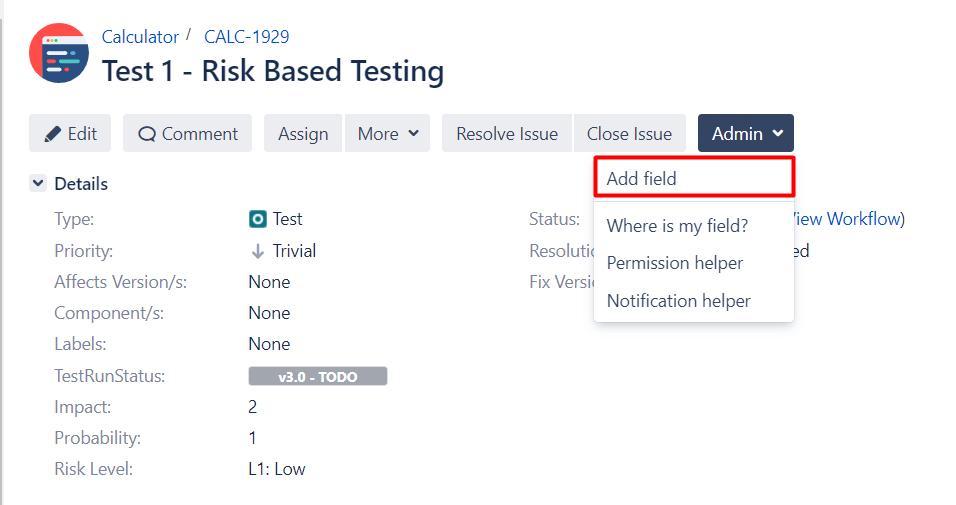
Add custom fields directly from the Test screen
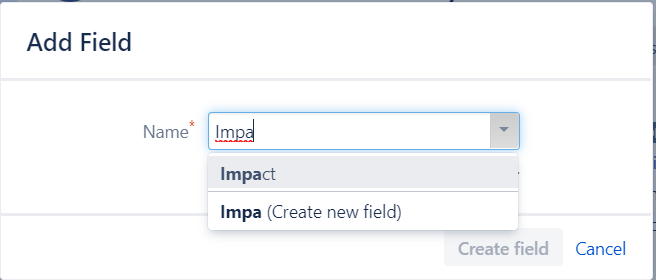
Create a new or select an already existing field from the Test screen
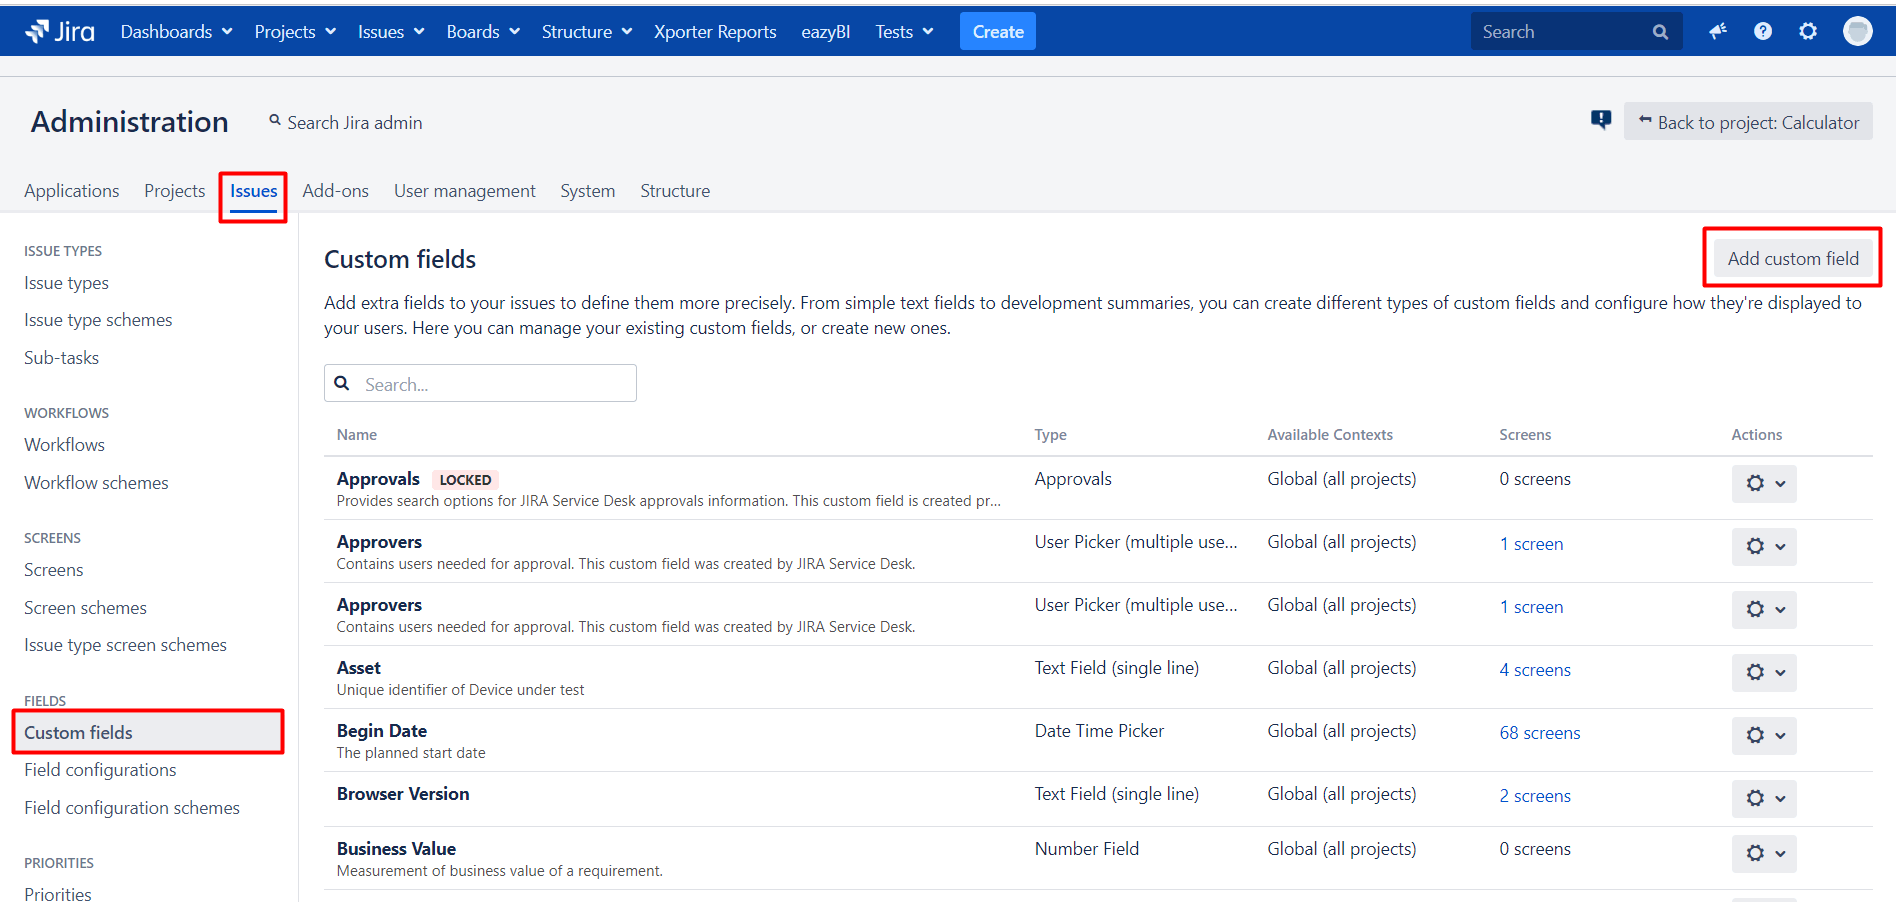
The second screen that you can use to add custom fields is directly from Jira’s administration settings, under the Issues tab. On the left side menu click on the Custom fields link and at the top of the screen, there is a button saying Add custom field.
Create a new field from JIRA, the Custom fields screen
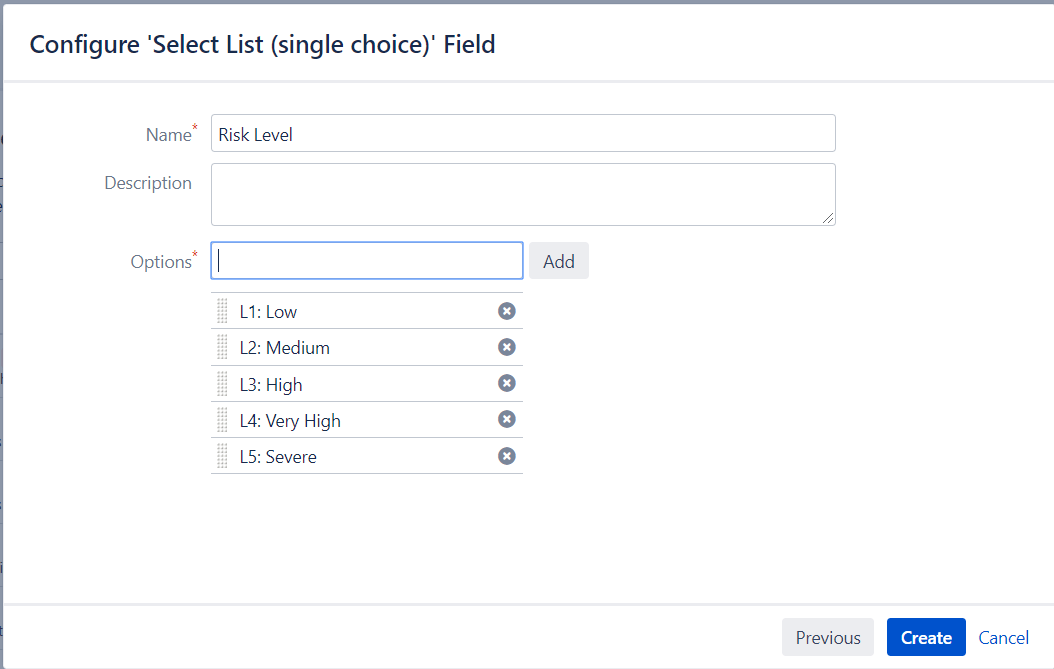
When you decide which screen you want to use to create new fields, e.g. you can choose to create a custom field from type Select List (single choice) and then you can manually add Option values which will be in the right order. Their values are alphabetically sorted.
(Configure Custom Field for Impact and Probability)
You should repeat all the above-mentioned steps for defining Impact and Probability, and all related fields needed for RBT.
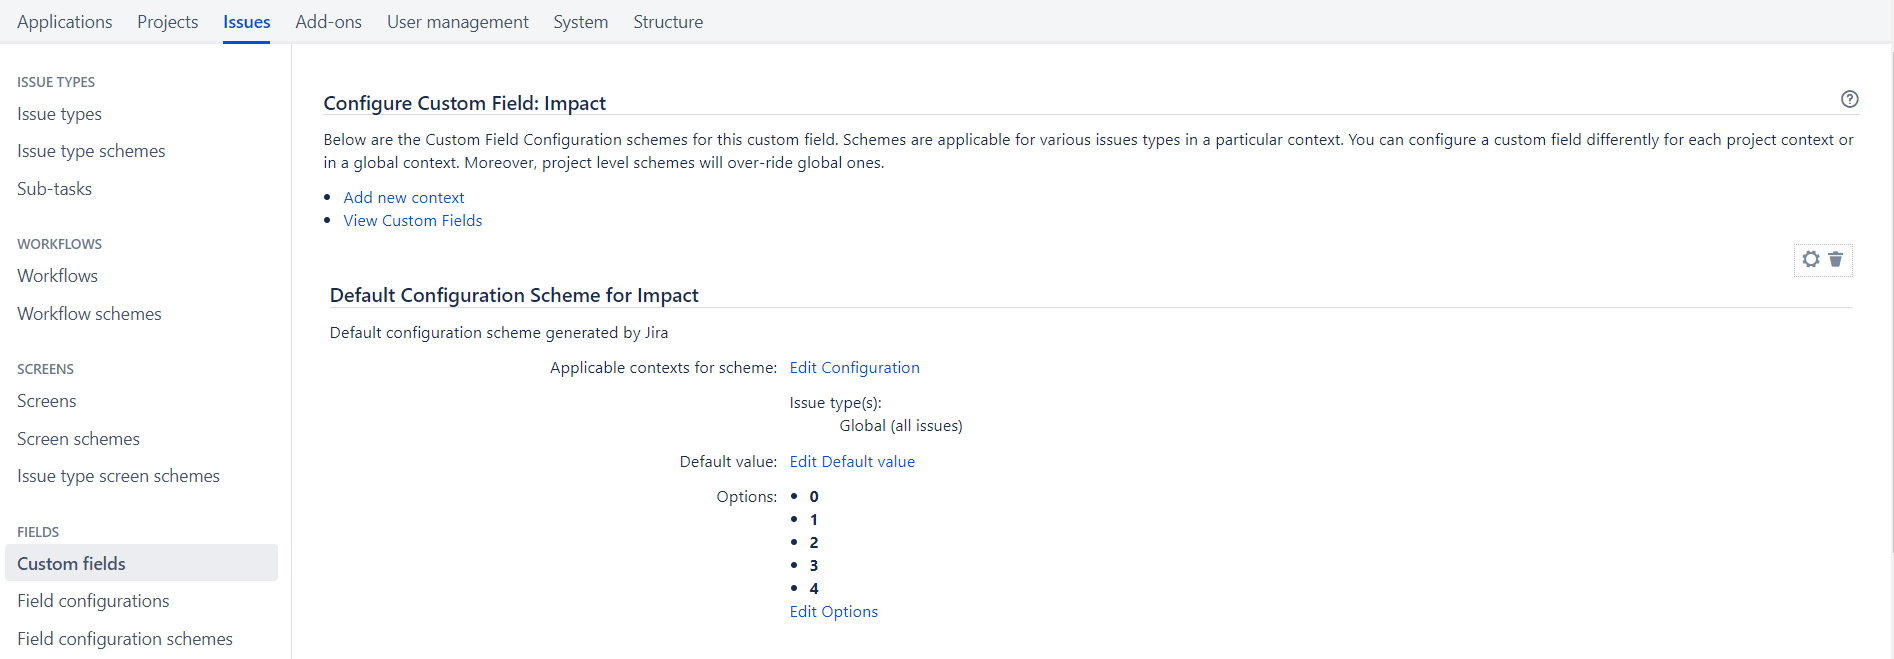
Risk Level is the most important field which is calculated on the basis of the Impact/Probability values, and as such appropriate configuration should be provided. What you should remember is that no matter what you choose, the level field for Risk will not be automatically calculated based on the Probability/Impact fields. Instead, you should use an app or custom development to do that.
(Configure Custom Field for Risk Level)
Adding Tests to a Test Execution by Risk Level:
When the configuration of all the related fields to RBT has been done, we can move to the benefits of Xray and how it can be used for Risk-Based Testing.
Additionally, when you add Tests to an existing Test Execution/Test Plan/Test Set, you may also choose whether to display the impact, probability, and risk level related fields or no. When you have successfully added all tests, you can rank risk level as you want, descending or ascending, our suggestion is descending, because in that way you will be able to see the higher risks and address them first. Besides risk level, you can sort Tests also by impact or probability.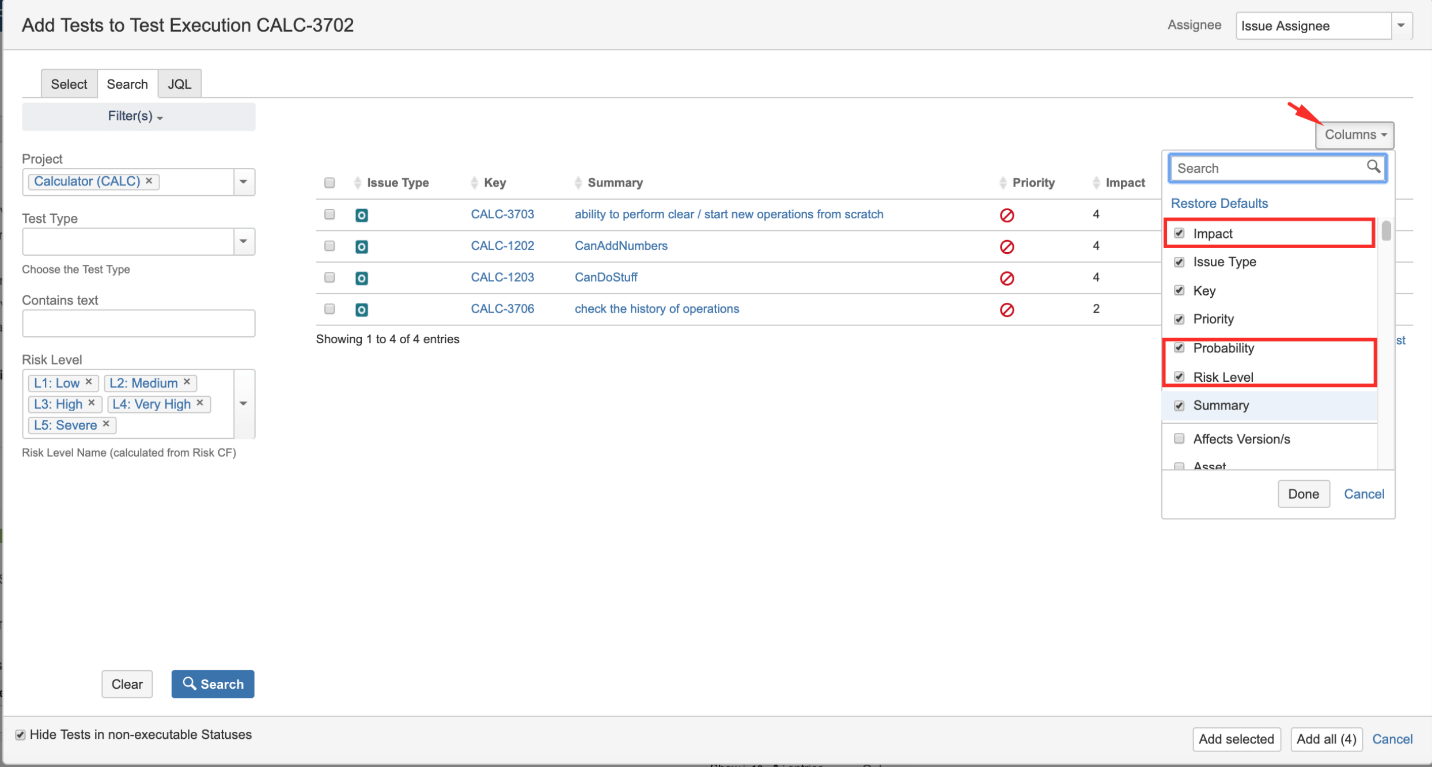
Add Test to Test Execution, sorted or ranked by Risk level, Impact or Probability
There are additional custom filters on the impact, probability and risk level fields, and these filters can prove very useful before you start with Text Execution.
Sorting and re-ranking in Test Execution by Risk level is very important during the Risk-Based Testing process, so the tester can have a clear picture and focus on the tests that are ranked higher by Risk level.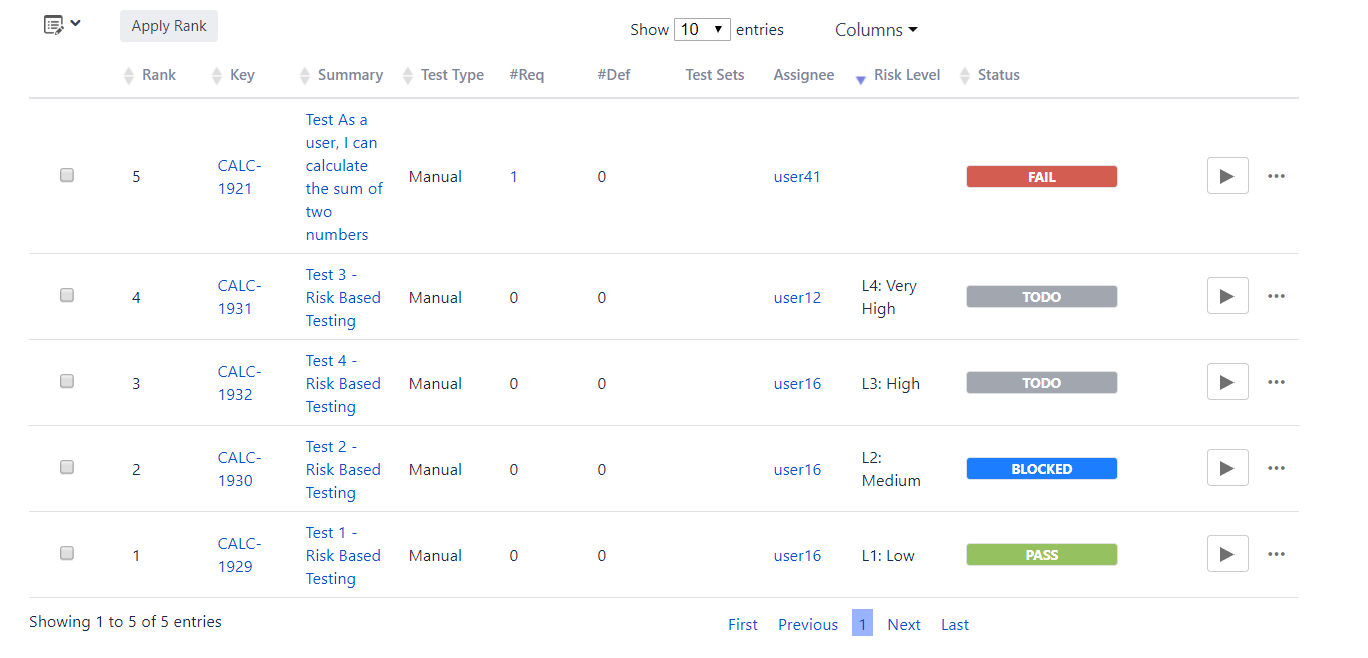
(Tests in Test Execution are ordered by Risk level)
Overall Requirement Coverage Gadget:
This gadget offers you a detailed report and groups your requirements by the related field for Risk-Based Testing such as Risk Level. The only restriction with this gadget is that Overall Requirement Coverage gadget works only on Project level so you need to select Project first and you are not able to use all your saved filters if you have them. By clicking on any Risk level, you will be able to see all tests that have that risk level.
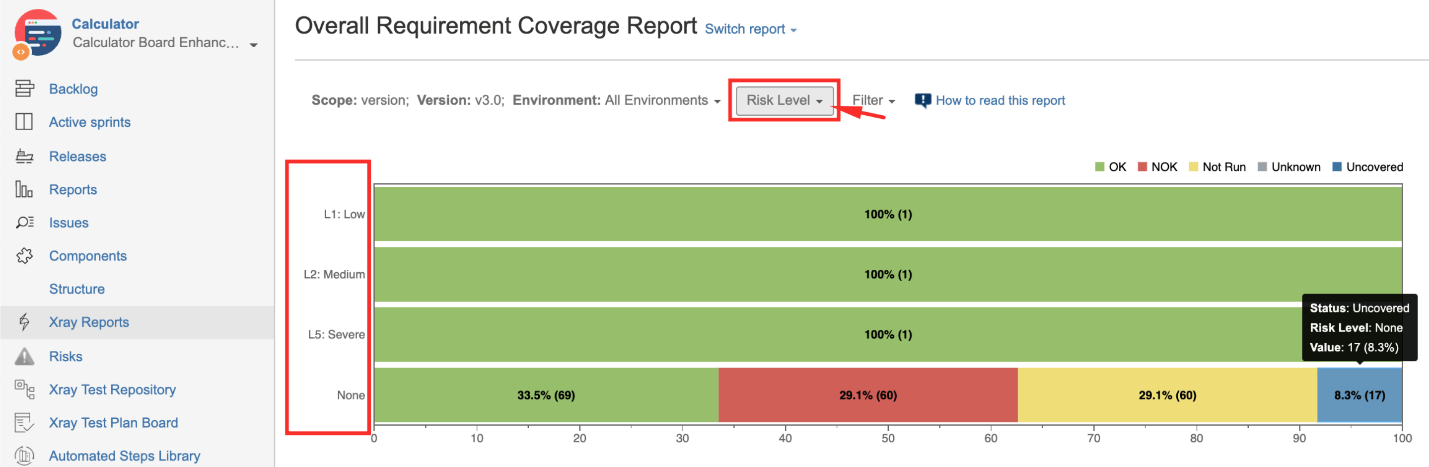
(Overall Requirement Coverage Gadget)
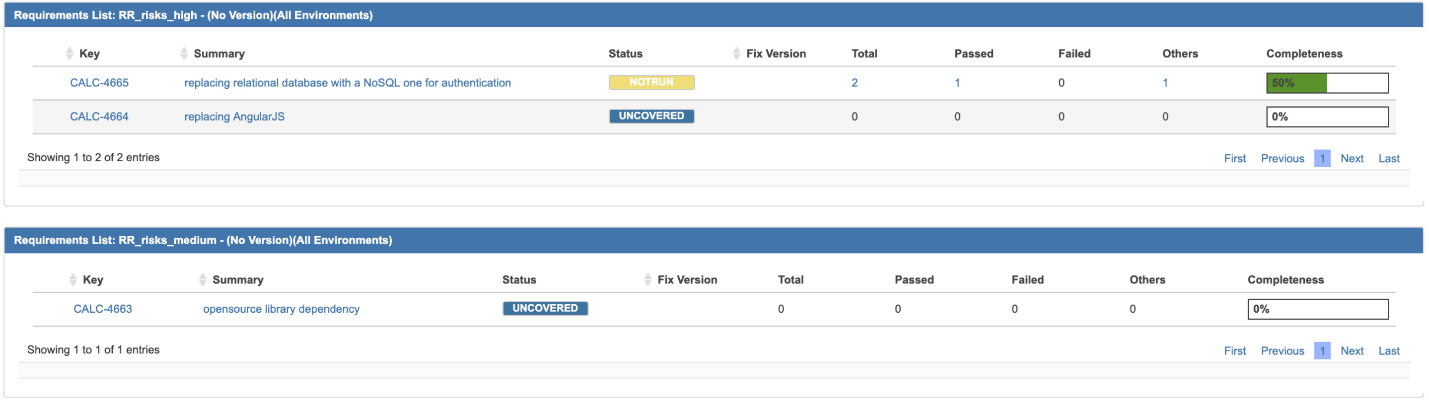
Requirements List gadget:
The Requirements List gadget shows you information about the coverage status, completeness, as well as information about the passed/failed tests of requirements that have a certain risk level. This gadget does not have the option for grouping, so you will need to instantiate it as many times as you have instances, and configure each instance with a different filter for a certain risk level.

Configuration for Requirements List gadget
Benefits of Risk-Based Testing:
When there is never enough time to test everything or the testing is done at the end of the project, in such circumstances, we must have compromises about testing and we should know where to focus. Risk-Based Testing helps us to focus on tasks based on Risk level. One of the many benefits of RBT is that you have effectively organized testing efforts, and even more the priority level of the risk items is rated depending on the intensity. This gives you a chance to associate the risks with appropriate testing activities. As far as the execution order of tests is concerned, they are executed according to the risk priority order.
Another benefit is the risk monitoring process. The risk monitoring enables you to have information and keep track of all the identified risks and furthermore to reduce the impacts of residual risks.
With RBT you can improve your software and product quality by having all of the critical functions of the application tested. And running the tests according to the risk order enables discovering of defects in severity order. In addition, by having the risks continuously monitored, you will always know the project status and its quality.
RBT also improves customer satisfaction because it always provides good reporting and progress tracking. The test reporting is always done in a language that all stakeholders understand. RBT also empowers early detection of problem areas and taking appropriate preventive activities.
And finally, it gives more focus on the risks of the business project instead of the functionality of the information system.
These are only a few of the lists of benefits that can be achieved with Risk-Based Testing. Using Xray for RBT is really good, not just because it is JIRA native, but also because it is the number one test management system, which promotes visibility and transparency among testers, developers and product owners.
Resources: https://www.getxray.app/blog/how-to-use-xray-for-risk-based-testing/