
Introduction
Our main job as QA engineers is to ensure that the application under test is secure, fast, stable, and meets the business requirements. In today’s world, the focus is mainly on WEB applications. As we know with today’s technology, we can open a WEB application on different browsers such as Chrome, Firefox, Edge, and on different platforms such as Windows, Linux, MacOS, Android, iOS. As QA engineers, we need to ensure that the application works as expected on this variety of devices and platforms. To achieve this, we need to create automated tests that will run on different browsers and different platforms.
In this article, we will explain the steps of configuring our already developed tests to be executed on Chrome browser on real Android device (not emulator). To execute our tests, we will use SauceLabs devices. Our tests will be developed using Robot Framework, SeleniumLibrary for Robot Framework, and Chrome web driver.
SauceLabs is a cloud-hosted platform for executing automated WEB and Mobile application tests. It provides a lot of different options for executing our tests. We can select from a list of different browsers, different browser versions resolutions, and OS versions for our desktop WEB application testing, as well as different real mobile devices with different Android or iOS versions and different models. We can also use mobile virtual devices with different manufacturers, device types, and OS versions.
In this article, we will stick to the real Android devices that we are going to use for our tests. For the purpose of this article, we are going to use a free trial SauceLabs account that includes only 1 real Android device, Samsung Galaxy S9 with Android version 9. (It is the only included Android device for the free trial account). More info about SauceLabs can be found on the following link: https://saucelabs.com/.
Robot Framework Tests Structure
We have already developed tests in Robot Framework using the SeleniumLibrary and Chrome web driver. We have also created POM (Page Object Model) for faster development and easier maintenance of our tests.
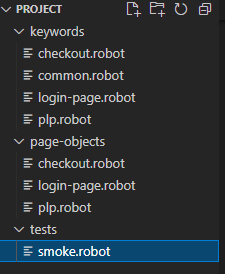
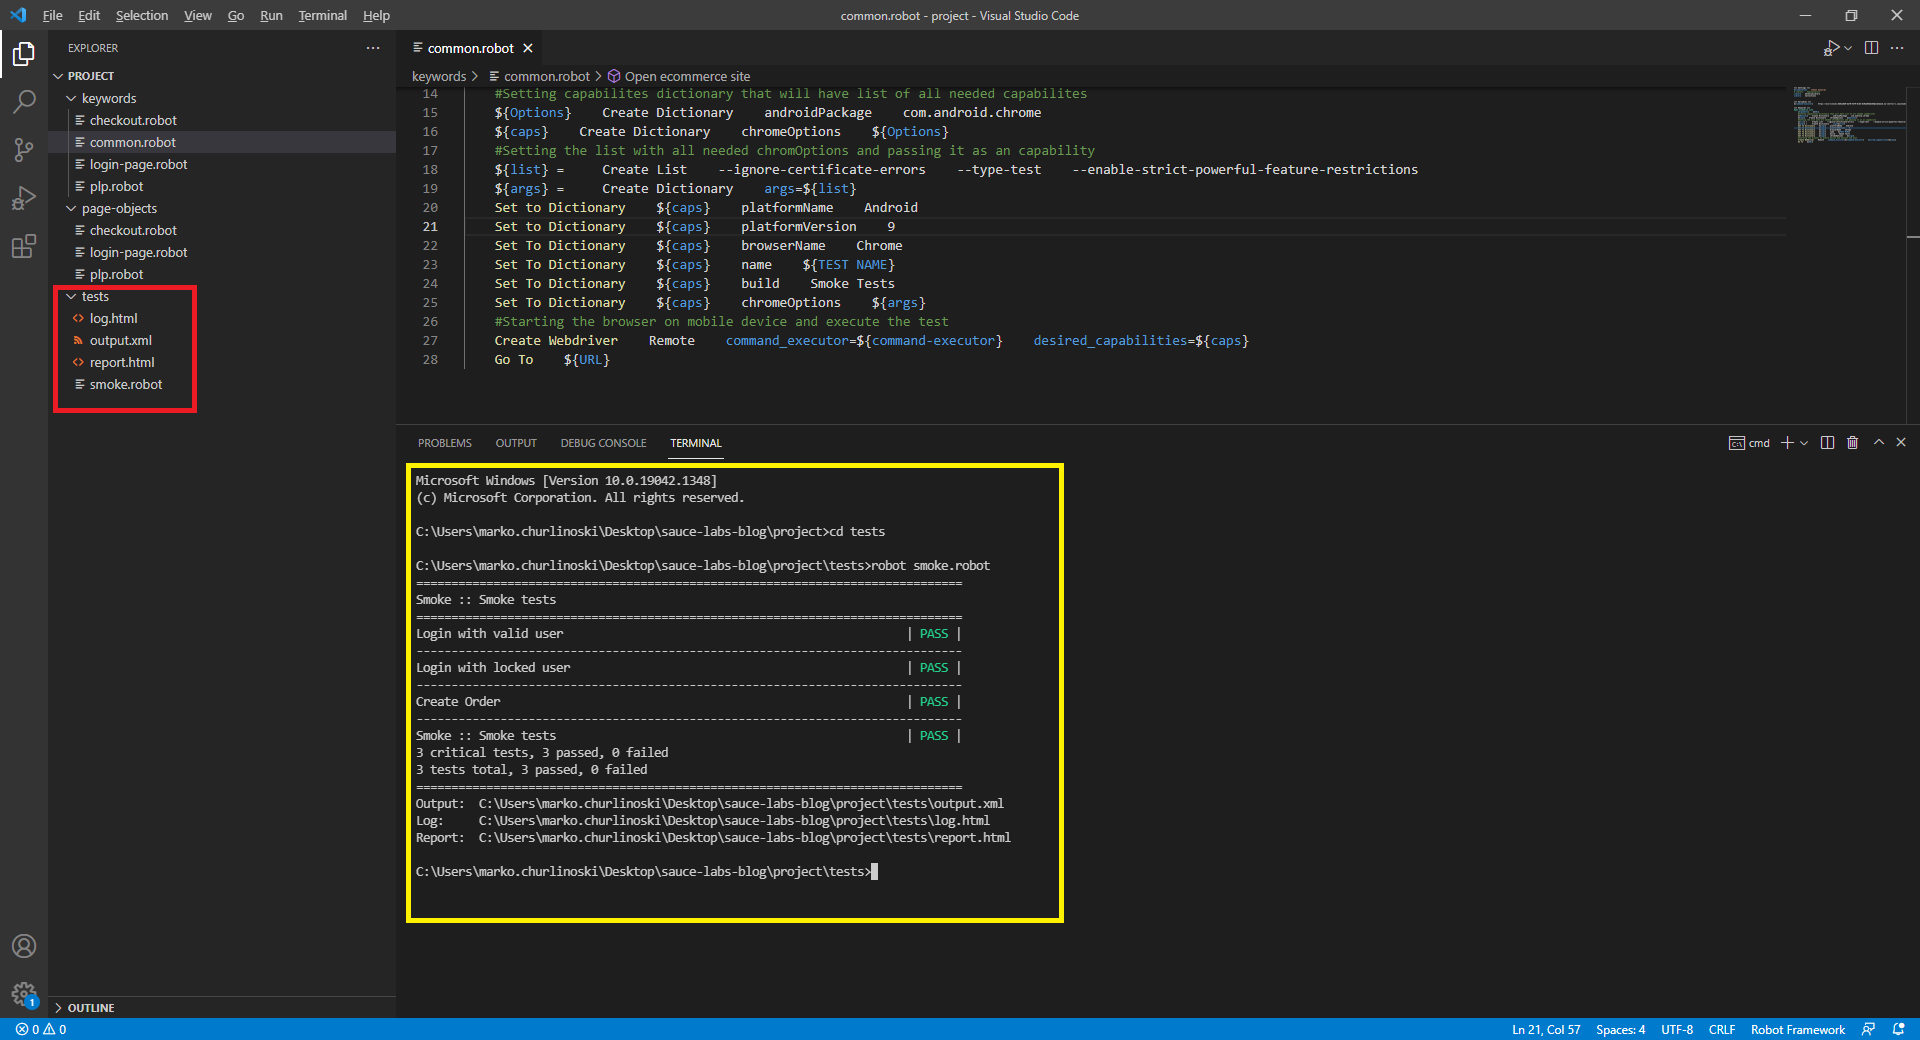
As we can see in picture 1, we have 3 folders: keywords, page-objects, and tests.
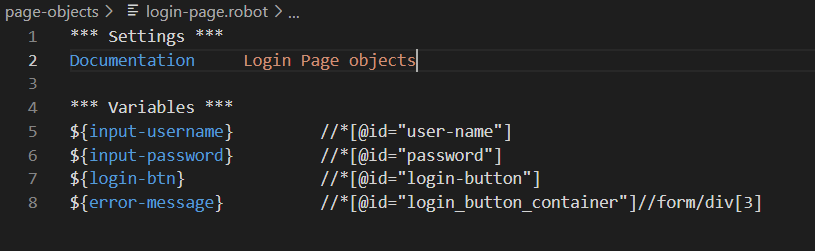
In the page-objects we keep all objects of a single page. For example on the login-page.robot file we have all objects on the login page like username input field, password input field, login button, etc. The example of the code is represented in picture 2.
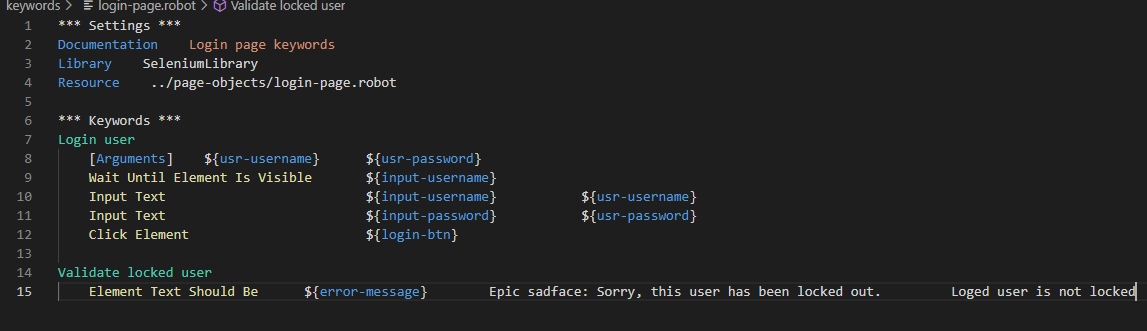
In the keywords folder, we have files that contain keywords for functionalities on that page using the already created objects. For example, in the login-page.robot file in the keywords folder we have keywords for login of the already created user (Login User) and validating a message for locked user that is displayed in the same page (Validate locked user). We also used the SeleniumLibrary in this file and imported the already created objects. The code example for this file is represented in picture 3.
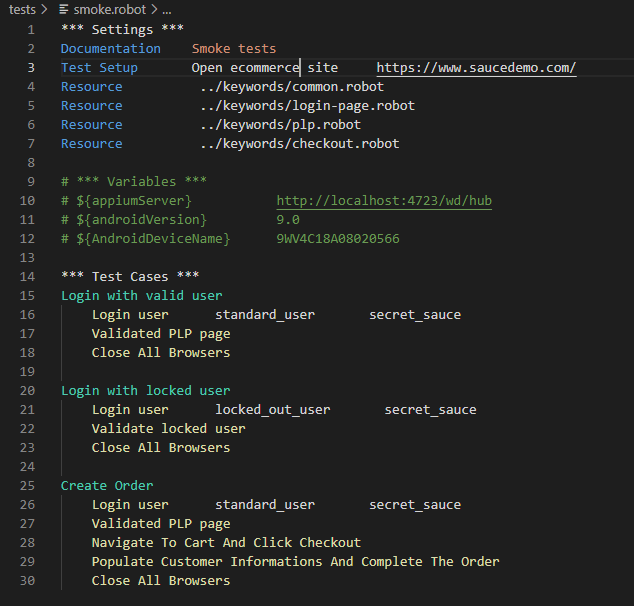
And finally, the test folder where we are creating the tests using the already generated objects and keywords. In our case, we have created one test suite, smoke.robot that contains 3 test cases. In this file, we import all the files that contain the keywords that we are going to use in our tests. In picture 4 we have an example of a file that contains tests.
Configuring our test to run on SauceLabs
As we can see in picture 4, we have a keyword Open ecommerce site that is running as Test Setup meaning it runs before every test starts. This keyword is located in the keywords folder in the common.robot file.
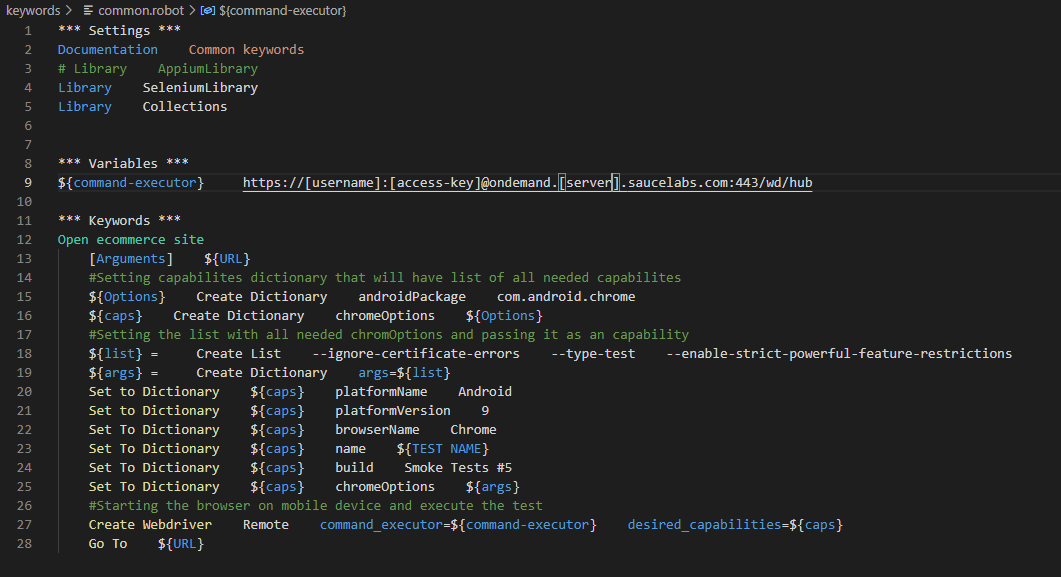
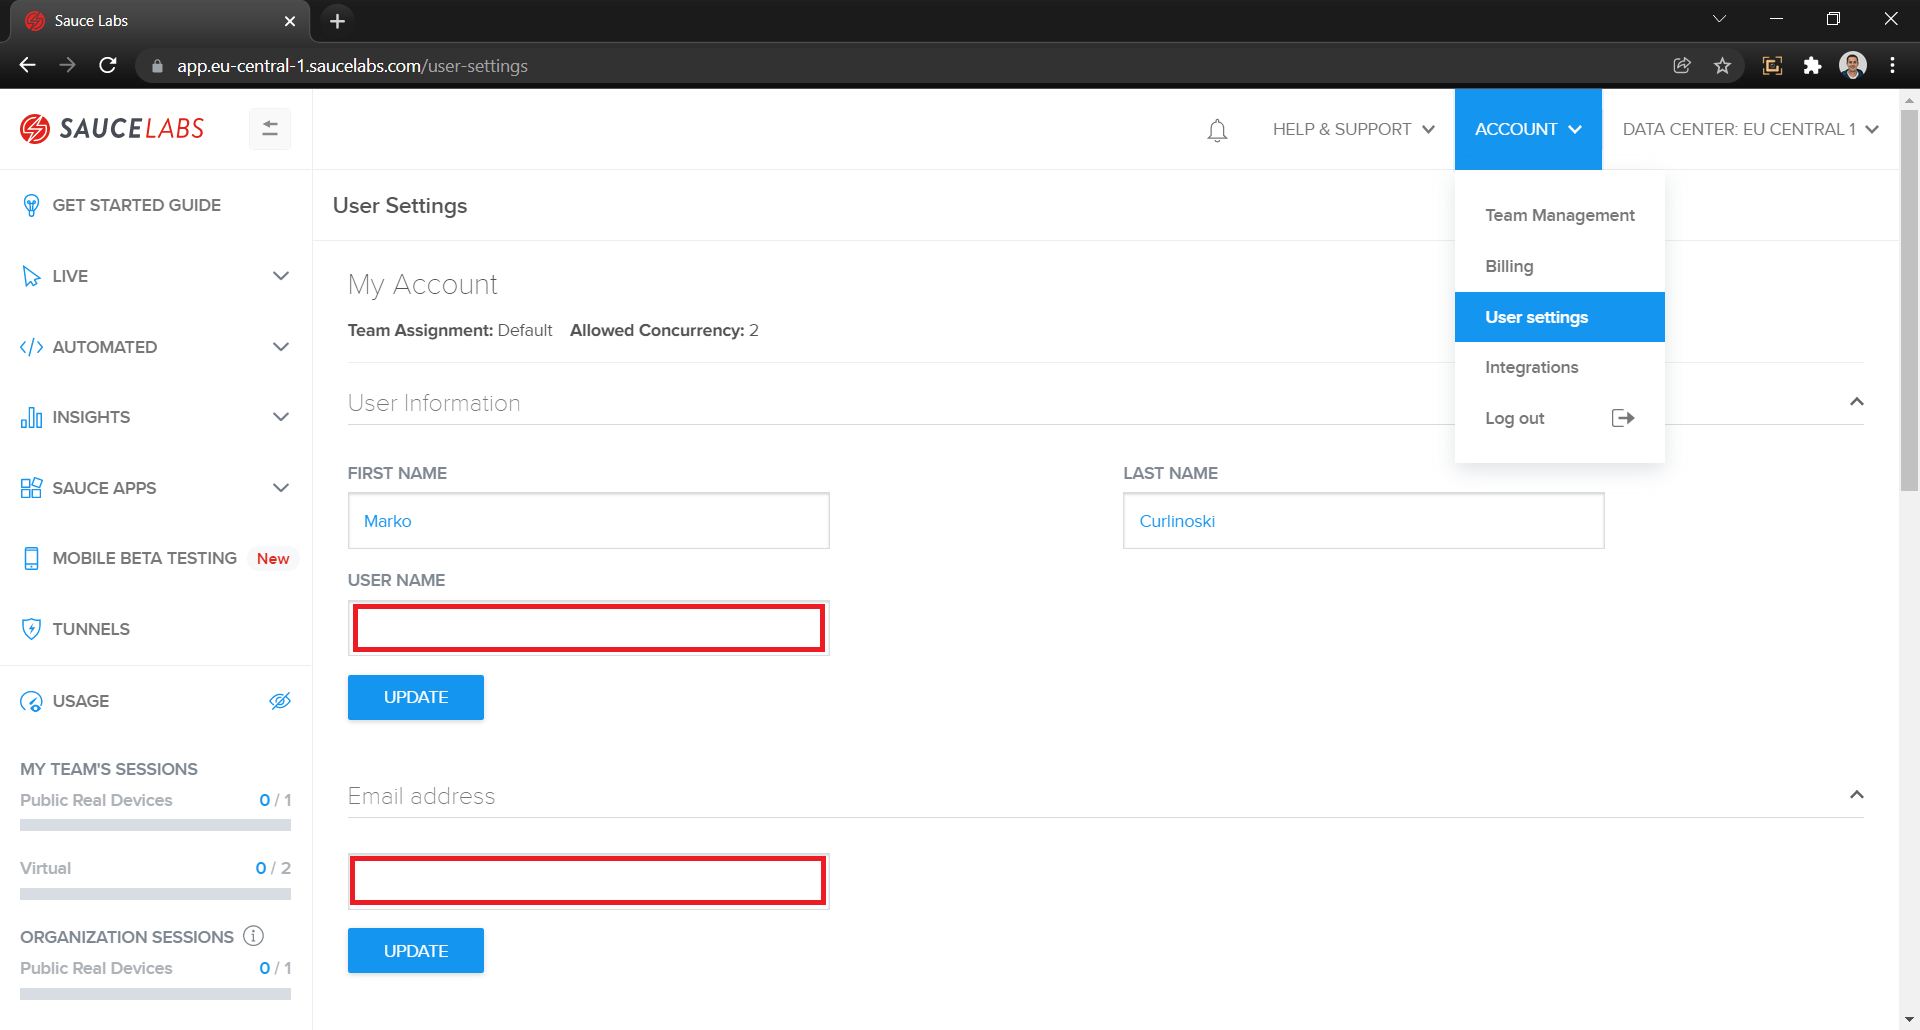
In this keyword, we create the entire configuration for connecting to the SauceLabs device and starting the browser. At the beginning of the file, we have a variable command-executor that is actually URL for connecting to a remote Selenium server. In order to get this URL, we should log in into our SauceLabs account, click on the account drop-down on the rights side of the screen, and select the user settings option (Picture 6).
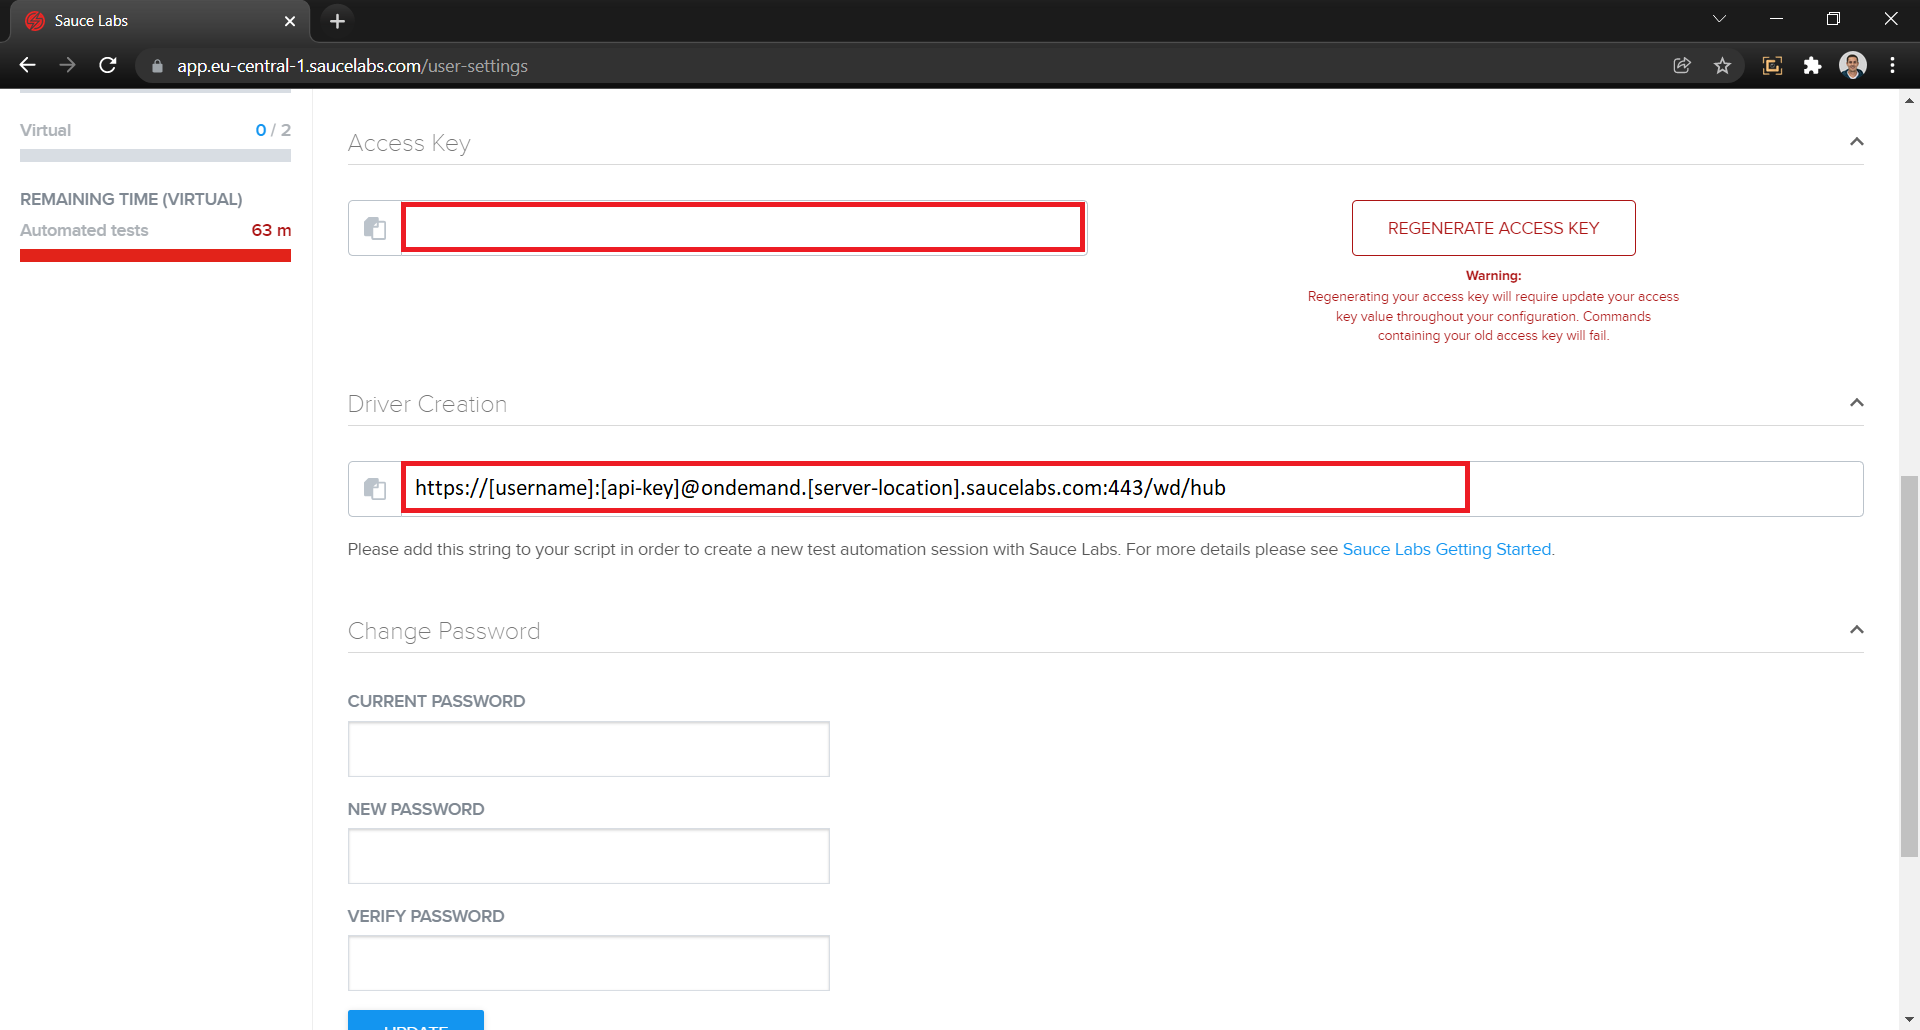
On this page, we should scroll a little bit and find the Driver Creation section. In this section, we can find the command-executor URL that we need. This is represented in picture 7.
From now on, the code is pretty much just a template. In our keyword, we receive one argument URL, which represents the URL we want to open in Chrome on our real Android device.
The rest of the code is a configuration that we create and pass to the command executer. On line 15, we are creating dictionary (object) with key: androidPackage and value: com.andorid.chrome. This command is telling our command executor (in our case SauceLabs) to open the chrome application on an Android device.
${Options} Create Dictionary androidPackage com.android.chromeOn line 16 we create capabilities that we will pass as desired capabilities when creating the WebDriver. The first parameter in the capabilities we are passing a dictionary with key: chromeOptions and value: the dictionary Options that we already created in the previous line.
${caps} Create Dictionary chromeOptions ${Options}Lines 18, 19, and 25 are optional and are not required. In these lines, we are adding a list of arguments we want to pass to the Chrome WebDriver. In our case, we are passing a few arguments that should ignore the SSL certificates error and disable location pop up on the opened Chrome browser.
${list} = Create List --ignore-certificate-errors --type-test --enable-strict-powerful-feature-restrictions
${args} = Create Dictionary args=${list}On line 25, we are just passing the already created list of arguments to the chromeOptions key.
Set To Dictionary ${caps} chromeOptions ${args}From line 20 to line 24 we are passing capabilities required by SauceLabs. The first parameter is the platformName that defines the wanted platform for executing our commands, in our case that is Android. The second parameter is platformVersion that defines the Android version we want to use for our tests, in our case 9. The third parameter is browserName which defines the browser we want to use for executing our tests, Chrome. name is the parameter that defines the test case name that is being executed. Also, we are providing the build parameter that is giving the name of the test suite run. The last 2 parameters (name and build) are very important for SauceLabs because they are represented in the SauceLabs dashboard and we can easily navigate through the test cases and builds in order to analyze our test executions.
Set to Dictionary    ${caps}    platformName    Android
Set to Dictionary    ${caps}    platformVersion    9
Set To Dictionary    ${caps}    browserName    Chrome
Set To Dictionary    ${caps}    name    ${TEST NAME}
Set To Dictionary    ${caps}    build    Smoke Tests
Set To Dictionary    ${caps}    chromeOptions    ${args}
With this configuration, SauceLabs will run our tests on the first available Android device with Android version 9. In my case, because we use a free trial account, the tests will be executed on the only available device for free trial accounts, Samsung Galaxy S9 with Android version 9.
After we create our configuration and write our tests, we can simply run our tests by executing the following command from the tests folder:
robot smoke.robot
After we run this command, the test execution will start on a real Android device on SauceLabs and after the tests are finished we will have the test results in our SauceLabs dashboard, our console, and HTML and XML formatted results in our tests folder (Picture 8).
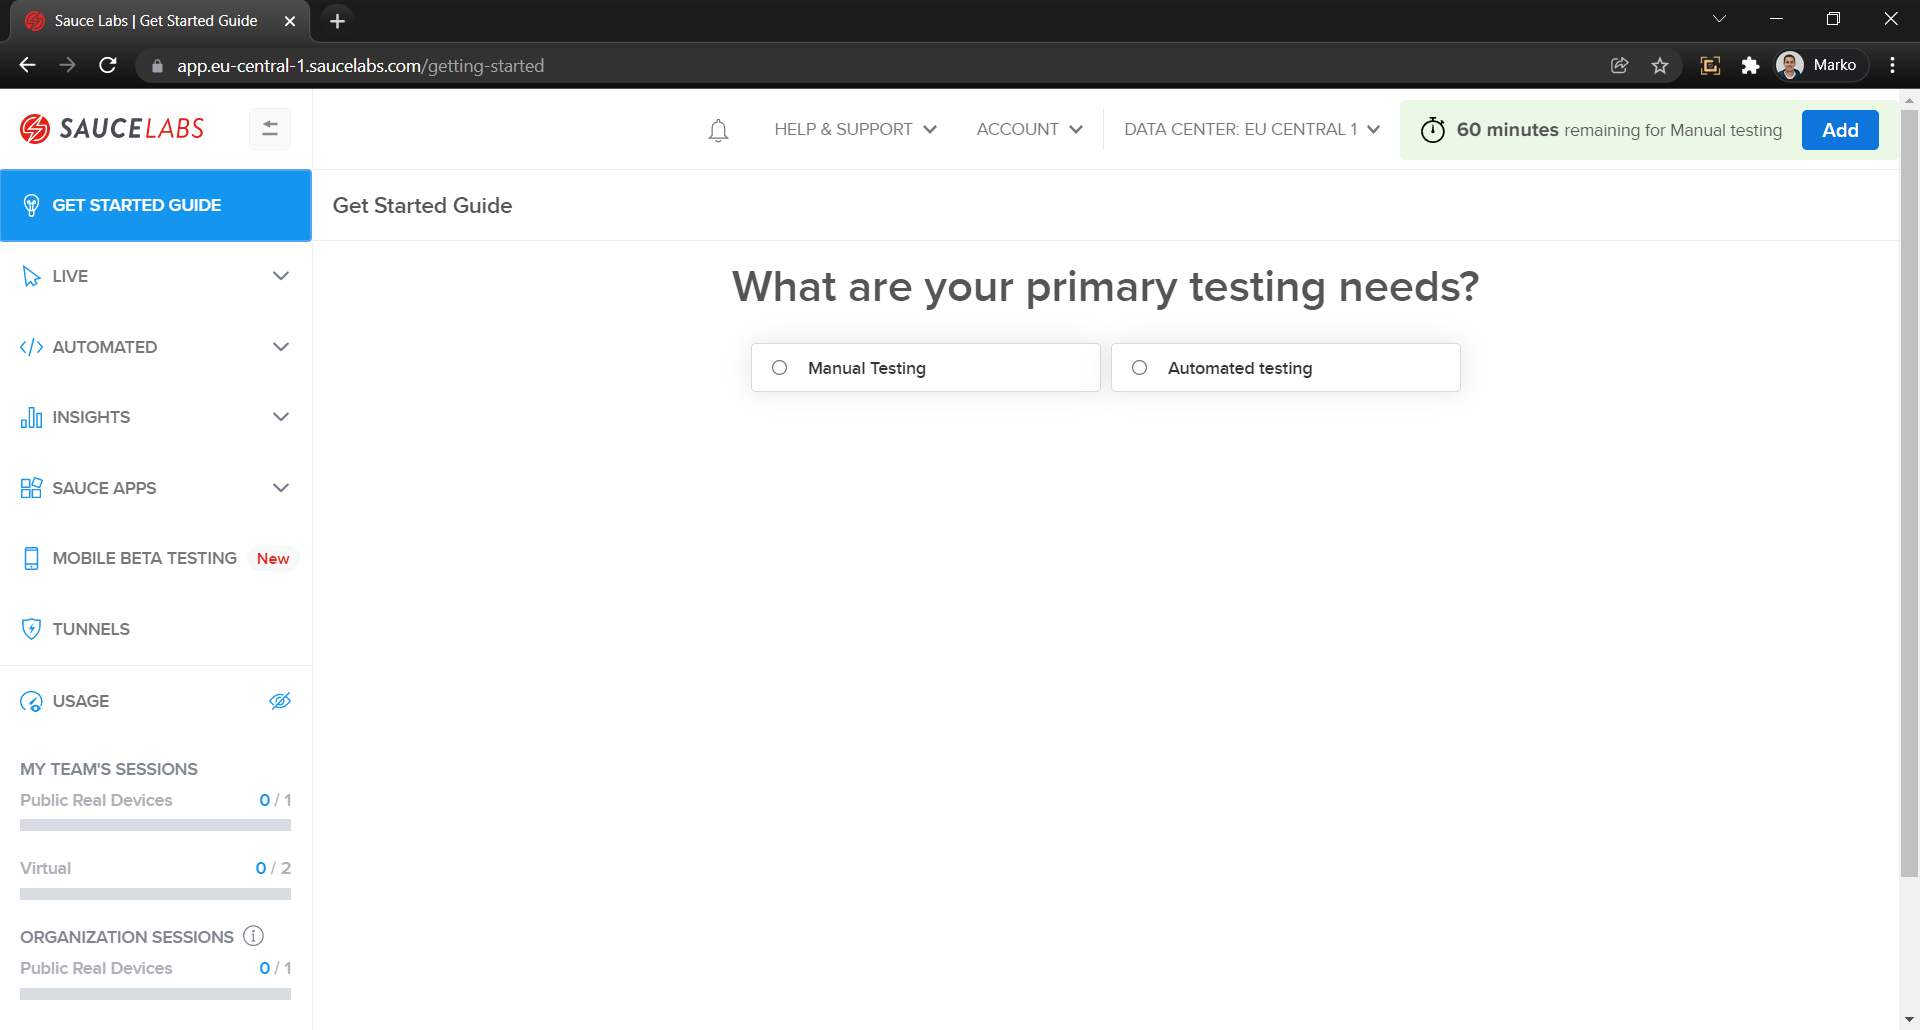
SauceLabs Dashboard
After we login in the SauceLabs platform, we are redirected to the SauceLabs dashboard where we have a lot of options (Picture 9).
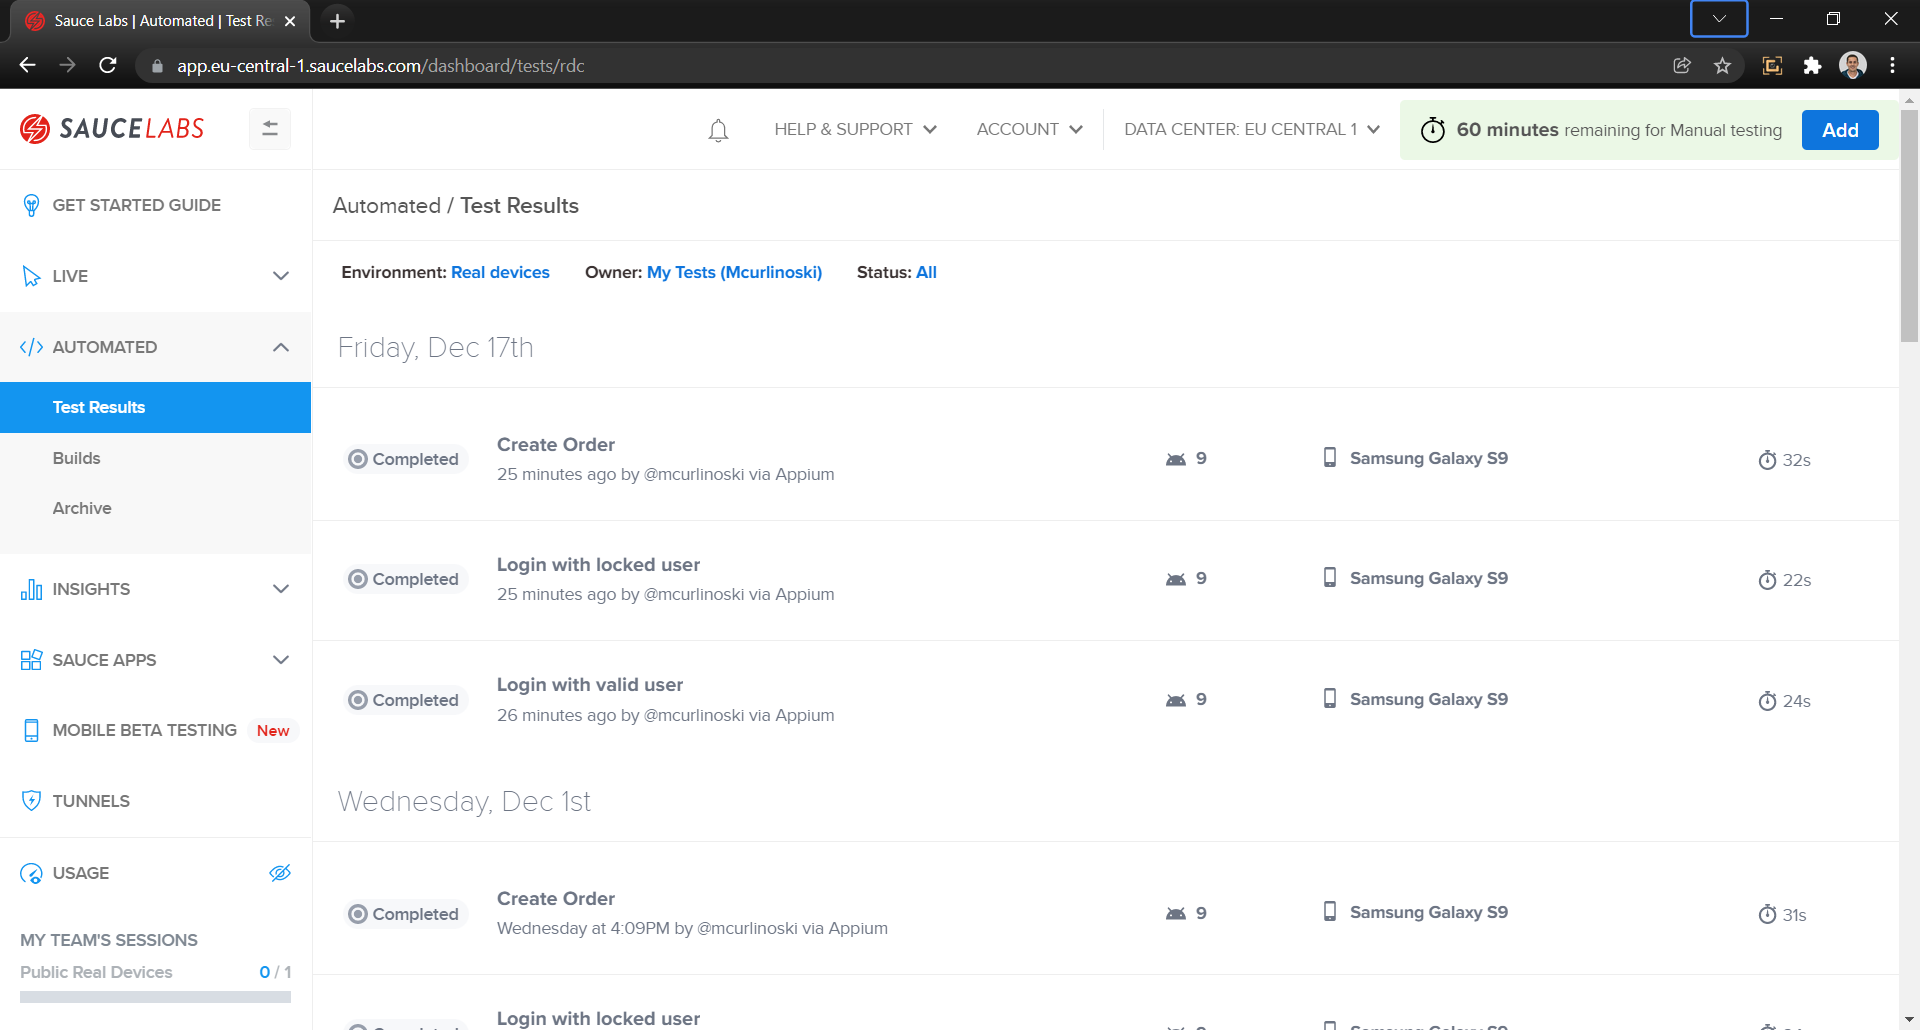
In the SauceLabs dashboard on the left menu, we should click on the Automated dropdown and then select the test results option to see our test results. Here we have a list of all test executions with details like status, test name, the time of execution, platform version, the device that was used for execution, and duration.
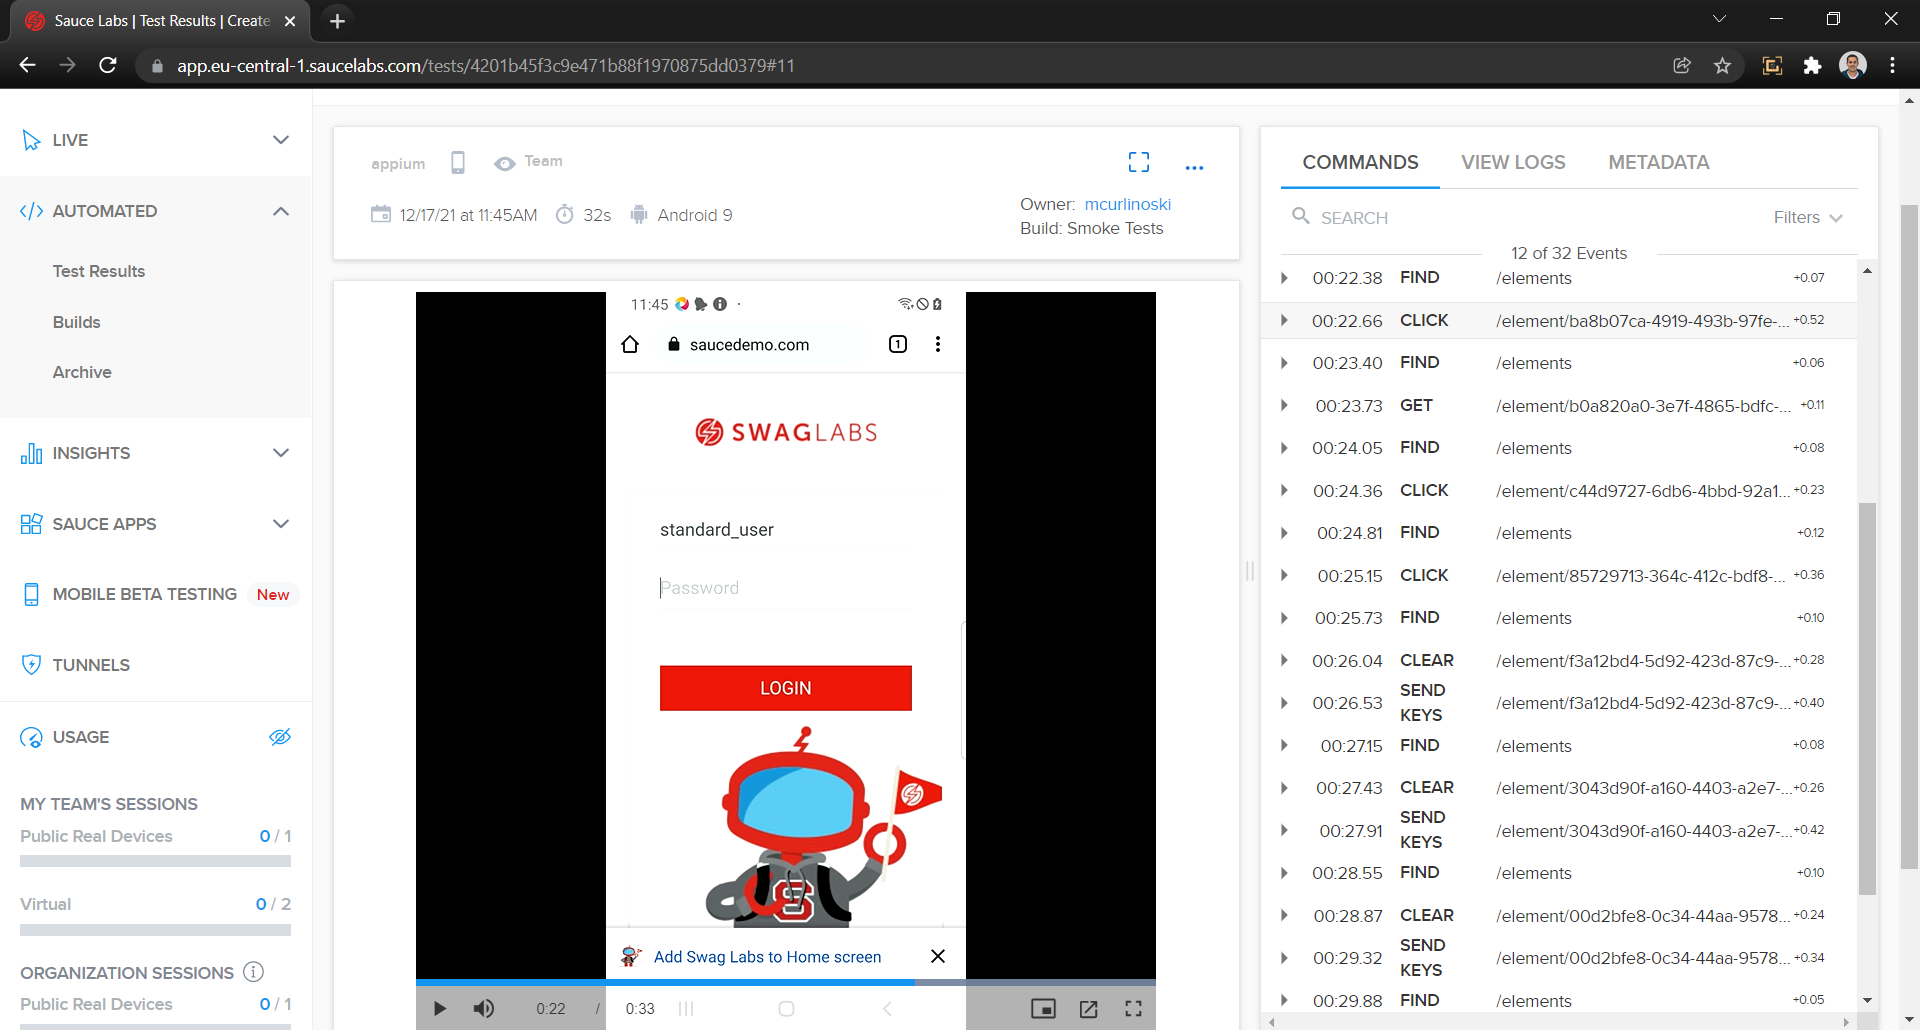
If we click on any of the test executions we will be redirected to a page with even more details for a single test including the time of execution, executor username, which build it belongs to, all received commands by SauceLabs, logs, metadata, and video of the execution of the test that will help us to debug our tests faster and easier.
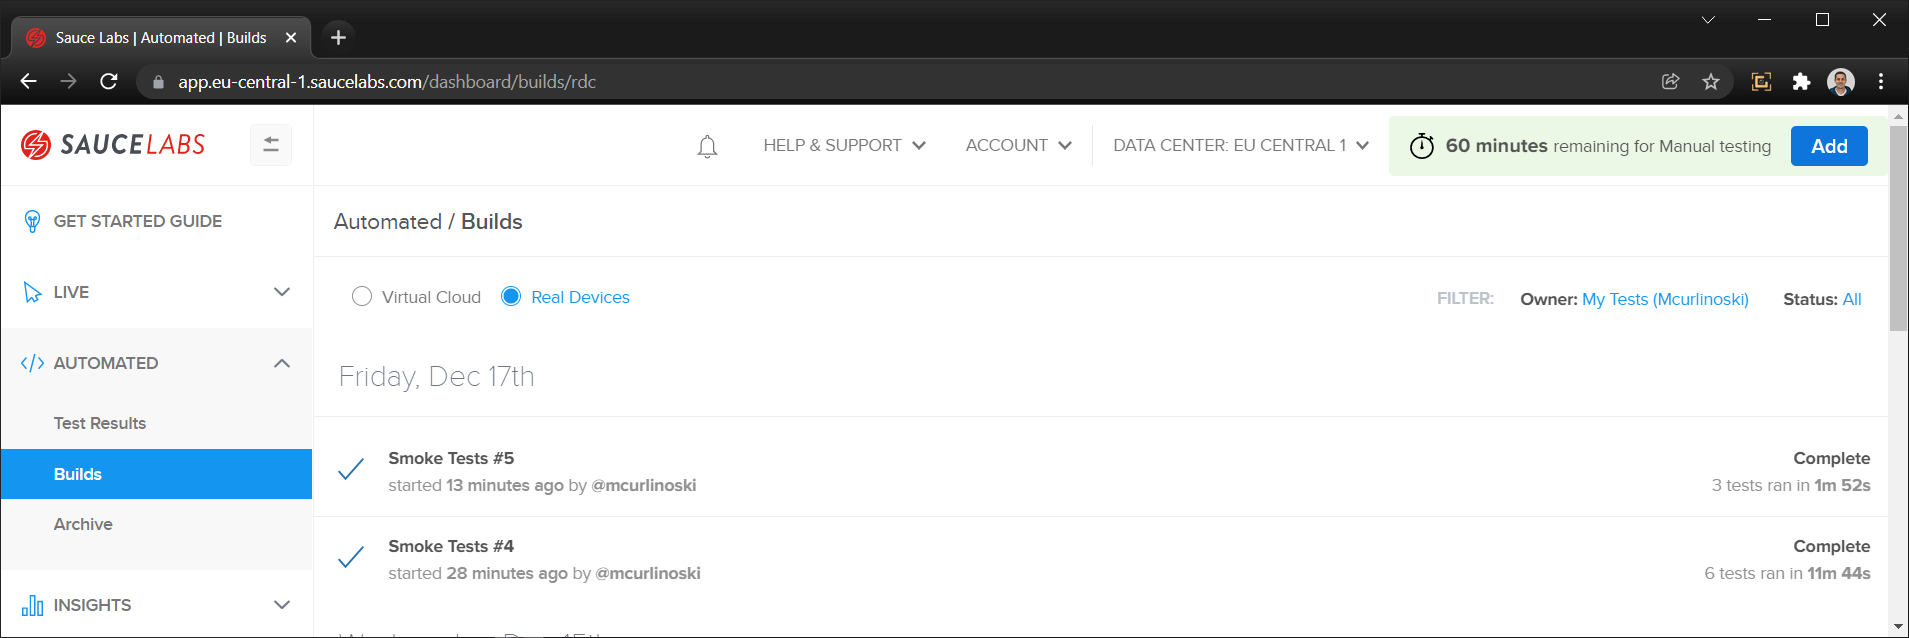
If we select Builds from the Automated dropdown, we will receive all the builds that have been executed with a few details like how many test cases are executed under the same build name, last started test, duration of the suite execution, etc.
Conclusion
According to the global studies from 2020, 68.1% of the internet traffic is coming from mobile devices (phones and tablets) and 31.9% is generated from computers (desktop and laptop) so we can conclude that the digital landscape is constantly evolving towards a mobile-centric ecosystem.
Because of this, businesses need to ensure that they incorporate both mobile and web app testing strategies with equal importance for mobile and desktop sites in order to maintain competitive edge in the market.
We have a lot of different manufacturers and operating system available for mobile devices making this type of testing very expensive if we create our own devices lab. Therefore, SauceLabs is a very good cloud-based platform with a lot of devices from different manufacturers and different operation systems that can help us test our web application very fast and easy on multiple different platforms, devices and operating systems.