

When building an enterprise eCommerce solution, one of the most important decisions we need to make is the payment gateway that will be used in our application. Even though we can use multiple gateways, we do not suggest that practice especially when small businesses are concerned.
PayPal offers a secure and fast way of paying online. Secure means that whether you are paying bills, sending money, or making a purchase, PayPal works hard to keep your financial information secure. Fast in terms that you don’t need to enter all your financial information every time you shop.
PayPal has a longstanding stranglehold as the most used payment gateway on the market.

In this blog post, we are going to show how to integrate PayPal as a payment processing mechanism in our Laravel application.
Initial installation
As we previously mentioned, we are going to make a Laravel application. For that purpose, we are going to create a new Laravel project (using Homestead). For more details check the official documentation.
Since Laravel 6, the front-end scaffolding isn’t installed by default, in our case we need to install it by running the following composer command:
composer require laravel/ui –dev
Also, we want the authentication scaffolding in our project, so we run:
php artisan ui vue –auth
PayPal provides REST server SDKs for several programming languages and each includes integration and configuration information and samples.
Using an SDK over a direct integration allows the SDK to handle authentication for you. The SDK obtains your OAuth 2.0 access token and automatically reflects any Orders and Payments API updates.
We are going to install PHP PayPal SDK using composer:
composer require paypal/rest-api-sdk-php
Setting Up the Environment
PayPal offers a sandbox mode for developers to make the testing really easy and safe before going live. To create a sandbox account, we need to log in with our regular PayPal account and browse the sandbox section in the developer documentation.
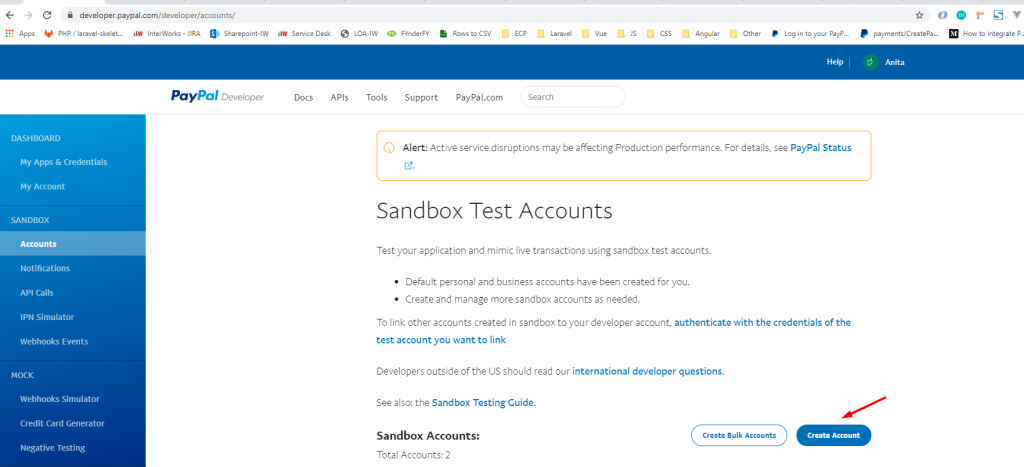
For testing purposes in our project, I’ve already created a new application named Laravel using the default sandbox business account, from which we are going to use the client ID and secret to make the connection from the Laravel application.
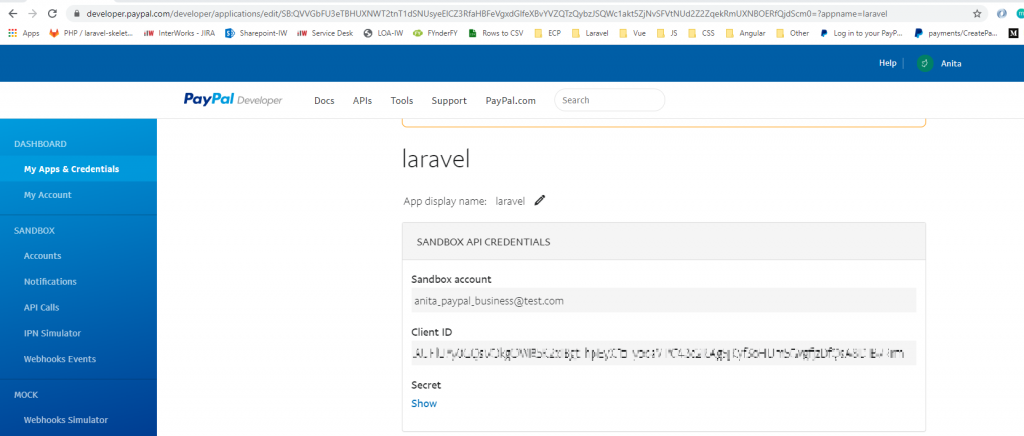
Next, we are going to add the PayPal credentials in .env file in the root project directory in the following manner:
PAYPAL_CLIENT_ID = “laravel_app_client_id”
PAYPAL_SECRET = “laravel_app_secret”
PAYPAL_MODE = sandbox
We are going to create a PayPal config file that will hold the PayPal settings that we are going to use later in the coding process:

Product selection
To be able to show the working process with PayPal, I’ve simulated a segment from the eCommerce site. We are not going to get into detail about the front-end coding but more on the payment process of the selected items.
To create the page, we used:
- The home.blade.php (initiated with the auth scaffolding) is the landing page for listing the products
- Bootstrap for a better visual representation of the product items
- Vue.js for checkout simulation and the purchase functionality
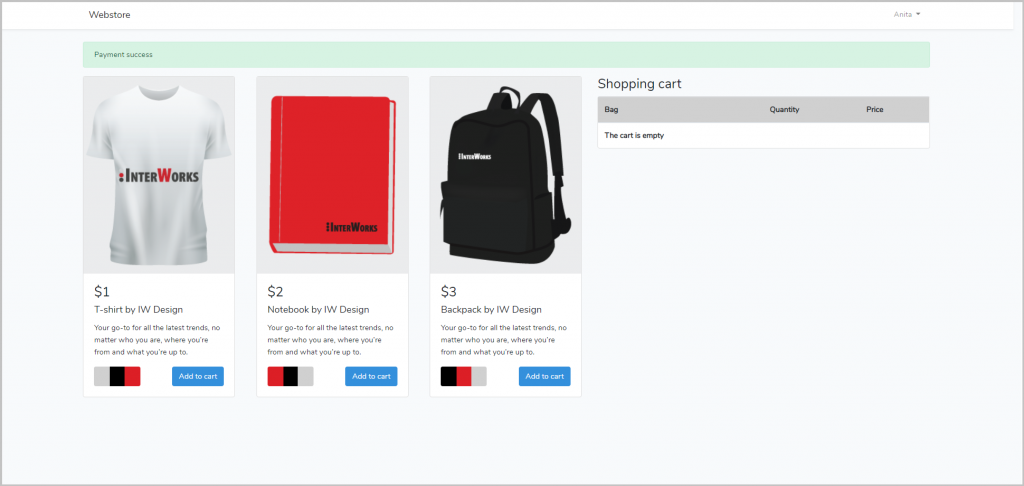
On the page are shown three products with the ability to change three colors for each item. On the right side is displayed the cart which is empty at the beginning of our shopping process. We can add each item multiple times if we want and the quantity number together with the price is recalculated accordingly. After we are satisfied with our product selection then we proceed to the checkout process by clicking on the Purchase button which is shown together with the total amount to be paid.
Checkout form
A simple form is used for initiating the payment process. The payment form has the following structure:
- The token sent with the outgoing request
– to protect our application from cross-site request forgery (CSRF) attacks - The input = items is used to send the selected products
- The input = total is used to send the total amount in the purchase (we are using USD currency in the example)
- The form is submitted to the corresponding route which is explained in the next section
Routing & Controller
We are going to create a new controller that will catch the request for payment processing and will handle all the integration of our data with PayPal SDK in order to create a new payment with the selected items.
php artisan make:controller PaypalController
Two PayPal routes will be used, one for creating the initial payment (purchaseWithPaypal) and the second (getPaypalPaymentStatus) to catch the callback from the creating process and based on the status of that request either to execute the payment or to return with an error message.
In api.php:
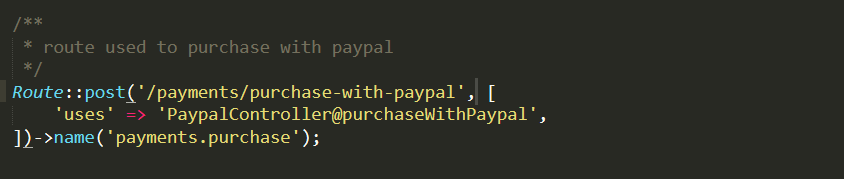
In web.php:

In the constructor of the PaypalController, we are going to create a new valid ApiContext object using the config PayPal settings that were defined previously, to authenticate the call, and to send a unique request ID (that ensures idempotency). The SDK generates a request ID if you do not pass one explicitly.

Now we have set everything that is needed for the payment process to continue. We have the form with the input data from the selection process, the route to handle the payment and we have the ApiContext configured. The next step is to actually create the payment. For that case, we are using the purchaseWithPaypal function which receives the input data.
Validation of the request data should be done both on the front-end and on the back-end part, for example by creating custom request validation rules for the specific input needs. We are going to skip this step in the blog post, but you should never do that in your live project.
In the following picture, you can see the whole functionality together with comments for each PayPal SDK entity that is used for the payment to be created.
After the payment is processed, in the callback method these rules should be satisfied in order for the payment to be executed:
- success == true – this means that the buyer approved the payment
- PayerID should be available
- the token should be set
- paymentId – the ID of the current payment for processing should be available
If the above criteria are fulfilled we can proceed to the final step, execute the payment, and redirect back accordingly.
Purchase flow
In the checkout form section, we stopped at the click on the Purchase button to submit the cart items for processing. Now we will continue with the flow.
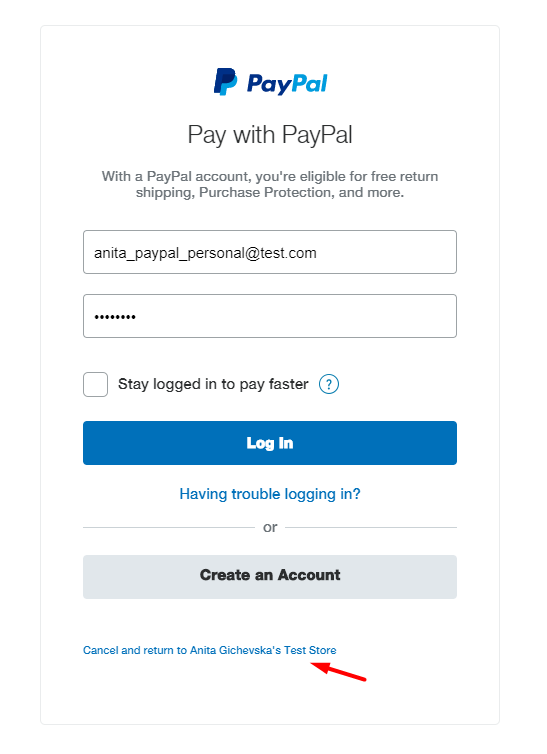
After the submission is made, then the user is redirected to the PayPal login screen, where you need to use your buyer sandbox account to make the purchase. At the bottom of the page is the cancelation link which PayPal creates automatically based on the point of origin and it will redirect to the home page if we choose not to proceed.
If the login is successful then the user is redirected to the PayPal approval screen where we can take the final action in the checkout process – to approve or cancel the payment.
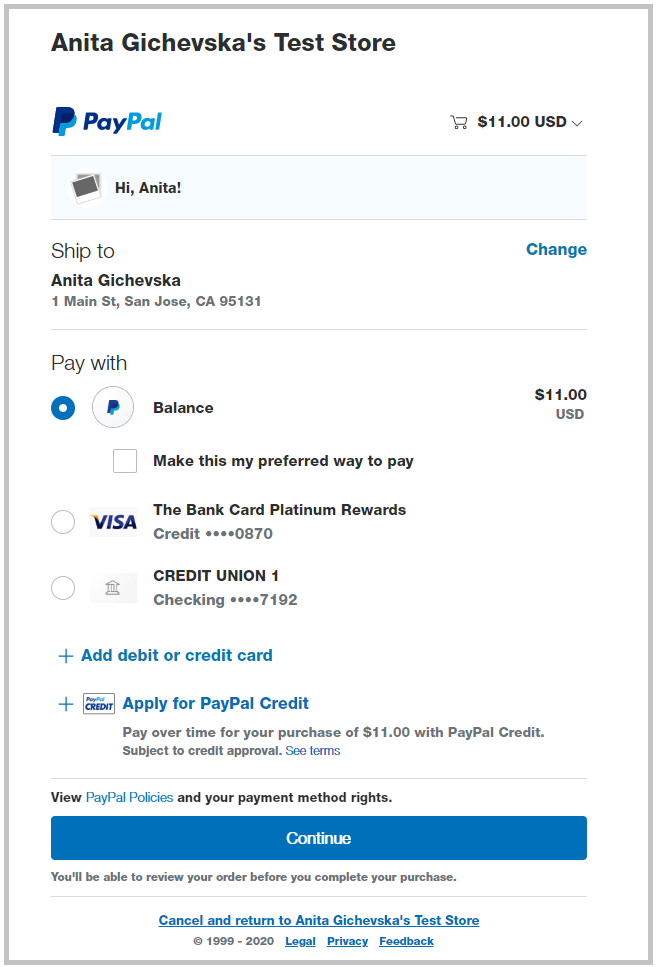
After we approve the payment and the payment is processed completely without any problems we are redirected to the home page (from the beginning of the checkout process) with a success notification to let the user know that the purchase action is completed. For this purpose, I’m using the session messages that were previously stored during the callback function.

To view and confirm that the purchase went through we can log in using the sandbox accounts from the buyer/business perspective and check the balance.
The login can be found here: https://www.sandbox.paypal.com/
Here is what our transaction looks like from a buyer’s perspective:
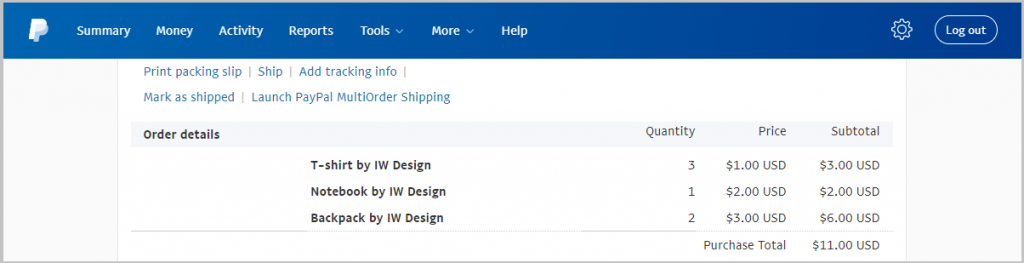
The transaction from the business account perspective is displayed in the following way:
We can see the transaction in more detail where the items are listed together with some other information about the payment.
Final thoughts
There are many reasons why PayPal is widely used. First and foremost, it is a secure way for money transfers. You can see that it was fairly easy to integrate it into our Laravel app. Costs to use the PayPal payment system are minimal. There is no setup fee, monthly fee or monthly minimum to use the payment system. Instead, you pay a small fee per transaction. Also, convenience is key. By simply entering your email address and PayPal password, your customers can purchase items to be sent to their address within seconds.
There are many other payment gateways available, with Stripe taking the lead, but it the end it comes to the pros and cons of each service and to choose what is most appropriate for your business.