
Rapise is the next generation software test automation platform that leverages the power of open, extensible architecture to provide the most rapid and flexible functional testing tool on the market today.
Rapise is ideal for functional GUI testing – both client-server and standalone applications, cross-browser web testing and data-driven testing. Rapise is the ideal testing solution for today’s agile software projects. (Read more about it here: https://www.inflectra.com/Company/Article/rapise-automated-functional-testing-system-release-100.aspx)
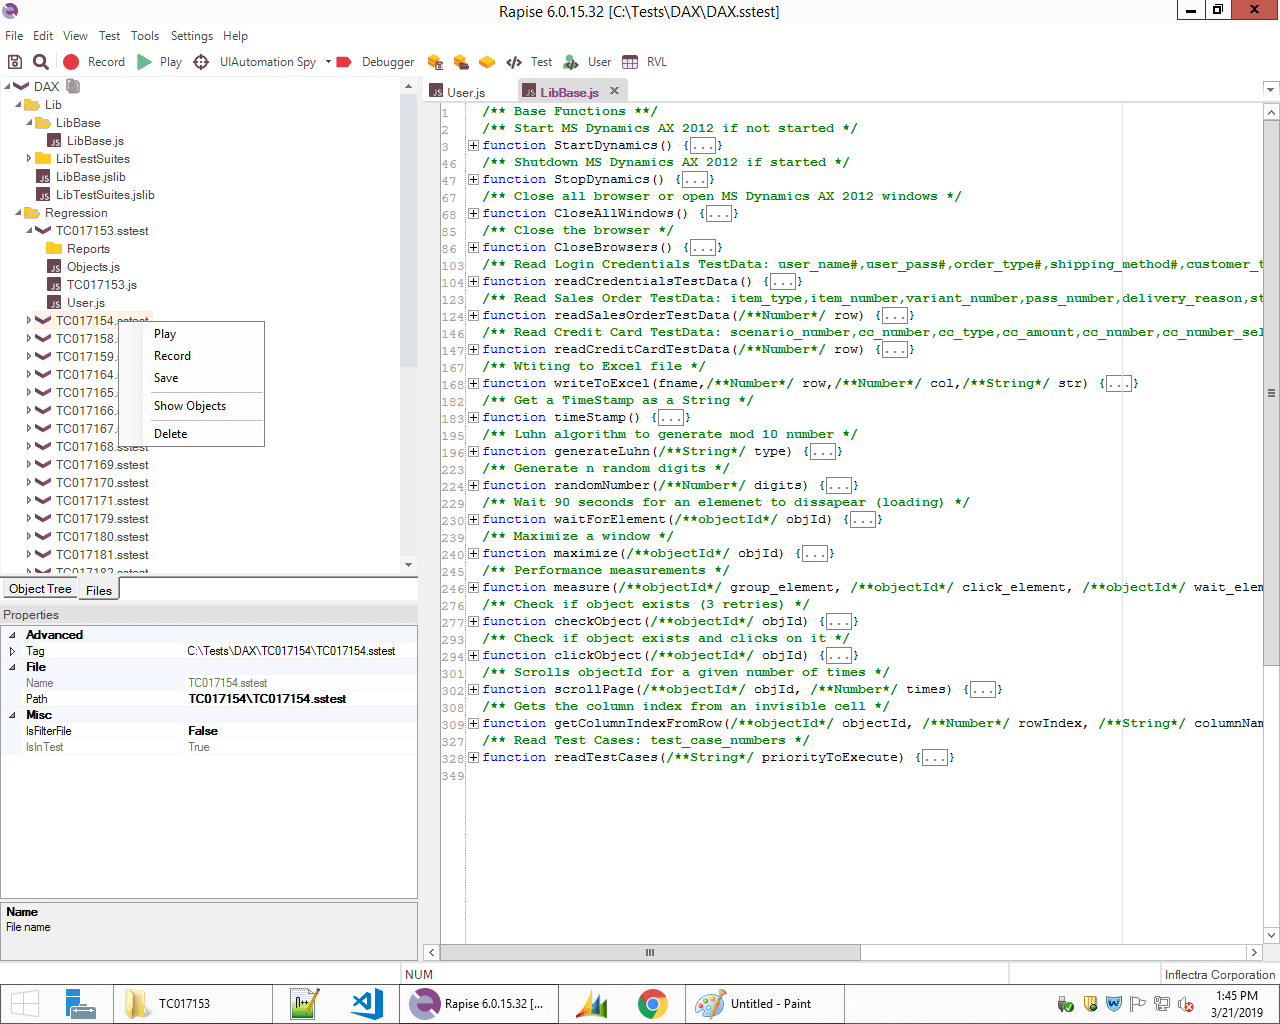
Basic Interface
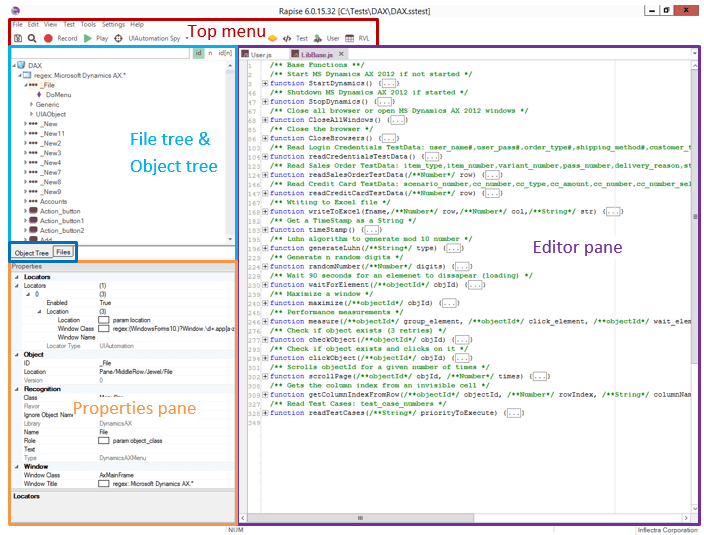
Top menu – basic controls and controls for playback, recording, etc. are on top.
Object tree/File tree – recorded objects/file structure (Switchable) and Properties pane (below) are on the left side.
Editor pane/Output pane– All files are opened, edited here and all reports are displayed on the right side. The output pane is usually hidden, but it expands if the output data or warning/error needs to be displayed (it can be expanded with: Ctrl+Shift+O).
Framework introduction
The purpose of this framework is end-to-end test automation of Microsoft Dynamix AX, but it involves a mix of both Web applications and MS Dynamix AX desktop application.
Creating a new project
To create a new project in Rapise, we select File -> New Test.
We get the Create New Test dialog.

Rapise creates the basic test structure, which we’ll expand as the project structure.

Intro to tests and test suites
Rapise supports creating sub-tests and sub-folders inside the main test project.
- Sub-folders are actually Test Sets (a name for a Test Suite)
- Sub-tests are actually the Test Cases
This is useful if we want to create multiple test sets or test cases (but use the same objects, user functions, or both) for a single application.
Rapise also supports User Libraries that contain common functions that can be used across all sub-tests.
Folder structure
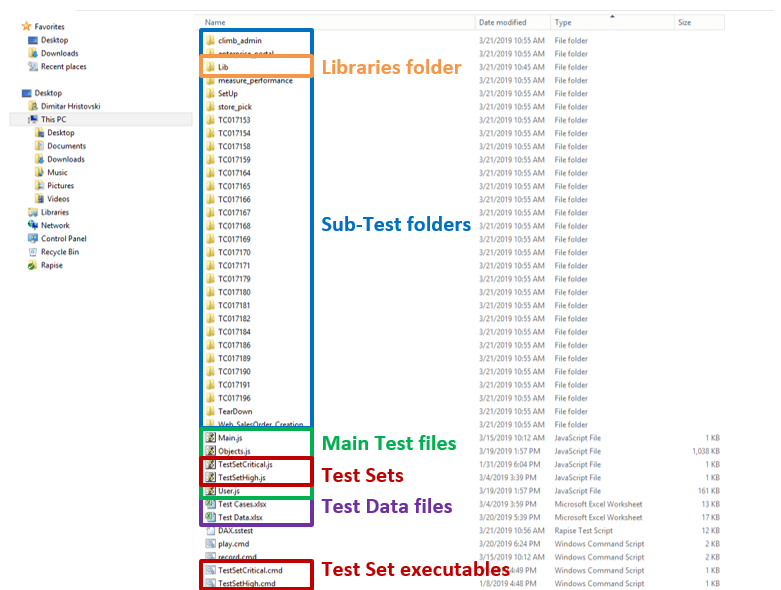
All files are in sub-folders of the main project folder (color-coded in the future text): libraries, sub-test folders, main files, imported files, test sets, etc.
Rapise structure
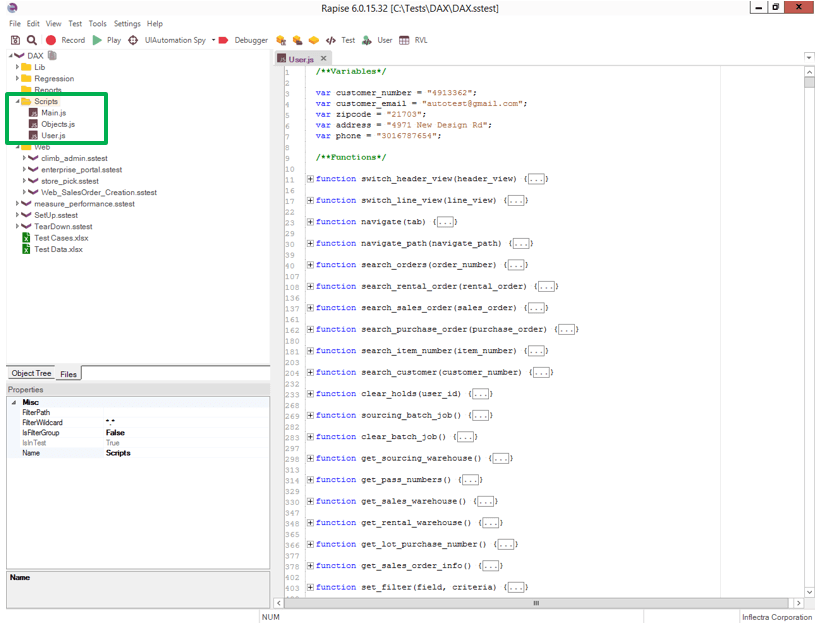
The main test suite files are located in the Scripts folder. These test files are used by every sub-test:
Main.js – This file is the main test file (recordings go here, otherwise it is rarely used)
Objects.js – This file contains all recorded/learned objects
User.js – This file contains all user functions that are used in the tests
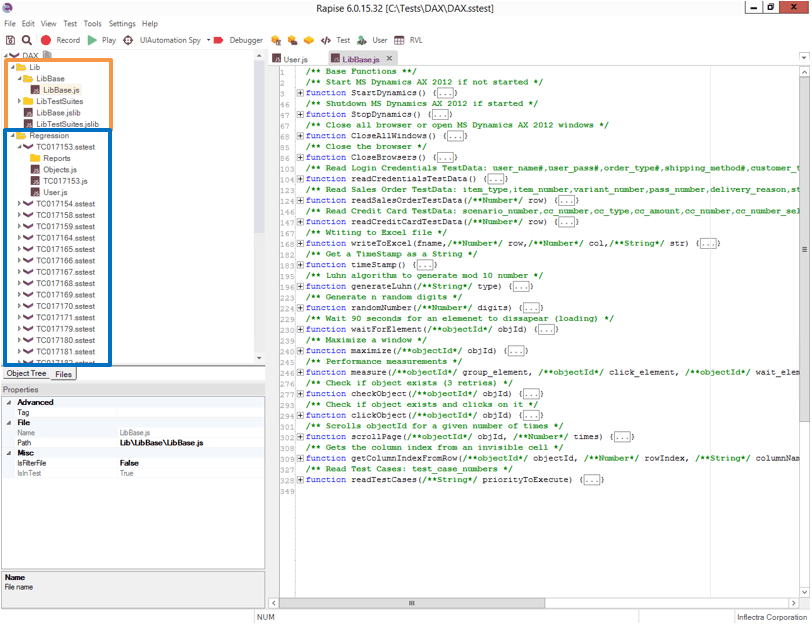
Lib folder contains the user libraries. Libraries are loaded every time any test or a sub-test from the current project is started. That’s why libraries contain global functions such as: starting an application, reading from a test data file, generating random numbers, wait timers, etc.
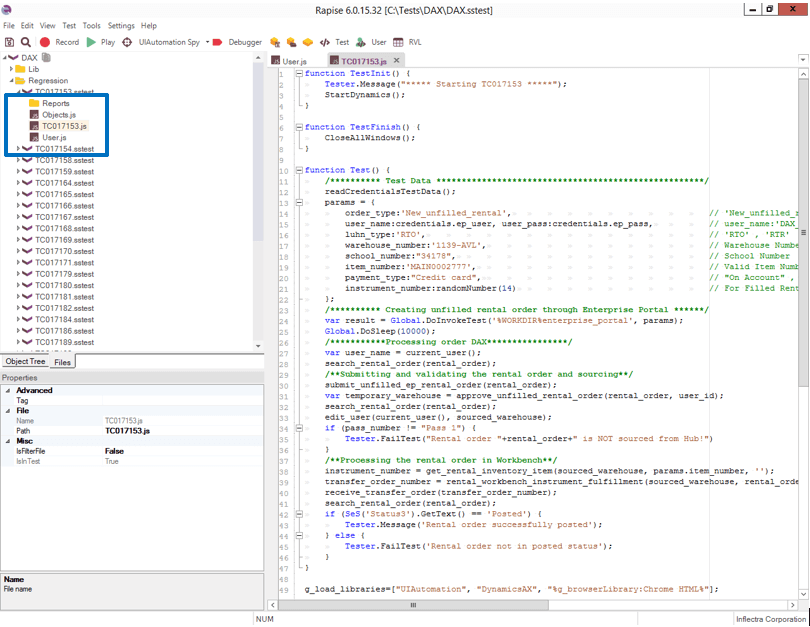
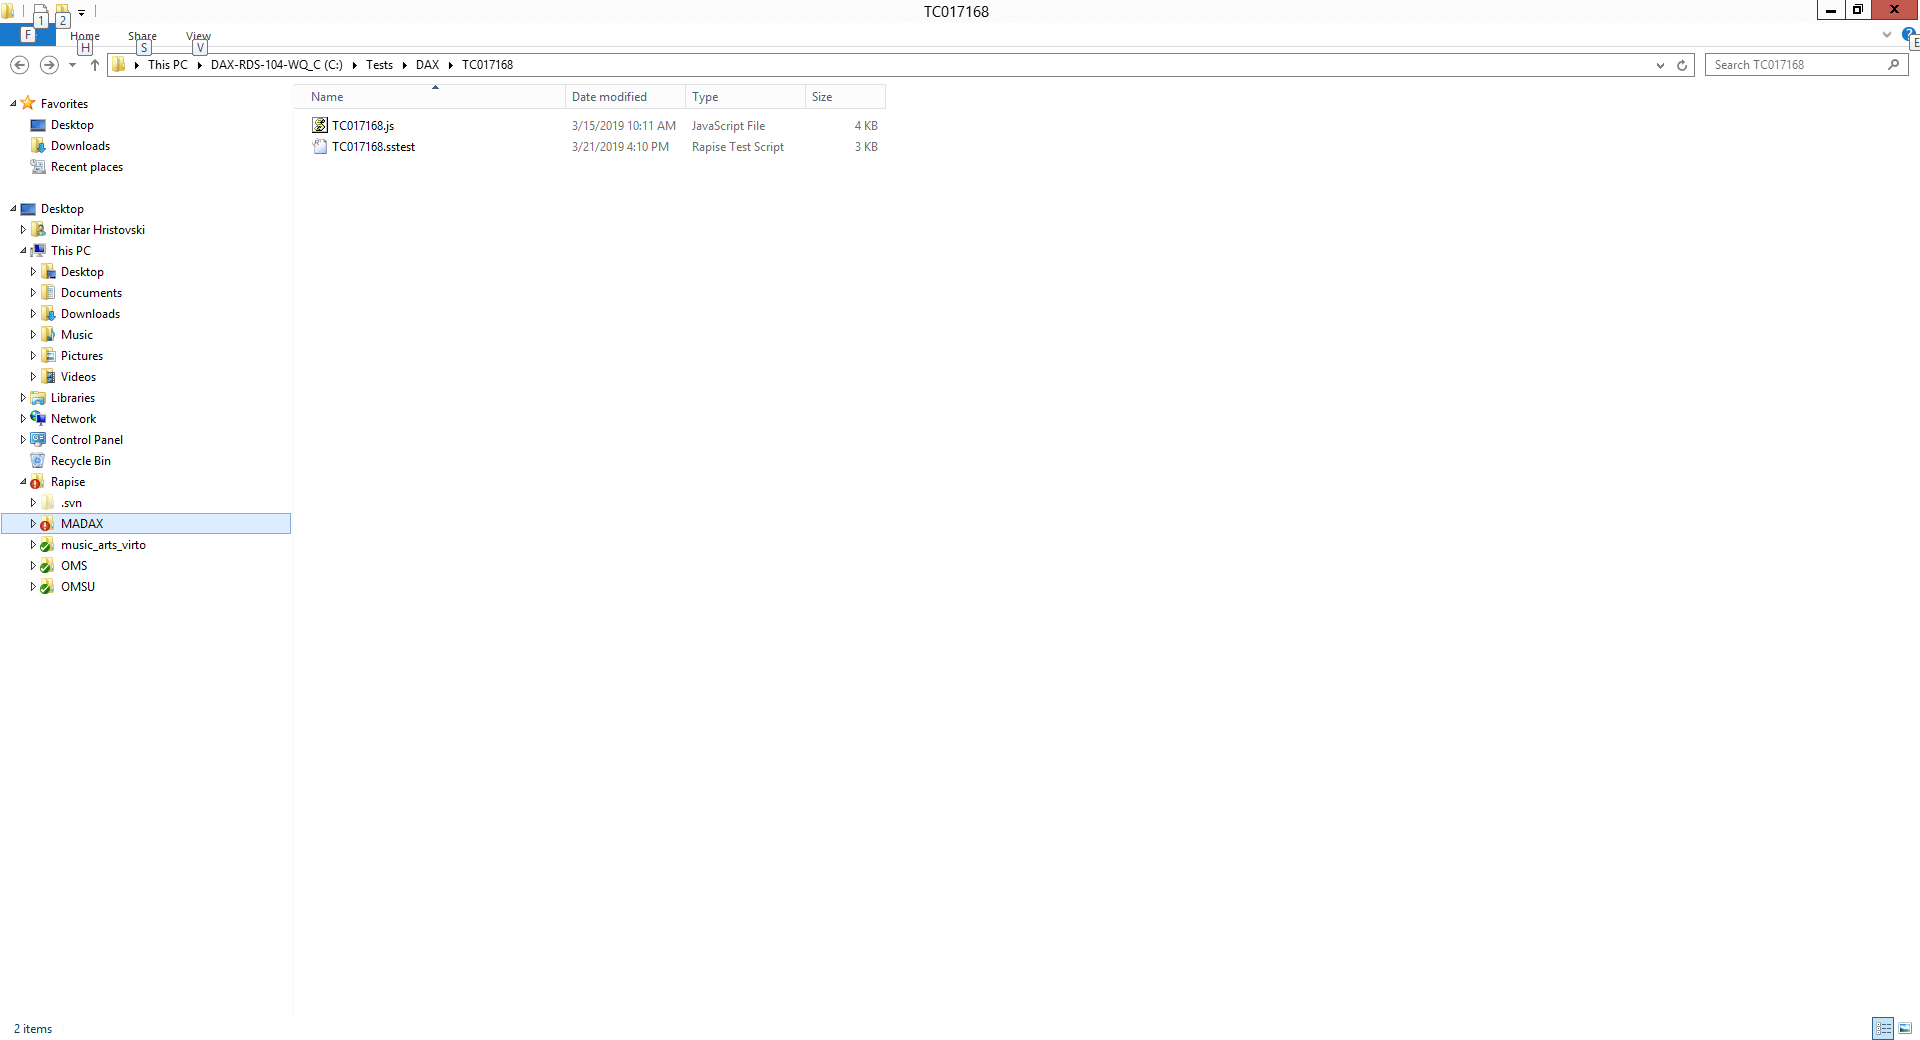
For every test suite (ex. Regression) there is a sub-folder and all its test cases are contained inside (TC*****.sstest)
Each test case contains the TC*****.sstest file, TC***** test case itself and the Reports folder. The Objects.js and User.js are the main project files attached only for easy access.
Objects
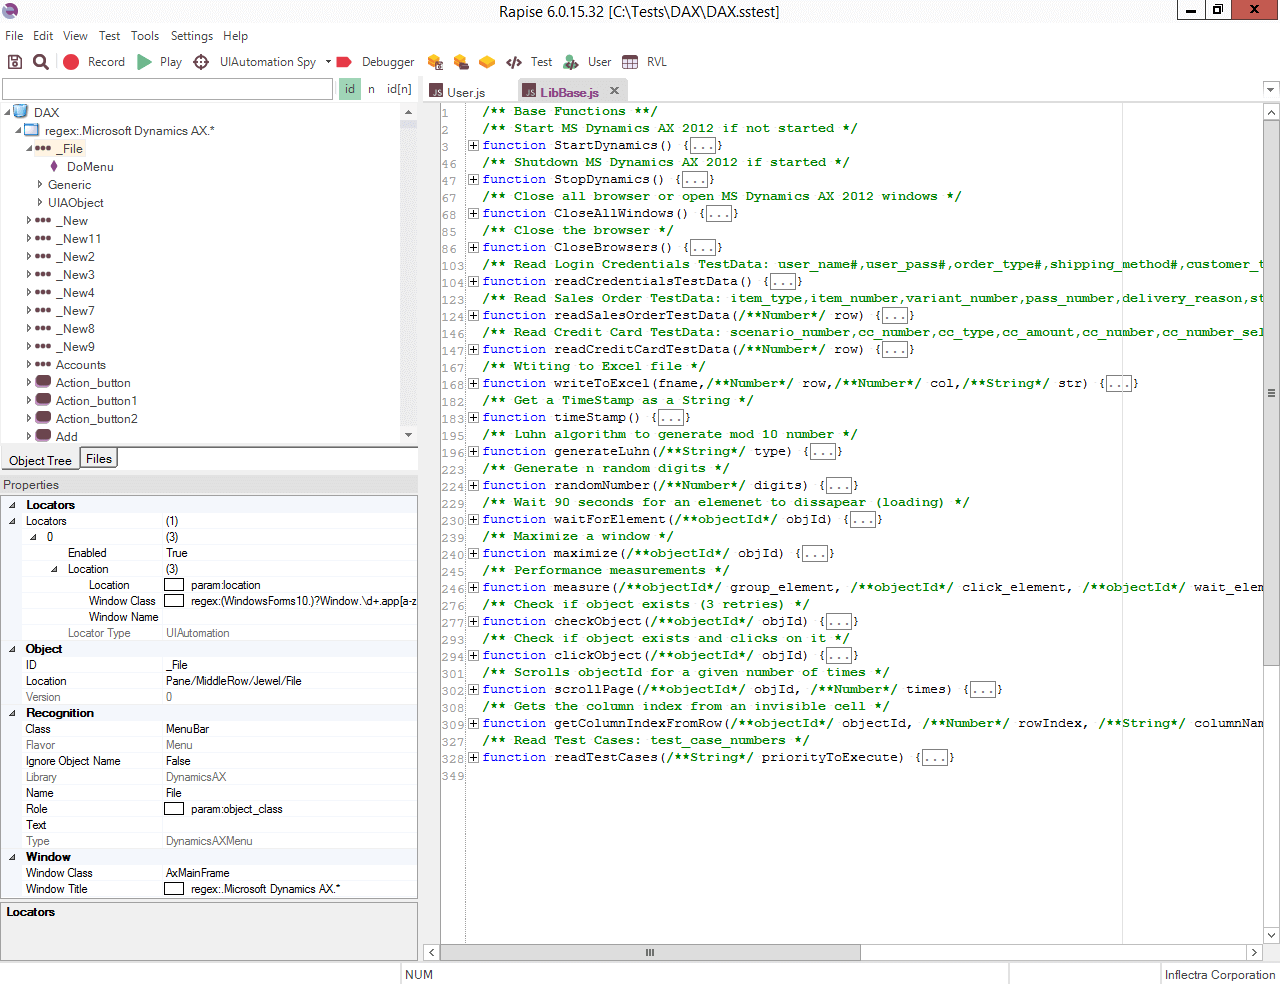
For every recorded click, an object is created.
The objects are the locators for the elements we want to interact with.
Every object has appropriate actions that can be applied to it/with it.
These are stored in the Objects.js file.
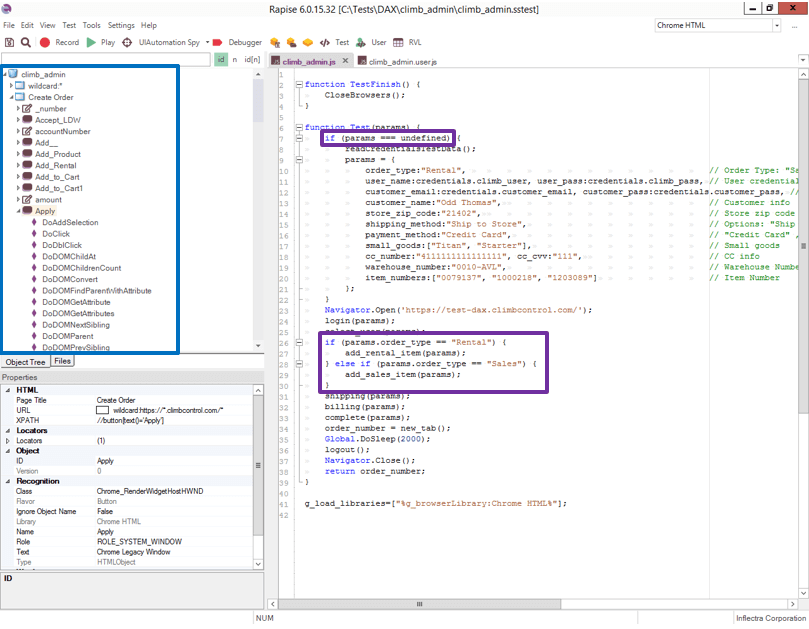
Objects in Rapise contain many different values, not only the basic name/locator, as is in many other testing software and frameworks.
Properties like: Window name, Class name, Object type, Title, Role, etc. help fine-tune the search for the specific object we want to use.
User functions
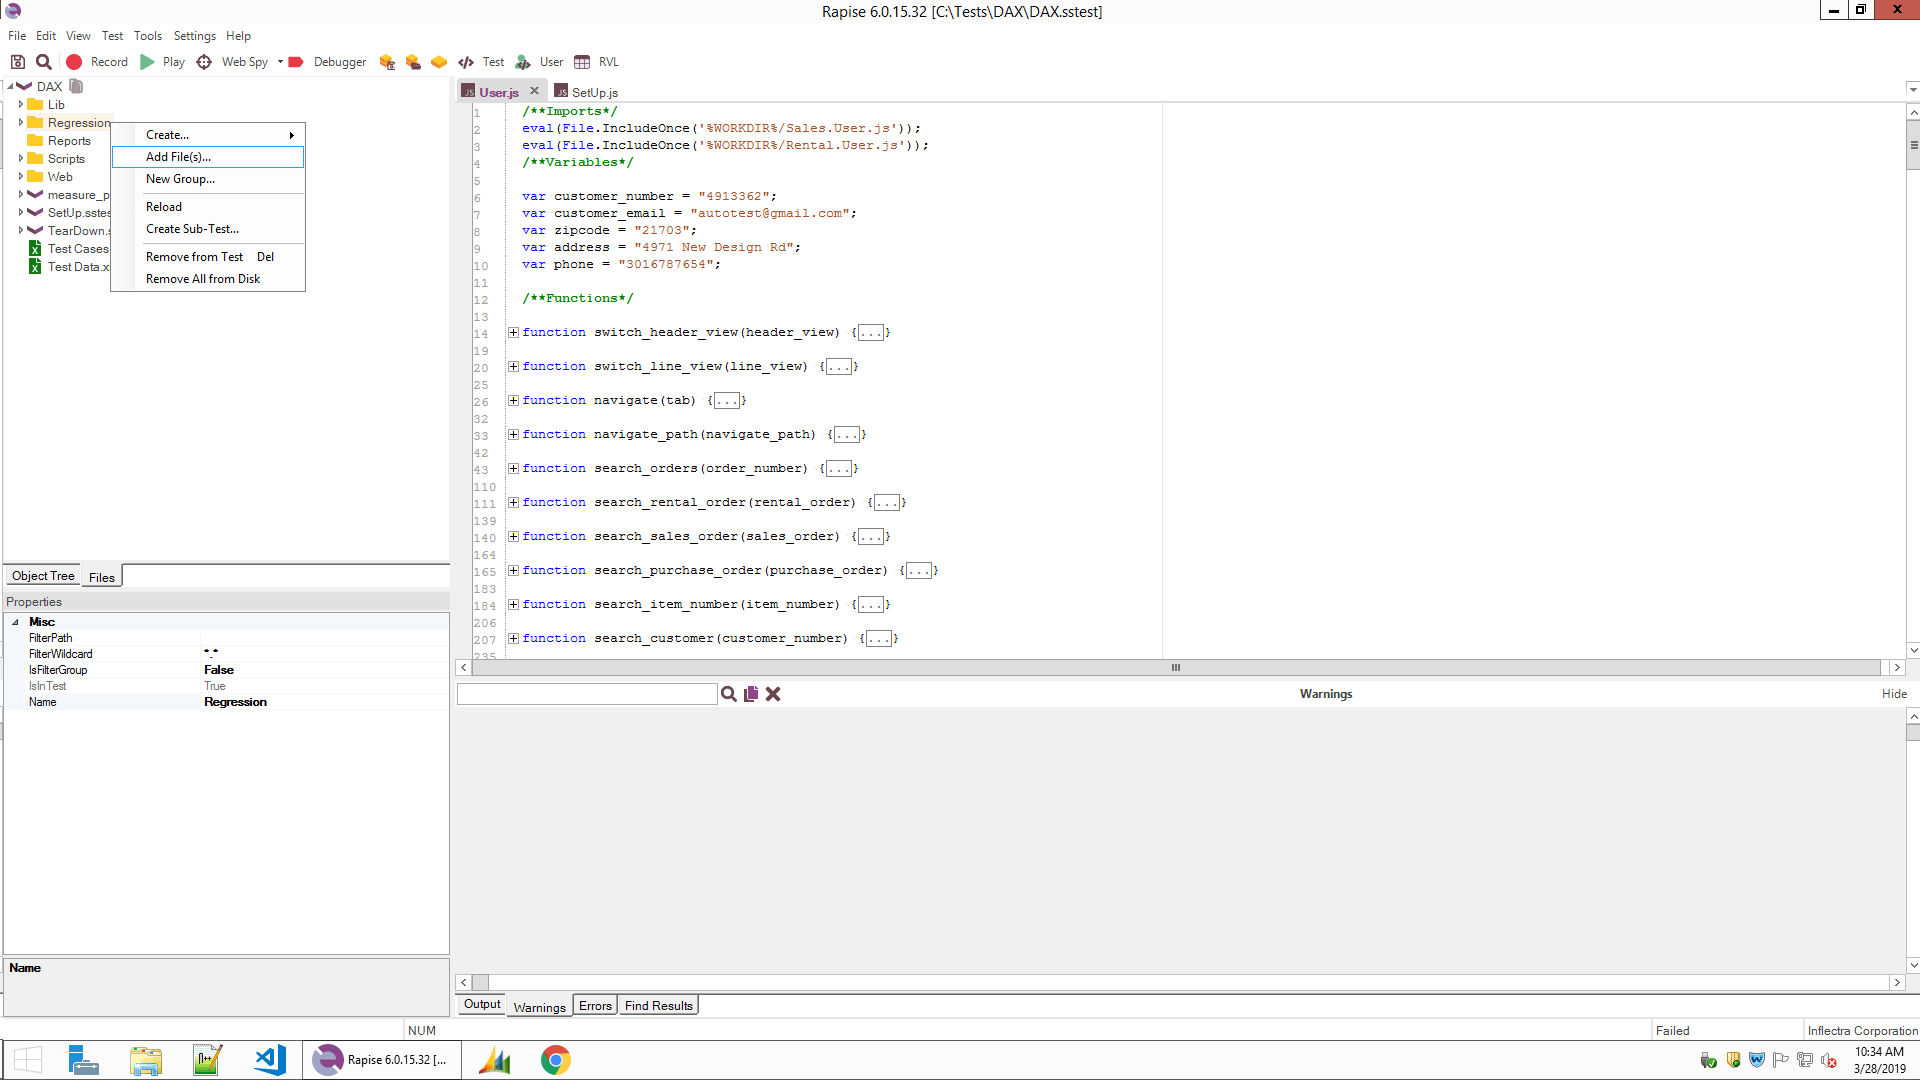
All functions used globally by the specific application should go in User.js file.
This file may contain functions like: navigate to a specific screen, search an account, search an order, get values, update fields of the orders on different screens, etc.
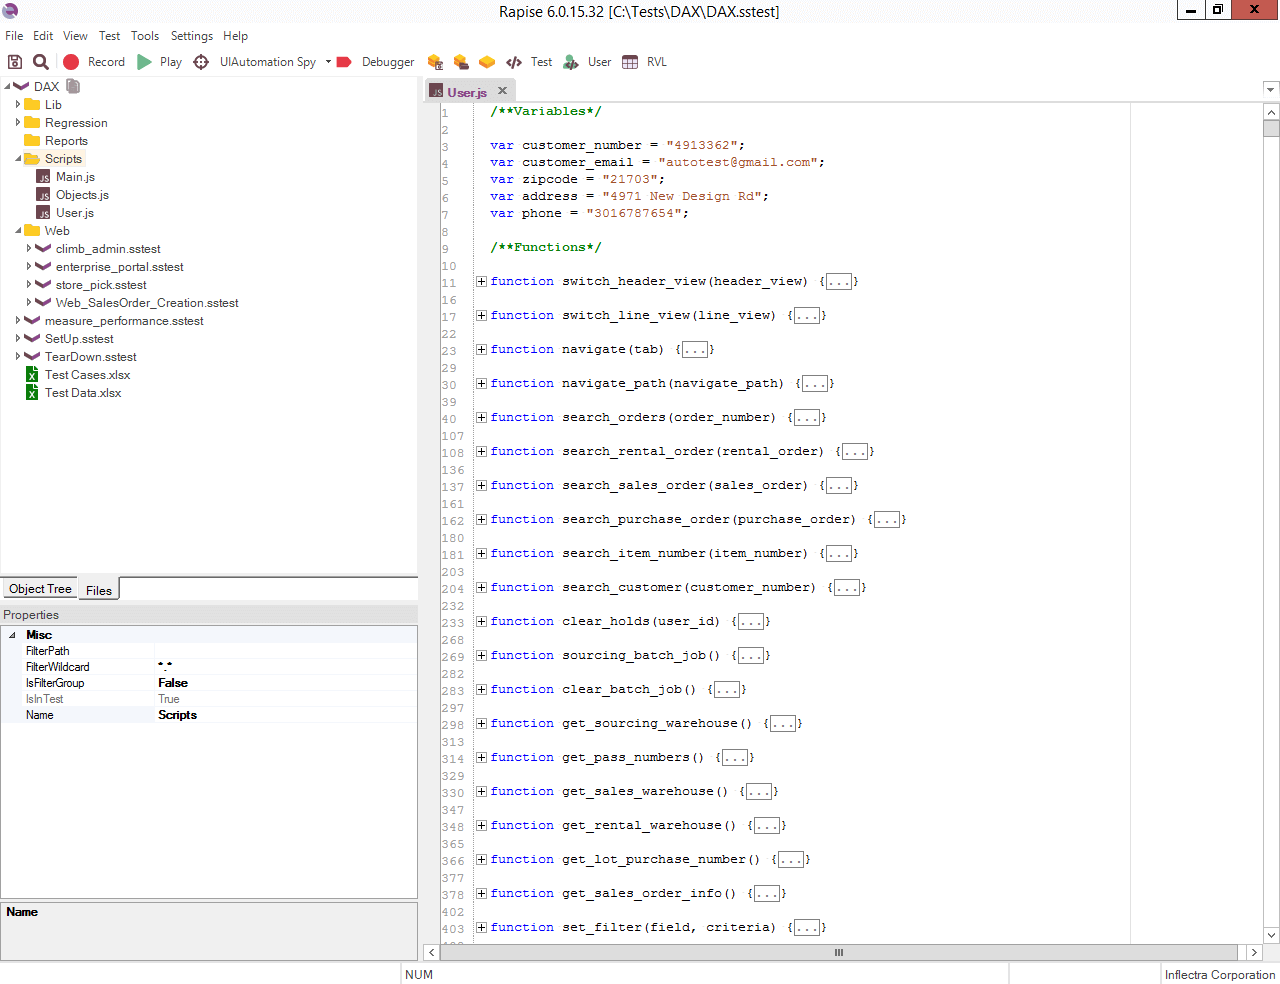
The only negative side is, that this file can get really big with hundreds of functions.
One option is to make a few smaller user function files, separated by, for example, order type and include them into the main one. For example:
Types of sub-tests
For this framework we have two types of sub-tests:
Desktop – Uses the same (root) DAX Objects.js objects and User.js functions.
WEB – Every sub-test has its own objects and functions for each different site.
Desktop sub-test
We only update the TC#####.js file in the test cases.
- js and User.js are the global project files that are included in all DAX sub-tests and updating them here, updates the objects/functions for all test cases
Web sub-test
We use browser tests as data setup or for a specific update that cannot be done directly in MS Dynamics AX.
These are called from the inside of a Test Case when needed.
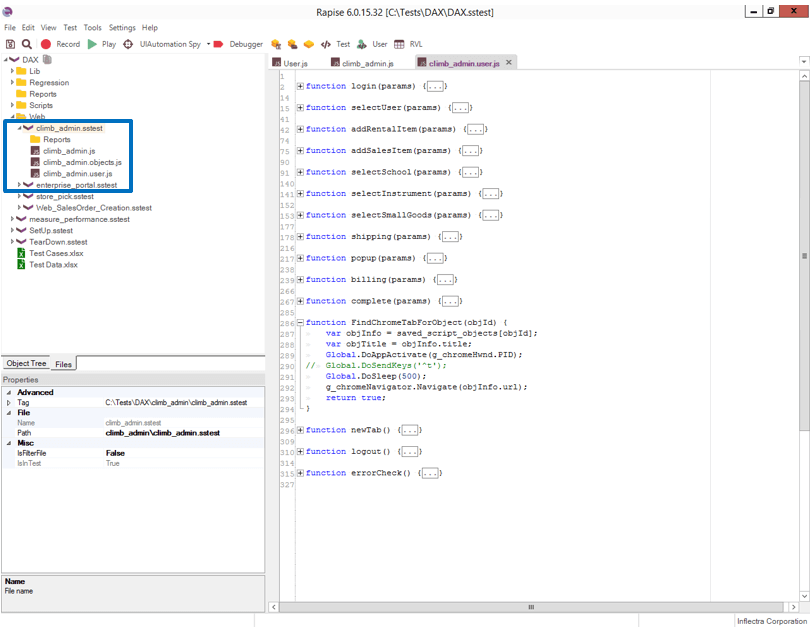
WEB sub-tests are actually separate test files with their own structure, added as an external sub-test to a DAX (Desktop) test case.
In order to edit any sub-test, we double-click sstest to open it in a new window, so we have easier access to its own objects and user functions.
- If the sub-test is a test case, the main Objects and User functions will be accessible and attached to the test case.
- If the sub-test is a web browser test, it will have its own set of Objects and User functions.
Libraries are loaded for every sub-test; both DAX test cases and web browser tests.
Each of the web sub-tests has separate objects and user functions files.
Many conditions and failsafe mechanisms should be implemented in the test cases if we want to have a smaller number of sub-test cases with more functionalities and fewer errors.
Adding new sub-tests
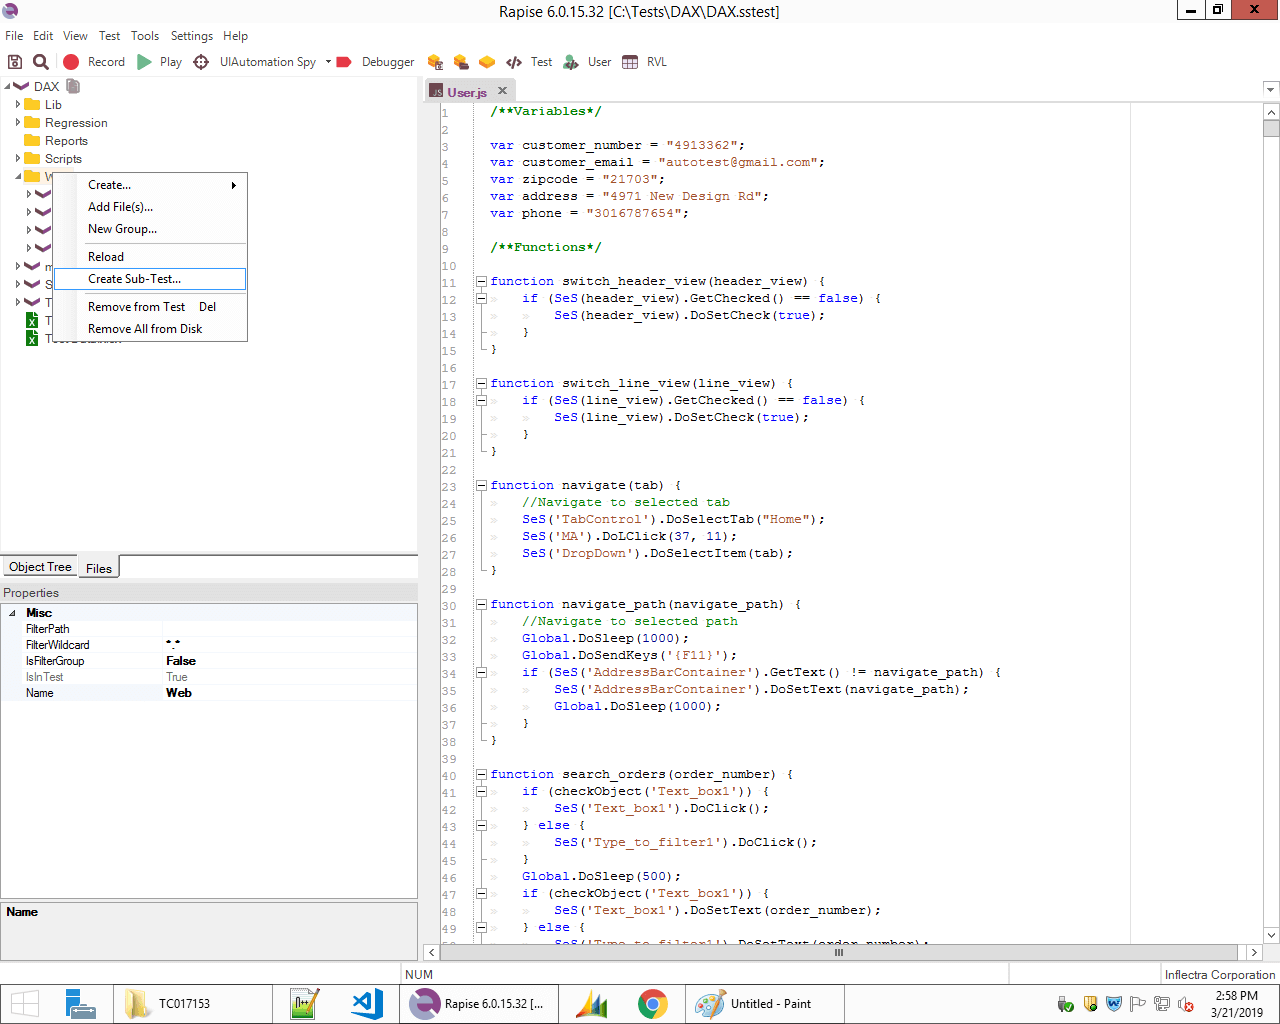
(Figure 13 – Right-click on any folder and select Create Sub-Test…)
A new dialog appears where we select which type of test we want to create
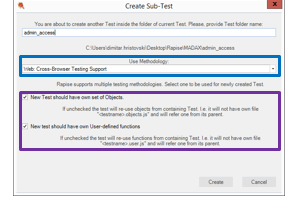
Depending on the type of test we need to create, we can select: Basic-Desktop, Manual, Mobile and Web methodology.
If the checkboxes are selected, new separate objects and user functions files are going to be created and used in the newly created test.
If the main project is a Desktop application and we create a new test case, we uncheck these and use the root Objects.js and User.js. If we want to create a Web Browser test, these are on and separate Object.js and User.js files are created for the browser test.
Running the tests
Calling sub-tests in a test
Let’s say we need to create an order in a web browser application, as a setup for our update order test. For that purpose, we call an external sub-test file at the beginning.
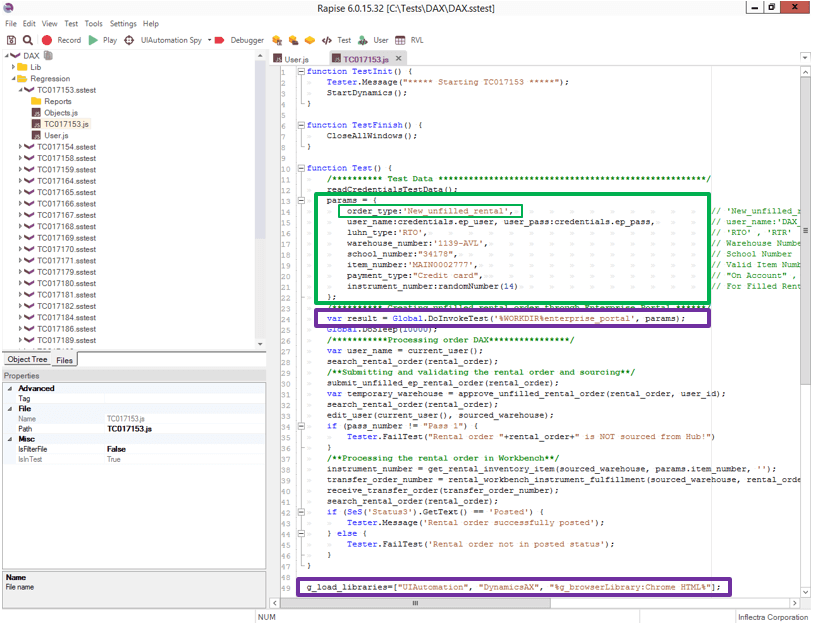
We call the sub-test like this:
Global.DoInvokeTest(‘%WORKDIR%/sub_test/sub_test.sstest’, params);
Sometimes the sub-tests need parameters for calling and deciding what flow to execute depending on the input parameters (for example: calling web sub-test with params order_type:Sales creates a Sales order and calling it with order_type:Rental creates a Rental order). Parameters can be a simple variable, an array or an object.
If the sub-test is a web browser test, we need to add the browser library in the main test’s libraries we’re calling from:
g_load_libraries=[
“UIAutomation”, “DynamicsAX”, “%g_browserLibrary:Chrome HTML%”
];
Running test sets
For creating a (Test Suite), we need to add a new *.js file containing a list of the required sub-tests (test cases).
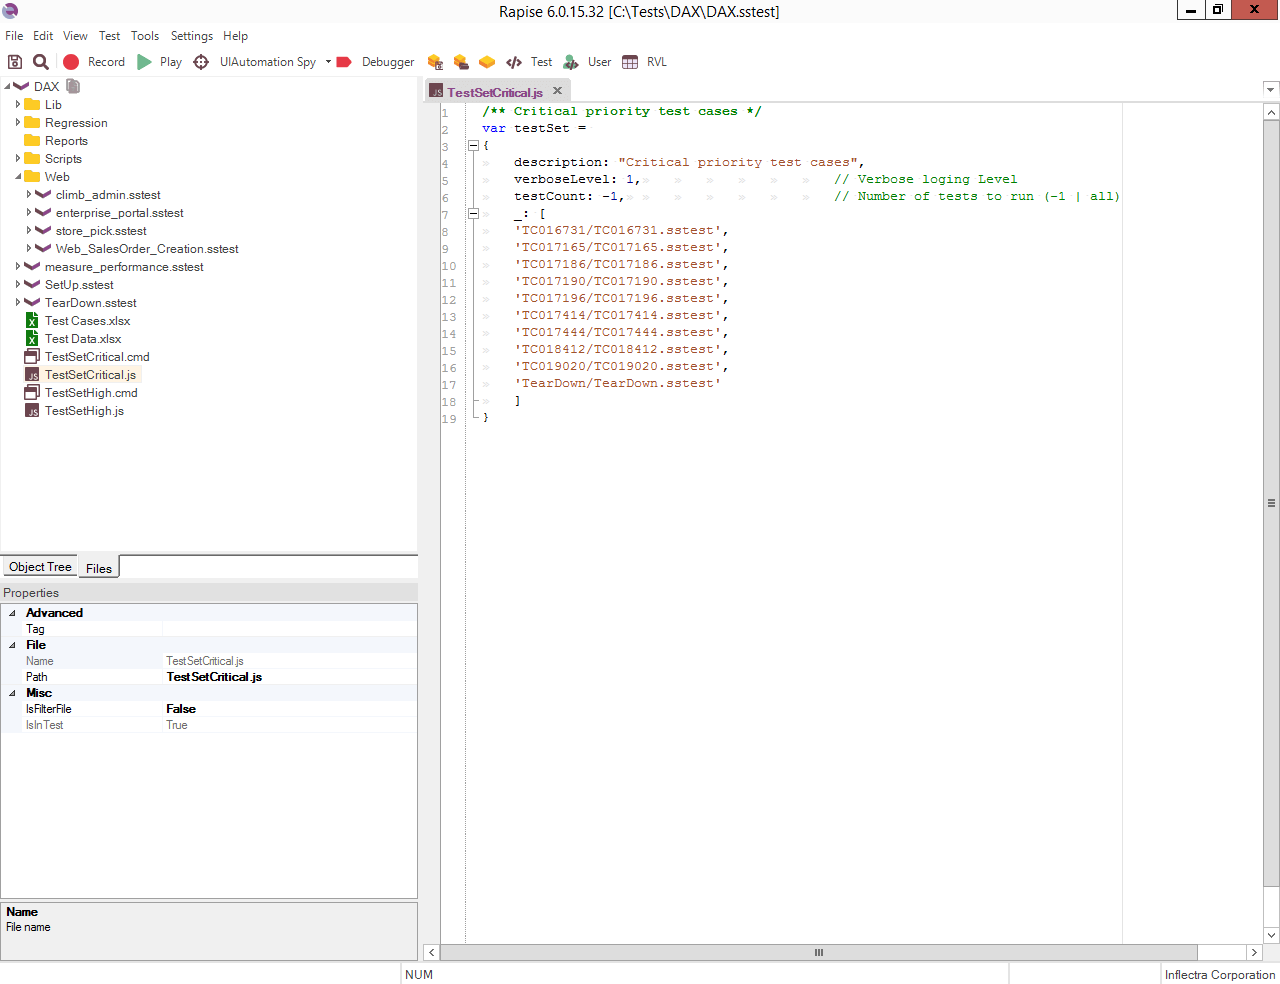
We can run Test Sets from the Main.js (we can also add parameters if needed):
Global.DoRunTestSet(‘TestSetName.js’, params);
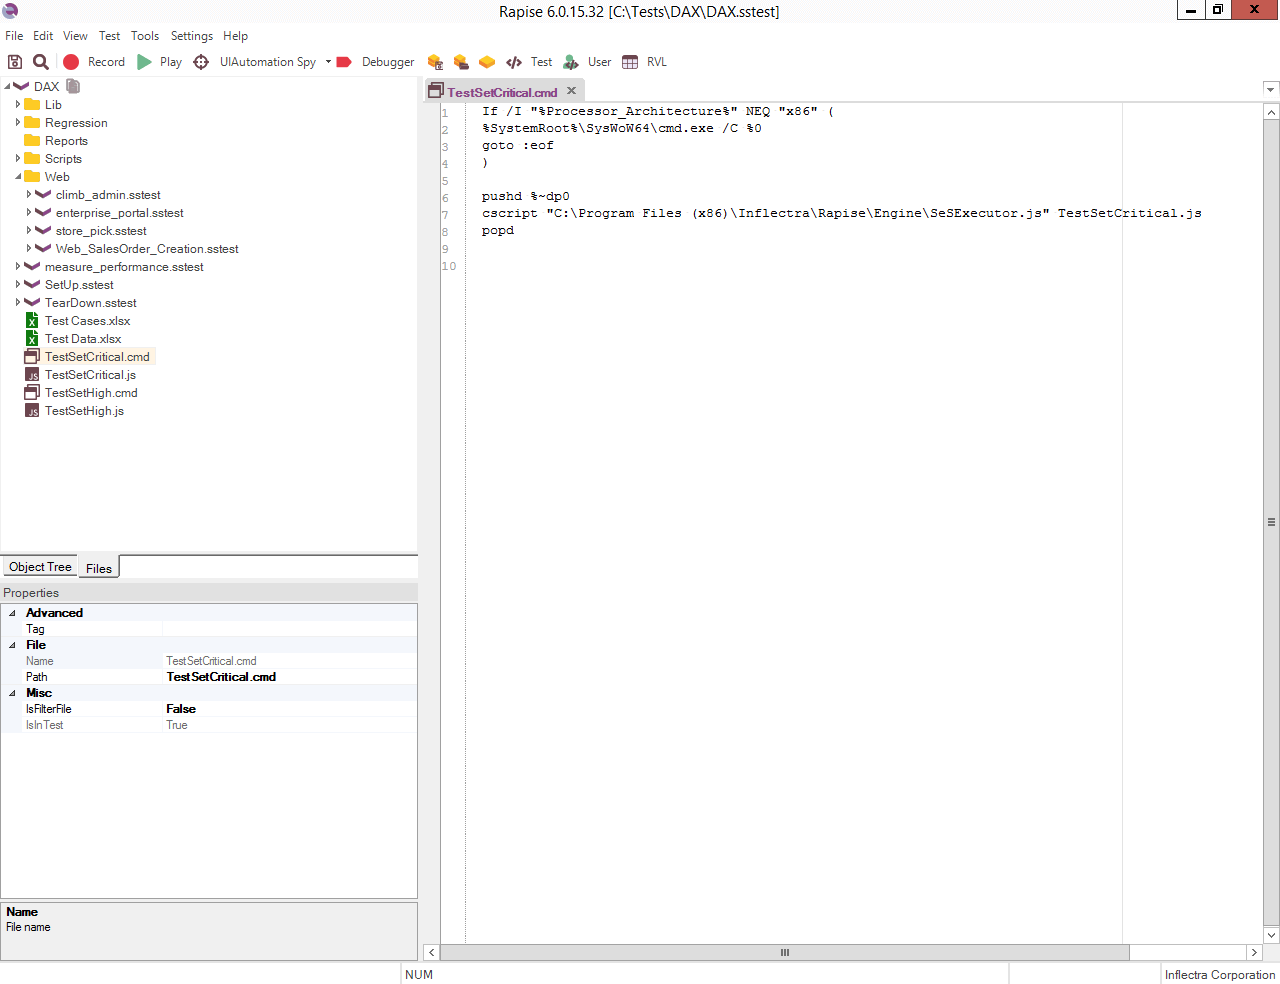
or from a command line, by creating a *.cmd file and executing it:
Working with external files
If the test data used in the test cases is changed often (ex. monthly password changes), it’s recommended to use external test data files.
This way, we only change the test data in one place and avoid searching through all files in the project.
If the imported files are Excel (.xlsx), Rapise has a great Excel editor already implemented.
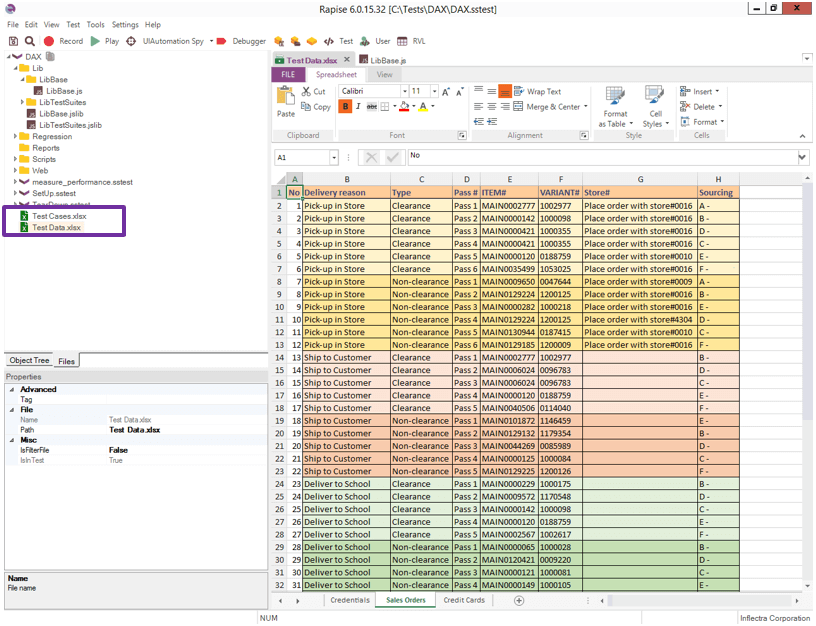

We first attach the excel file.
Then read the test data from it.
In this example, we can just send the row number in the parameters and get the row’s values (as global variables).
Results
At the end of a test run, a report is generated.
All reports are stored in the Reports folder located inside each test case folder.
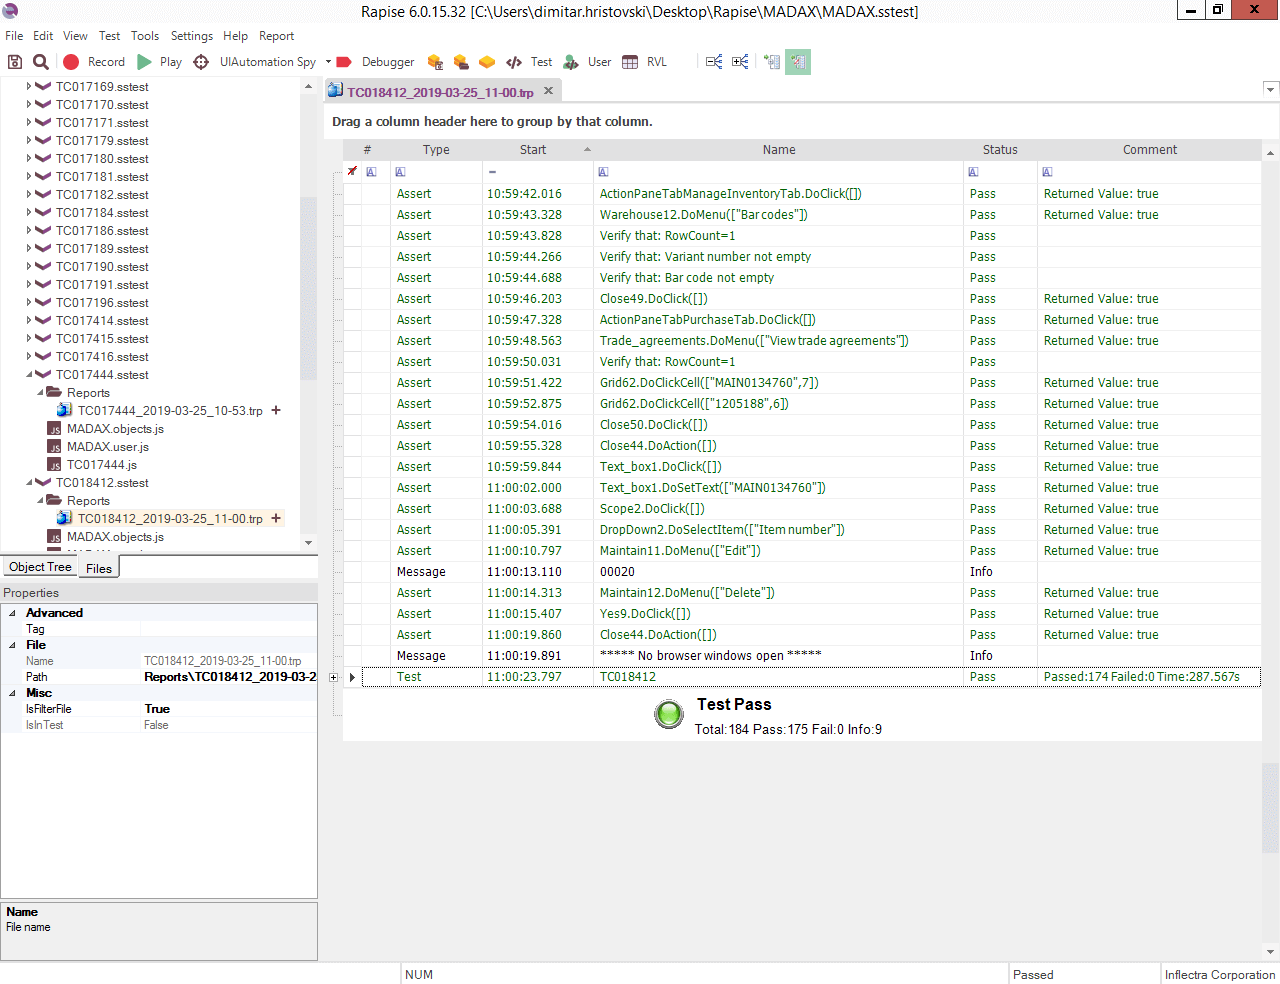
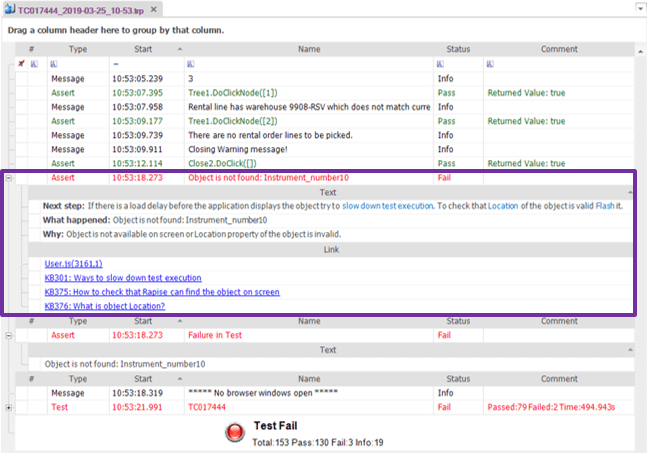
The reports in Rapise are quite detailed and if the test fails it often pinpoints where the fault was.
Errors can be expanded for a more detailed explanation of the failure and a few suggestions for fixing.