
This article describes how Rapise can be integrated with Jenkins and how test reports can be customized in order to get more meaningful reports of automated test executions. Before we start with the description, let’s give you a notion of what Rapise is and some of the features that it comprises.
Introduction
Rapise is a cross-browser, automated software testing tool offering some really powerful features, such as:
- Scriptless Testing – This feature of Rapise gives its users the ability to write automated tests without any programming code, but by using only RVL (Rapise Visual Language).
- Automated Recording – By using an automated test recorder, Rapise can capture the interactions with the application that is being tested and uses that to build a reusable object repository and automated test script.
- Intelligent Playback – Every recorded test is translated into a script giving you the possibility to playback the test. There are three ways to playback the tests, i.e. through the Rapise user interface, directly from the command-line, or from a test management system such as SpiraTest.
- Cross Browser Testing Tools – The tests which are created with Raipse can be executed without any further modifications across all major browsers, as Rapise supports Microsoft Internet Explorer, Mozilla Firefox and Google Chrome.
- Powerful Object Manager – The powerful object manager gives you the ability to handle application changes without need for script rewrites.
Configuring Jenkins to run Rapise tests
Let’s consider that we already have recorded and created automated Rapise tests for particular e-commerce web application named as: CreateAccount, PlaceOrder and CheckOrderStatus.
And now, let’s configure tests in Jenkins for automated test run and reporting. It is a good practice to configure a separate Jenkins node in order to ensure that we will always have a free node for our Rapise tests and that no conflict will arise if we try to run two tests that have the same functions file simultaneously.
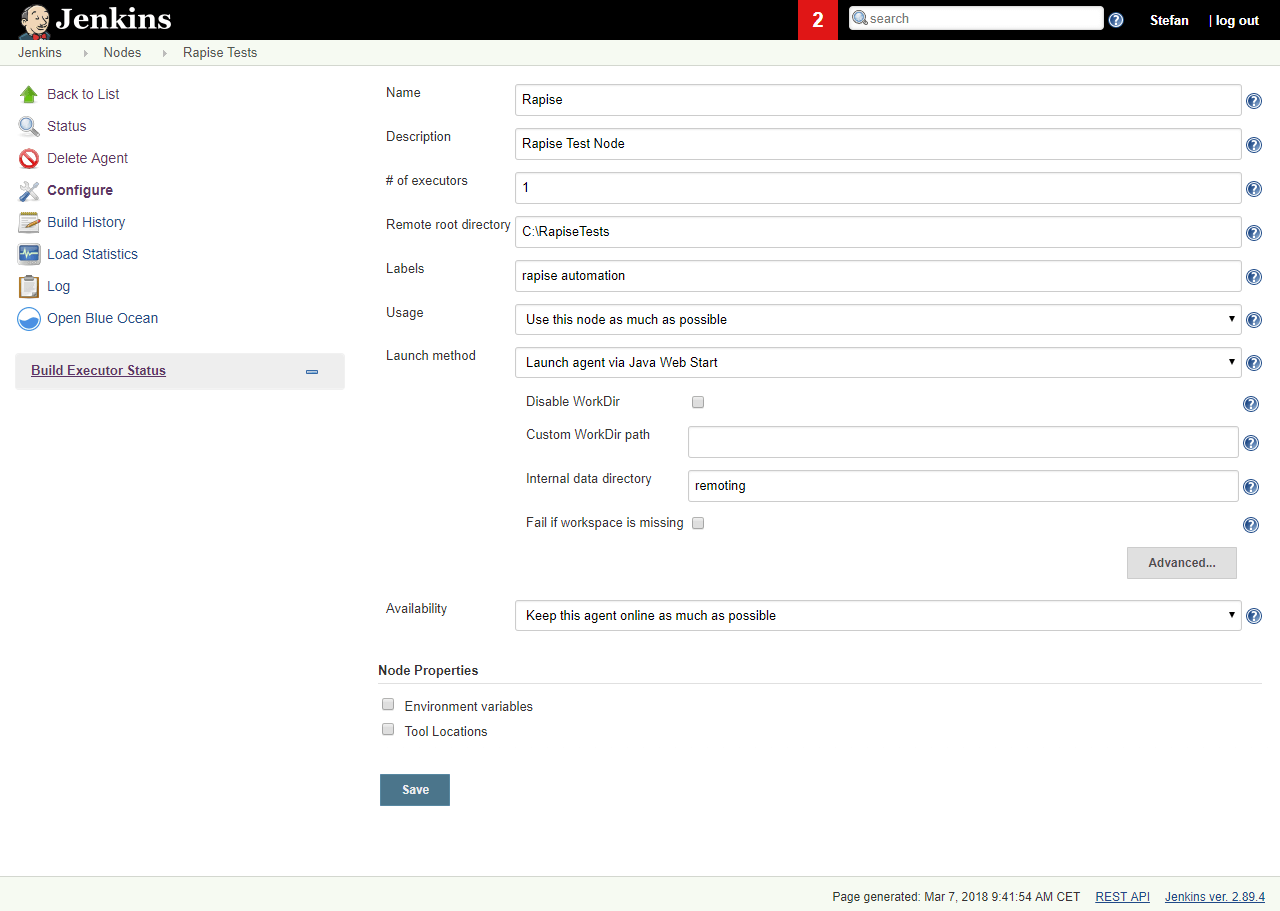
In order to do so, open Jenkins home page and go to Manage Jenkins > Manage Nodes. We add a new node here and configure it to suit our needs.
 (Figure 1 – Jenkins node for the Rapise tests)
It is important to note down the remote root directory for configured node, since we need to move our Rapise workspace in that directory later on. We have also added labels “rapise” and “automation” that we will use in our builds in order for those to run specifically on this node only. Please note that, adding a new node and configuring it the way we described above is completely optional but if you are dealing with a crowded Jenkins, it is a good practice.
Now that we have the Rapise node up and running, we need to prepare the tests folder structure. Jenkins will create a ‘workspace’ subfolder in the remote root directory of our node (C:\RapiseTests in our case) and we need to place all the tests we want to run in this subfolder.
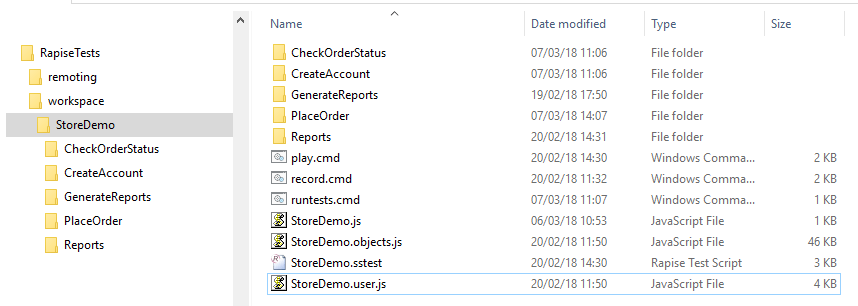
(Figure 2 – Sample folder structure for running Rapise test in Jenkins)
If we open the tests in Rapise from this directory and play them locally, the paths to the test files are updated in the ‘play.cmd’ files for each test. This is the file that Jenkins will actually call to run the test(s). Tests CheckOrderStatus, CreateAcount, PlaceOrder are implemented as Rapise sub-tests so they have own ‘play.cmd’ file within a corresponding folder. In order to run in sequence each of these Rapise sub-tests, we will create a separate batch file named as ‘runtests.cmd’. This batch file first deletes reports from previous executions, executes tests by calling ‘play.cmd’ from corresponding folder and prints auto-generated .tap report. Rapise generates these .tap reports automatically after each test execution so we will use that file and display its contents in the console log on Jenkins.
@set RUN_ROOT=%~dp0

@del /s/f/q %RUN_ROOT%\Reports
@call %RUN_ROOT%\CreateAccount\play.cmd
@echo ========== Output Log ==========
@type %RUN_ROOT%\CreateAccount\last.tap

@del /s/f/q %RUN_ROOT%\Reports
@call %RUN_ROOT%\PlaceOrder\play.cmd
@echo ========== Output Log ==========
@type %RUN_ROOT%\PlaceOrder\last.tap

@del /s/f/q %RUN_ROOT%\Reports
@call %RUN_ROOT%\CheckOrderStatus\play.cmd
@echo ========== Output Log ==========
@type %RUN_ROOT%\CheckOrderStatus\last.tap
runtests.cmd sample file that will execute 3 tests and dump the .tap reports in the console log
Now we are ready to create our Jenkins job. Go to Jenkins > New item > Freestyle project and give it a name. Since we have created a separate node specifically for these type of tests, we will add the labels that we gave to our node earlier and restrict this project from running elsewhere. That is done under the ‘General’ tab.
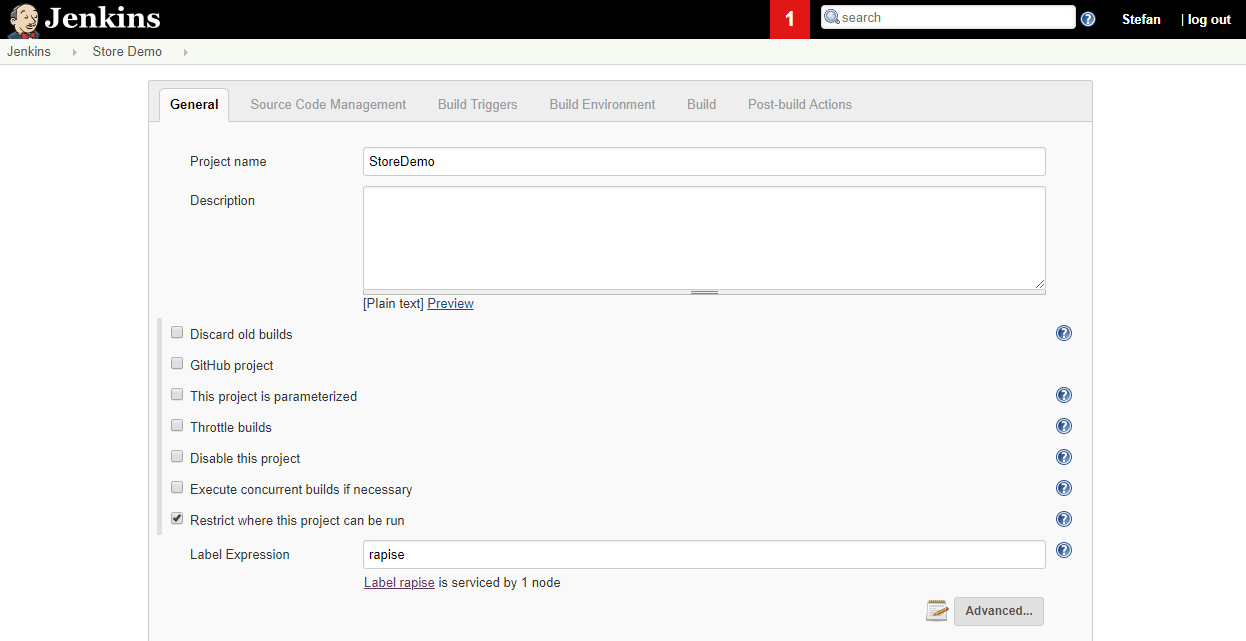
(Figure 3 – Using labels to restrict Jenkins job in order to run it only on specific nodes)
Next, we need to populate the build tab. Here we will add the ‘Execute Windows batch command’ as a build step and tell it to execute our runtests.cmd file that we have created earlier.
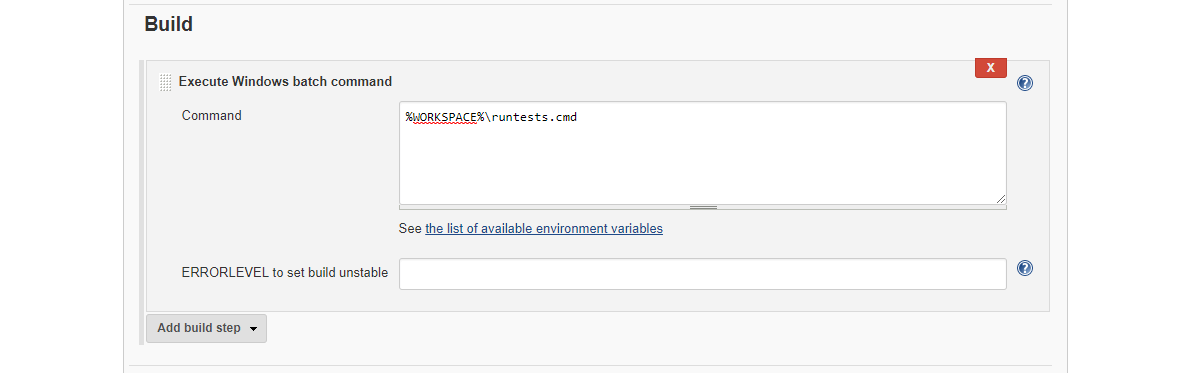
(Figure 4 – The build tab)
By completing this step, we can start running our tests in Jenkins. But, the only available output we have so far is the not so friendly Rapise-generated .tap report that will be dumped in the console log among the other build info.
Generating test reports with TAP plugin
In order to ‘prettify’ the output in Jenkins, we will use the TAP Plugin. Go to Jenkins > Manage Jenkins > Manage Plugins and install the ‘TAP Plugin’ from the list of available plugins. This plugin looks for .tap files in the project directory like the following one.
# StoreDemo
# Starting scenario: Test
# Create Account
ok 1 - Verify that: InnerText=Store information
ok 2 - SignInButton.DoClick([])
ok 3 - CreateAccountEmailBox.DoSetText(["20180307111301@inter.works"])
not ok 4 - CreateAccountButton.DoClick([])
sample .tap file generated from Rapise test run
Once a stream like the one above is found, the plugin delegates the parsing to the tap4j. After that, the results of the tap4j parsing are analyzed, organized and displayed in a more user friendly format. The only thing we need to configure is to add this as a post-build action in our Jenkins job/project. Then the plugin will look for the generated .tap file in the projects workspace after the test execution and produce an output that would look something like this:
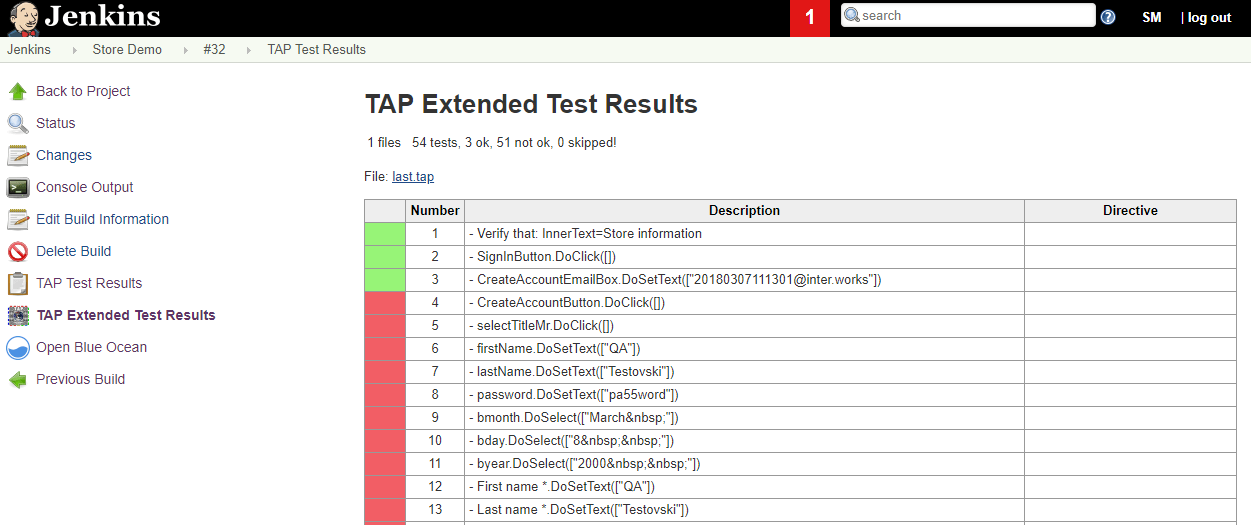
(Figure5 – TAP Plugin parsing results)
This is way better than printing the original .tap file directly to the log but still isn’t quite what we wanted right? It is good for illustrating which steps of the test passed or failed but what if we have hundreds of tests with hundreds of steps in each? That’s why we decided to start playing with the .tap report file and came up with our own kind of .tap parser.
Customizing Test Reports
After each test run, a .tap file is created containing info about all the steps that were executed during the test run and their status – ok or not ok. What we have done is the following: we took the test name and the last executed step status from the .tap file and put them in another file that we aim to transform into an XML document. We have cut out all the unnecessary characters from these lines and put them into a custom tags, say <testname> and <teststatus> respectively and added a parent tag, say <test>. So after each test run, we extract these values from each test’s .tap file and concatenate them into our newly formed soon-to-be-XML file. After the test run we got something that looked like this:
<test>
	<name>CreateAccount</name>
	<status>Success</status>
</test>
<test>
	<name>PlaceOrder</name>
	<status>Success</status>
</test>
<test>
	<name>CheckOrderStatus</name>
	<status>Failed</status>
</test>
Pseudo-xml file after parsing .tap test report file
The next step was to add the XML declaration to the beginning of the file in order to get a fully functioning XML. We have also created an XSL file to go alongside our XML file and give it a proper styling. This XSL contains a simple two column table, printing the test name in the first one and the test status in the second one.
In our XSL, we have implemented some rules to examine the values of the ‘Status’ column and color the cells according to the test results – green for pass and red for test fail. With this, we are almost done fiddling with the project files and all that is left now is to create an HTML file for our xml and xsl file. For this purpose, we have turned to java.
import javax.xml.parsers.*;
import org.w3c.dom.*;
import javax.xml.transform.*;
import javax.xml.transform.dom.*;
import javax.xml.transform.stream.*;
import java.io.*;

class XSLT {
    public static void main ( String argv[] ) throws Exception {
	File stylesheet = new File("xslrules.xsl");
	File xmlfile  = new File("testresults.xml");
	DocumentBuilderFactory dbf = DocumentBuilderFactory.newInstance();
	DocumentBuilder db = dbf.newDocumentBuilder();
	Document document = db.parse(xmlfile);
	StreamSource stylesource = new StreamSource(stylesheet);
	TransformerFactory tf = TransformerFactory.newInstance();
	Transformer transformer = tf.newTransformer(stylesource);
	DOMSource source = new DOMSource(document);
	//The Html output is in testresults.html
	StreamResult result = new StreamResult("testresults.html");
	transformer.transform(source,result);
    }
}
Java class that generates HTML file from the XML and XSL files
Upon the execution of this class, we will get an HTML file called ‘testresults.html’ in our project directory. This file will contain the formatted HTML table with the test results.
Now, the final step is sending the test report in an email. To do that, we need the Email-ext plugin. You can find various templates on the net or play with Jenkins’s built-in variables to create an email that suits your needs.
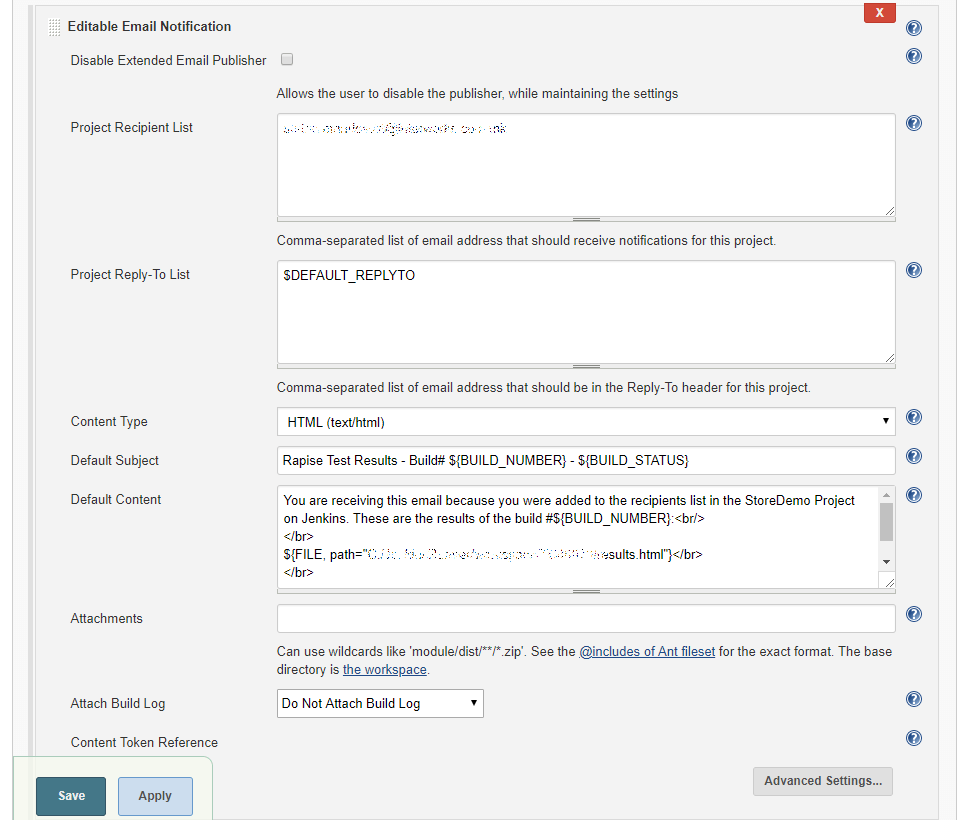
(Figure 6 – A sample of our email-ext configuration)
This was the final step, and we have completed the setup, so we can build our first job. After all the tests are executed, an email will be sent to the addresses specified in the email-ext ‘Recipient list’. The mail will contain all the info we gave in the ‘Default Content’ field, and most important a table with the results of each executed test.
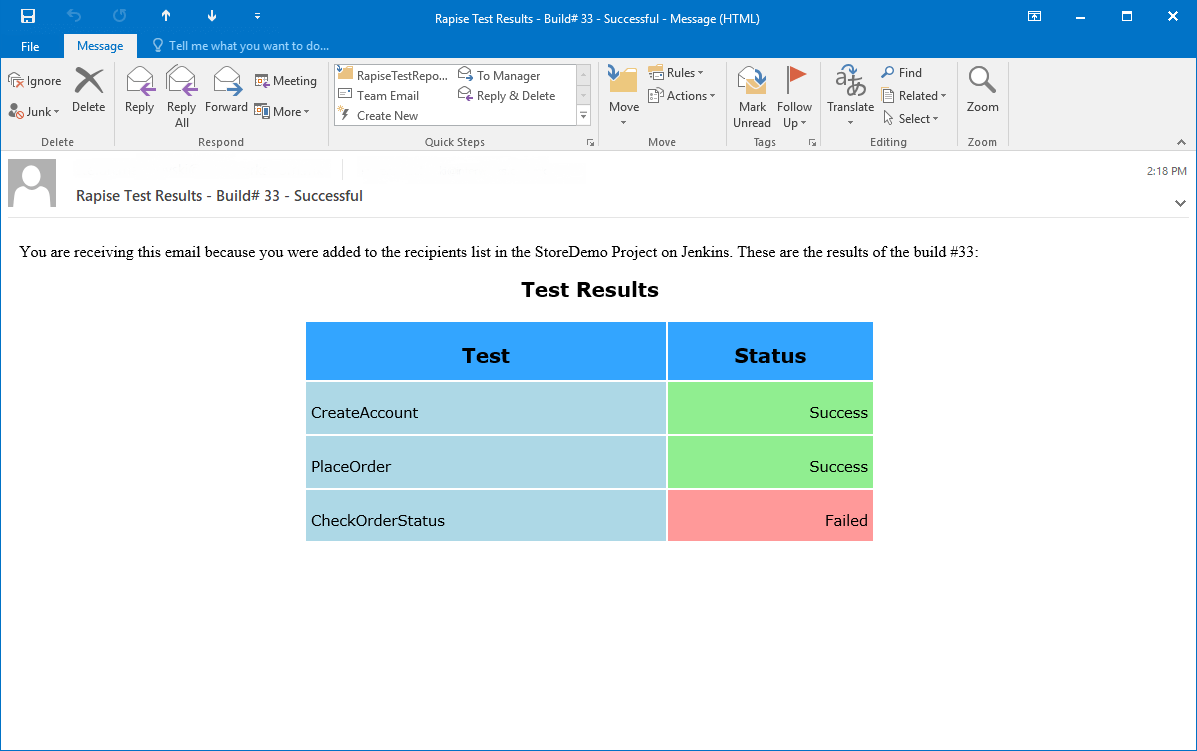
(Figure 7 – E-mail with test results)
Conclusion
Rapise is a powerful automated software testing tool that has one of the most flexible test automation features available on the market today. It’s still evolving and gaining a lot of popularity among the QA community. It can be used to easily automate almost any user action on any platform and playback through the Rapise user interface, directly from the command-line, or from a test management system such as SpiraTest. In this article we presented how Rapise testing reports can be enhanced in continuous testing approach utilizing Jenkins.