
This article describes the steps that are needed for integrating Jenkins with Inflectra SpiraTest, SpiraPlan, or SpiraTeam and running Rapise automation tests from Spira systems. This process is the same for all 3 Spira systems (SpiraTest, SpiraPlan, and SpiraTeam), and in this article, we will use SpiraTest.
Introduction
SpiraTest is a complete quality assurance and test management platform, developed by Inflectra, that comes with integrated defect monitoring and release scheduling. The solution provides management tools for requirements, test cases, and bugs/defects with coverage analysis in real-time as well as requirements traceability. With SpiraTest, users improve and hasten the software testing life cycle. The features that will be used in this article are:
- Releases: Managing the list of releases/versions of the software being tested and the list of builds made during the release.
- Test Case: Tool for managing the test scenarios. Test Cases in SpiraTest can be executed manually or automatically.
- Test Sets: A test Set is a collection of test cases that can be scheduled for execution at a particular time.
- Incidents: Spira Test feature for tracking: bugs, incidents, change requests, issues….
- More details about Inflectra Spira systems can be found on the following links:
- SpiraTest: https://www.inflectra.com/SpiraTest/
- SpiraPlan: https://www.inflectra.com/SpiraTeam/
- SpiraTeam: https://www.inflectra.com/SpiraPlan/
Creating a Release in SpiraTest
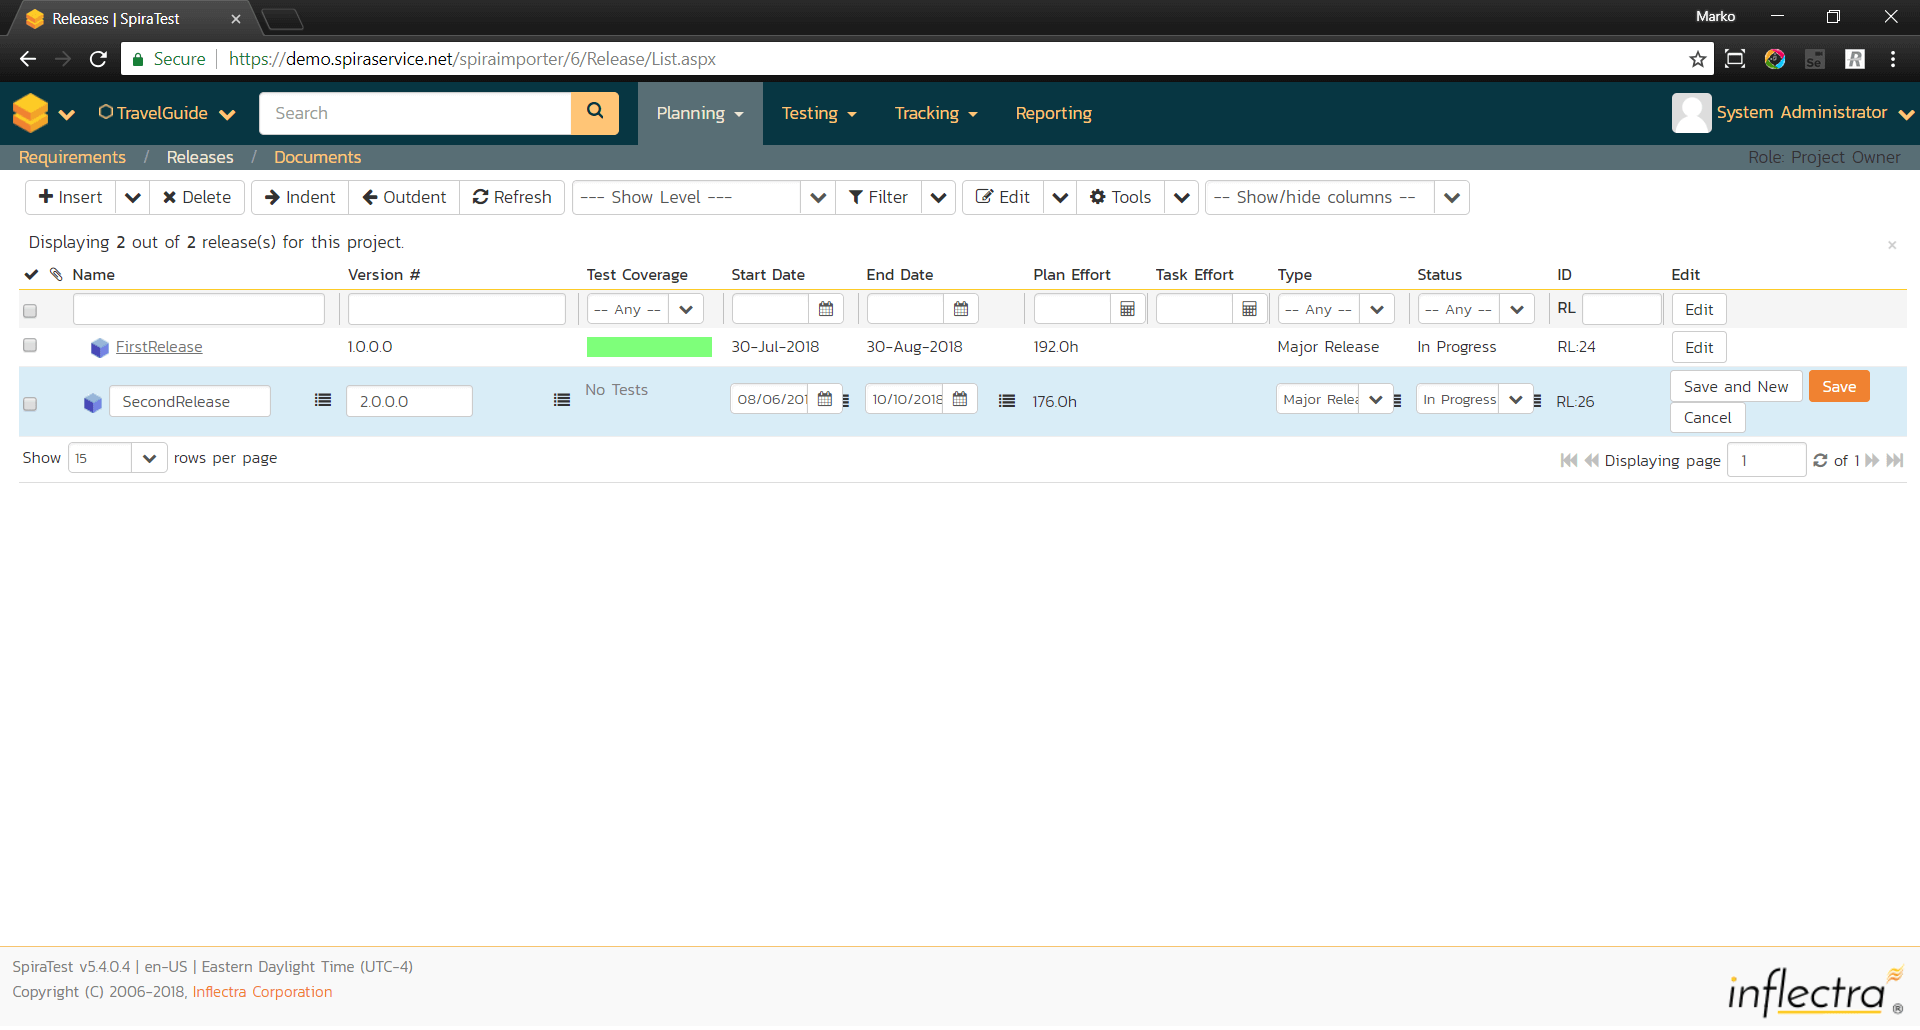
SpiraTest provides the ability to track different versions/releases of the application that is being tested. Each project in the system can be decomposed into an unlimited number of specific project releases, denoted by name and version number. Test Cases developed during the design phase can then be assigned to these different releases. When a tester executes a series of test cases, he is able to choose the version of the project being tested and the resulting test run information is then associated with that release.
In addition, all incidents raised during the testing process and logged in SpiraTest are associated with this release, allowing the development team to easily determine which version of the project is affected. Finally as the incidents are resolved and verified during the testing phase, the appropriate release can be selected to indicate in which release the incident was resolved and/or verified.
To start creating a release in SpiraTest, after login, navigate to Planning -> Releases and press “Insert” button. Populate all required fields: Name, Version Number, Start Date, End Date, Plan Effort, Release Type and Status. After populating the required fields, you just need to save the release.
Configuring Jenkins to work with SpiraTest
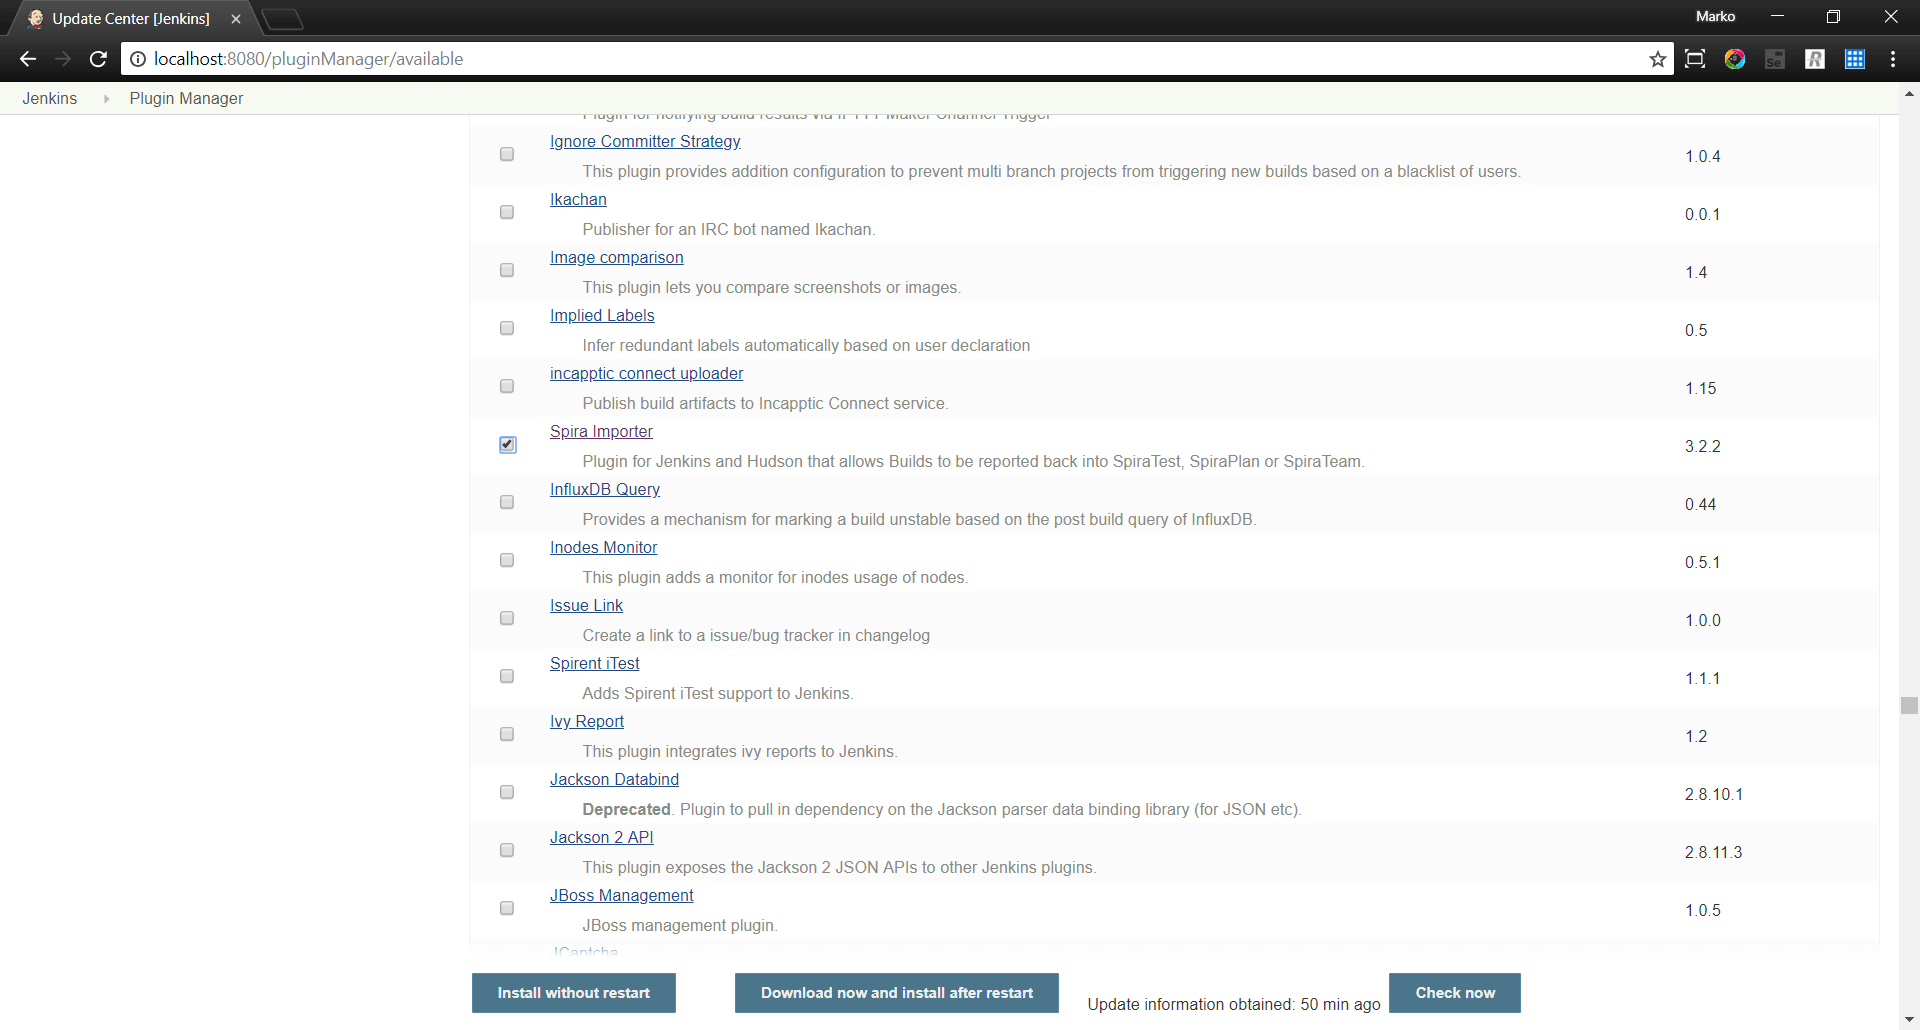
In order to be able to get the build results in SpiraTest Releases from Jenkins, Jenkins plugin “Spira Importer” is required. To install the plugin, in Jenkins, navigate to Manage Jenkins -> Manage Plugins, than select the Available tab. Select the Spira Importer plugin and click the Install without restart button.
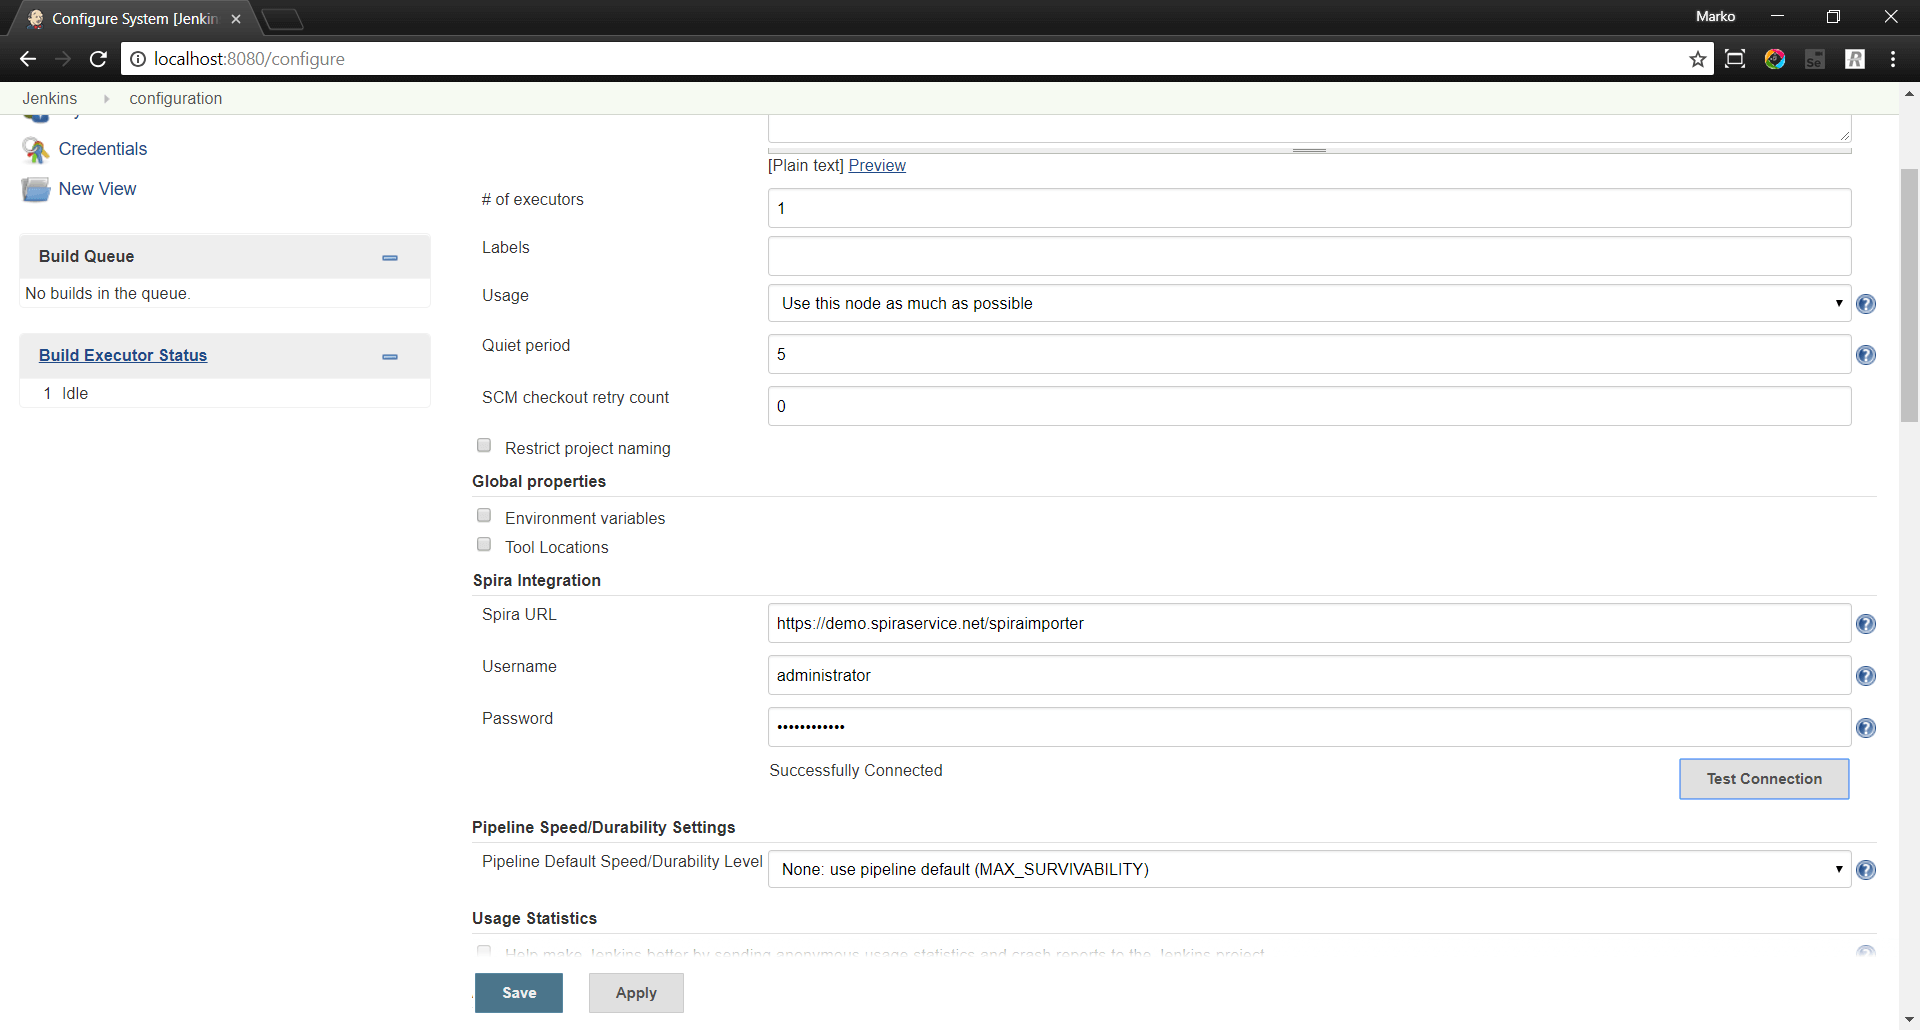
After installing this plugin, you need to create a connection between SpiraTest and Jenkins. In Manage Jnekins -> Configure System, under the “Spira Integration” section you must populate all fields: Spira URL (the URL where your SpiraTest system is installed), username and password (the user that you use here must be SpiraTest administrator). After populating all fields, click on the “Test Connection” button to validate that Jenkins can connect to SpiraTest successfully.
Configuring Jenkins job
In the Jenkins job configuration, check the “Enable Spira Integration” check box, under the “Build Environment” section.
In SpiraTest Configuration section populate all fields:
- Project ID – The numeric ID of the SpiraPlan Project that the Build belongs to. (e.g. for Project PR1 just enter 1), in my case it is 6. (To find the Project ID, in SpiraTest navigate to the project general page, and find the Project ID in the top left corner.)
- Release Version Number – The version number of the SpiraPlan Release/Iteration that the Build belongs to. (e.g. for Release RL0004 with version number 1.0.0.0 you’d enter just 1.0.0.0), in my case 2.0.0.0 . Practically this is the release number you enter, when you are creating a release.
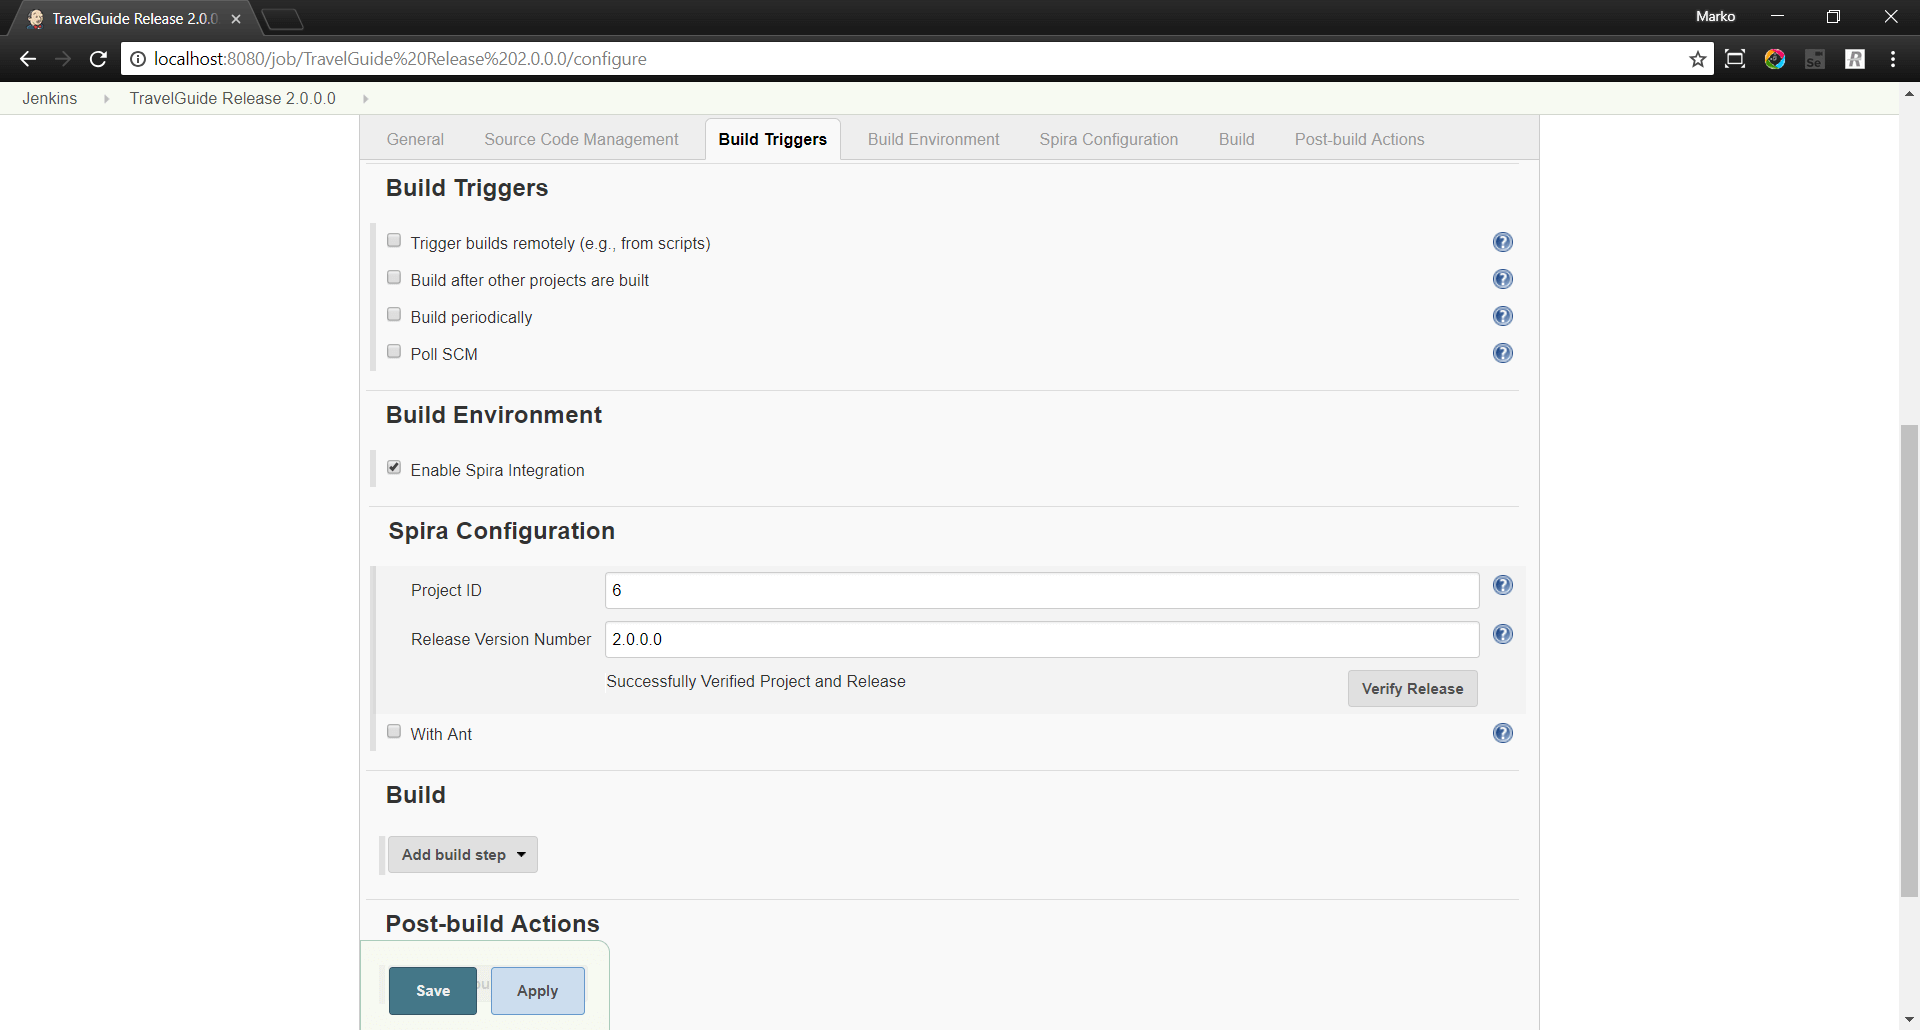
After populating all fields, press the “Verify Release” button to verify that the inserted Project ID and Release are valid.
Viewing the Build Results in SpiraTest
You can now use Jenkins to manage your software builds and have the results of the build be reported back into SpiraTest after every build.
You can find all build results in SpiraTest system in Planning -> Releases -> [your release name], in the “Builds” section.
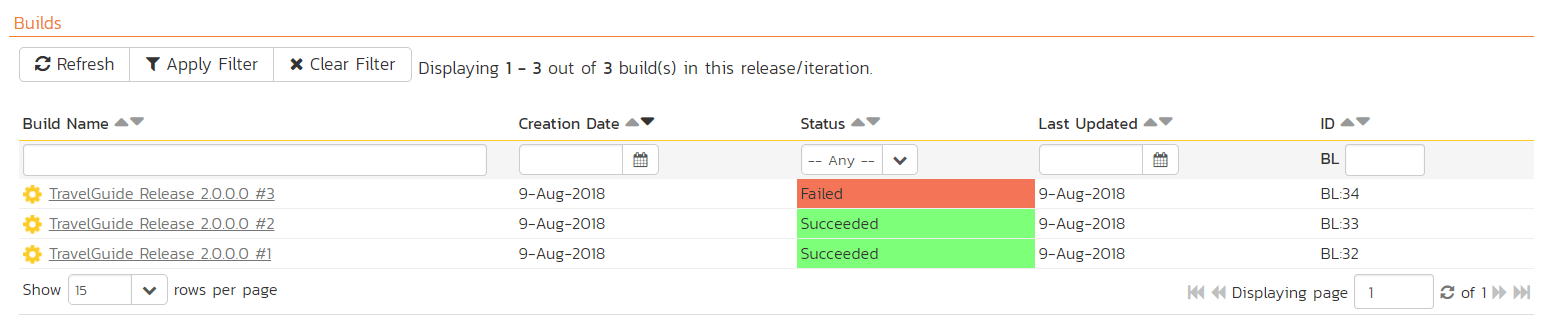
(Figure 6 – Build results in SpiraTest)
Working with source code changes

When your developers commit changes to your application’s source into the SCM repository, they should make sure to link the commit to the appropriate artifacts in SpiraTest. For example, they may want to record that the revision fixes a specific incident. To be able to use this feature, all incidents must be reported in SpiraTest system.
Linking incidents with the build is very simple. Developers need to enter the incident token in the following format in the commit message: [IN:ID]. Fixing more than one incident is possible simply by listing all fixed incidents with the same token. Example: Fixed: [IN:ID_1], [IN:ID_2], [IN:ID_3]….
Incidents updated with this build are also visible in Spira Test. Navigate to Planning -> Releasses -> [your release name]. In the “Builds” section, select the latest build and click on the “Incidents” button. The incidents that have been affected with the latest build have the same status as before the build. Blocked Test Cases with the particular incident need to be retested, and verify the incident fix.
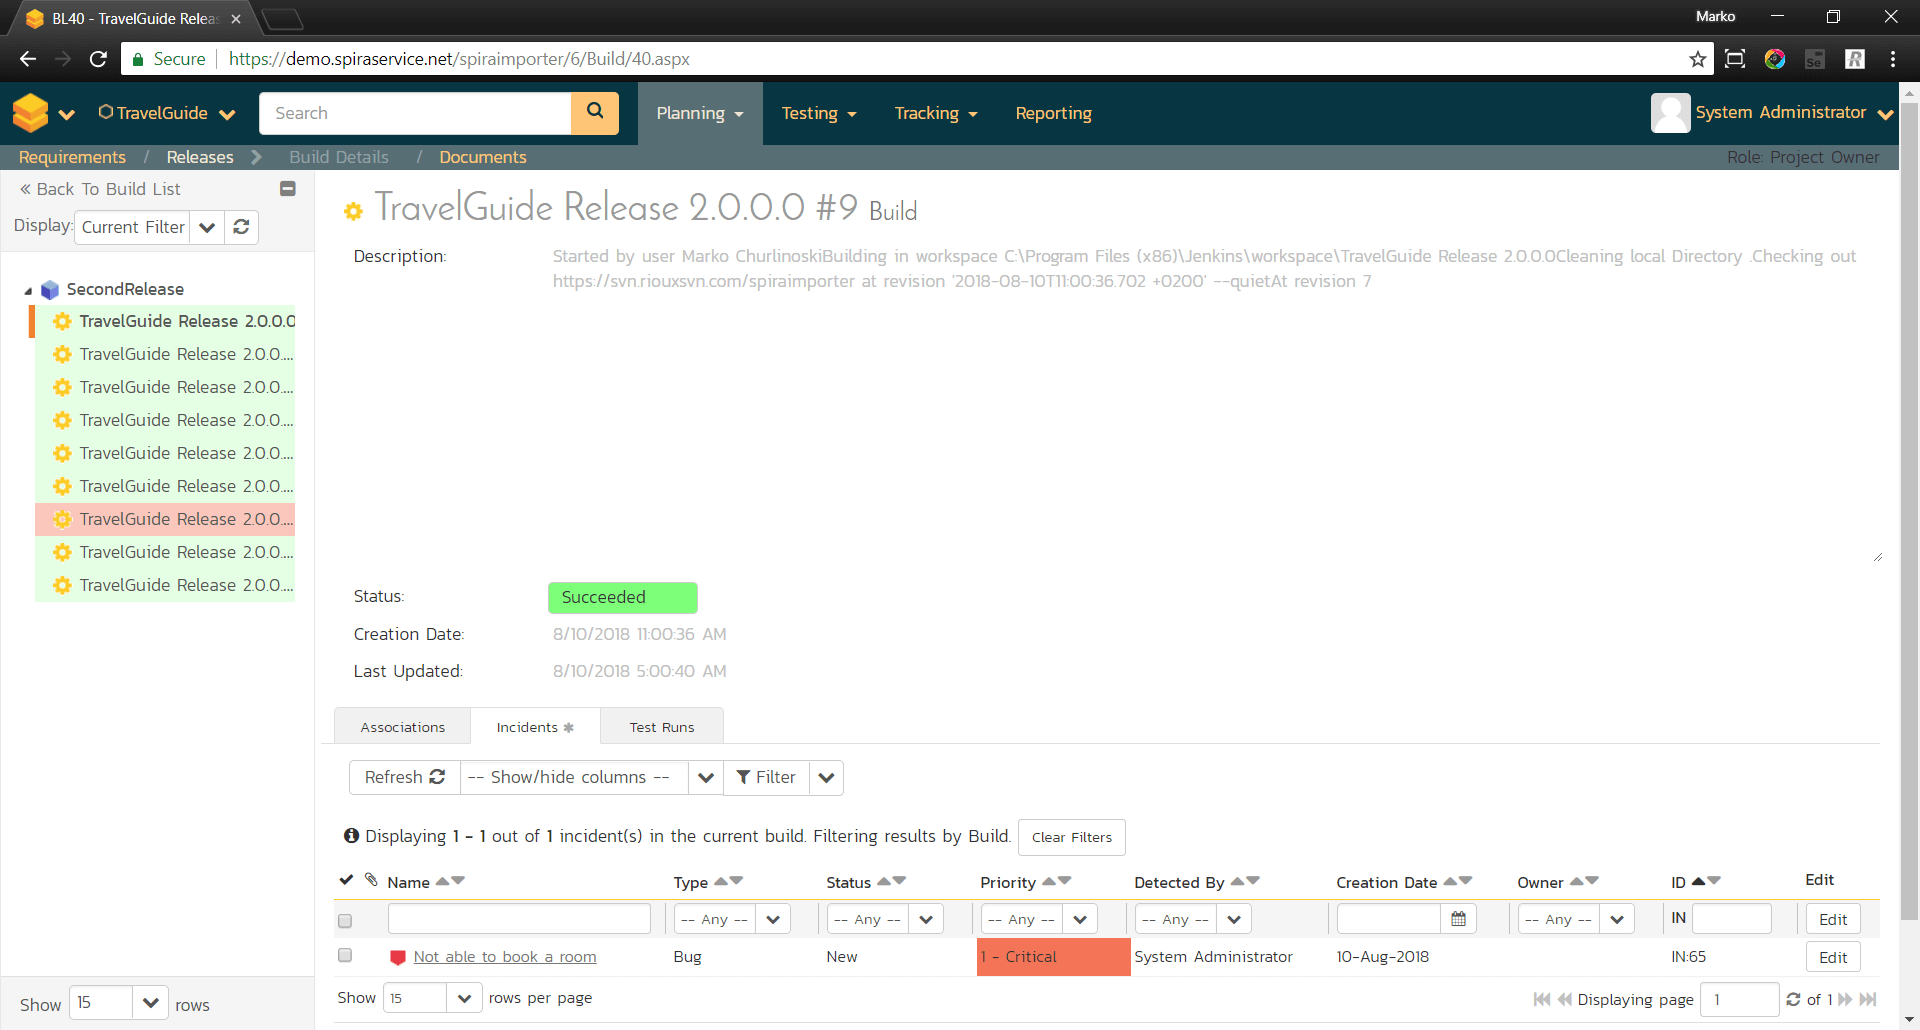
(Figure 8: Logging fixed issues in SpiraTest with the build)
Executing Test Set after successfully build
One of the features of SpiraTest is the ability to schedule execution of automation tests, whenever a build passes. Automated test is triggered by Spira systems, on a remote machine with installed “Spira Remote Launcher” software. In my case I use automated Rapise tests. More details about Rapise tool can be found on the following link: https://www.inflectra.com/Rapise/.
To execute tests right after a successfully build, you need to schedule a Test Set to be executed right after a build. Navigate to the particular Test Set (in my case “Smoke Tests”). In the “Dates and Times” section, mark the “Schedule on Build” field as “Yes”.

Figure 9: Scheduling Test Set execution in SpiraTest after build
Conclusion
Integrating Spira systems with Jenkins using “Spira Importer” Jenkins plugin is very useful for developers and testers. The communication between Development and QA teams is simpler and much more detailed. All tools: test casies, incidents, releases and continue integration builds are connected to each other. This way developers can detect their bugs much faster and easier, and testers get more information about releases, builds and incidents fixes.