Siri integration before the release of SiriKit was limited to Apple’s apps. After its release with iOS 10, senior developers had the ability to integrate Siri in their apps, but even then, the things you could have done with Siri were limited to a set of built-in domains like messaging, payments, fitness, etc. Since the release of Siri Shortcuts in iOS 12, developers can now create custom intents with the possibility to add custom input parameters, and custom Siri responses (to fill the gap of the missing domains and for a better voice interaction experience with Siri).
What are Siri Shortcuts?
We know that shortcuts give us the possibility to get tasks done quicker within our systems. Siri Shortcuts are exactly the same – quick actions used to get one or more tasks done, within our iOS app. They can perform actions while your app is running in the background, or they can open up your app so you can quickly get something done within it. You can invoke your shortcut by just tapping on it, or by asking Siri to run it with a simple trigger phrase, which is the name of the shortcut.
What are Intents?
Intents are the actions that can be performed by the user with Siri. With the custom intents, we can have better control over Siri Shortcuts. We can also create a custom Intents UI that can display some relevant information to the user without opening the app.
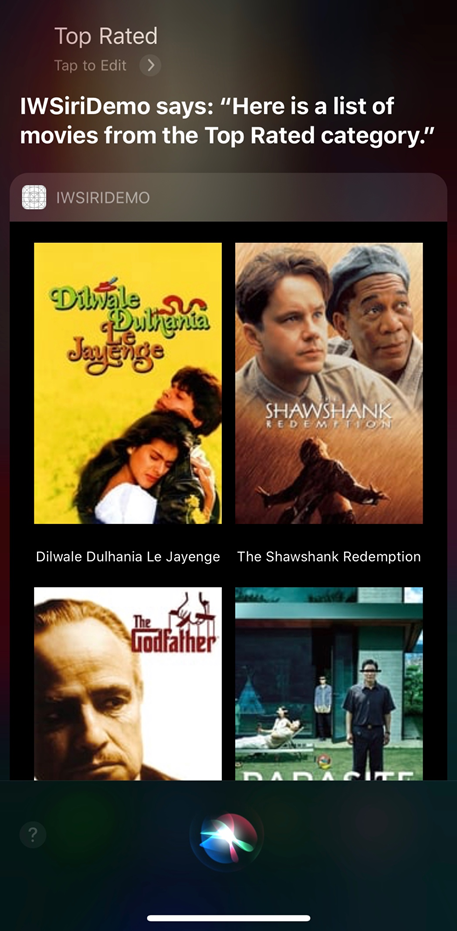
We will integrate Siri Shortcuts and custom Intents in our sample app that lists different categories of movies using The Movie DB API. In the end, we should be able to invoke the Siri Shortcut with its trigger phrase, converse with Siri, and display the results with a custom Intents UI.
Create Intents Extension
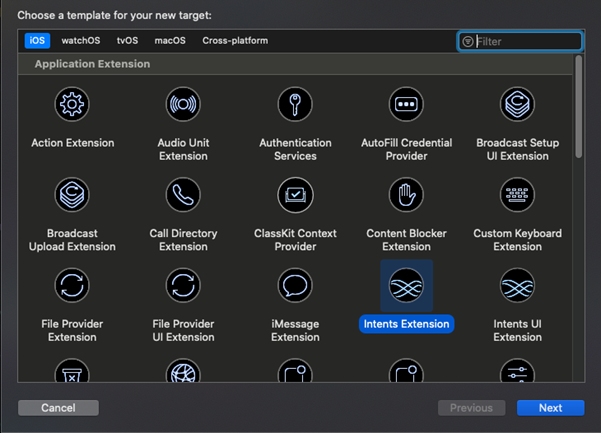
We will start off with creating the Intents Extension. To create an Intents Extension, we need to add a new target to our Xcode project. To do that go to File > New > Target, select Intents Extension template.
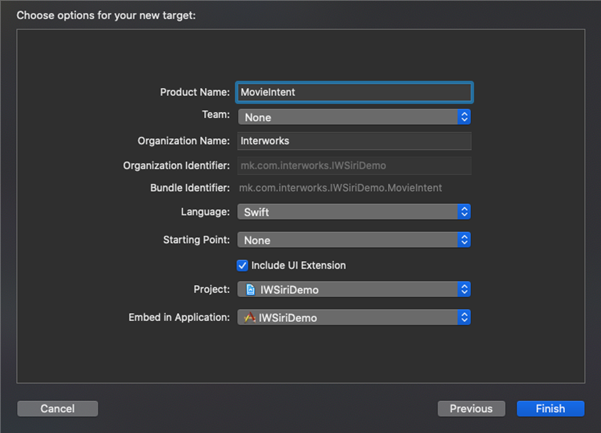
After that fill out the name MovieIntent and check the Include UI Extension checkbox so Xcode can generate the Intents UI Extension as well. After clicking Finish, Xcode will ask you to activate the build scheme. We need to activate both schemes for the MovieIntent and the MovieIntentUI. With the Intents Extensions, we will be able to handle our custom Intents that we will define in the SiriKit Intent Definition file.
Create SiriKit Intent Definition
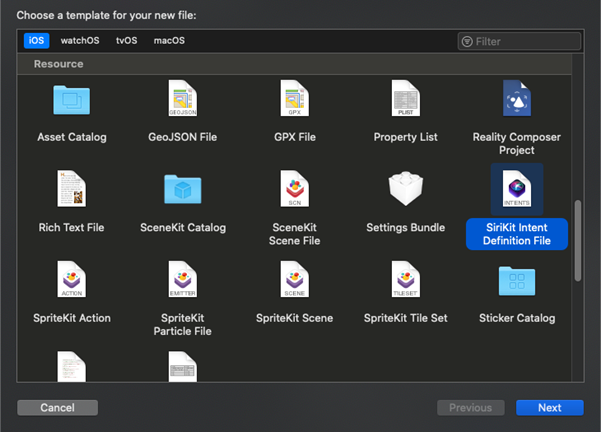
After creating the Intents Extension, we need to add the SiriKit Intent Definition file. This can be done by going to File > New File and select SiriKit Intent Definition File. The SiriKit Intent Definition file is used to create custom intents and responses.
After that open the file and click the + button at the bottom and create a new Intent named Movies. Change the category to View and add a title, description, and default image. Once you do that, add a new parameter and name it moviesCategory, set its type to String and tick the checkbox the Valid values are provided dynamically.
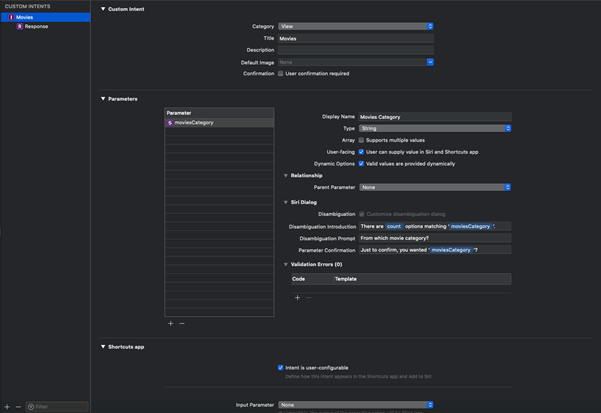
The next step is to update the summary and description fields in the Shortcuts app and Suggestions sections. Also, select the checkbox Supports background execution.

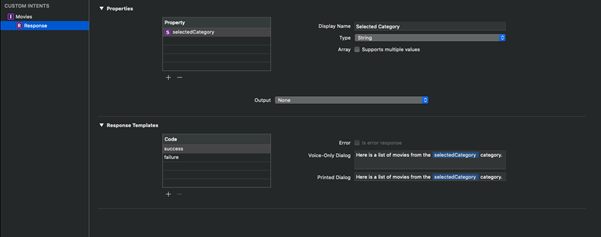
After we finished up setting up our custom intent, we need to configure the responses. Open up the response and add a property named selectedCategory of type String. The next thing that you should do is set the success and failure voice and printed dialogs.
Handling the Intent
In the MovieIntent Extension add a new class MoviesIntentHandler that implements the MoviesIntentHandling protocol. The MoviesIntentHandling protocol was automatically generated when we created the custom MoviesIntent in the SiriKit Intent Definition file. Next, we need to implement the protocol stubs in the MoviesIntentHandler.
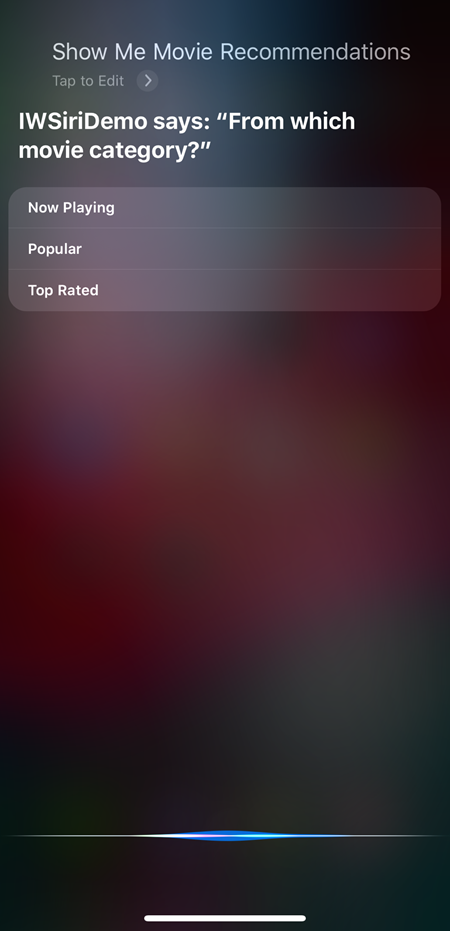
In the provideMoviesCategoryOptions we need to provide the categories that our intent can handle. The resolveMoviesCategory method needs to check if the parameter that the user provided is valid and that our intent can handle it, and if the user input is okay, we send a success response, otherwise, we ask the user to provide us with a new value. And in the handle method, we check if the intent moviesCategory parameter is available, and if it is, we send a success response, if not we pass a failure response code.
class MoviesIntentHandler: NSObject, MoviesIntentHandling {
private let moviesCategories = [“Now Playing”, “Popular”, “Top Rated”]
func handle(intent: MoviesIntent, completion: @escaping (MoviesIntentResponse) -> Void) {
guard let moviesCategory = intent.moviesCategory else {
completion(MoviesIntentResponse(code: .failure, userActivity: nil))
return
}
completion(MoviesIntentResponse.success(selectedCategory: moviesCategory))
}
func resolveMoviesCategory(for intent: MoviesIntent, with completion: @escaping (INStringResolutionResult) -> Void) {
guard let movieCategory = intent.moviesCategory else {
completion(INStringResolutionResult.needsValue())
return
}
if moviesCategories.contains(movieCategory){
completion(INStringResolutionResult.success(with: movieCategory))
}
else {
completion(INStringResolutionResult.needsValue())
}
}
func provideMoviesCategoryOptions(for intent: MoviesIntent, with completion: @escaping ([String]?, Error?) -> Void) {
completion(moviesCategories, nil)
}
}
After we finish implementing the MoviesIntentHandler class, open up the IntentHandler class in the MovieIntent Extension and update the handler method to check if the intent is MovieIntent, and if it is, we return the MovieIntentHandler that we implemented previously.
class IntentHandler: INExtension {
override func handler(for intent: INIntent) -> Any {
guard intent is MoviesIntent else {
return self
}
return MoviesIntentHandler()
}
}
Create Intent UI Extension
In the MoviesIntentUI Extension open the MainInterface.storyboard, add a collection view to the view controller, setup the view cell and create an outlet for the collection view in the IntentViewController.
This collection view will be used to display the results from The Movie DB API based on the user input parameter. After that open up the IntentViewController and in the configureView method check if the intent is MovieIntent and get the data from the repo.
func configureView(for parameters: Set<INParameter>, of interaction: INInteraction, interactiveBehavior: INUIInteractiveBehavior, context: INUIHostedViewContext, completion: @escaping (Bool, Set<INParameter>, CGSize) -> Void) {
guard let intent = interaction.intent as? MoviesIntent else {
completion(true, parameters, .zero)
return
}
let type: String
switch intent.moviesCategory {
case “Now Playing”:
type = “now_playing”
case “Top Rated”:
type = “top_rated”
default:
type = “popular”
}
movieRepo.fetchMovies(from: type, successHandler: { response in
DispatchQueue.main.async {
self.movies = response.results
}
}, errorHandler: { error in
print(error.localizedDescription)
})
completion(true, parameters, desiredSize)
}
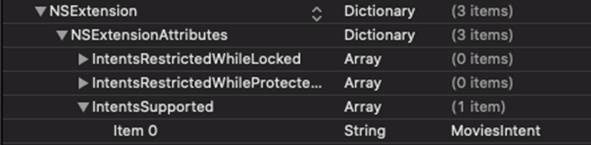
Next, we need to tell our app which intents it supports. To do that we need to select the Info.plist file in the MovieIntent Extension, open the NSExtension key and add our custom intent (MoviesIntent) to the IntentsSupported. The same should be done for the MoviesIntentUI Extension as well.
Donating shortcuts
After we have created and implemented the handler for the custom Intent, and the Intent UI we need to donate a shortcut.
First, we need to add the Siri Capability. To do that select your project, press on the + Capability button and add the Siri Capability. Next in your ViewController we will add a new function named donateShortcut that will be called in the ViewController’s viewDidLoad. In the donateShortcut function, we instantiate a MoviesIntent and set its suggested invocation phrase. After this, we create an interaction from this intent and donate it by calling the donate method on the interaction.
private func donateShortcut() {
let intent = MoviesIntent()
intent.suggestedInvocationPhrase = “Show me movie recommendations”
intent.moviesCategory = “movies category”
let interaction = INInteraction(intent: intent, response: nil)
interaction.donate { error in
if error != nil {
if let error = error as NSError? {
print(“Interaction donation failed: \(error.description)”)
} else {
print(“Successfully donated interaction”)
}
}
}
}
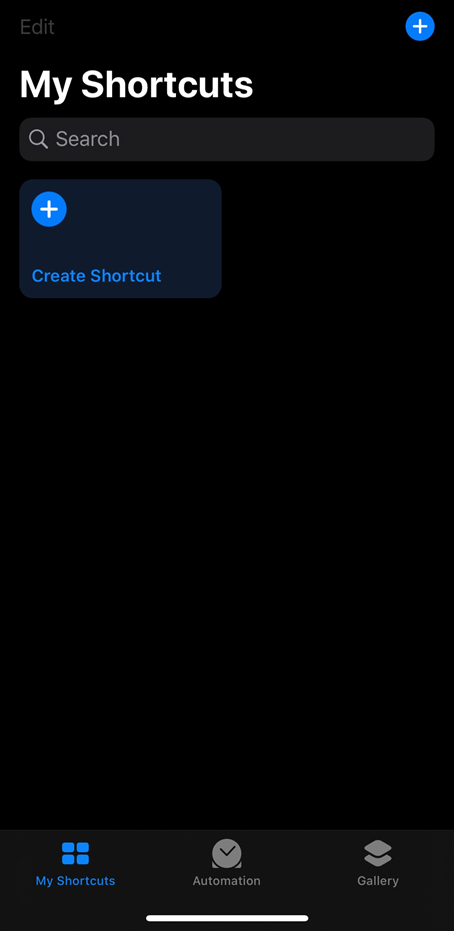
Creating and invoking the shortcut
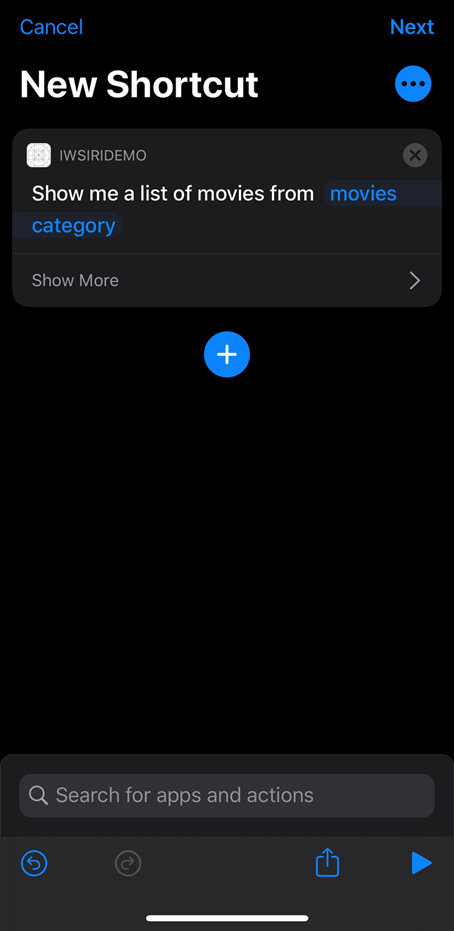
To create a shortcut we need to open up the Shortcuts app and create a new shortcut either from the suggestions or by selecting our app from the Apps list. After that, we need to finish up the creation of the shortcut by giving it a name that will be used as an invocation phrase in Siri.

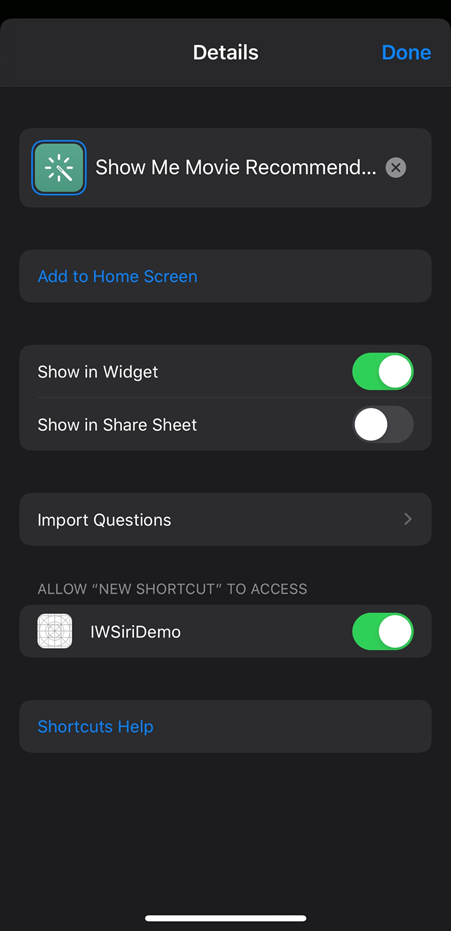
After we created the shortcut, we can invoke it by telling Siri the invocation phrase (the shortcut name), and Siri will run our custom intent asking the user for input to fill out the parameters and display the results for the given user input.