
Introduction
SnapLogic is a powerful integration tool for both application and big data integration. Here at ⋮IWConnect we are making a lot of clients satisfied by finishing the projects in the fastest time possible thanks to SnapLogic. The SnapLogic Elastic Integration Platform is also the industry’s fastest Integration Platform As A Service ( iPaaS ). GitHub on the other hand is the best place to share code with friends, co-workers, classmates, and complete strangers. When there are multiple people working on a project, it is very hard to keep track of all the changes in details, such as what were those changes, where were they made and when were made. GitHub or more precisely Git is a version control system where it keeps your code straight, storing the changes in a central repository. This allows us, the developers, very easy to collaborate, make changes, and upload the newest version to the live version of the project.
So why we should keep versions of SnapLogic integrations on GitHub?
The SnapLogic platform already has a good versioning of the pipelines and the versions lets you easily replace an existing pipeline with a newer one or to roll back to a previous version in the event something went wrong or you want to compare directly in the control plane with the previous version. This feature has its pros and cons, so as a biggest cons with it is because when you are deleting a pipeline, it will be deleted with the whole history, which will lose the whole versioning of the pipeline and there is no coming back. For that matter, starting few weeks ago, with the new release from SnapLogic we can integrate our SnapLogic account with GitHub repositories with a few easy steps which basically gives you the opportunity to make versioning of the pipelines and the assets on GitHub also and for you to follow the best practices of each integration project.
There is an amazing tutorial from the SnapLogic documentation which we tried to follow in order to version our projects on Git, and here are our way of doing it:
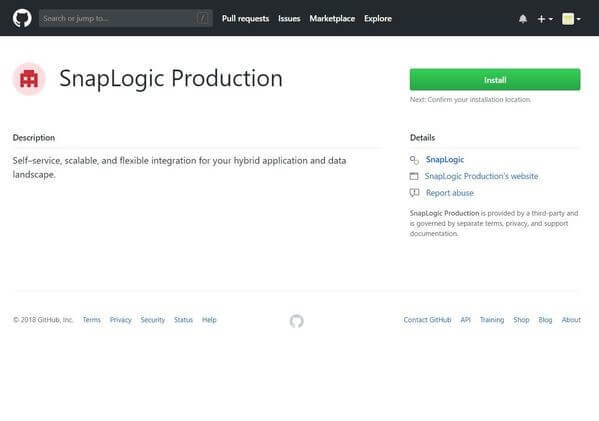
As a Step1, you must install SnapLogic app into GitHub.
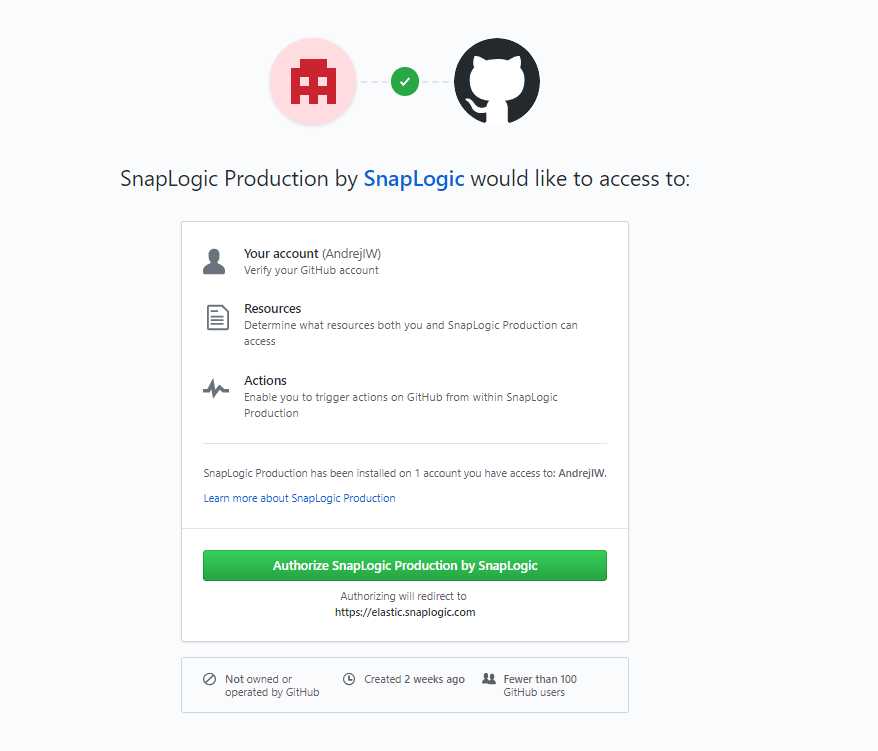
In order to integrate the SnapLogic Platform with GitHub we must install the SnapLogic App on the GitHub org. This is pretty easy and straightforward, just navigate to SnapLogic App in it. By just clicking the link provided it will open up a window in GitHub apps from which you need to install the SnapLogic Production App.
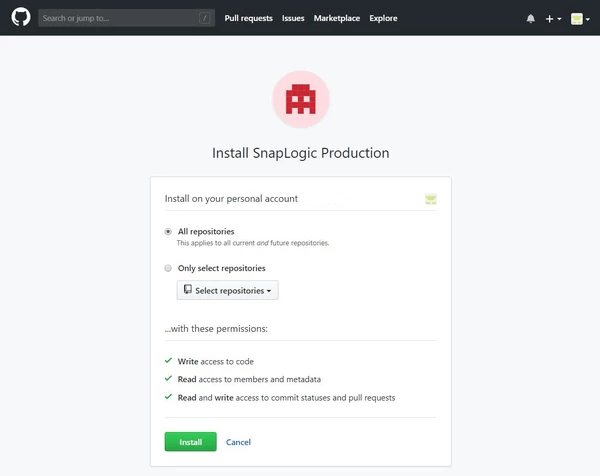
It can be set to All repositories or you can select which repositories you want, it’s really depending on your need and choice.
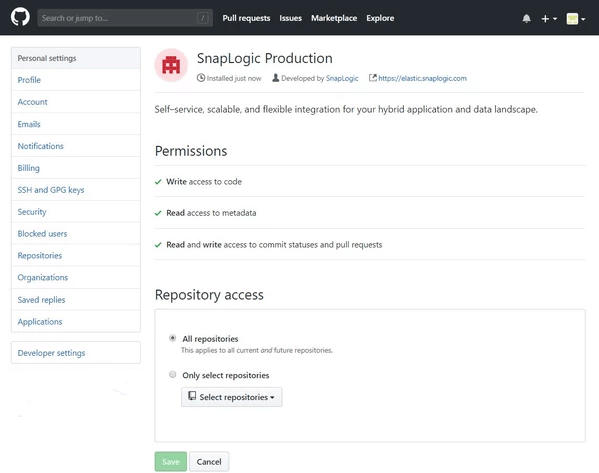
Please note that you can also modify the repository access after the app is installed by just going into Account settings → Applications → Installed GitHub Apps → Configure.
Basically this is just a straight forward thing, where you cannot probably do any mistake.
Just to know, only admin users can install SnapLogic app into Gihub. However, a basic user can create a request for installing the app and later on the admin will determine if it is a valid request from a valid user, and decide to approve or disapprove the request.
Let’s go to Step 2: How we can integrate SnapLogic and Github?
Very simple thing to do actually. For start you need to Authorize your GitHub account and Checkout repository.
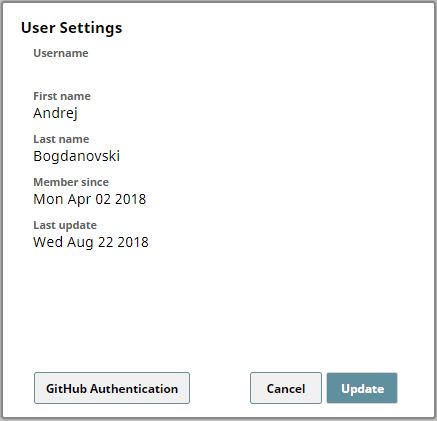
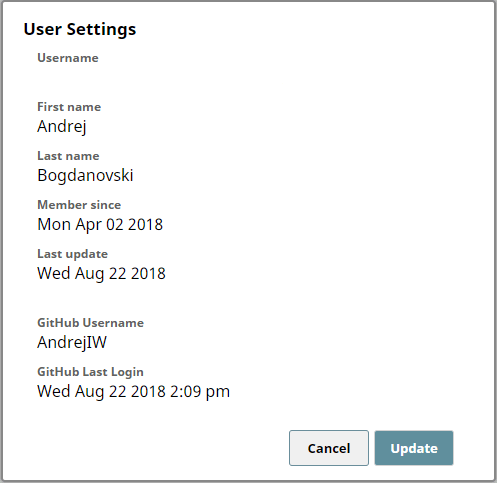
To do that you need to navigate to your SnapLogic profile name on the top-right corner to open the User Settings dialog box and click the GitHub Authentication button which will lead you to the login page of Git. Just with specifying your username and pass, login.
After you logged in, you will be asked to authorize the SnapLogic app to it. Authorize it and continue.
To check that you made this successfully, open the user settings and they will be updated with Github Username. That means you successfully authorized SnapLogic app to Git and click Update. You are done.
What can be wrong here? If you have disabled pop up blockers in your browser, maybe it won’t give the login dialog box, so for that reason, please disable the pop up blocker on your browser.
Ok, now we are all set. We can now try to checkout our code from Git to SnapLogic. In order to do this you need to go to the Manager tab of SnapLogic and navigate to the project you want to make a checkout.
Go to the SnapLogic Manager Tab, find the project where you want to do the checkout and just click the downward positioned arrow, same as you want to rename or delete a project. So, if everything from above is set properly then Checkout GitHub Repository option is available in the list of possible options as shown in the screenshot:

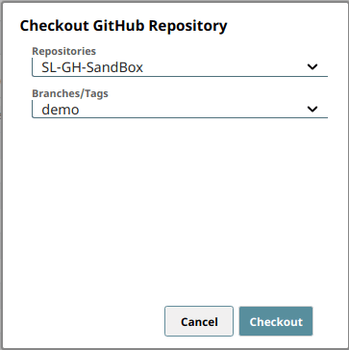
When you open the Checkout GitHub Reporstory option, you’ll see two boxes: Repositories, and Branches/Tags. The Repositories drop-down menu contains a list of the repositories in your GitHub org to which you have access and that have the SnapLogic app installed. Choose the right repository and branch to which you should link the SnapLogic project using the Repositories and Branches/Tags drop-down menus and just click Checkout. Files and assets will be displayed in the Asset table of the SnapLogic project you have chosen. In the asset table you can see the Github menu.
What you can do with Github, from the SnapLogic menu?
There are few stuff that can be done from SnapLogic UI, that we have not mentioned above which are crucial when using GIT. Below, I’ll continue with mentioning and briefly explaining each of those options:
How you can see your repository path from SnapLogic?
In the Manager tab when you navigate to your folder/project you can see the Repository Path from GitHub next to your Project Name.

This is essentially composed of three parts:
- The path of the GitHub repository. Clicking on the repository’s path opens the repository in GitHub.
- The commit ID. Clicking on the commit ID takes you to the commit’s details page in GitHub. This is update with each GitHub commit and pull.
- Username of the GitHub account that made the last commit.
GitHub menu in the SnapLogic manager tab is displayed. What we have in it?
When in Manager a GitHub icon will be added to the organization’s Asset means that you have successfully connected your SnapLogic organization with your GitHub account.
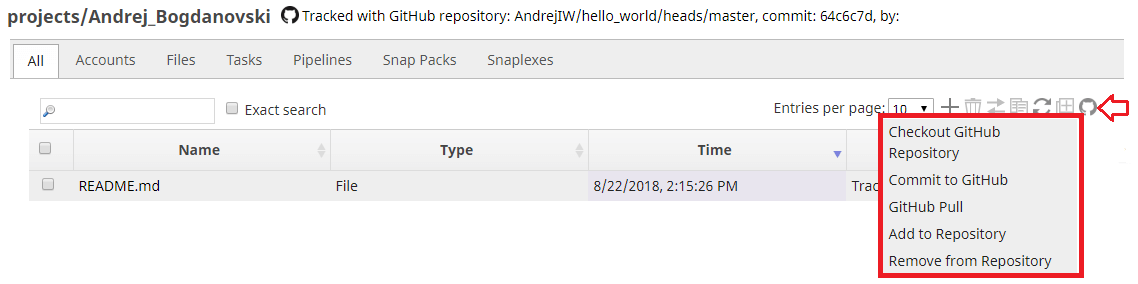
The menu shown on the above picture contains these options:
- Checkout GitHub Repository
- Commit to GitHub
- GitHub Pull
- Add to Repository
- Remove from Repository
When you are working with GIT already, you know what each of these options means and what it is used for.
What the GitHub status column means?
Like the name itself says, it displays the status of the assets that you are trying to sync up with GitHub.
Each asset has one of the following statuses:
- Tracked: Assets are updated in the repository.
- Untracked: Assets are not updated in the repository.
- Added:Assets are added but not committed in the repository.
- Removed:Assets are removed but the file delete is not committed in the repository.
- Unsupported:Asset type is not supported.
Similar to what you are doing from terminal, in SnapLogic you can perform several operations with Git, in order to sync up your assets, such as:
- Add files
- Update files
- Delete files
For a more detailed explanation you can refer to the SnapLogic Documentation link.
Few Very Important things with GitHub: Branches, Merging etc.
First thing: Let’s say we have a file on GitHub and in snapLogic we do a GitHub Pull. It will give us the same file from GitHub in snapLogic. If someone changes the file and commits it directly to GitHub and after that if someone from snapLogic also changes the file and tries to commit it to GitHub it will give us a message.
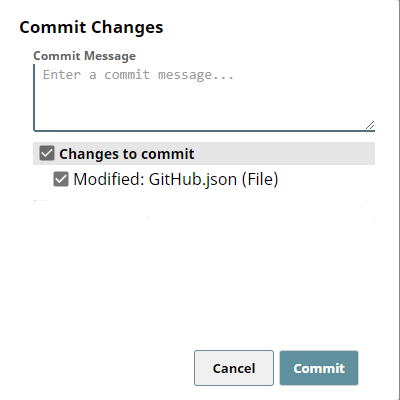
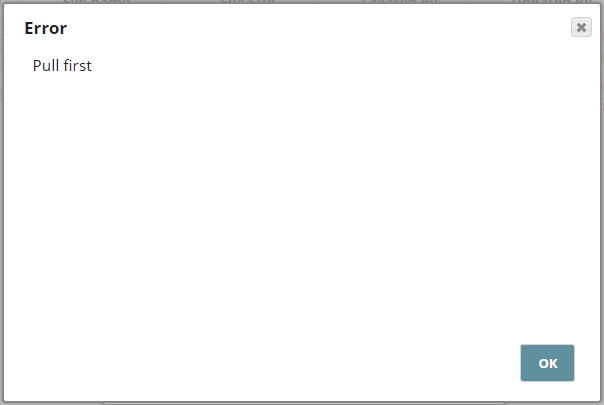
In front of the file name it will say Modified which is telling us that the file has been modified in GitHub and when we try to Commit our change it will pop up a message saying that we must pull the updated file from GitHub first, then commit changes to it.
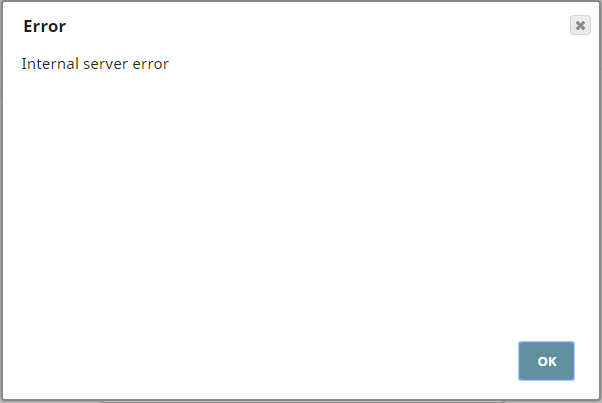
Second thing: If someone creates a second branch in GitHub and in snapLogic in Checkout GitHub Repository we select the second branch, all of our files in snapLogic will be updated according to the second branch in GitHub. Now let’s say the second branch just got merged with the master branch and the second branch is deleted because is no longer necessary. From snapLogic side if we try to click GitHub Pull form the second branch it will give us an error because that second branch is deleted, in the pic you can see the error that we are getting.
And in the master branch you will have all of the changes contained from the merged branch also.
Conclusion
As we all know, the latest trend for code versioning is GitHub. No matter if you are an application, web or integration developer, we all use Git to sync up the code and have good versioning and organization of it. Before this feature was added to snapLogic, we were implementing custom integrations with GitHub, custom pipelines for syncing the code or manual efforts with downloading the code from the snapLogic cloud platform and pushing it to Git manually. Now, with the new feature with automatically with just one click syncing the code to Git, our effort for code versioning and organization made it quite easy and only just click away. This gained us more performance and better organization in everything.