
First, you are all going to ask why do we need Path-Based Routing Application Load Balancer? Weill the answer to that question is simple, for testing some website in two different projects why do we have to buy two ELB and two domains to have SSL/TLS connection?
NOTE: We are going to configure the using of the same default HTTPS port on both website applications.
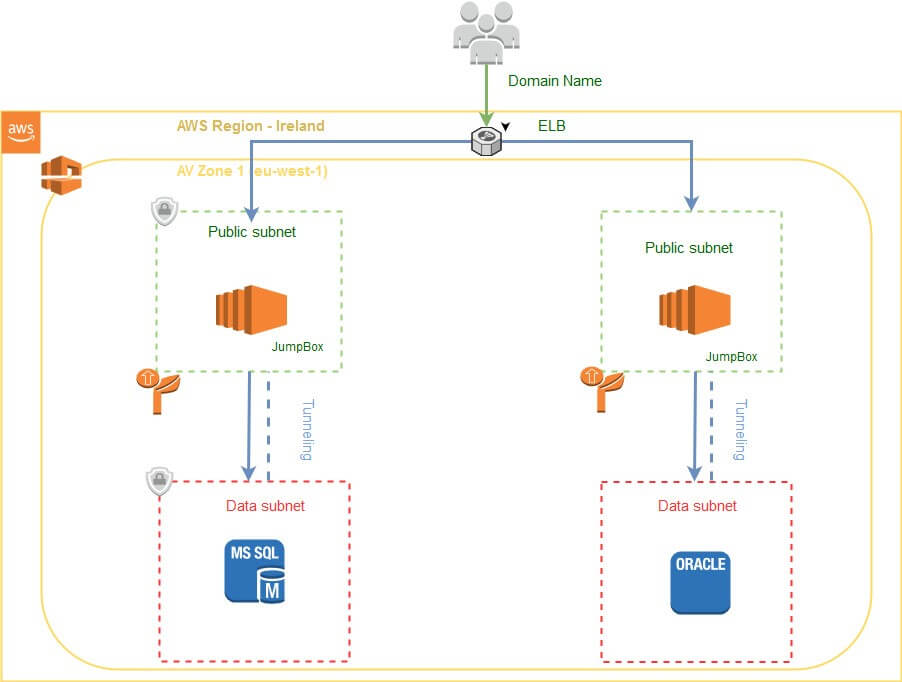
To understand this better check the photo below to see that we are talking for websites that are located on different servers.
After we have purchased a domain name both servers are up and running apache service so the websites can be reached. As AWS engineers, we are creating a New Load Balancer or we can use the existing one if you have created one before.
To create a load balancer, go to AWS Management Console > EC2 > Load Balancing > Load Balancers and hit the Create Load Balancer Button.
During creating Load Balancer, I will explain only the fields that are important for us.
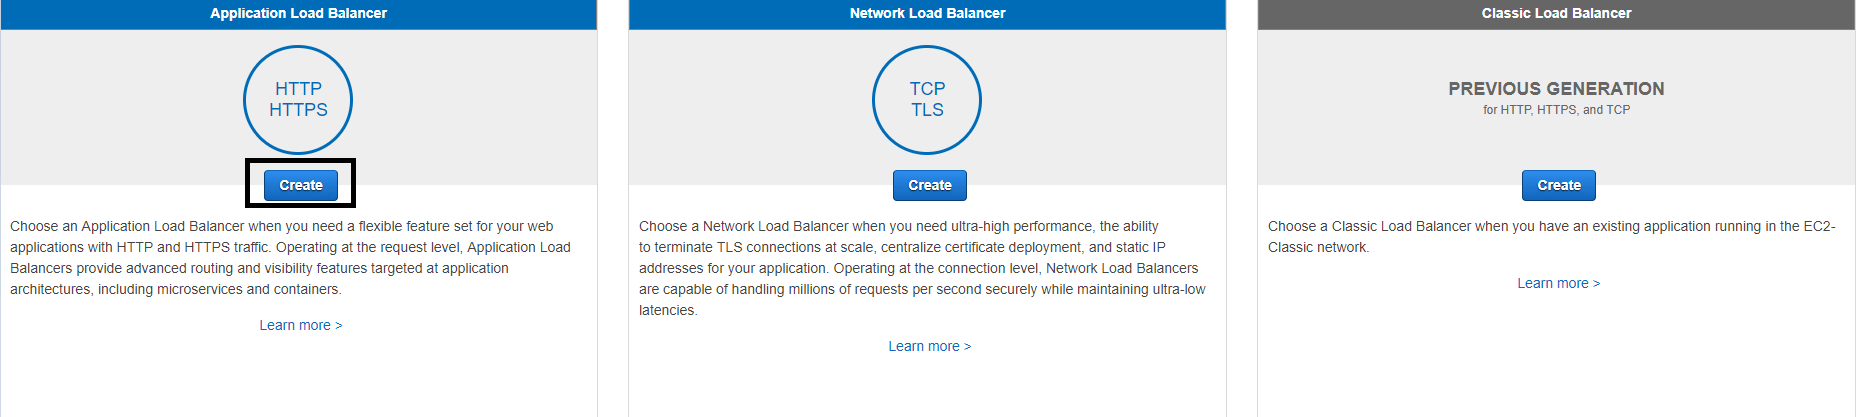
To start creating Application Load Balancer hit the CREATE button under HTTP/HTTPS as marked on the photo above.
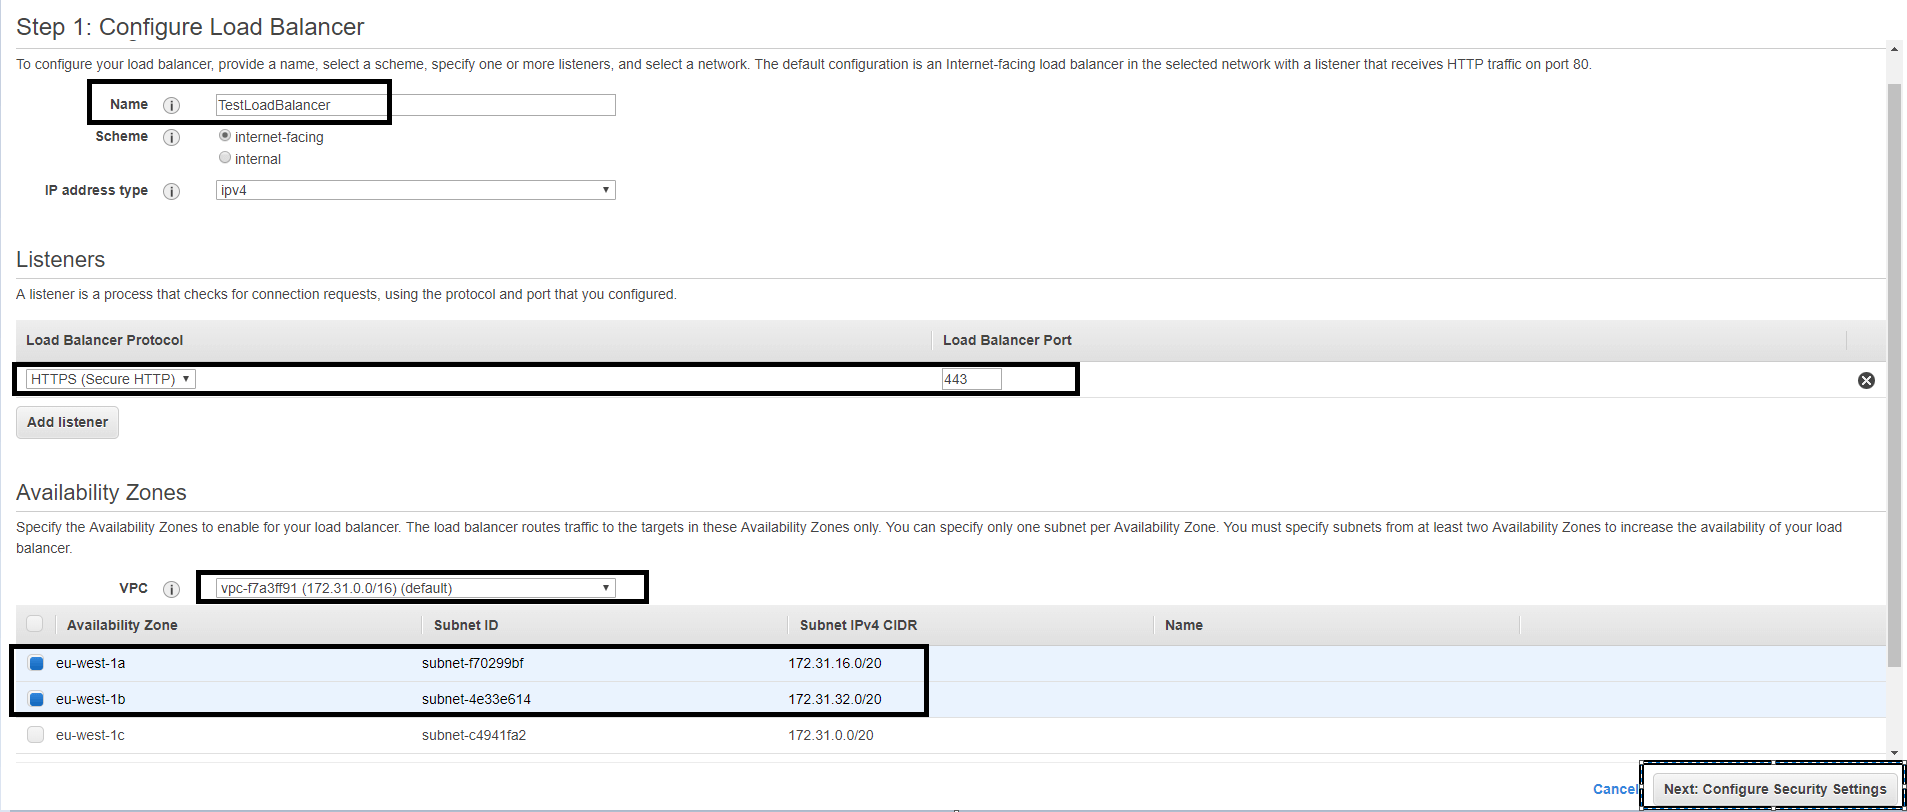
Next step is basic configuration so we are filling the following fields:
- Name: TestLoadBalancer
- Listeners: HTTPS (Secure HTTP) > Port: 443
- VPC: (Select your VPC) vpc-f7a3ff91(172.31.0.0/16)
- Availability Zone: (Select two different zones): eu-west-1a and eu-west-1b
And hit the next button.
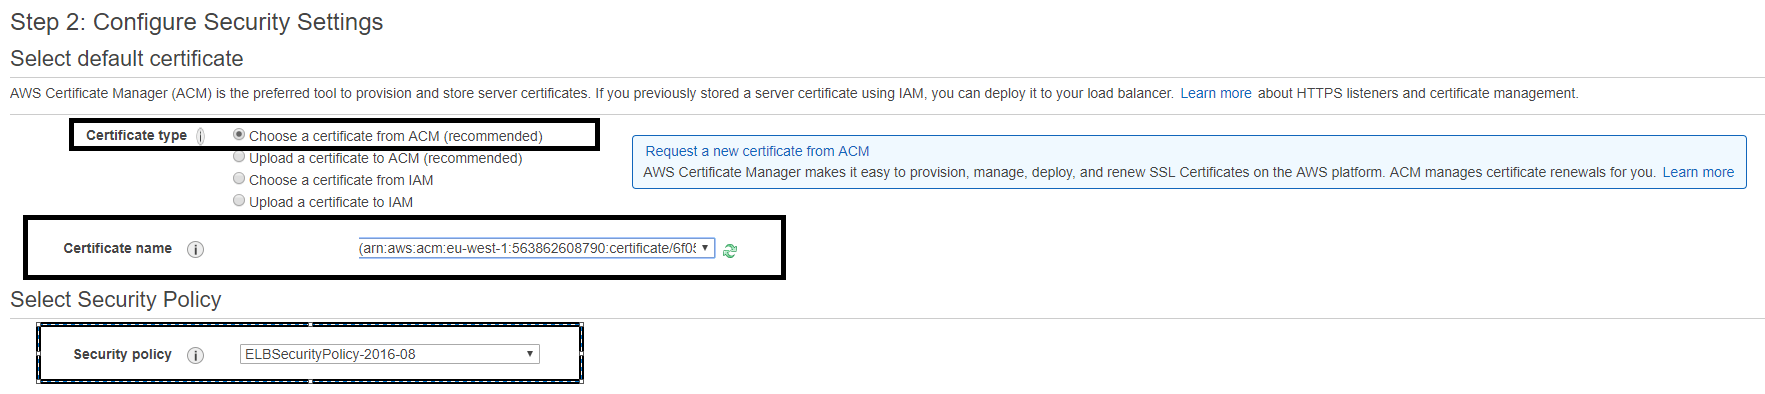
Now we are selecting the certificate. Because we have a certificate for our ELB we will use the existing one.
- Certificate type: Choose a certificate from ACM (recommended)
- Certificate name: arm:aws:acm:eu-west-1:563862608790
Security policy: ELBSecurityPolicy-2016-08
The next step is attaching security groups. We can create a new security group or we can use the existing. Because we have already created a security group we will use that one:
- Assign a security group: Select an existing security group

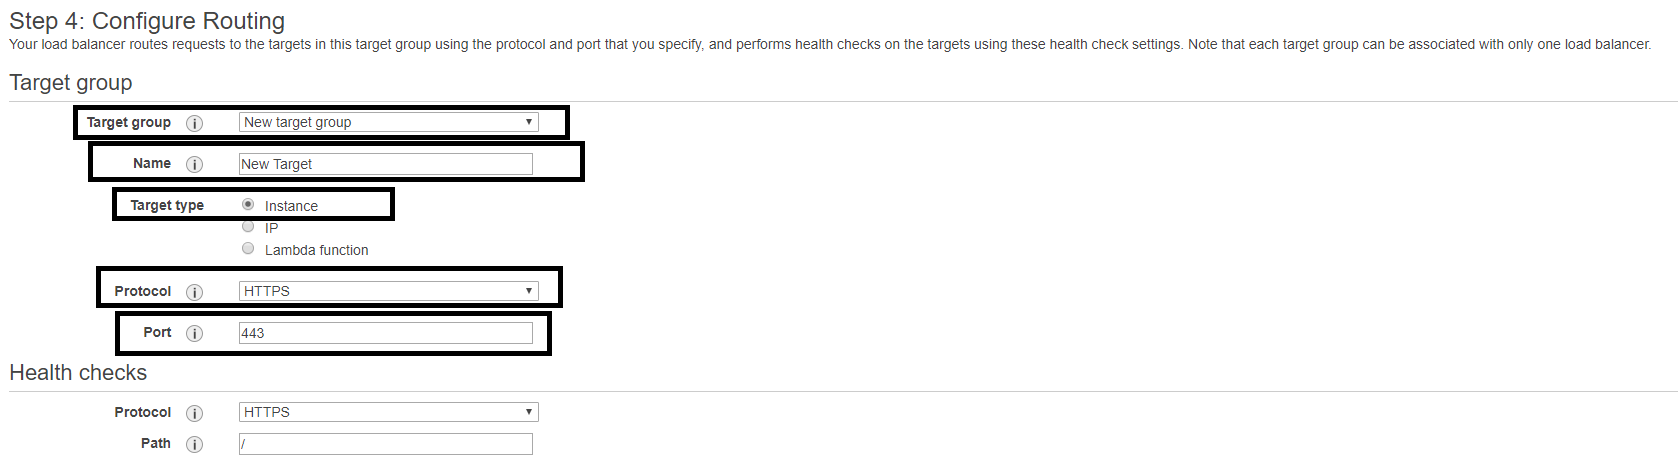
Now we will setup some routing:
- Target Group: New Target Group
- Name: (Apply Your Name) New Target
- Target Type: Instance
- Protocol: HTTPS
- Port: 443
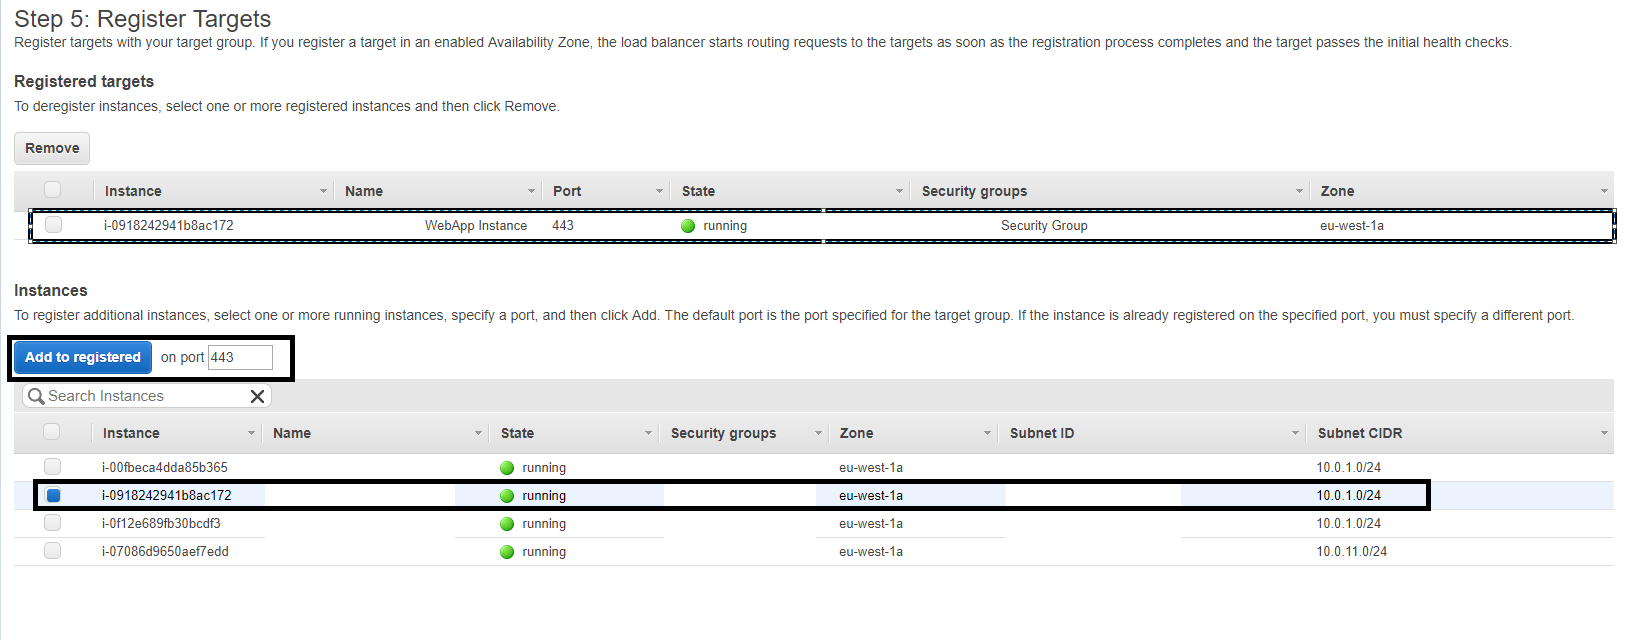
The last step before the ELB is online: we have to register Targets.
We are creating a Target group after the ELB is online and we will create a second target group for the second instance.
After we click on Next we just need to review the configuration and we can create the Load Balancer.
Now we are going back to AWS Management Console > EC2 > Load Balancing > Load Balancers and we will be able to see that there is a Load Balancer available.
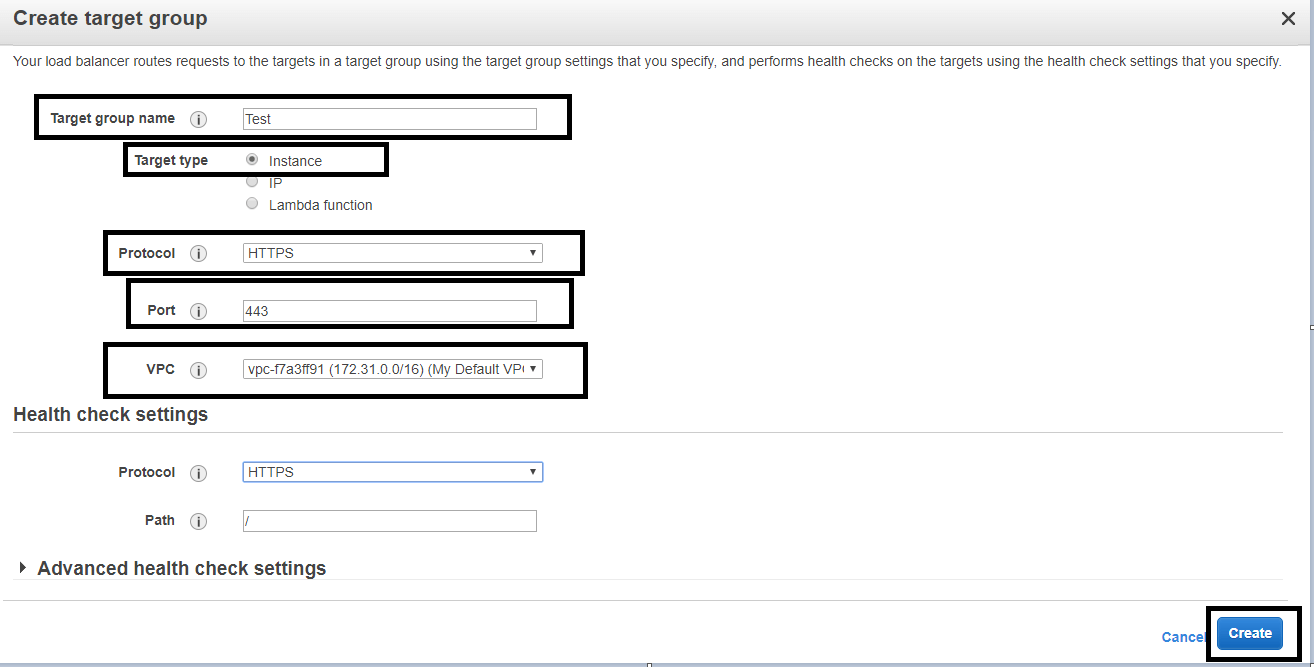
As I said before we have to add a second target group. To do so we need to go to AWS Management Console > EC2 > Load Balancing > Target Groups and click on the Create Target Group. New menu will pop up. Fill up the following fields:
- Target Group Name: (Add a name for your target group) TargetServer2
- Target Type: Instance
- Protocol: HTTPS
- Port: 443
- VPC: (Your VPC of the second instance)
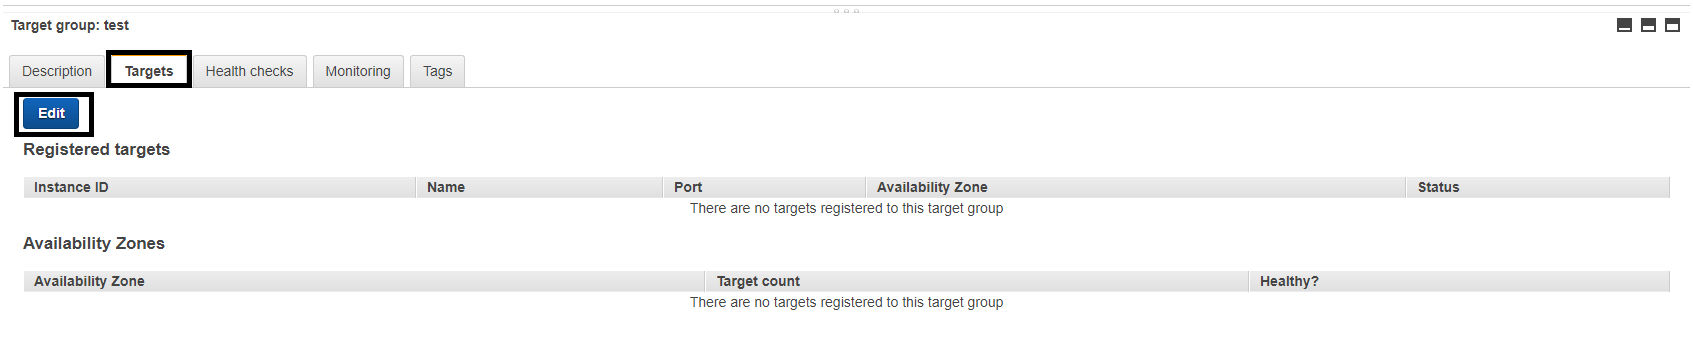
Your second Target group is successfully created. Now you need to register your instance, like I said we have to create a second target group because we will use it with the same port as the primary target group. If we wanted to use the other port, we could register on the primary target group.
Select second created Target Group click on Targets and hit the Edit button.
New menu will pop up so you can add your second instance to be called on port 443.
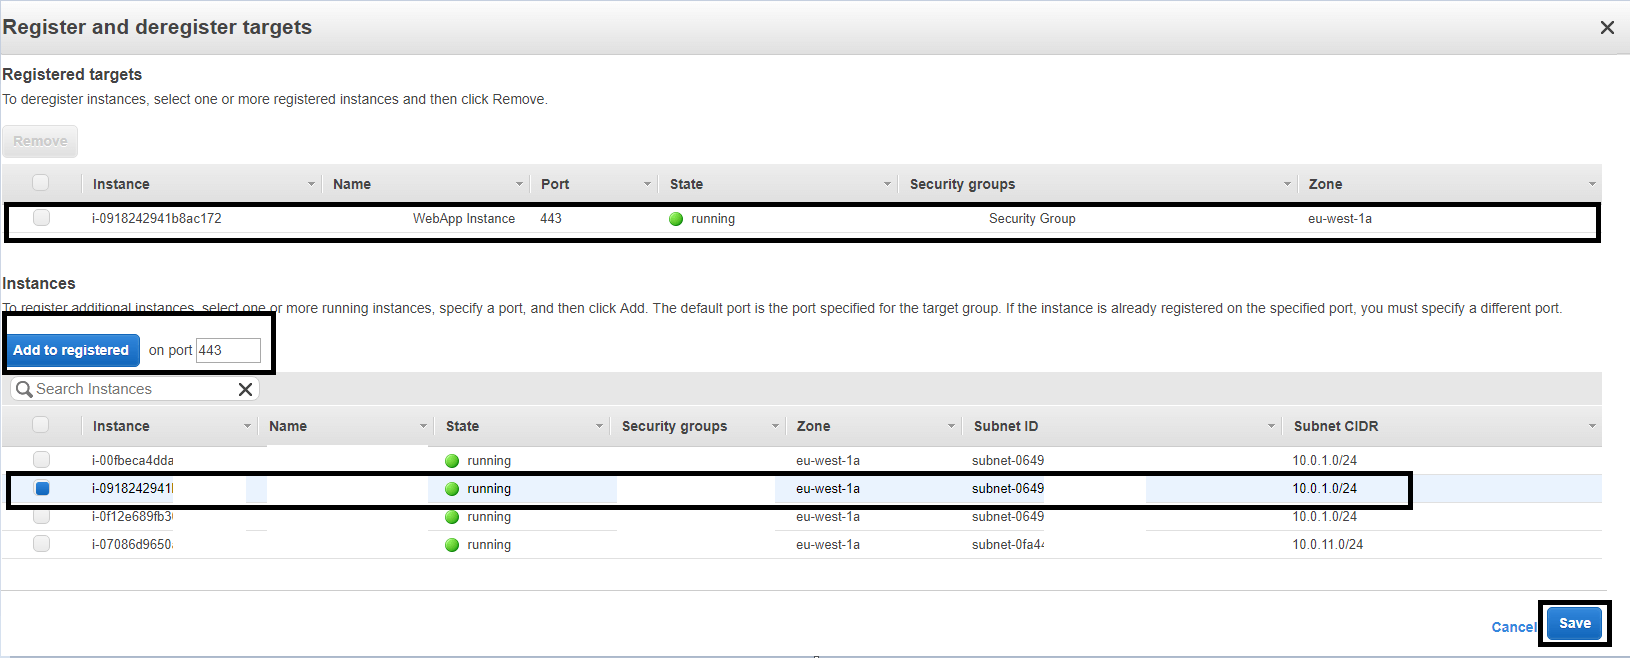
After you have clicked into Add To Registered, the new instance will be shown in Registered Targets. Click Save and the second target group is configured to work with your second instance.
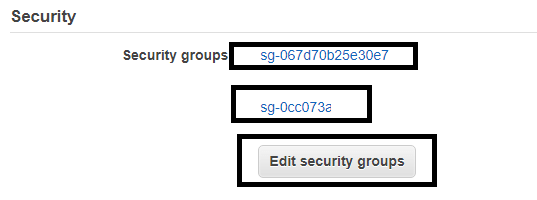
Head back to Load Balancer menu > select your load balancer and at description scroll down to Security. Click on Add security groups (on the picture I have already configured it and it only shows Edit security groups). I have marked my two security groups just to see how it will look like after you have added yours.
Now you are protected and your websites are only visible to the people added in the allow list.
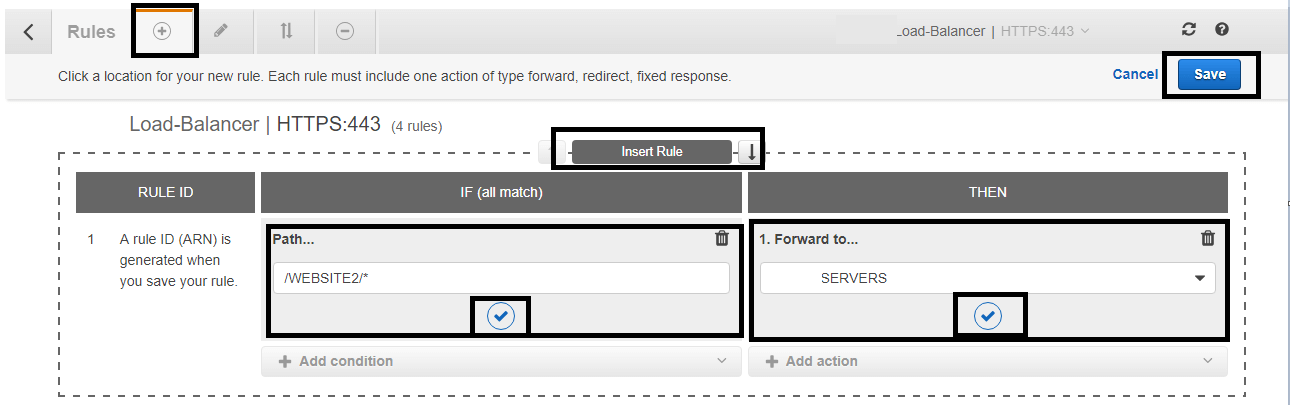
The last step is adding Rules to your ELB. Go to the Listeners tab, select your already created listener. Click on View/Edit Rules. Also you are able to see Default Rule to forward to primary servers. Now we are going to add a rule for the second instance and everything will be working without any issues.

In the new menu that you have entered click on the ADD(Plus) button additional click on the Insert Rule.
At the IF(all match) click + Add condition > Path… and add the path of your second website.
WEBSITE2/*
At the THEN click + Add Action > Forward to… select from the dropdown menu the second target servers created TargetServer2
On both places hit the CONFIRM button and SAVE
That would be all, there is no need to configure anything else because the Primary Target Group will by default send all requests to the WEBSITE1 and all requests /WEBSITE2/ will be sent on the second instance/website. Using this kind of method helps us reduce the cost of the testing environment.