
Introduction
Bitrise is a CI/CD platform with a main focus on mobile app development. It can also be used for running tests, setting up nightly builds, etc. In this article, we want to show you how you can add a new app on Bitrise and how to run Robot framework tests with Appium library using Bitrise on SauceLabs.
Adding a new application on Bitrise
To add a new application on Bitrise, first, you should go to https://app.bitrise.io/dashboard (before you start you should have Bitrise account).

Click on the + and choose “App app” (Fig.1), the “Create new app” screen will be displayed. (Fig.2)
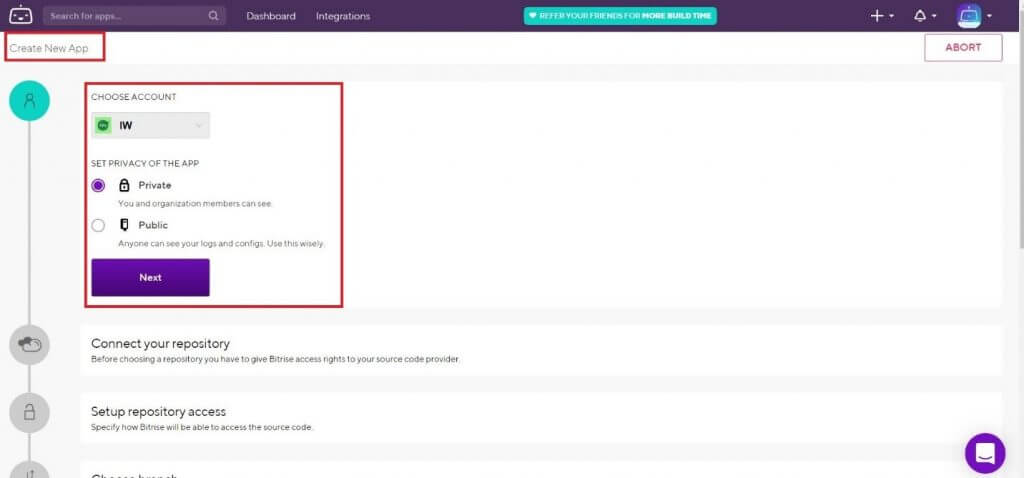
Select your Bitrise account, set the privacy of the app (Private or Public) and click next. (Fig.2)
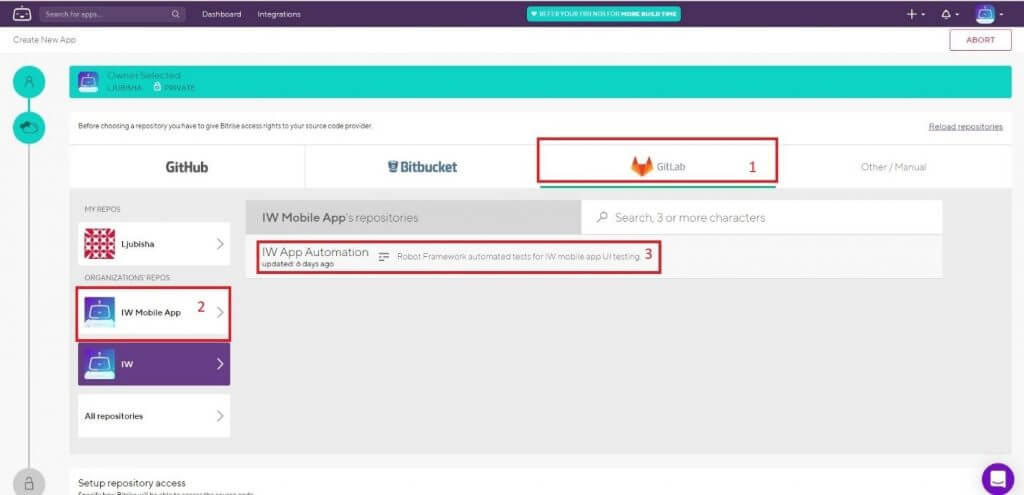
The “choosing repository” screen will be displayed, in this step, we will connect it to GitLab (where the Robot framework tests are stored).
From the menu, we will choose GitLab (1) (if your code is stored in some other repository like GitHub or Bitbucket you can simply specify the repository here), under Organization Repos select your Organization (2) and then click on the Repository (3) (Fig. 3).
After you have selected your repo, the “Setup repository access” screen will be displayed (Fig.4). In this step we need to set up a repository access, in order to do that first, we need to choose between Automatic or you can add your own SSH. In our article, we will go through it automatically with an auto-add SSH key.
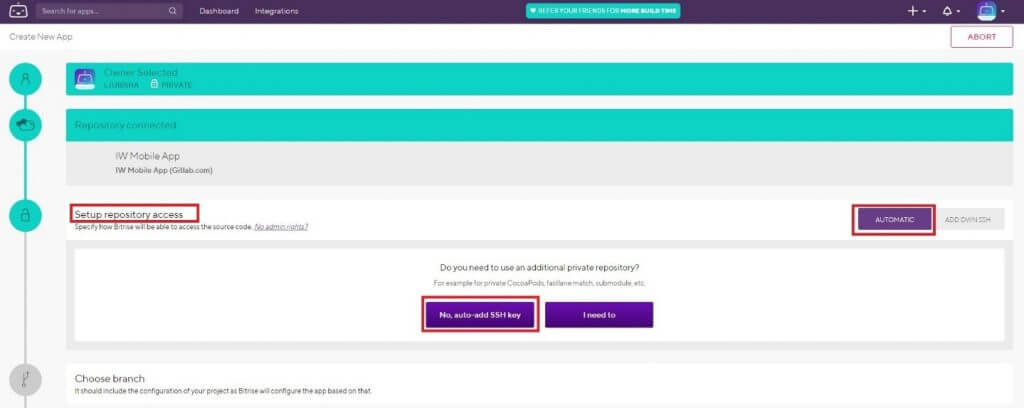
Click on “No, auto-add SSH key” button (Fig.4).
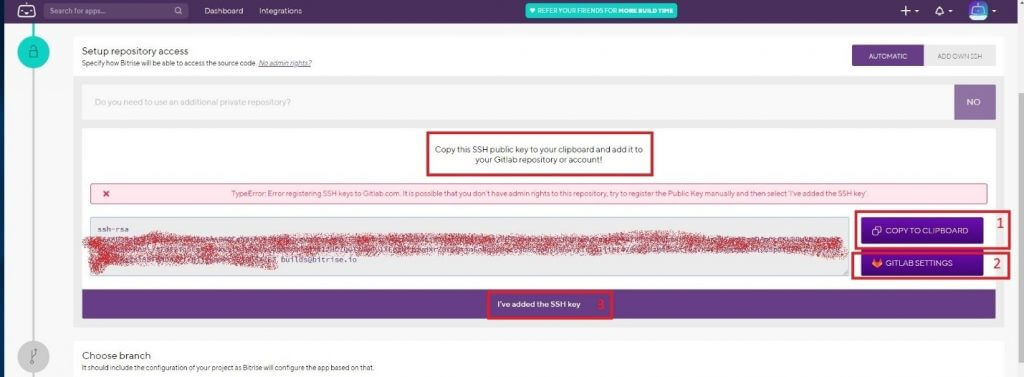
In order to connect Bitrise with GitLab we should copy the SSH key (Fig.5-1) (which we previously generated by clicking the “No, Auto-add SSH key” button, then open the GitLab settings (see SC.5-2).
After clicking the “GitLab setting” button (Fig.5-2), the page will be redirected to GitLab and “SSH Keys” page will be displayed (Fig.6). Under “Key” paste your public SSH key (that you previously copied from Bitrise) and then click on “Add Key” button.
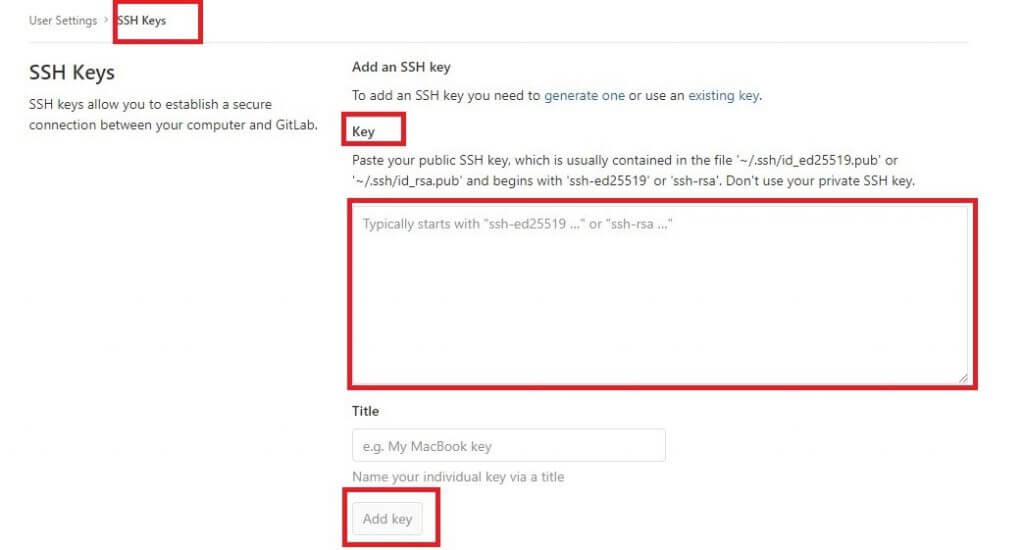
After the SSH key is added to your GitLab account, click on “I’ve added the SSH key” button (Fig.5-3). Once this is done, the Bitrise and Gitlab will be synchronized and Bitrise has access to the repository, so now we can clone it during the build process.
In the next step, we should choose the branch. When it comes to choosing a branch, we suggest to choose the branch where you keep the latest version of your application.
Type the branch name and then click on the button Next. (Fig.7).v
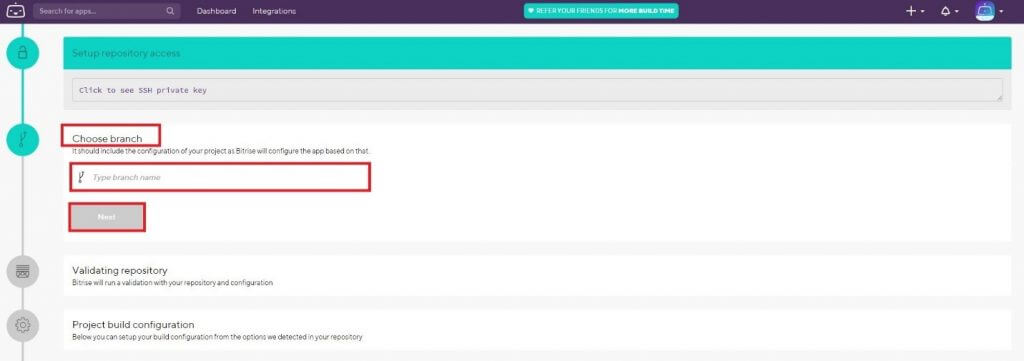
After choosing the branch you need to wait a few minutes for validation.
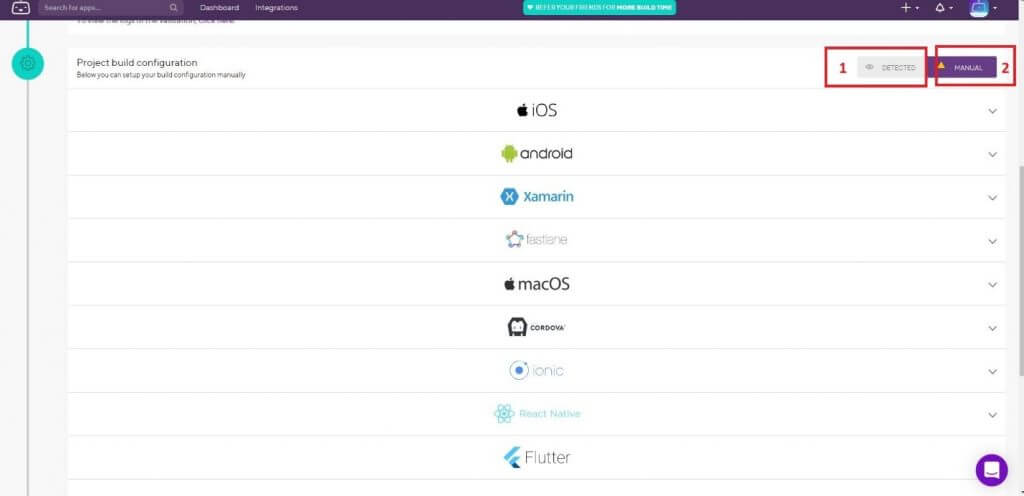
At the next step, the “Project build configuration” page will be displayed, here you can set up your build manually or you can click on Detected.
If you choose Auto-detect app (see SC.8-1), Bitrise will start an auto scan and validate your repository. The application will set-up based on the results of the scan, Bitrise will detect the platform type of your application based on the configuration files and if for some reason the validation fails you should set up the application manually (see SC.8-2).
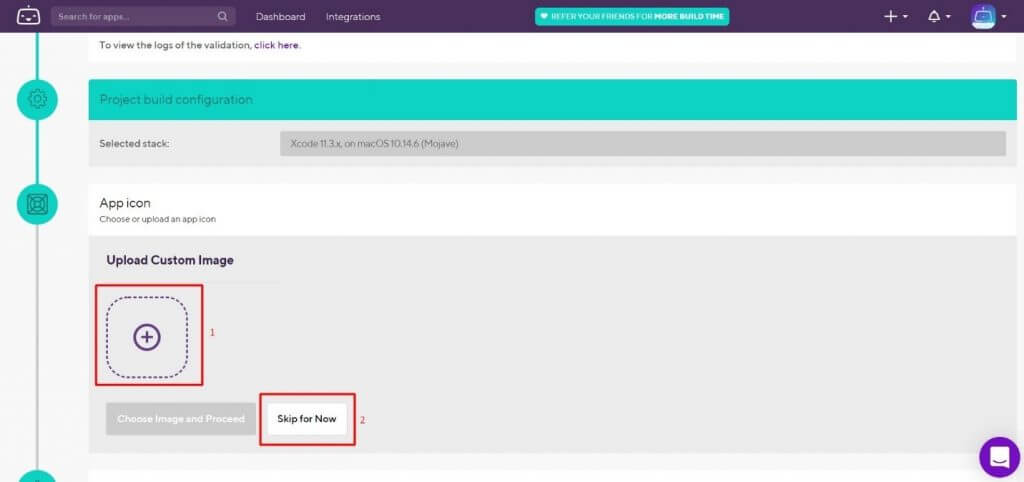
After you have selected your build configuration, the next step is to add an “app icon”. (Fig.9)
In this step, you can add a custom image from your local machine or just click on “Skip for Now” button.
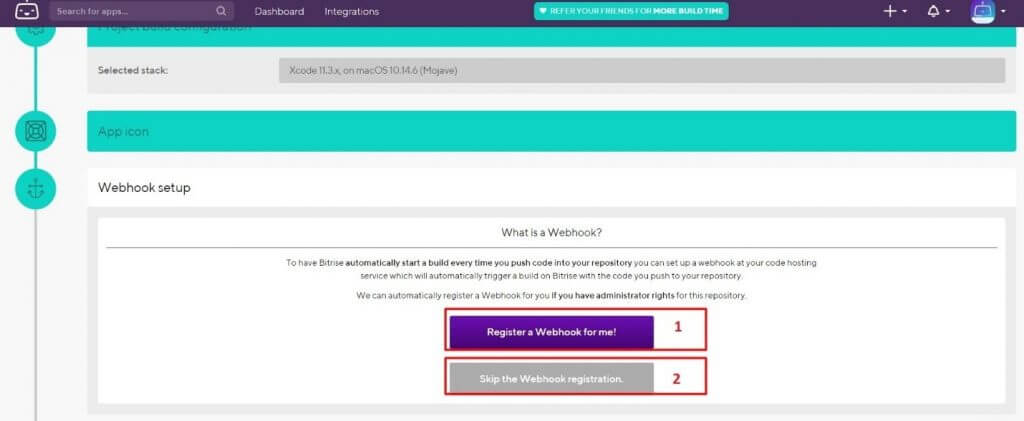
Before you finish the configuration, Bitrise will offer you to register Webhook in your repository.
Click on “Skip the Webinar registration” button (Fig.10-2) – this is the last step of the configuration.
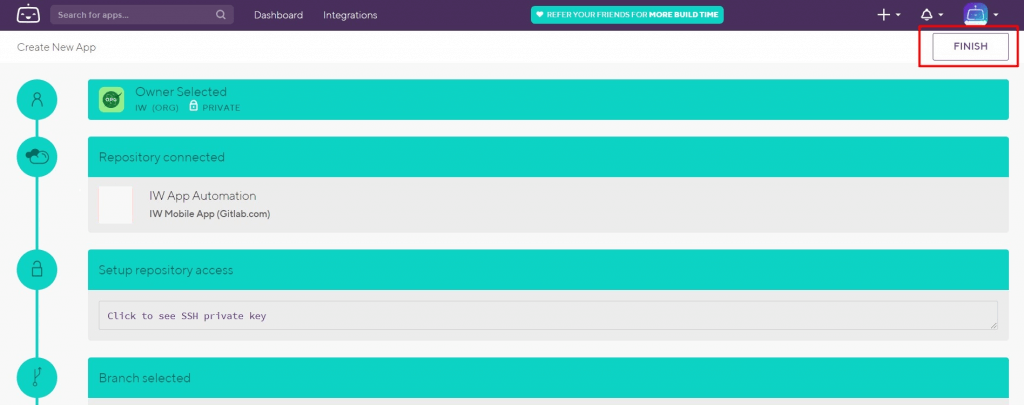
Click the FINISH button at the top of the page. (Fig. 11)
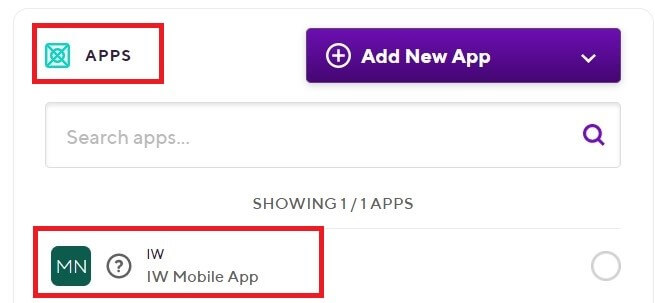
At this point your app is successfully added, and the newly created app can be found in the Dashboard page under “APPS”.
Run Appium Tests Using Bitrise
Select the application which we previously added (go to Dashboard under Apps, select the app) (see Fig. 12).
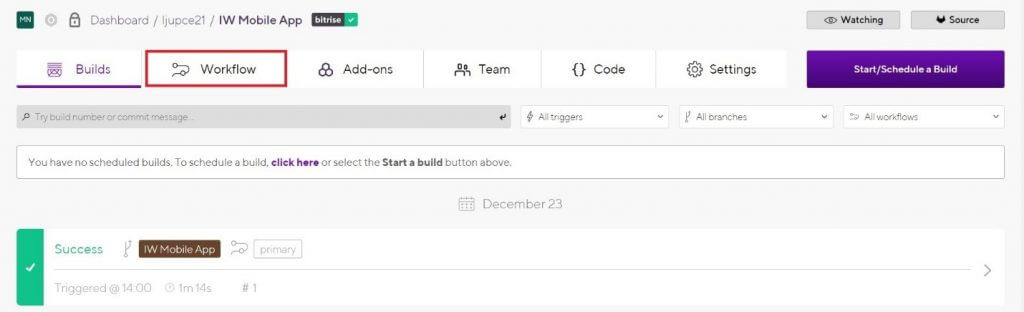
Click on the Workflow tab. (Fig. 13)
A Quick Look Into Bitrise Workflows
There are two ways to create/modify the workflow: 1) by editing the Bitrise.yml file or 2) you can use the GUI workflow editor.
Both methods will modify the bitrise.yml file so basically there are not differences which way you will choose, we choose the GUI because is friendlier.
Run Appium Tests Using Bitrise on SauceLabs
Unfortunately, Bitrise doesn’t have a pre-built integration with SauceLabs. But, Bitrise gives you full control to decide which steps your build takes on the virtual machines. This means that we can use a simple “Script” step to run any commands that you would do locally in your terminal – this also means that almost every third-party solution could work with Bitrise.
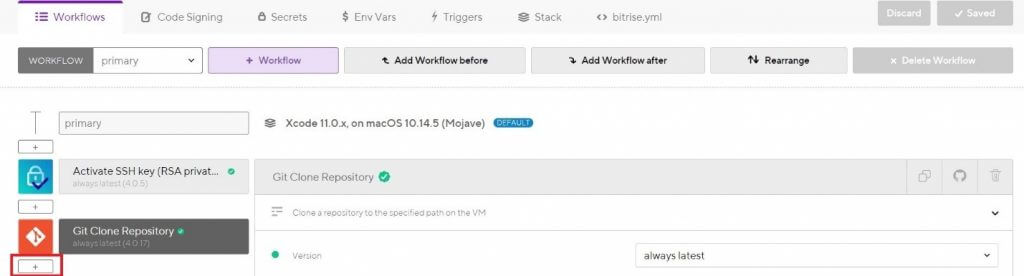
Under workflow click on the + in order to add “Script” step. (Fig. 14)
The Script pop-up will be displayed, In the search bar type “Script” (Fig. 15).
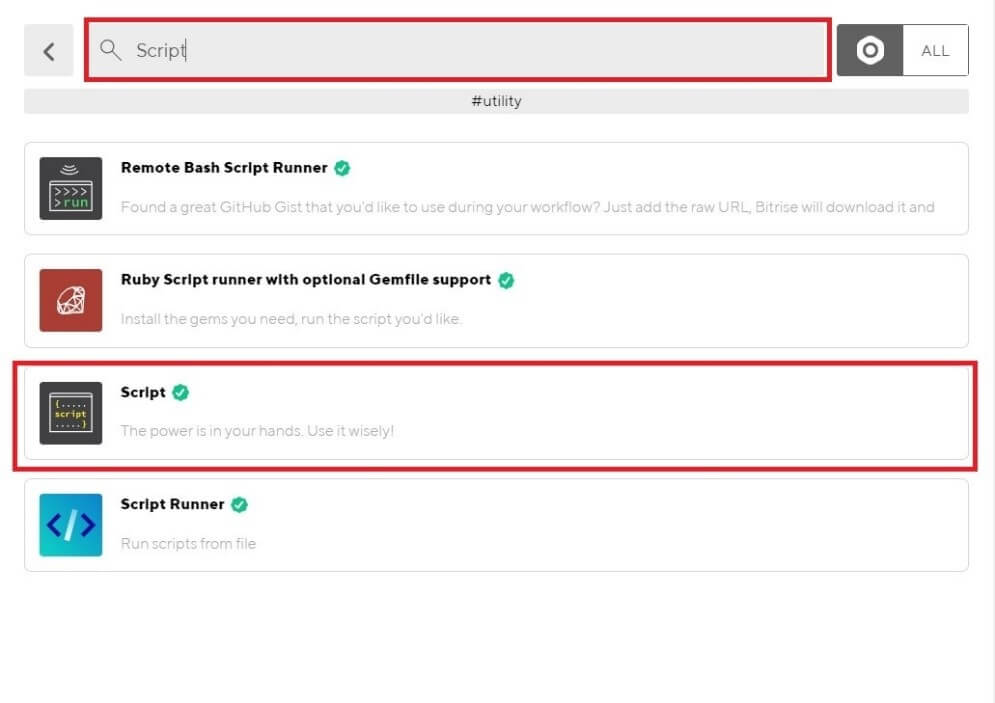
By clicking on the Script under search results the script will be added into your workflow.
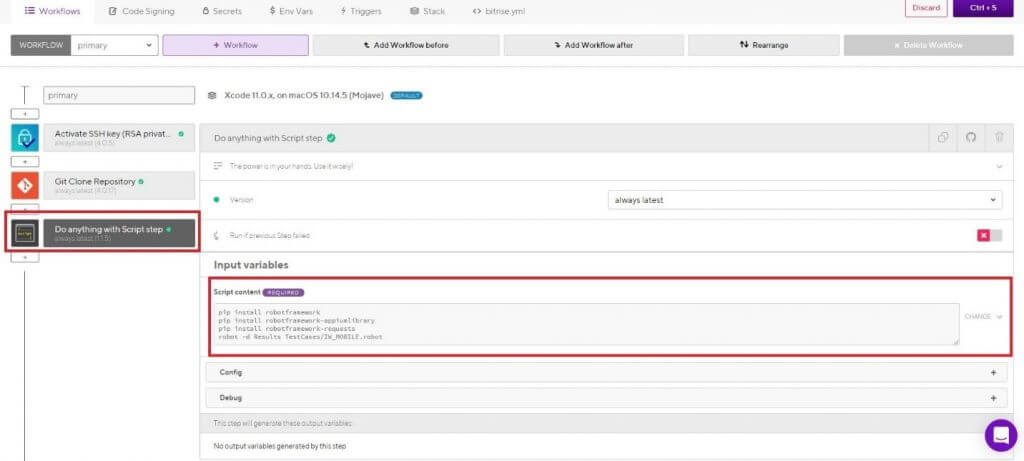
Click on the “Script” under workflow and there under “script content” (Fig. 16) you decide what steps your build takes on the virtual machines. In my case I have written the script to Install Robot Framework, Appium and request library packages and then to run the tests from GitLab.
Run tests on Sauce Labs, e.g. Robot Framework script:
#Install Robot Framework on the virtual machine
pip install robotframework
#Install Robot Framework Appium library on the virtual machine
pip install robotframework-appiumlibrary
#The command below is to execute the tests on SauceLabs,
- REMOTE_URL set the remote endpoint of your Appium server on SauceLabs
- DESIRED_CAPABILITIES
- Required capabilities for real devices testing:
- testobject_api_key – This is used for authenticate your tests. (This key can be found in the sauce labs, under Appium setup instructions)
- platformName – Which mobile OS you use, this can be “Android” or “iOS”
- appPackage – This is the name of app provided by the developers
- appActivity – (Android only) – Activity name for the Android activity you want to launch from your package.
- Non-Required capabilities for real devices testing:
- platformVersion– Mobile OS version
- deviceName – The name of the device
- And finally, we add the git lab path where the tests are stored, in my case the path is /Users/test/git/TestCase/ the robot is the name of the script that we want to execute
- Required capabilities for real devices testing:
robot -v REMOTE_URL:https://iw.appium.testtest.com/wd/test -v DESIRED_CAPABILITIES:”testobject_api_key=123ADB123456789 platformName=Android platformVersion=9.0 deviceName=OnePlus_3 appPackage=com.iw.mobile.qa appActivity=ad7a149451i6e5f169de6q.SplashScreenActivity ” -d results /Users/test/git/TestCase/IW_Android_Suite.robot
Run the Build and execute the tests on SauceLabs
In order to run the build and execute the tests, go back to the Dashboard and select the App (Fig. 12).
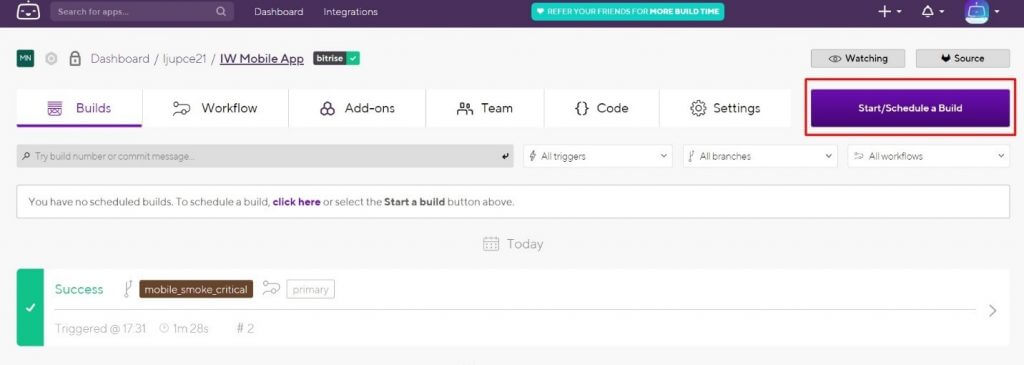
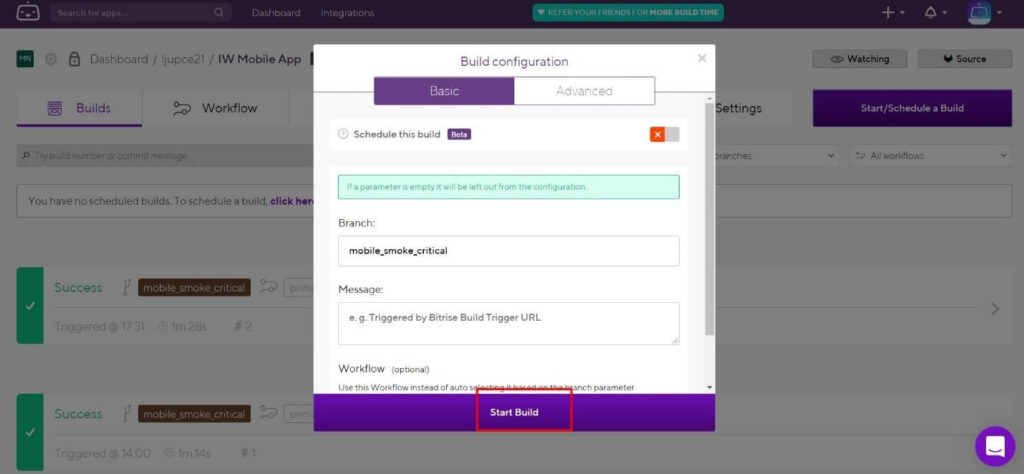
When you click on “Start/Schedule a Build” button (Fig. 17), the “Build Configuration” pop-up will be displayed. After it is displayed, click on Start Build (Fig. 18).
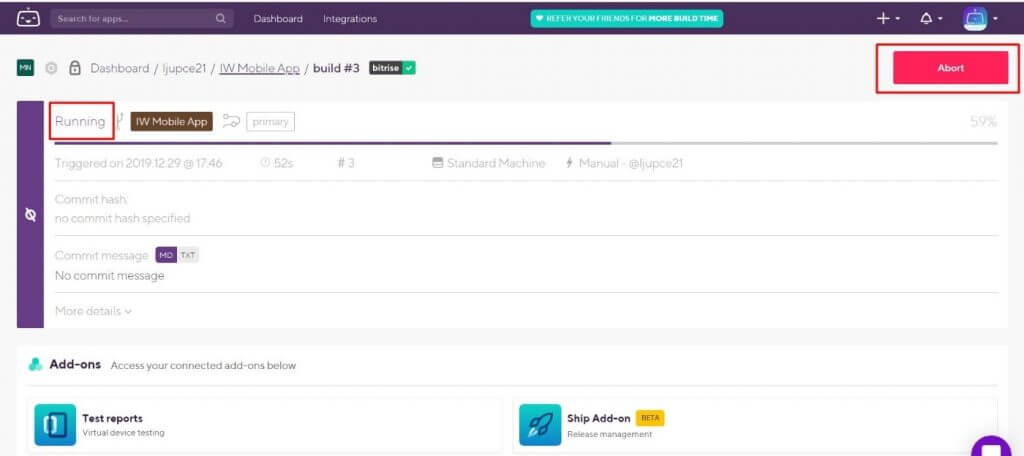
The build will be started, during the build is running the “Abort” button will be visible at the top right corner of the page and the status will be Running. (Fig. 19).
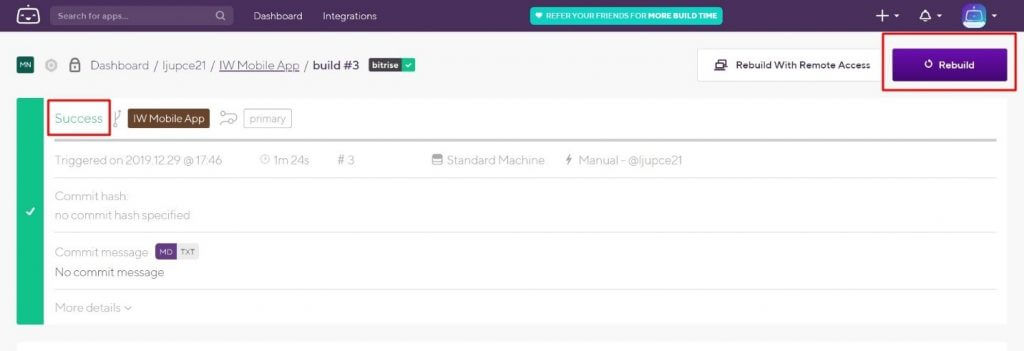
When the build is finished, the status will change in Success/Failed and the “Rebuild” button will be visible at the top right corner of the page.
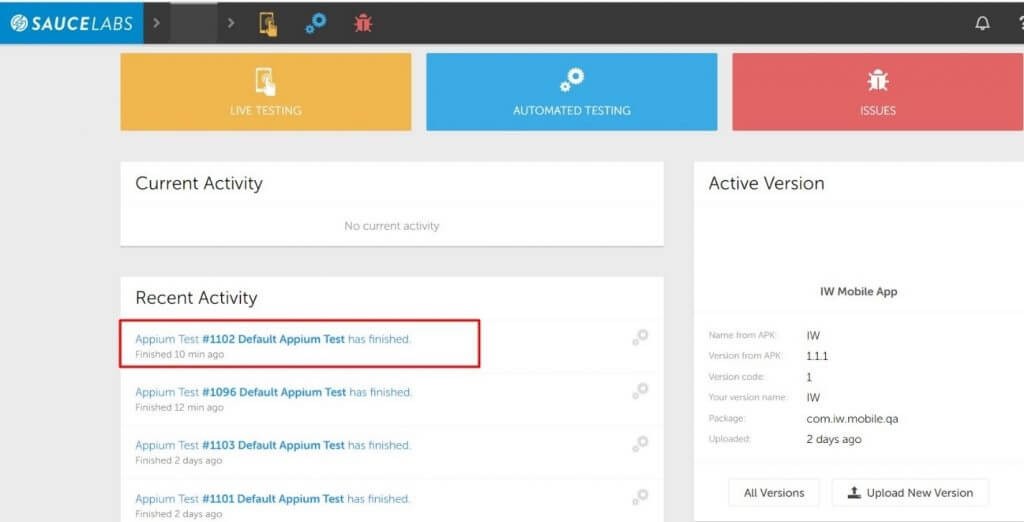
Now, we will open the SauceLabs dashboard to confirm that the test is executed there. (see Screen 17)
Conclusion
Bitrise is a very powerful platform, it can easily integrate with almost every third-party solution. Supporting a large number of application platforms, which Bitrise automatically identifies, provides great help to the developers and testers to make the setup process much faster.
From a QA perspective, this platform can help us a lot, especially when we use it as the last step in running critical tests on every build. In this way, we’ll be sure that the new app build is stable without taking additional effort.
If you want to learn more about this topic or discuss it, feel free to contact us.