
Introduction
I was assigned as a Scrum Master to a new Agile project. As most of you know, an Agile project makes the work visible across your company in real-time and includes everyone to determine scope, roadmaps, and dependencies with the purpose of enhancing customer value. At the beginning of the project, I was encountered with the challenge of storing team requirements. The team wanted to work in Azure DevOps boards and the customer on Jira Software board.
I have done some research and realized that this is not a problem at all. Furthermore, we can use one system for developers and one for customer support, and by integrating these two systems, both sides can work in their own environment. In the following blog post, I will explain how I have done the integration between Jira and Azure DevOps instances.
Why JIRA or Azure DevOps boards
Both JIRA and Azure DevOps boards are useful for teams in various roles and both have different strengths.
Today, JIRA has become a powerful project management tool that fits teams using an agile methodology. JIRA is available for cloud (hosted version) or self-managed (server). Atlassian provides JIRA for free to open source projects that meet certain organizational criteria. It can be used for projects that are non-academic, non-commercial, non-governmental, non-political, non-profit, and secular. For academic and commercial customers, the full source code is available under a developer source license.
Jira is highly customizable and the Atlassian marketplace provides numerous extensions for JIRA. This allows software teams to adapt and extend the functions of Atlassian products.

With Azure Boards, teams manage software projects. Azure Boards provides native support for Scrum and Kanban, customizable dashboards, and integrated reporting.
Like Jira, Azure DevOps integrates well with Visual Studio, Microsoft’s popular development environment, as well as Eclipse.
What Azure Boards and JIRA have in common, is that Azure DevOps board has two versions, cloud or hosted, and has a marketplace full of extensions.
Thus, the advantage of integrating these two boards is that the teams have the freedom to set up their own platforms however they want. When the platforms are integrated correctly, you don’t have to worry about the security or autonomy in the process.
Jira Azure DevOps Integration
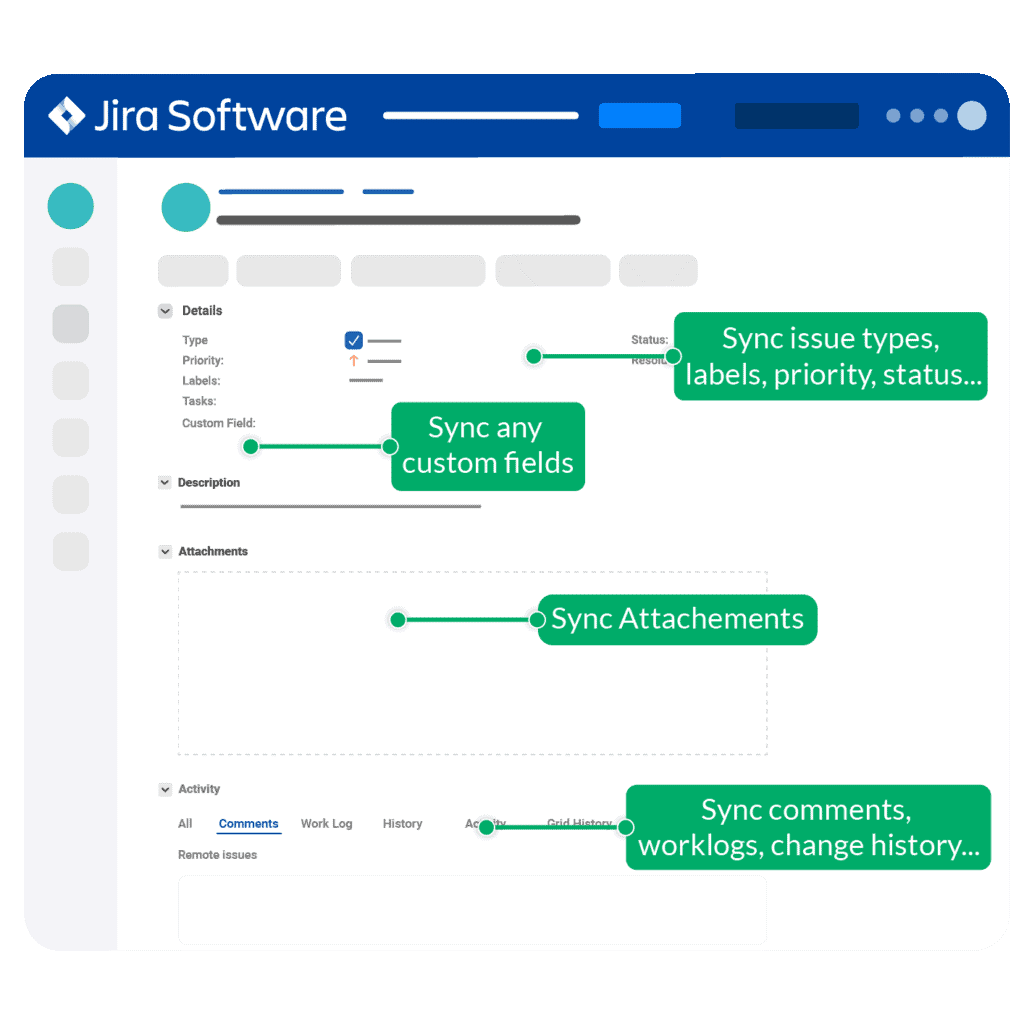
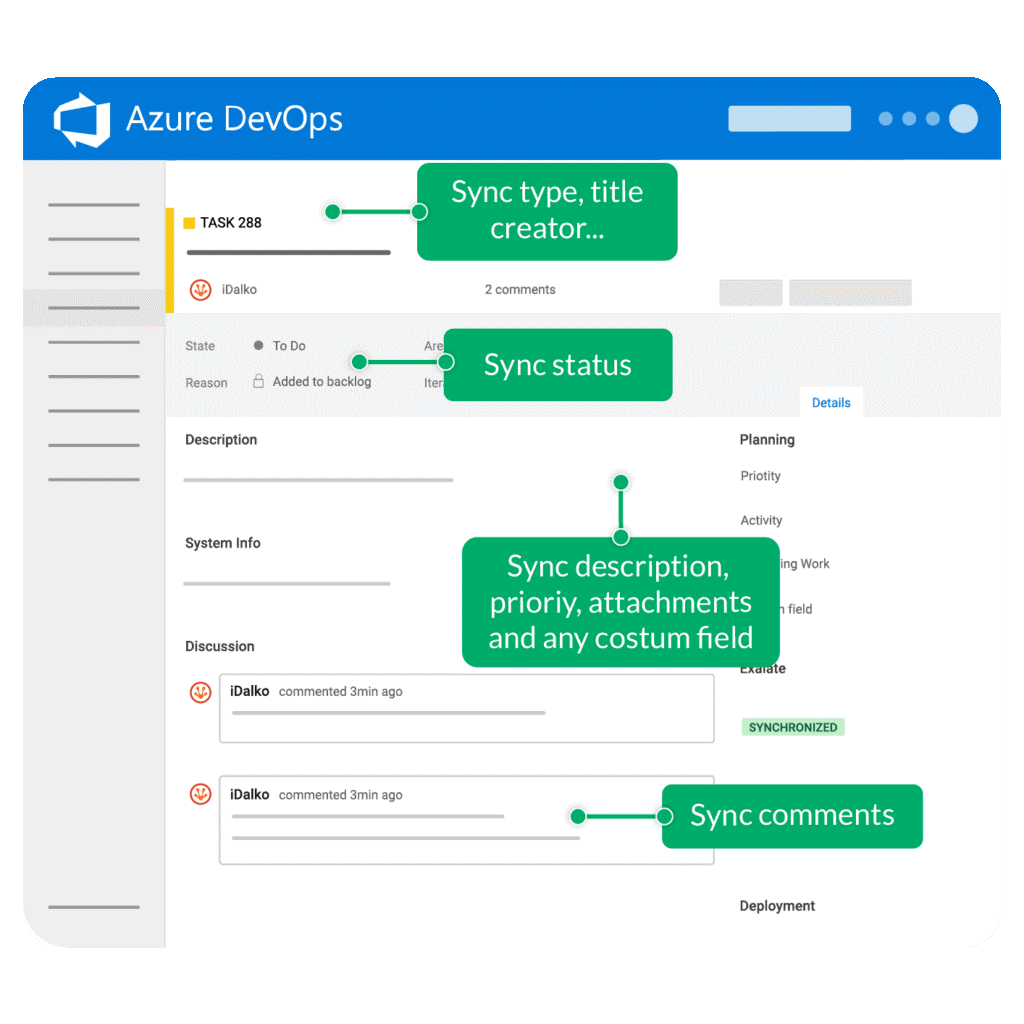
To automatically synchronize issue data, I have chosen Exalate, a tool for issue trackers and task management systems.
This type of integration helps teams to manage their data according to their roles and needs.
In order for the cross-team collaboration to be successful, the team must keep an eye on things because the information they store can be duplicated or mistaken.
Setting up the integration
The first step to setting up the integration is to install Exalate.
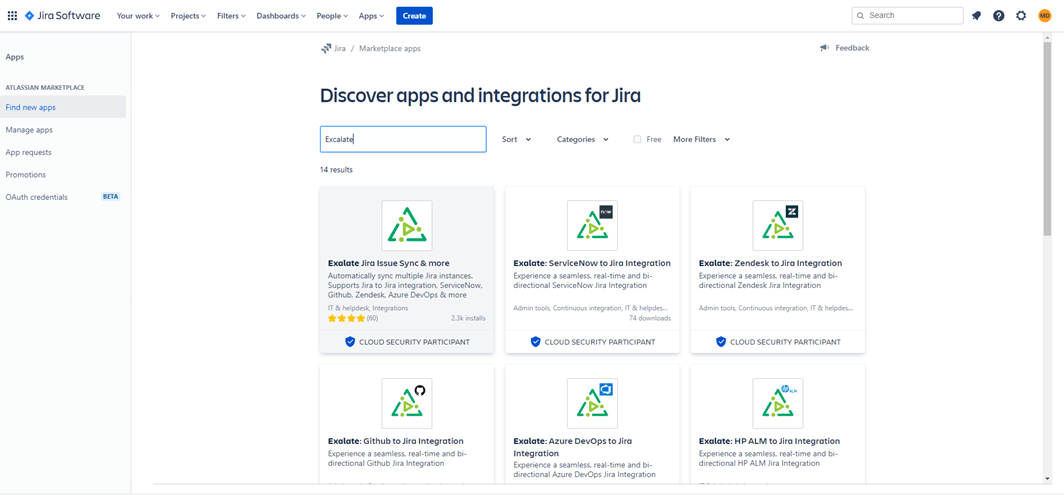
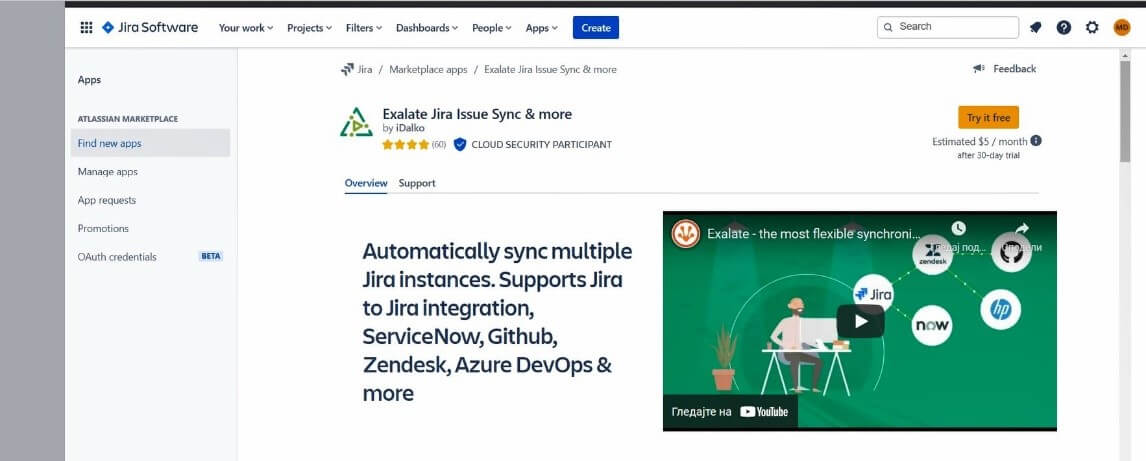
For Jira Cloud, click the JIRA administration settings button and choose add-ons from the dropdown menu. Select “Find New Apps”. Type “Exalate” in the search box and you will see multiple apps listed. Click the “Exalate Jira Issue Sync & more” option and then the “Try it free” button.
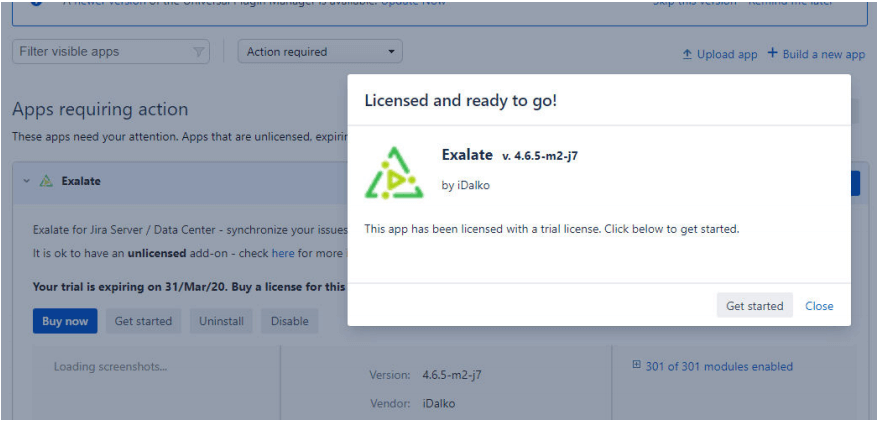
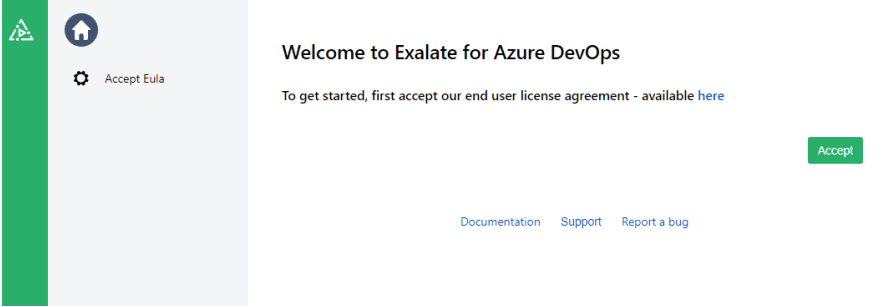
This will take you to My Atlassian where the license should be generated. A popup will appear and ask for confirmation. When your license will be generated, it should be applied to the JIRA instance. After confirmation, a pop-up will appear confirming the Exalate is licensed. By clicking “Get started” the installation is completed.
There are two ways to install Exalate for Azure DevOps: through the marketplace, or on the server.
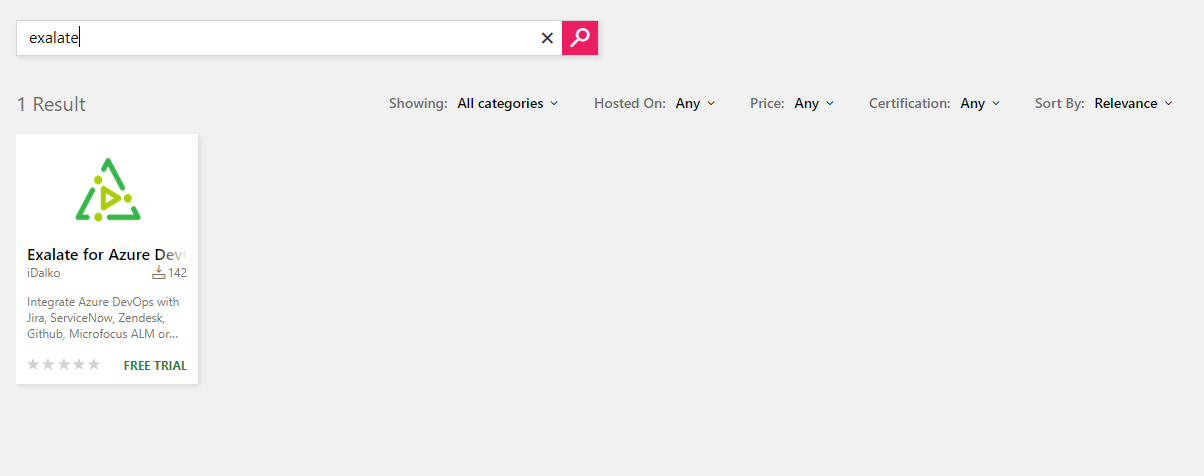
When you click on the “Exalate for Azure DevOps” app and the green “Get” button to activate the free trial you’ll be taken through an installation wizard. By clicking “Proceed to the organization” on the next screen Exalate is installed. To get an evaluation license, on the “30-day-trial” on the popup that will appear enter your email address. The evaluation key is provided by email. Paste the code, click “Update” and it’s done.
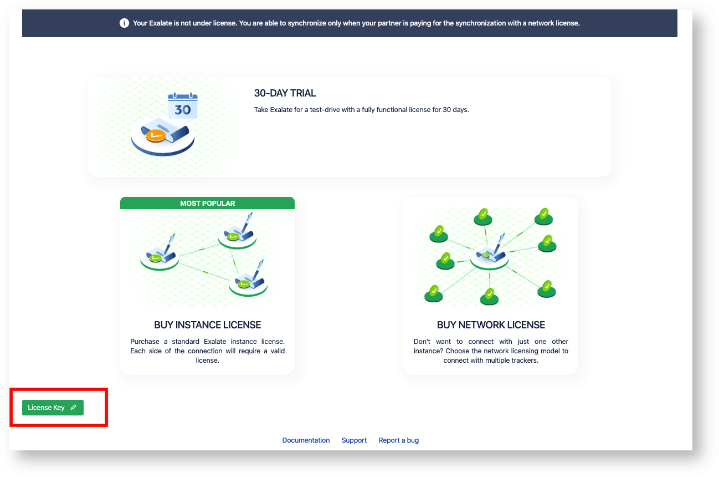
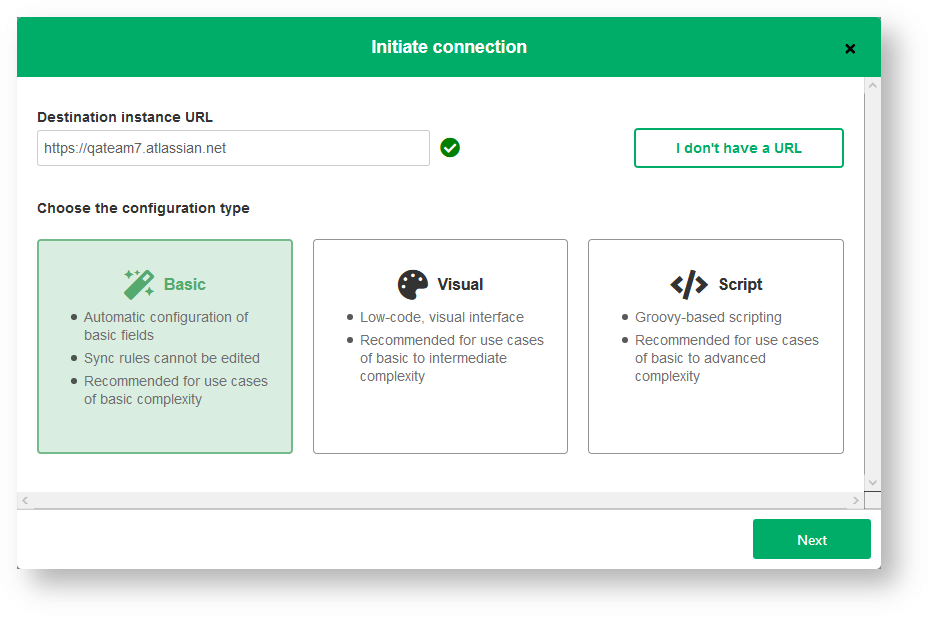
There are three configuration types of connections when using Exalate for Azure DevOps
Connecting Azure DevOps and JIRA
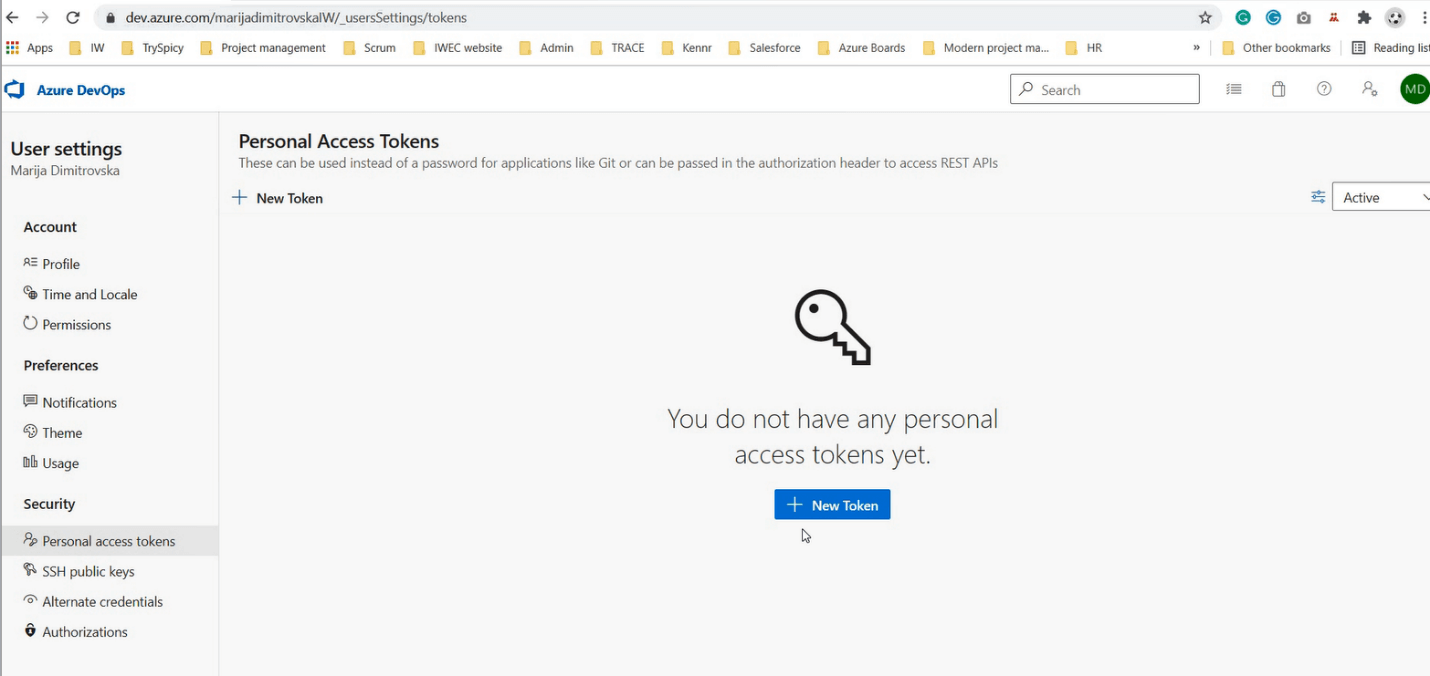
Before checking out the app link, a personal access token should be generated. The first step that you should do is open the settings menu and click ‘Profile’. Go to the left-hand menu, and click ‘Personal Access Tokens’.
Click the button that says ‘New Token’. If you haven’t done this before, there will be two buttons a blue and a white one. You can click either one.
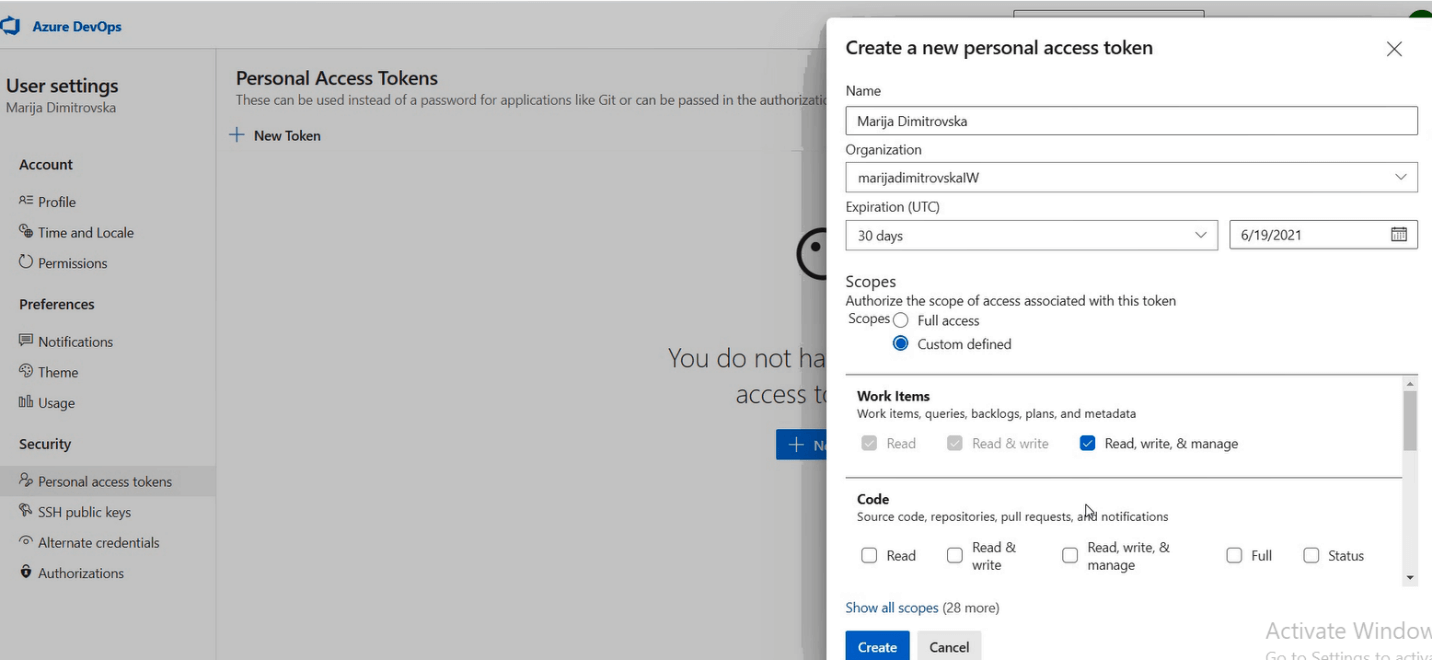
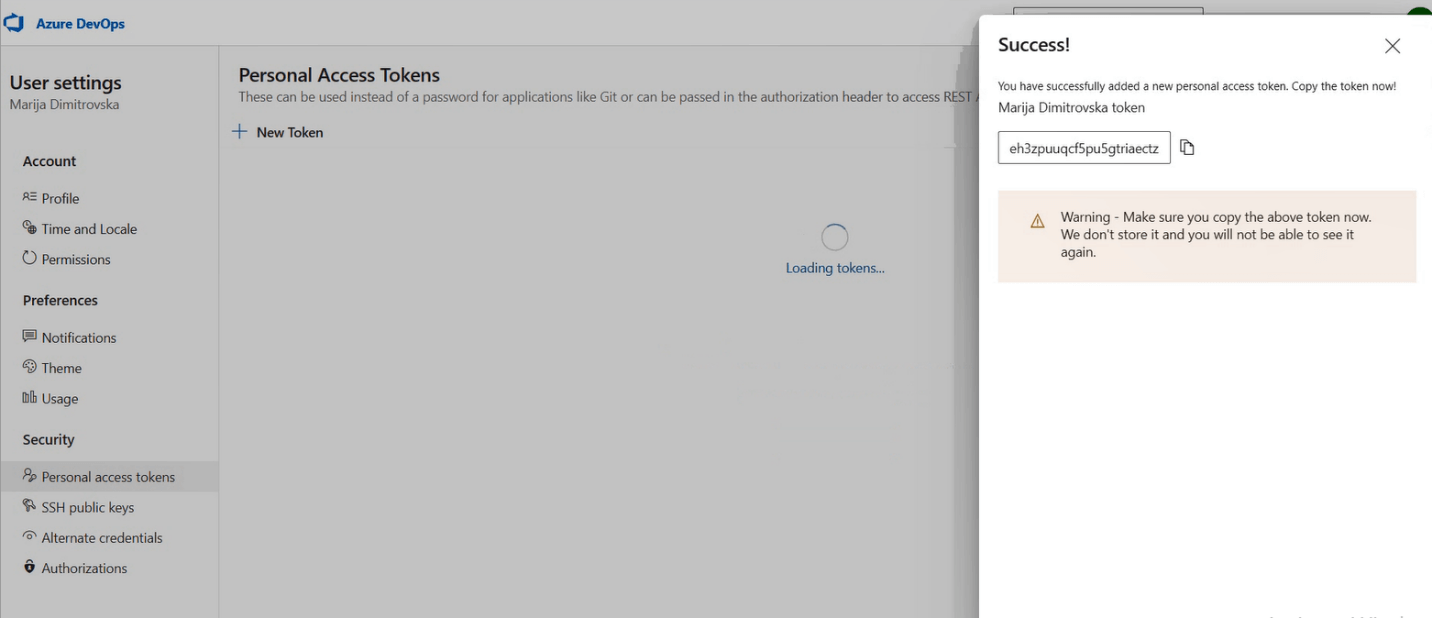
There are several scopes you can set. Make sure you grant access to read, write and manage work items. Click ‘Create’ to continue and the token is generated. It is a text string, so copy it and store it somewhere.
Check your in-tray for the message from Exalate that was requested earlier. Navigate to the new app node using the link in the mail. First, you need to accept the license.
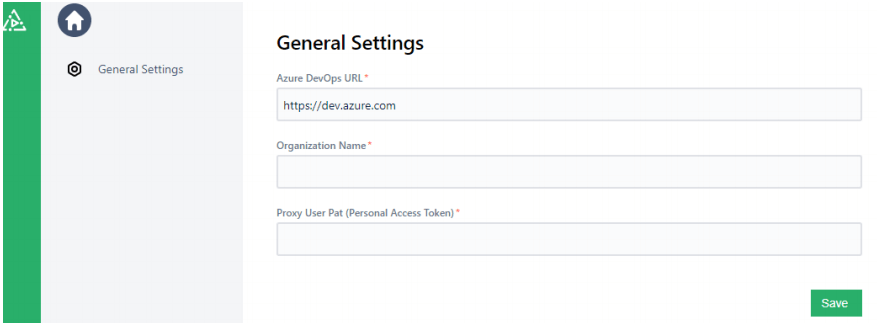
The next step is to enter the details for your Azure DevOps instance. These include the instance URL, your organization name, and the Personal Access Token generated earlier. Confirm your login, and then enter the personal access token again.
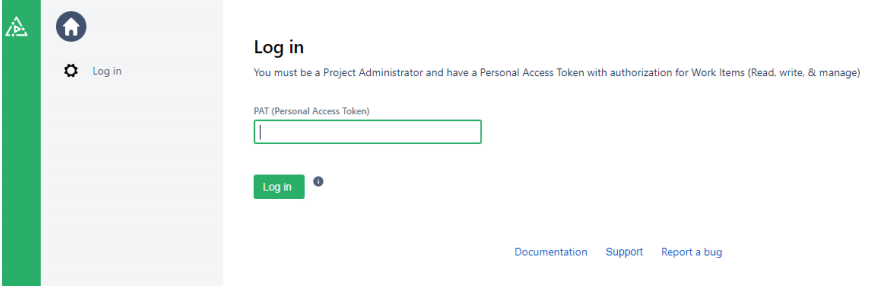
Once you’ve entered your token, click the “Login” button and you’ll be redirected to the settings page.
Connecting Jira and Azure DevOps Instances
When both platforms are installed, we need to set up the Jira Azure DevOps integration. The connection can be made from both platforms.
First click on “Manage extensions”, choose “Exalate” from the left-hand menu and click the green “Initiate connection” button at the top right to get started.
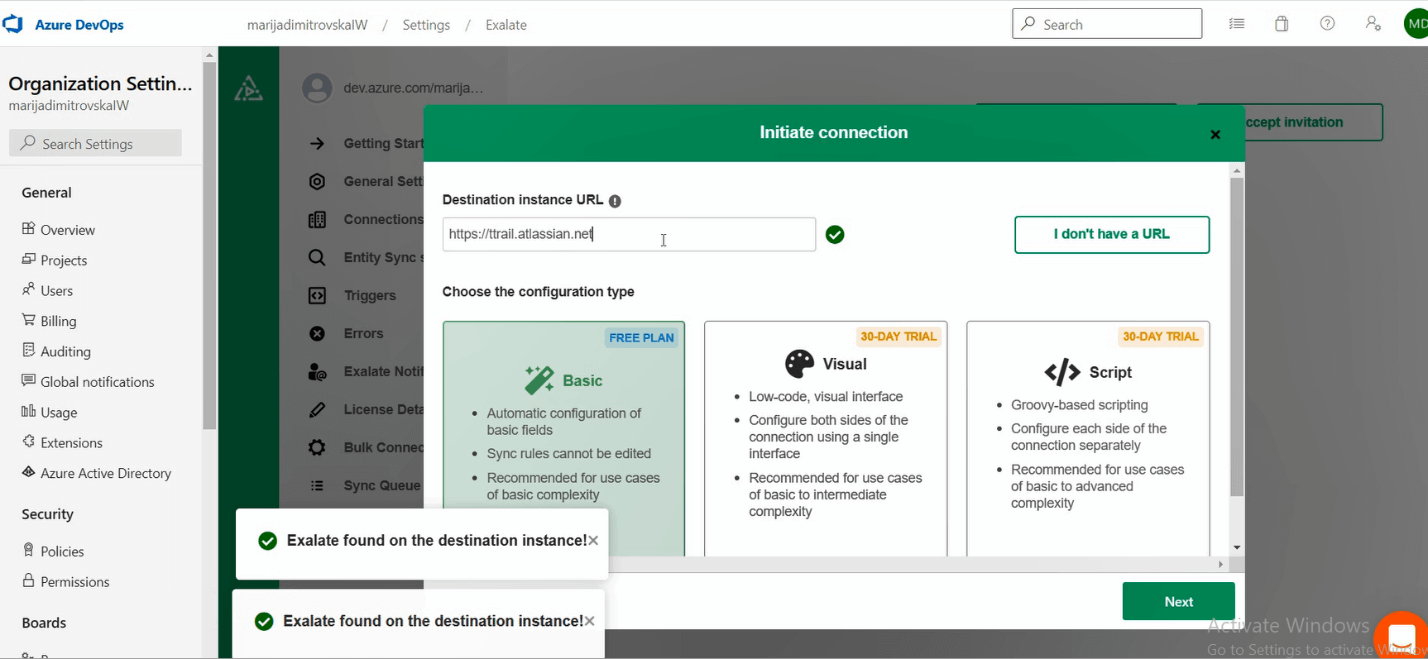
Choose the connection type and enter the URL of the Jira instance and when done, click “Next” again. On the next screen, you can pick whether to sync basic project information or use a synchronization template.
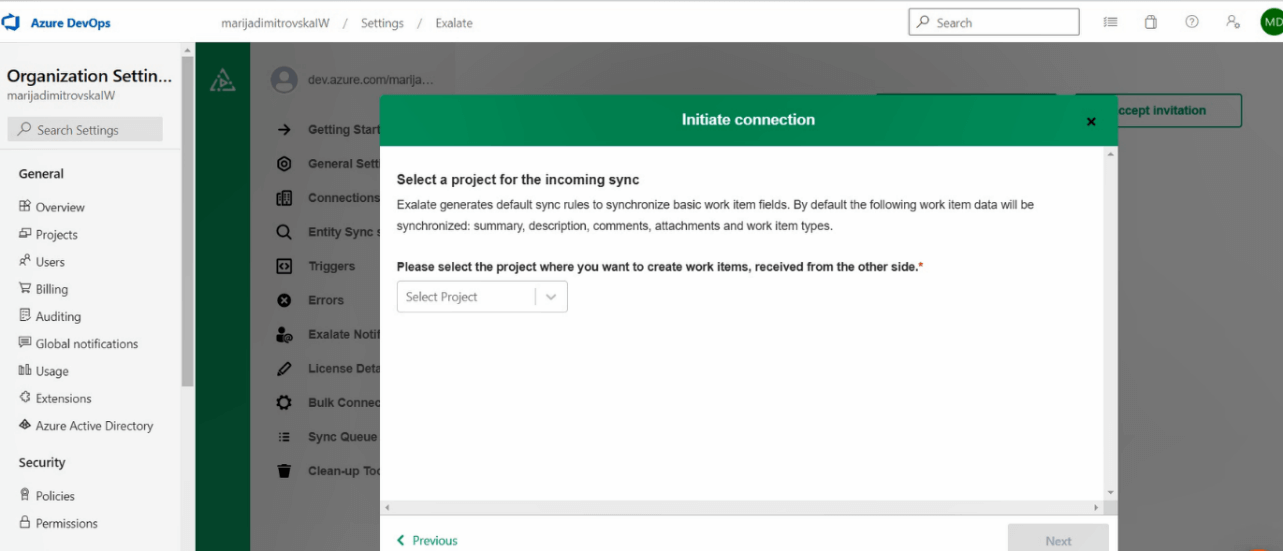
Then, pick the project you want to synchronize from the drop-down list and click “Next” again. Finally, give the new connection a name and leave the “active” button ticked. Then click the green “Initiate Connection” button to create the connection.
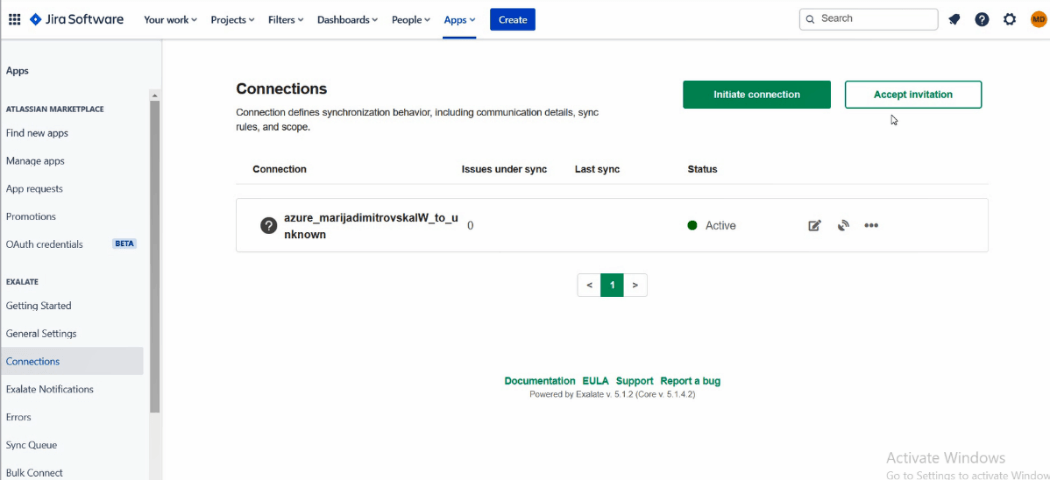
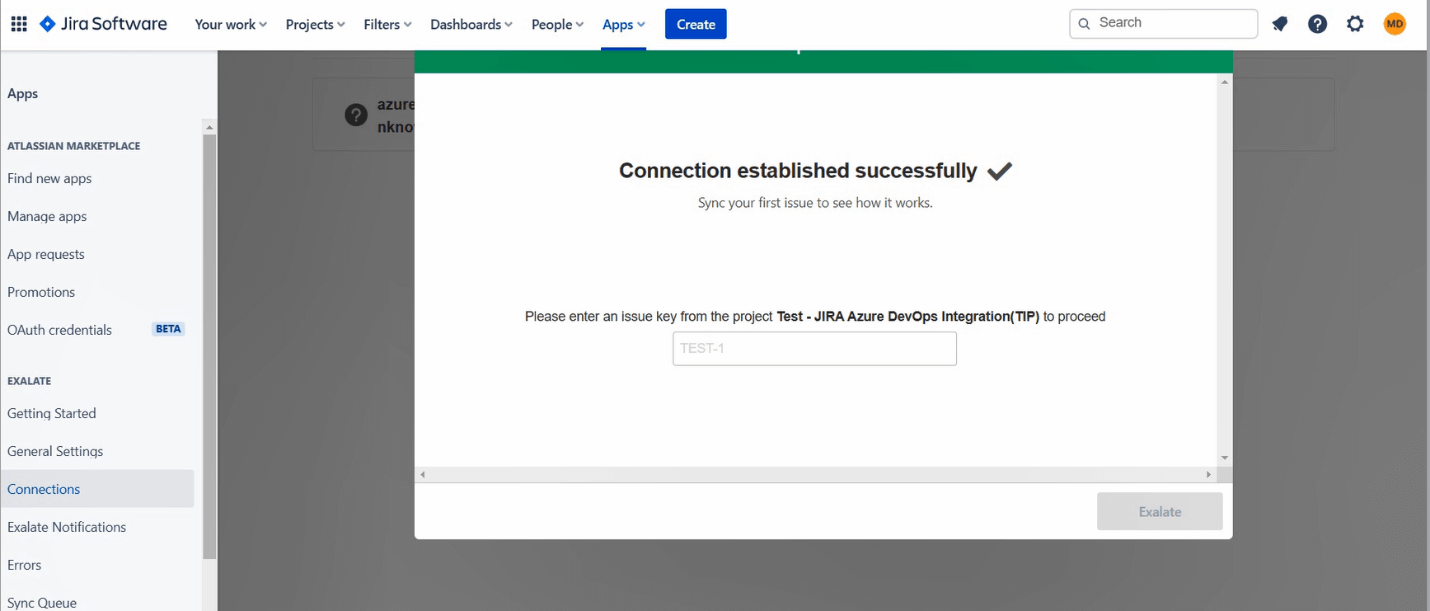
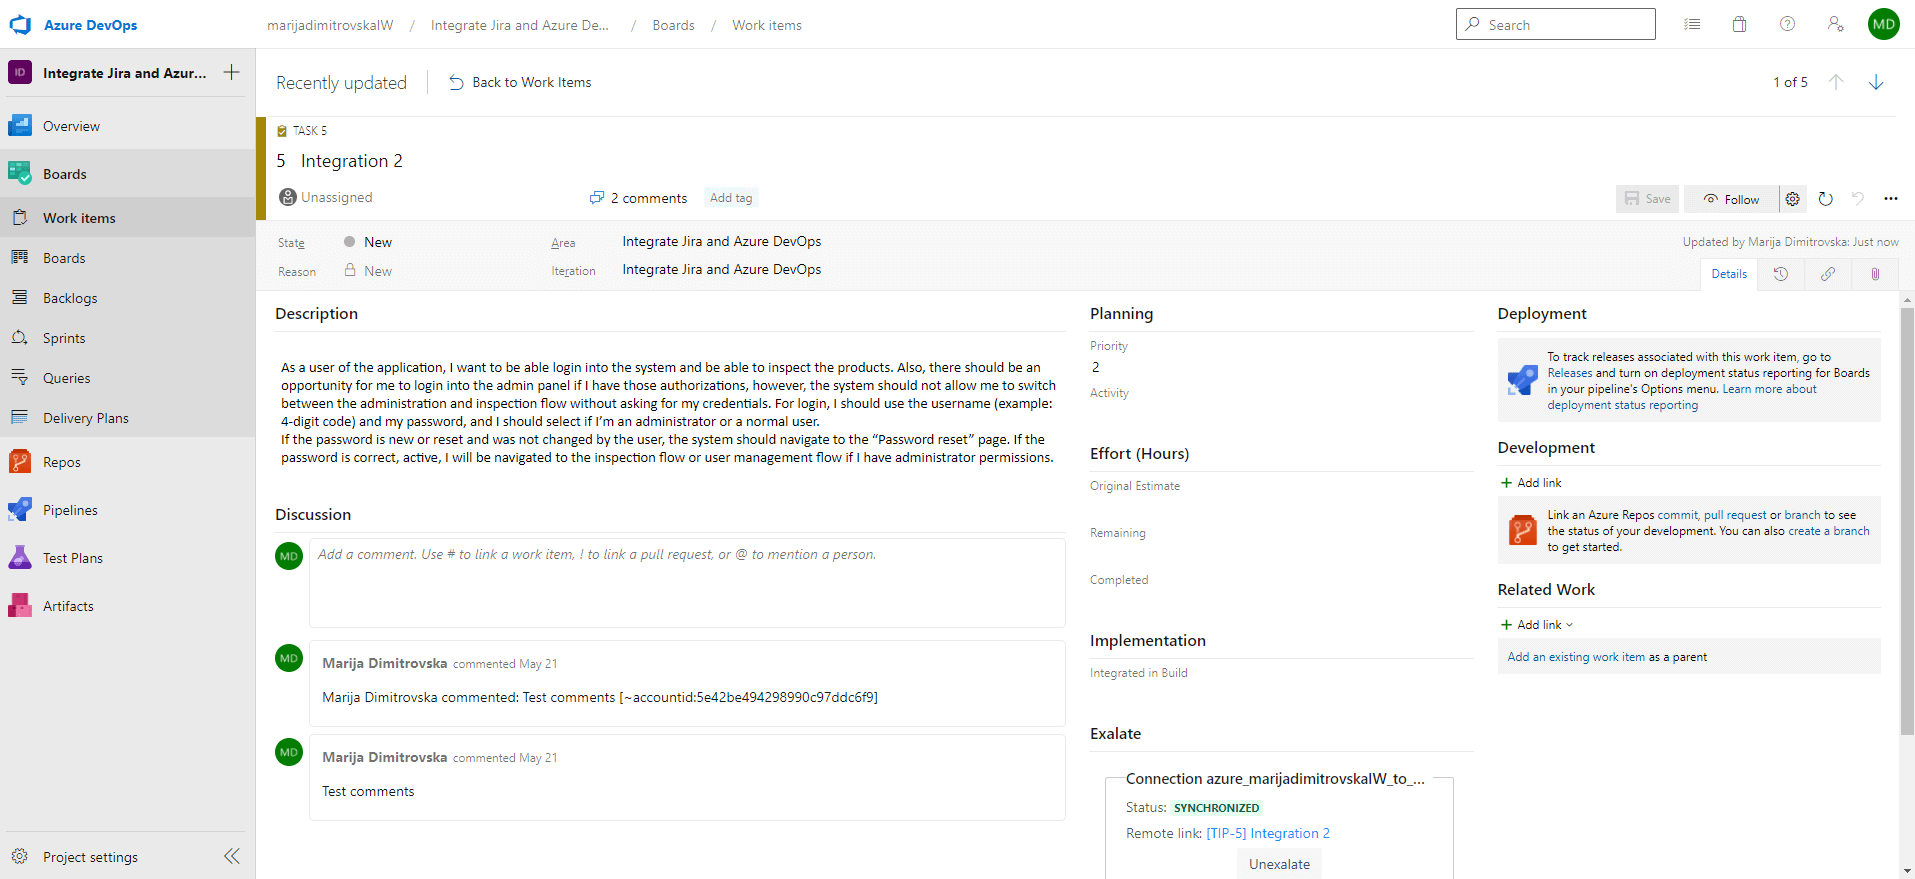
Exalate generates an invitation code that should be copied and entered into Jira. Click the “Accept Invitation” button. On the next screen, enter your invite code. Copy the one generated earlier, and paste it. Then click “next”. On the next screen, choose the project to work with from the drop-down menu. Then click “confirm” to create the connection on the Jira side. Configure the connection to make sure it shares what we want. After that, a brief connection is listed as in the image below.

Conclusion
Both JIRA and Azure DevOps are tools that significantly augment the development process. JIRA is an issue tracking and project management system, whereas Azure DevOps covers the entire software development lifecycle. Both of them provide dashboards where projects can be managed, and JIRA’s capability for agile reporting allows teams to received various reports.
To take advantage of the strengths of these two platforms, we need to integrate them. By using integration, teams can work together effectively by using trackers for problems and online services, and their efficient connection.
Save your time and money by connecting the dots in your company.
To take advantage of the strengths of these two platforms, we need to integrate them. By using integration, teams can work together effectively by using trackers for problems and online services, and their efficient connection.
Save your time and money by connecting the dots in your company.