
IT service management operations are often completely inefficient in a company because of document-based data management, manually entering whole or part of the data or some semi-dynamical process flows that need humans to interact with it. Nowadays, companies are investing increasingly in streamlining operations via cloud-based ITSM solutions. This new implementation of a cloud-based ITSM system can create an even bigger headache if it is not integrated properly with your existing systems and applications. To avoid this, you winterill probably need an extensible and scalable strategy to avoid losing more time and money and successfully connect all these investments into a complete operating solution, which will help your enterprise achieve the first goal and have an agile, efficient way to organize and decrease your operational costs.
If you are looking for integration between ServiceNow and SnapLogic you probably heard about both of them. But here are a few words about them:
SnapLogic as an elastic cloud-based integration platform delivers the only Enterprise Integration solution in the market today that is purpose-built for Cloud integrations. More and more companies are demanding the agile IT that SaaS and cloud applications are offering.
ServiceNow is a software platform that supports IT service management and automates common business processes. This software as a service (SaaS) platform contains a number of modular applications that can vary by instance and user. With it, a user can achieve end‑to‑end transformation for all IT services and infrastructure, through a single cloud‑based platform. ServiceNow IT Service Management (ITSM) software lets you consolidate fragmented tools and legacy systems while automating service management processes.
Custom integration is a heavy and pretty expensive process that will require custom development, time, and money for production deployment code hosting, etc. Now, we can completely avoid this using the SnapLogic platform that features pre-built, intelligent connectors, called Snaps specialized for ServiceNow which expose the ServiceNow API visually.
Also, SnapLogic provides a pretty simple way to build, deploy, and monitor the code and perform a completely stable production integration.
Use case
For each of the processes (pipelines) that we are developing, SnapLogic’s best practices and coding standards are followed and error handling, logging, and retry logic are implemented. ServiceNow as an application provides the ability for incident creation that will gain an easy tracking of the error that occurred, time spent for the incident to be resolved, team that worked on that specific incident and etc.
In this specific scenario, we will explain how to create an incident ticket with a specific category, assignment group, description, and type. Hence, we will add an attachment file to the ticket, which contains all the errors that happened in one particular flow.
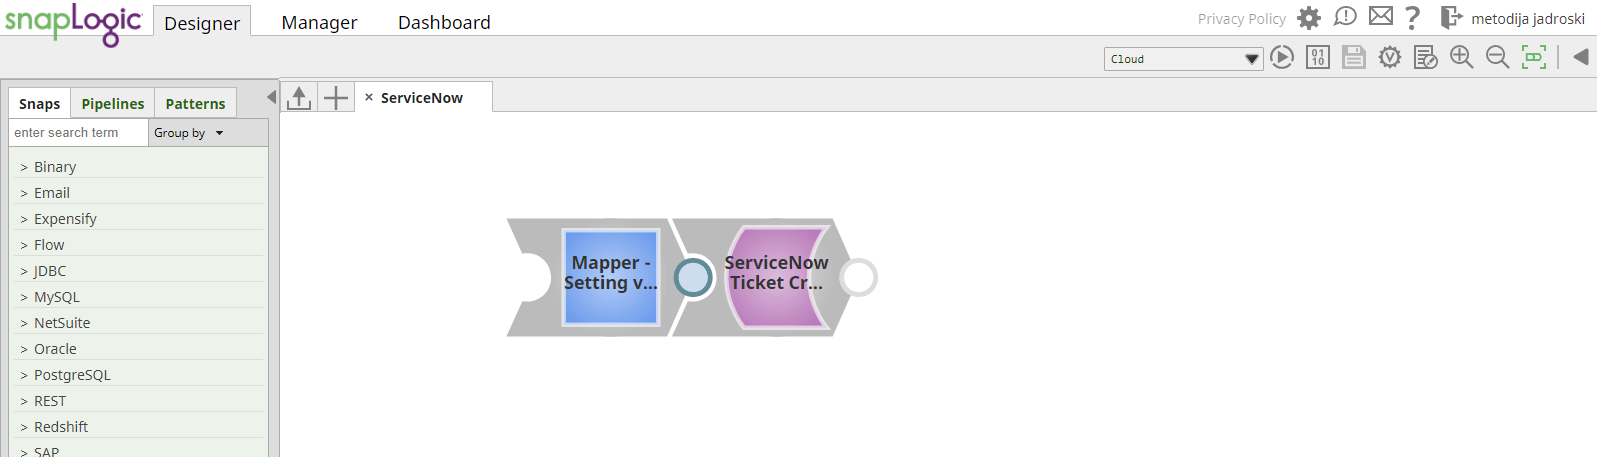
To keep this simple and easy understanding we will minimize the use of snaps. At the start, we will create an incident ticket in ServiceNow for a specific error that may occur.
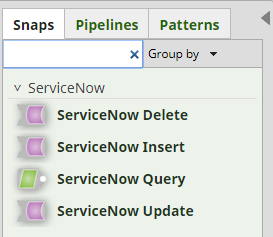
Snaps used for this scenario:
- Mapper
- ServiceNow Insert
In order to successfully create the incident ticket, we will send the following parameters to ServiceNow:
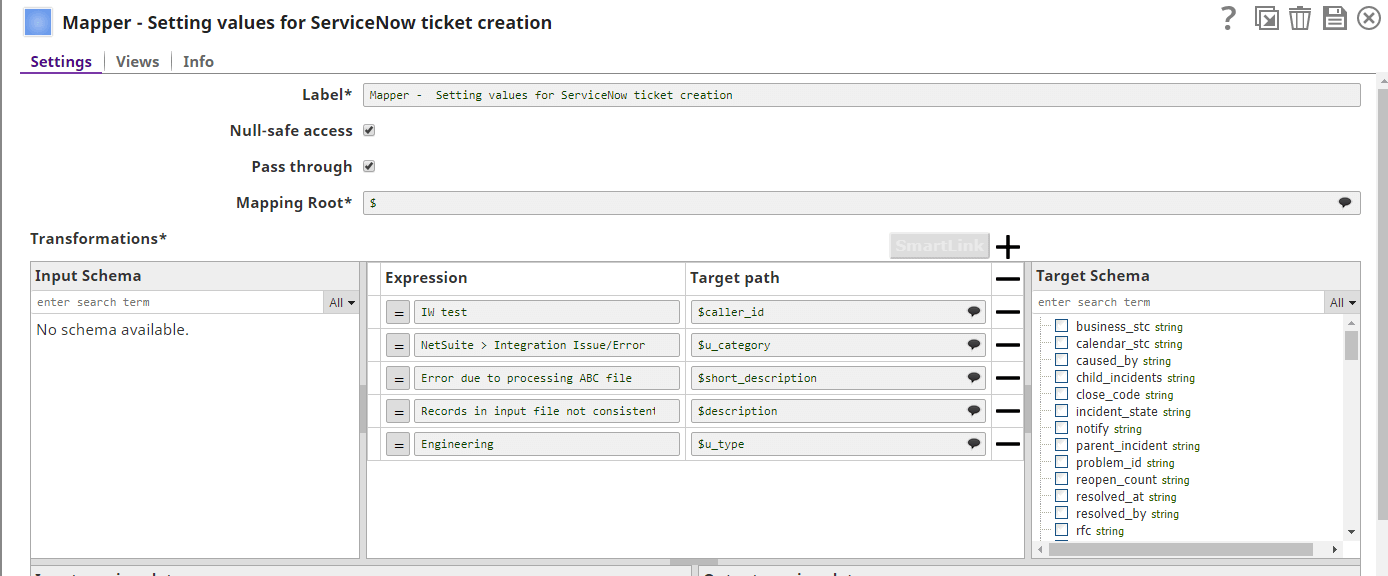
As you can see on the right side of the mapper there is a schema exposed from the ServiceNow API incident table.

Please note that these are not required fields for the successful creation of the incident ticket, but we chose them so we can show the benefits of having ServiceNow better and how easy the integration is going between it and SnapLogic, even though there are many fields to be populated.
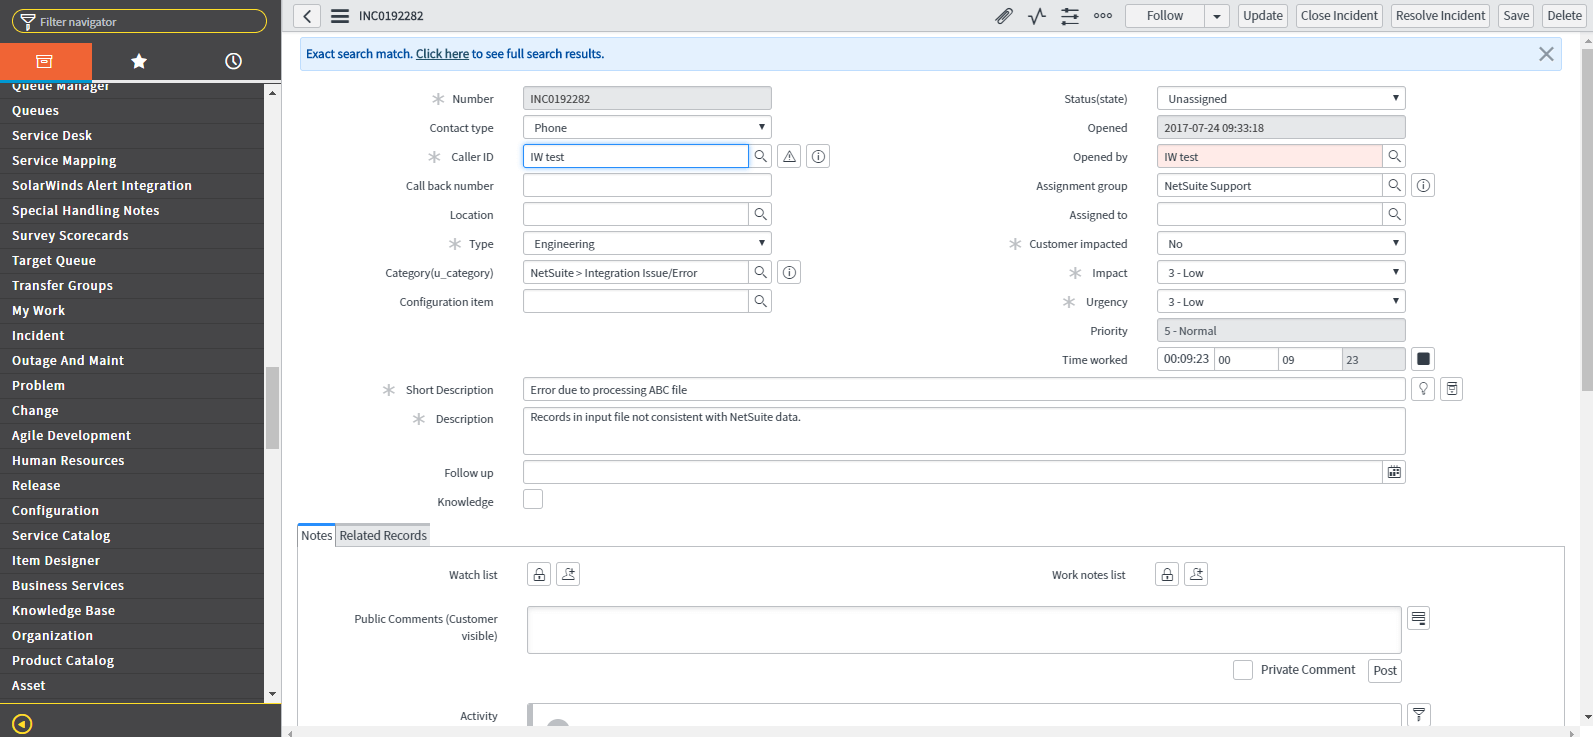
As we send this request, with these specific parameters, we will create a ServiceNow ticket which can be previewed in the UI of ServiceNow:
After the successful creation of the ServiceNow ticket with certain types, categories, and descriptions, we can go a step further and upgrade this already existing ticket. For that purpose, we will need a few more snaps, to add the attachment file mentioned previously.
Why is this important?
On many occasions, the business wants to take a closer look into the error cause. For that purpose the file that has been subject to processing, has to be to the ServiceNow ticket, with the proper error description for the records that are not valid. With this approach, the business can easily repair the invalid records and once again send the file for further processing where we can successfully insert it into the target system.
Snaps used for this scenario:
- File Reader
- Binary to Document
- Join
- Mapper
- ServiceNow Insert
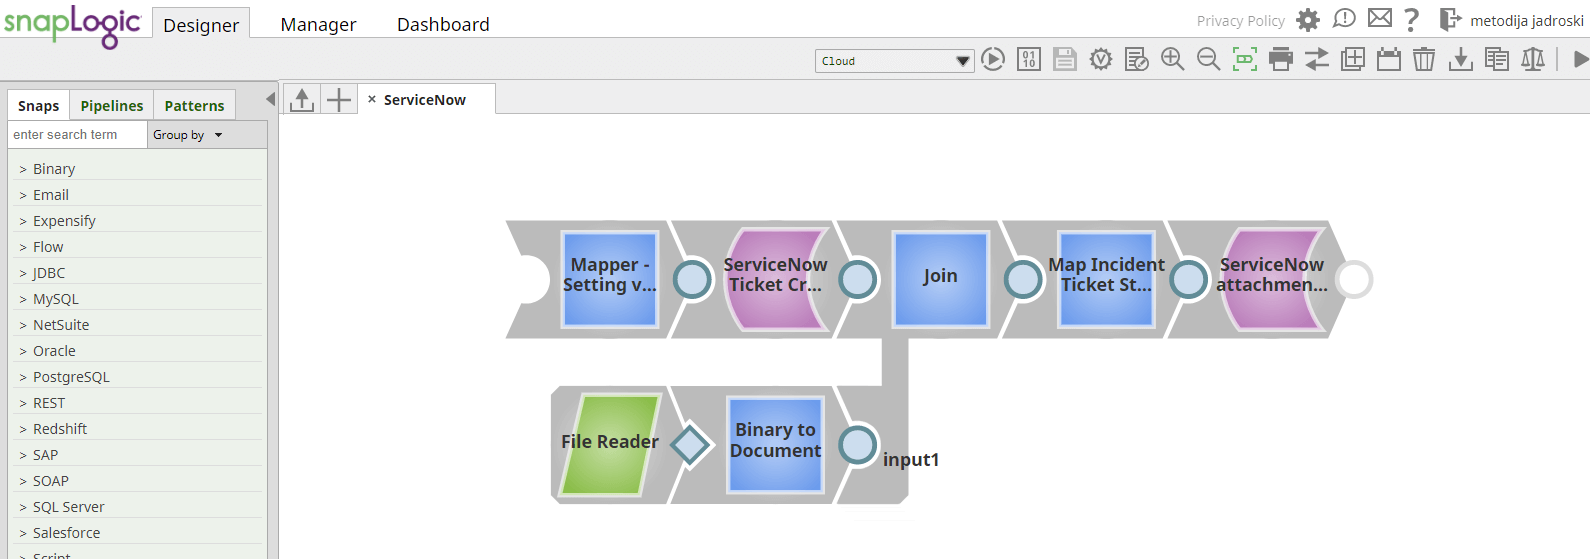
Namely, let’s assume that the file sent from the user was invalid and error file was created by the business needs in Snaplogic.
First, we will read the error file.

Because the output of the file reader is in binary format, we will use Binary to Document snap for transforming the binary data into JSON format.
We will use Join snap to collect the content of the file with its parameters and the ServiceNow creates snap output which returns info about the ticket that we previously created.
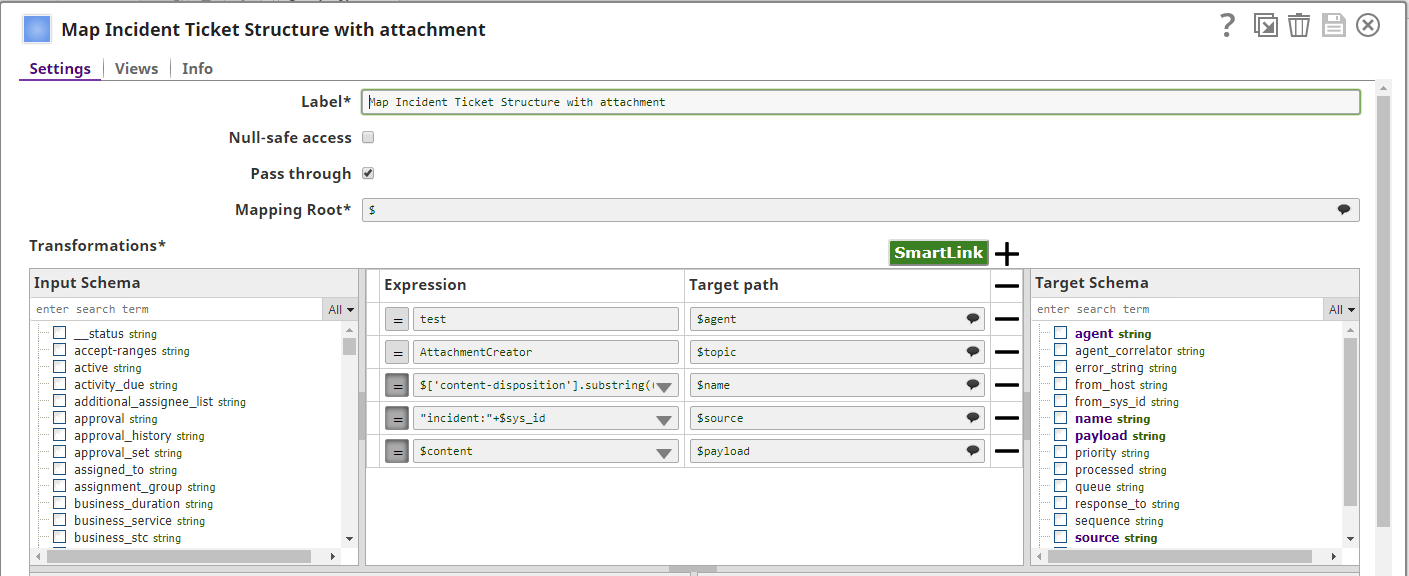
Once we have all the values that we need, we will use a mapper to send a transformed insert request to ServiceNow. Once this mapper is connected with the ServiceNow Insert snap we must choose the suitable table for this operation in the ServiceNow snap. For this purpose, we are going to use the ecc_queue table from ServiceNow.

In order to make this request successful, there are required fields that should be mapped in it.
At first, we should map the $source field which must contain a “:” delimited value of the target table and its sys_id. Example: incident:dd90c5d70a0a0b39000aac5aee704ae8. In our case we have the sys id from the ServiceNow create a snap response and we are concatenating with the “incident:” string. In the $payload field from ServiceNow we are mapping the content that we got once we read the file. Another field that is necessary, for this attachment to be added successfully, is the $topic which needs to have the following value: “AttachmentCreator” so it can successfully trigger the attachment creation.
Finally, we have a ServiceNow ticket updated with the attached error file:
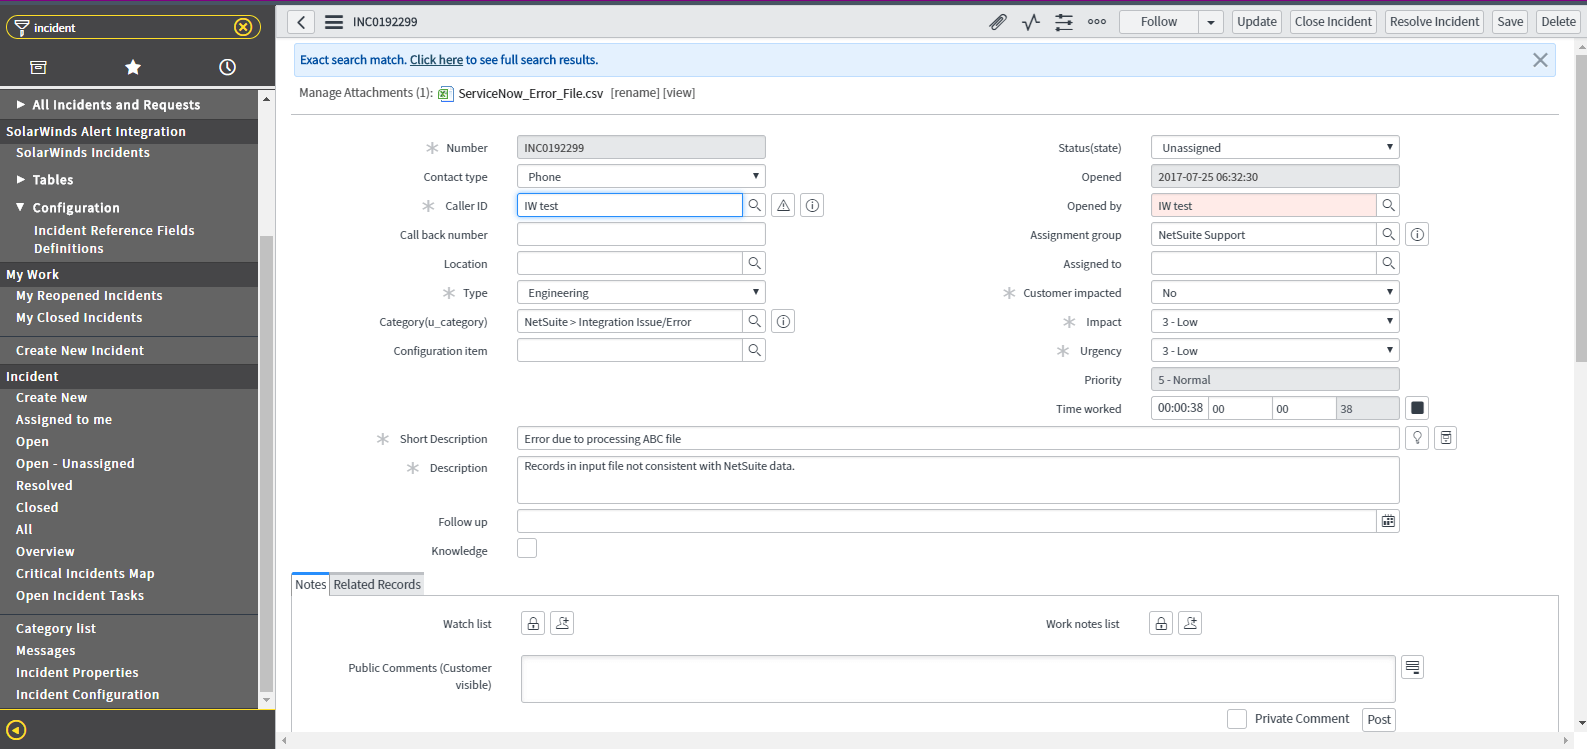
In the following screenshot we can see the error description, and the reasons for failure behind every record:

Conclusion
From this particular use case, we can see that SnapLogic makes the integration process of ServiceNow fairly easy without any manual efforts or complex traditional integration processes. There is one quote being said: “More can be done in two hours with SnapLogic than two days with traditional solution.”