

Most of the applications we develop are managed using some sort of version control database system (for example Git). But what about databases used by those applications?
We make most changes to our databases manually. This approach may work for an application that features a team of one or two developers, but in a larger team, this becomes difficult. Mostly because it is hard to share the changes with everyone and if a new developer comes to the team he/she will have to execute all scripts manually.
But there are no worries for a Java developer since here comes Liquibase to the rescue – which is a Java based open source tool for managing and Java versioning database schema changes. It is something like Git for databases.
Liquibase uses changesets to represent a single change to the database.
In our project, we will have one changelog master which will contain all changelog files (versions/changes).
Each changeset has an “id” and “author” attribute that uniquely identifies it.
Changesets can be defined in four different formats :
- SQL
- XML
- YAML
- JSON
Liquibase uses a changelog to list database changes in order.
There is a table called DATABASECHANGELOG which tracks which changesets have or have not been deployed.
If your database does not already contain a tracking table, Liquibase will create it for you.

It consists of ID, Author, filename, date when it is executed, order of execution, description (sql,xml,json or yaml), comments, tag and liquibase deployment id.
Liquibase versioning supports many databases and some of them are:
- MySQL
- MariaDB
- PostgreSQL
- Oracle
- SQL Server
- HSQL
- H2
Integration with Spring Boot
Because Liquibase is a Java-based tool integration with Maven and Spring Boot is super easy.
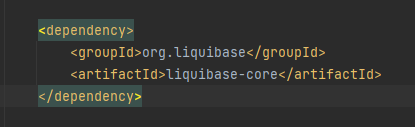
The first thing we need to do is add the dependency in pom.xml.
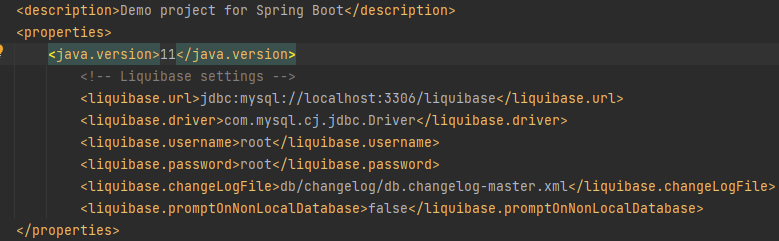
Next in the pom.xml file, we need to add settings like URL, Driver, username and password for connection and interaction with the Liquibase database and the location of the changelog-master.
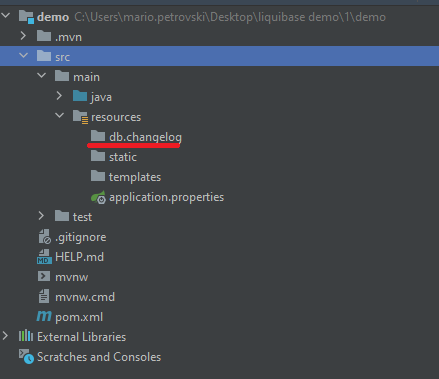
After that is configured in our project structure under src/main/resources we will notice that we have package db and inside there is another package called changelog. Here we will add all changelogs including master.
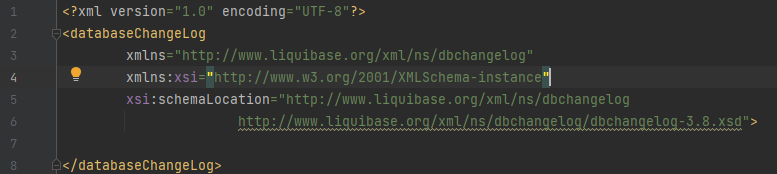
First, we need to create the changelog master which will track all changes. In db/changelog create a file that will be called db/changelog-master.xml.
This is the content of the file:
After that just register that file in application.properties as follows:

And that’s it, now you are ready to make changes.
Let’s make our first migration in which we will create a new table called person which will have id, first name and last name.
Create a file in db/changelog and name it db-changelog-create_person_table-1.0.sql.
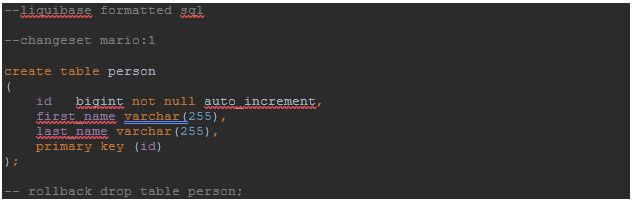
Each Liquibase SQL changelog must start with “–liquibase formatted sql”.
The second statement is –changeset <authorName>:<versionId>.
After the second statement goes the SQL statement, and the last one specifies what SQL statement needs to be executed on Spring Boot Liquibase rollback.
In the changelog-master we have to include that file so we add this in the file:

That’s it, now let’s run the application.
To run it with Maven open the command line in the project’s folder and run it: mvn spring-boot:run
Or if you are using IDE just run it from there like any spring boot application.
Now if you go to the Spring data versioning, actually the database, you will notice there is our person table which we created, and there are 2 tables that Liquibase Spring created.
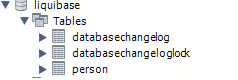
If we inspect database changelog table we will see that our first migration is there.

Here we can see the id(version), author, the file that was executed and other information that Liquibase Spring Boot keeps track of, so we know if there are any changes that need to be applied.
Liquibase rollback
Now as developers, it’s not always perfect and sometimes we need the ability to Liquibase rollback Spring Boot or undo our changes. No problem Liquibase has a solution for that too!
We have a command that will rollback:
mvn liquibase:rollback -Dliquibase.rollbackCount=1
After executing this command, we will see that the person table is gone.
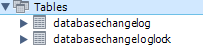
And database changelog is empty now because we had 1 migration and we made a Spring Liquibase rollback.
Conclusion
We saw how easy and useful Spring Boot Liquibase is. If you are starting a new project this is a database versioning tool that will help you manage your database schema and boost the productivity of the team, or even if you have an old project you can still integrate it. It is free but there are also paid versions including more features you can look them up on their official site.
If you want to take a look at the project the code is on GitHub: