
This article describes the basic steps on how to customize your Jira Service Desk project.
Before we start with the explanation just to clarify what Jira Service Desk is and what the main functionalities and benefits of using this product are.
Introduction
Jira Service Desk is a tool developed by an Australian Company Atlassian. Jira Service Desk is an incident and service management tool, which is built on the Jira platform. It’s actually a help desk request tracker that helps employees and customers to ask for help, report incidents, or request new services. The app comes with a self-service web portal where customers fill out forms to ask for help.
Also, Jira Service Desk can be integrated with other Atlassian products like Jira Core, Jira Software, Confluence etc.
Briefly, Jira Service Desk helps your team track and improve their services and customer satisfaction.
It helps your team deliver top-notch customer service. It is a great choice for companies who already use Jira products.
The main benefits of using Jira Service Desk are:
- Easy-to-use customer portal
Jira Service Desk is a helpdesk request tracker. It lets you receive, track, manage and resolve requests from your team’s customers. The app comes with a self-service web portal where customers fill out forms to ask for help.
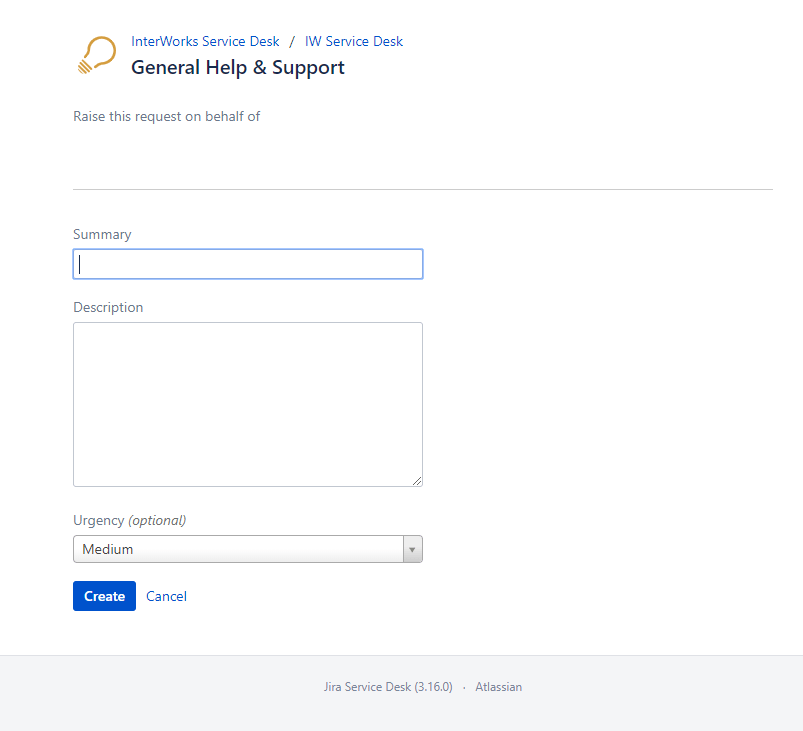
- Easy request form and approval process
Jira Service Desk also makes it super simple for customers to submit requests with a no fuss request form, which can be customized depending on the request type. Customers also have access to their requests from the portal where they read updates and communicate with the support team with additional information or questions.
- Faster service request fulfillment
The intuitive interface of Jira Service Desk makes IT service teams more productive when responding to service requests. The SLAs tell them what’s the most important and what requires their immediate attention.
- Smart knowledge base
Jira Service Desk plays well with another Atlassian product called Confluence. Confluence is a collaborative document management and storage app. With Confluence, your team can create a knowledge base of articles that appear in your web portal. Your customers can read these and help themselves before reaching out to you.

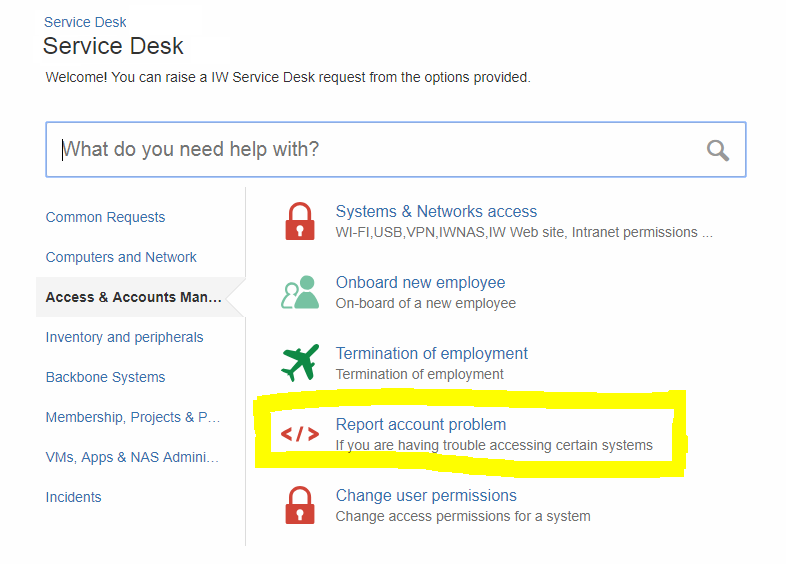
Request Groups
The Jira Service Desk requests can be organized in different request groups. A request group is created of request types which are put in a group by some common characteristics (for ex.: Inventory and peripherals, Access & Account Management, Computers and Network etc.).
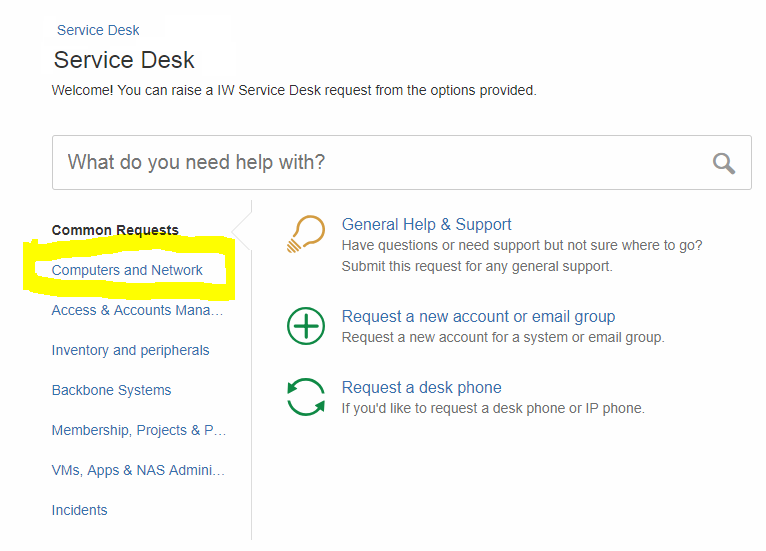
Thus, a preliminary list of request groups is needed to start the customization process.
A group is simply a category you can assign to each request type. In the customer portal, your request types are organized in vertical tabs based on your groups.
To add request groups, go to Settings > Request types. You should see your groups in the sidebar and select + Add group.
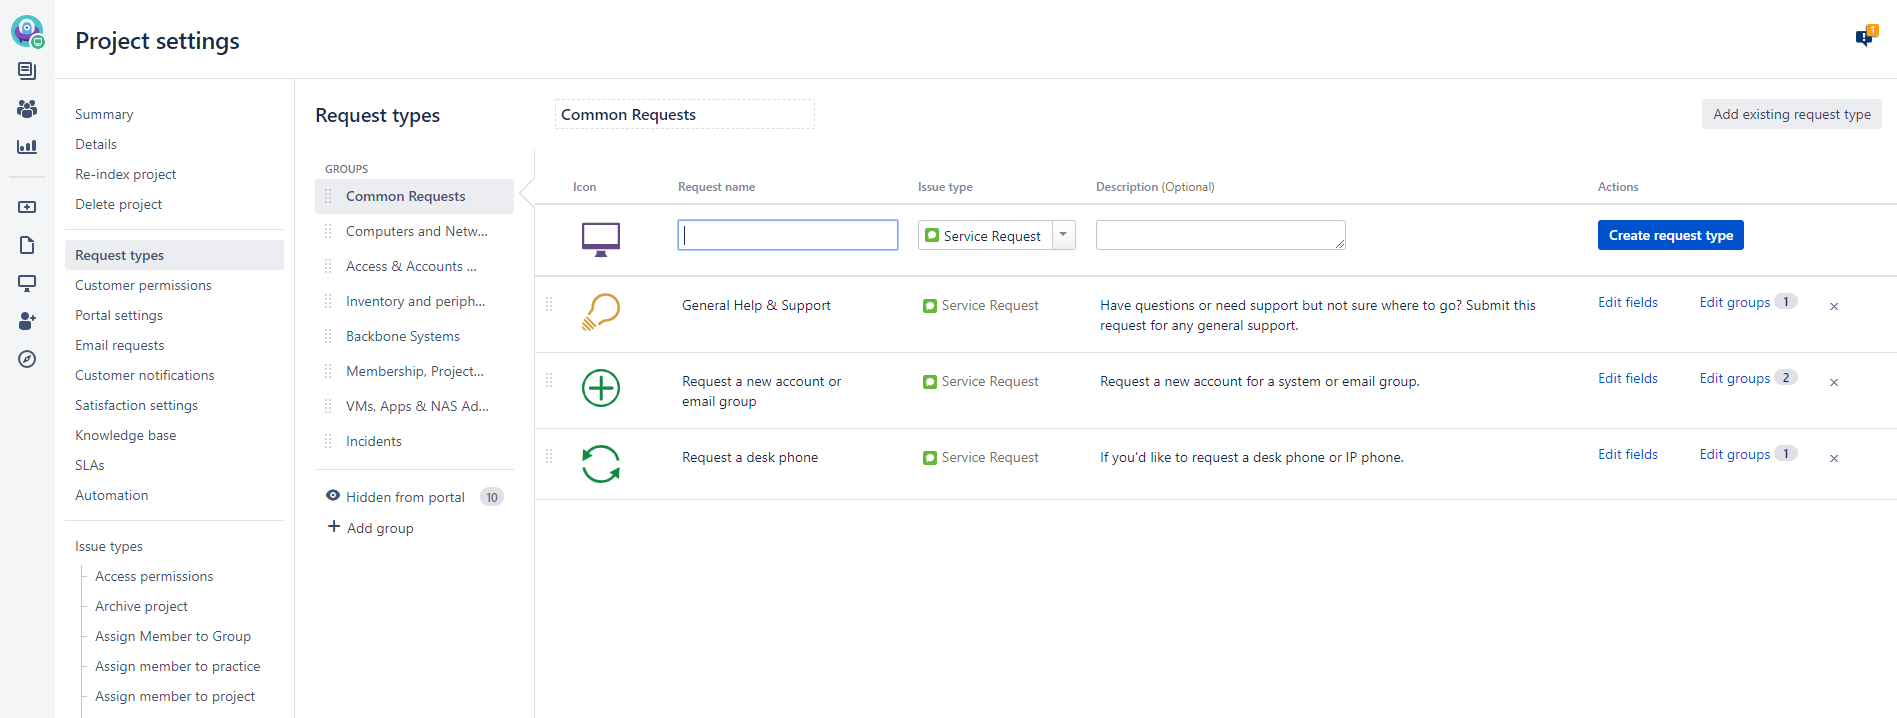
Request Types
In each of the groups we can add different request types. But before doing that, we need to determine all the issue types that are needed since every request type is a kind of issue type. The default JIRA Service Desk issue types are: Service Request, Service Request with Approval, Change, Incident, Problem, Task and Sub-task. If needed, new issue types can be defined and used.
Request types let you define and organize incoming issues so your service desk team can more efficiently help your customers.
To add a request type, go to Settings > Request types. You should see your requests in the sidebar and select Create request type.
When creating a new request type, we select an icon, request name, issue type and description:
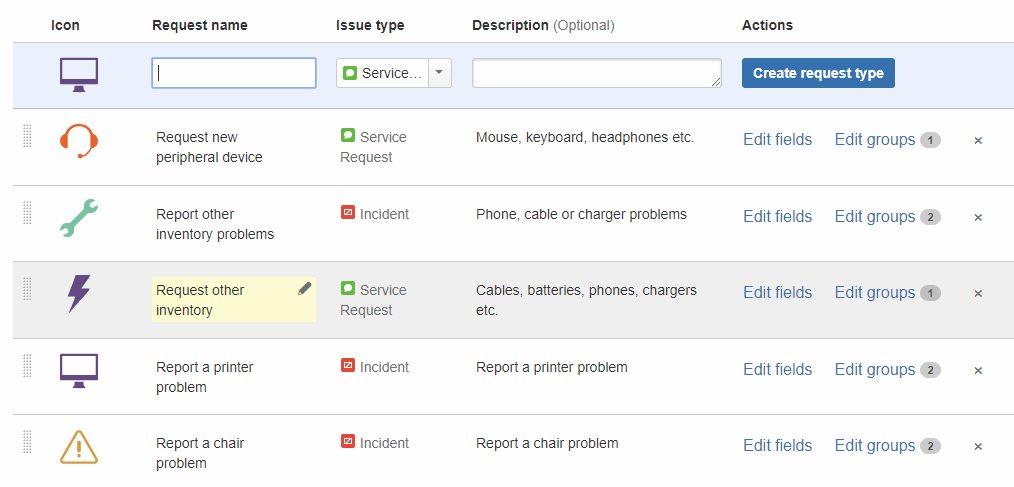
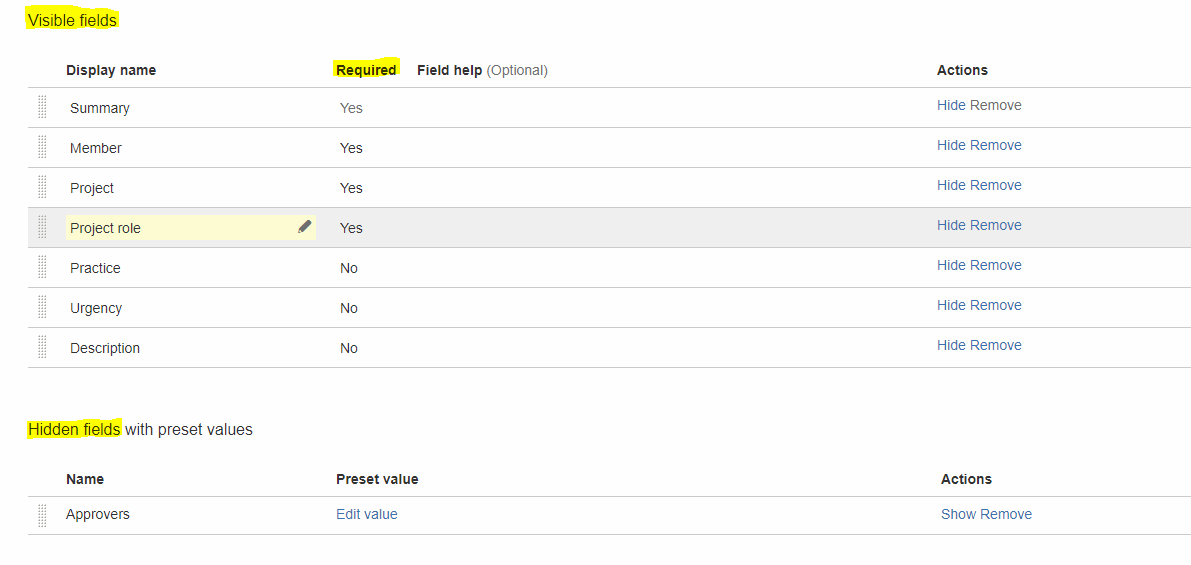
Fields
When created, we have the opportunity to Edit Fields (this means that only certain fields are included in every request type, and this is something to be determined before creating the types). There is a list of existing predefined fields, but we can create as many custom fields as needed depending on our needs.
Some of the fields can be made required, which means that they have to have value on creation, and some can be hidden (invisible) – only for the agents to see.
Fields help customers understand what information they need to provide when submitting a request.
To add or edit fields, go to Settings > Fields. You should see your filed configuration.
Screens
There is a possibility to have different screens for the customers (ones who create the requests) – Create Screen, and for the service desk agents (who work on resolving the requests) – Edit/View screen.
To add or edit screens, go to Settings > Screens. You should see your screens configuration.
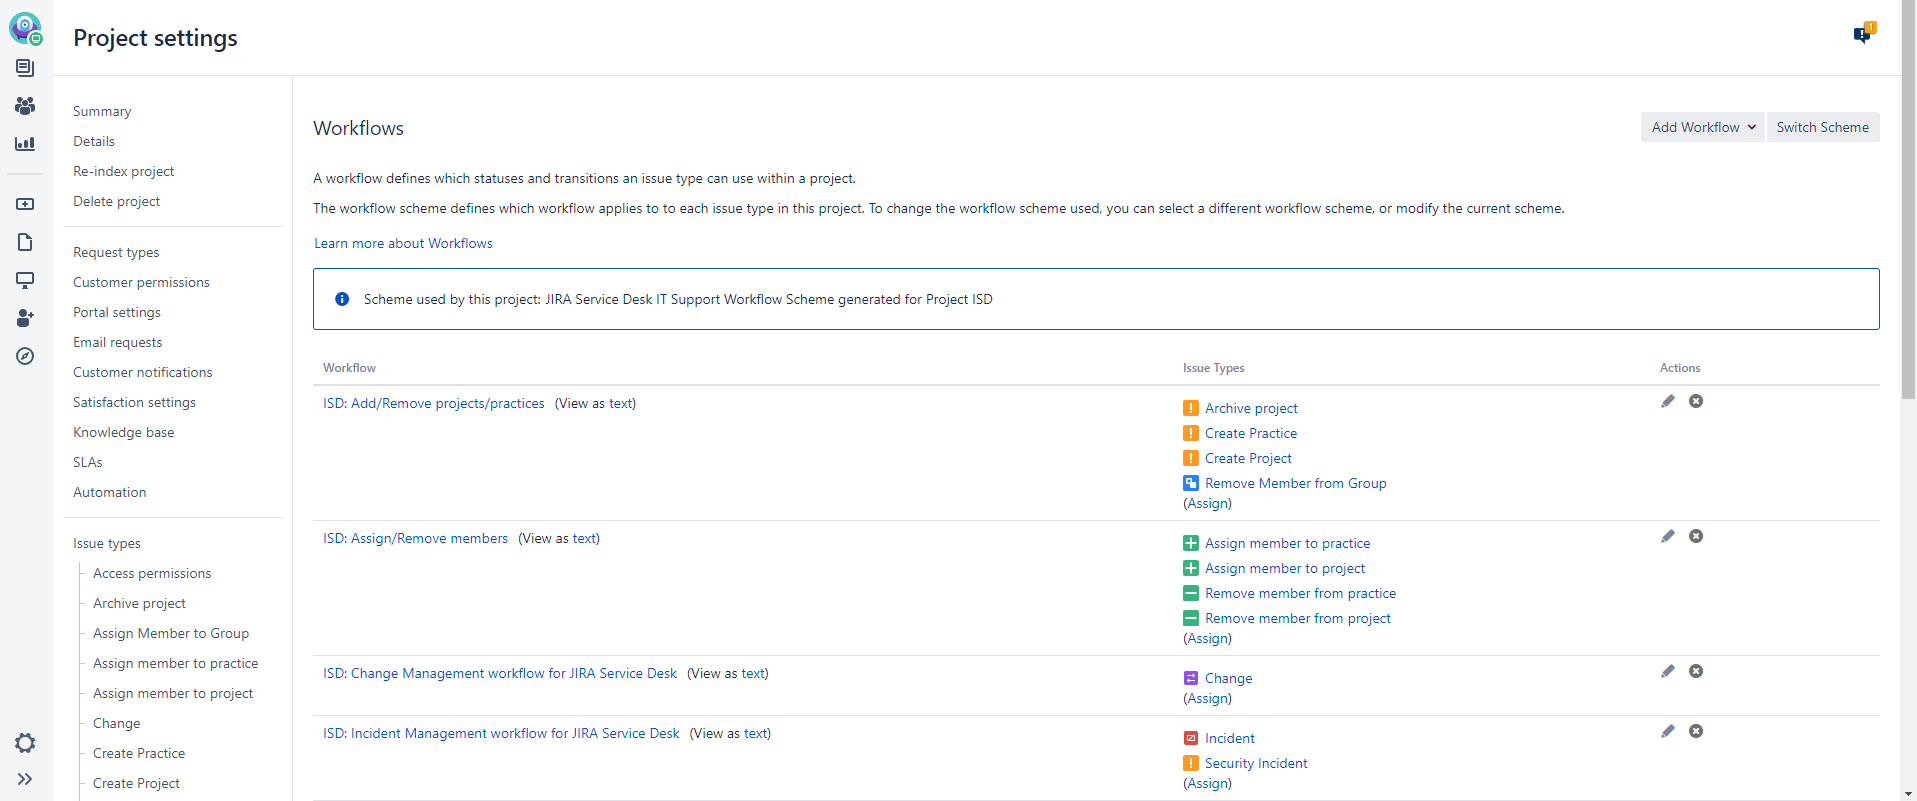
Workflow
All the default Jira Service Desk issue types mentioned above have their own defined workflows. If we create a new issue types or need to make changes to the existing processes, we can always create new workflows. This is also something that is part of the basic configuration of Service Desk.
A Jira workflow is a set of statuses and transitions that an issue moves through during its lifecycle, and typically represents a process within your organization. Workflows can be associated with particular projects and, optionally, specific issue types by using a workflow scheme.
To add or edit workflow, go to Settings > Workflows. You should see your workflow configuration.
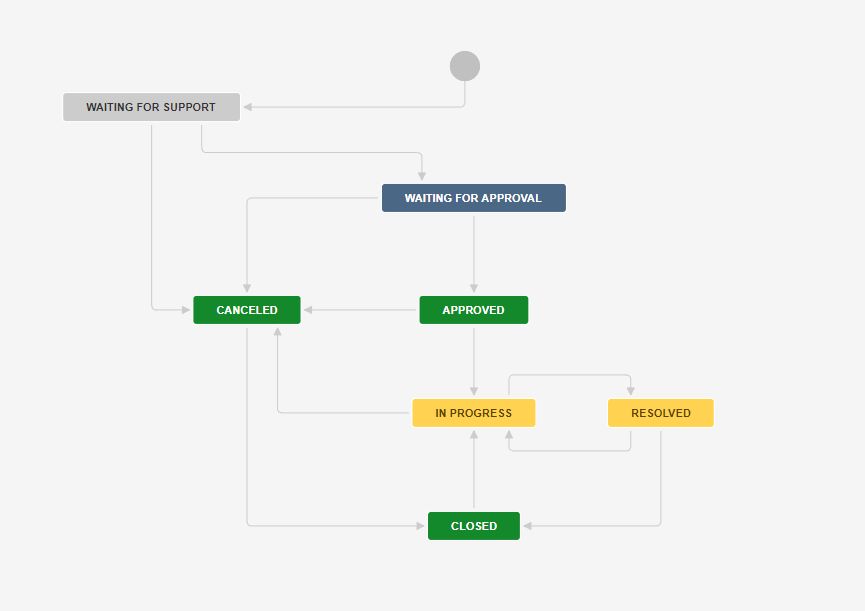
If you want to see more details about your workflow, go to edit mode of the workflow.
Permission and Notification Schemes
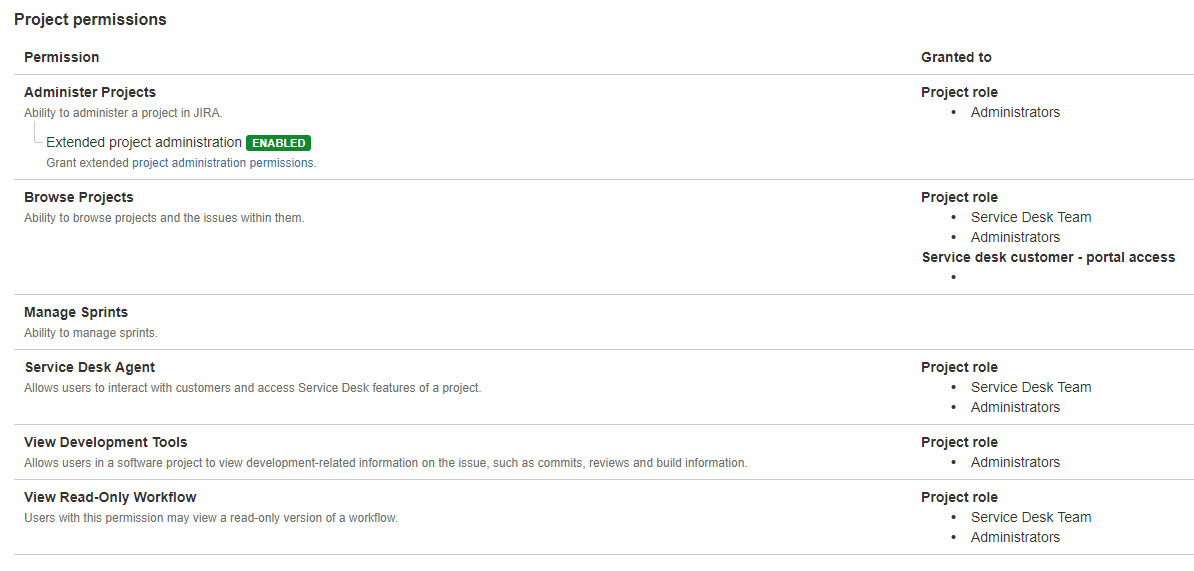
Defining the Permission and Notification Schemes is also very important, but it can be considered as a second phase of customization (after all the previously mentioned things are defined).
To edit permission schema, go to Settings > Permissions. You should see your project permissions configuration.
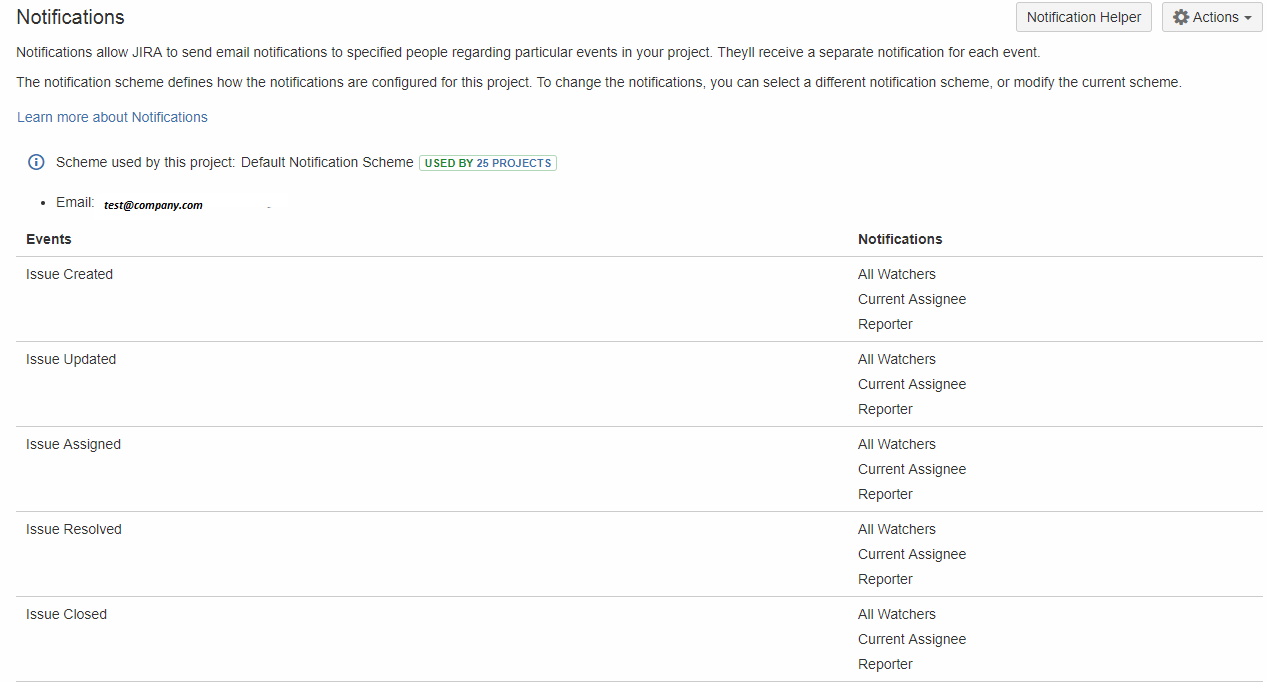
Jira applications can generate email notifications for various events that happen throughout the lifecycle of an issue, including custom events. The notifications are defined within a notification scheme (see below), which associates particular events with particular email recipients. The notification scheme is then assigned to a particular project.
To edit a notification schema, go to Settings > Notifications. You should see your notifications configuration.
Groups and Roles
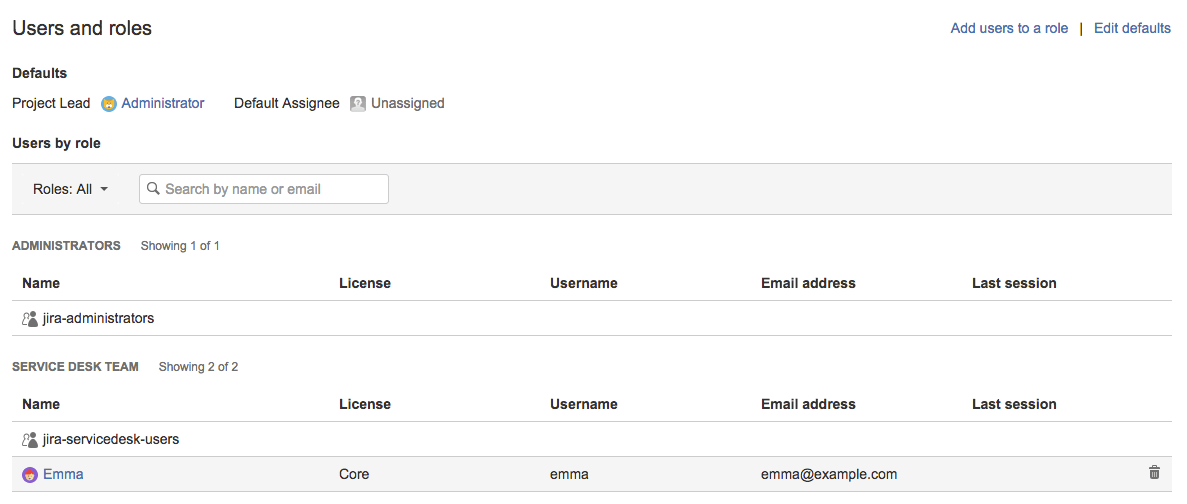
At the end, I will just mention that there is a possibility to define different Groups and Roles in Service Desk to help you restrict the permissions and notification, as well as give different access to groups of people that do not have license. Collaborators are not an official role, but you can bring in non-agents in Jira to work with agents on JSD projects. Simply add them to the Jira Service Desk Team role in a project, and they can view issues, be @mentioned, and make internal comments without using agents license.
To add or edit groups and roles of the users, go to Settings > Users and roles.
If you need more details about these tools like, demo, help in configuration or implementation of the best practices, please contact us.
For more details about the tool itself, you can visit the official Atlassian website on the following link.