
In your Kubernetes cluster, you might need to deploy multiple services as part of your application. Some of them should be publicly accessible. You could use a separate load balancer for each of the services that you want to expose to the outside world, but it is not a very rational approach. It would be nice if you can differentiate traffic entering your cluster and make a routing decision based on the properties of the request. To be able to do this, you need a routing mechanism that understands application layer protocol (in most cases HTTP).
Istio can intercept all traffic entering or exiting the pod, by injecting sidecar proxy containers. This creates another layer of communication, hidden from deployed applications. Once in charge of all traffic between pods, Istio can make decisions about routing and load balancing, manage authentication and authorization and can keep detailed track of all communication. As part of its routing capabilities, Istio can recognize HTTP traffic and make its routing decisions based on HTTP properties. In this article, we will see two simple examples that demonstrate application-layer routing.
Prerequisites
It is assumed that you already have Kubernetes cluster. In our example, we are using Docker Desktop.
If you don’t have Istio installed, you can download it from https://github.com/istio/istio/releases
After unpacking the archive, find istioctl executable in the bin folder. To install Istio in your cluster, execute:
istioctl install --set profile=demo -y
You can follow more detailed instructions for installing Istio in your cluster here.
Istio uses sidecar containers and it will inject its containers in your pods in namespaces where you have enabled Istio injection. For our examples, we will create a separate namespace that will have Istio injection enabled and set this namespace as default.
kubectl create namespace mesh-test
kubectl config set-context --current --namespace=mesh-test
kubectl label namespace mesh-test istio-injection=enabled
To enable outside traffic into your cluster, you need an external load balancer. When installing Istio, in the Istio-system namespace, a service named istio-ingressgateway of type LoadBalancer is created. If your Kubernetes cluster is hosted by some cloud provider, an external LoadBalancer will be created and the external IP address of the istio-ingressgateway service will be the address of created LoadBalancer.
You can check your configuration:
$ kubectl get service istio-ingressgateway -n istio-system

NAME                   TYPE           CLUSTER-IP      EXTERNAL-IP   PORT(S)             AGE
istio-ingressgateway   LoadBalancer   10.105.225.77   localhost     15021:30304/TCP …   16d
In our case, we are using Docker Desktop and the external IP of istio-ingressgateway is localhost, which means we can access the cluster from the host machine using localhost.
If you are using minikube, you can use minikube tunnel command which will assign an external IP address to the ingressgateway.
Creating a Test Environment
To demonstrate Istio routing, we will create two web servers using Nginx server and Apache server, so when we access them from the browser, we can tell to which server our traffic is routed.
Paste the following content in a terminal:
cat << EOF | kubectl apply -f -
apiVersion: apps/v1
kind: Deployment
metadata:
  labels:
    app: httpd
  name: httpd-server
spec:
  replicas: 1
  selector:
    matchLabels:
      app: httpd
  template:
    metadata:
      labels:
        app: httpd
    spec:
      containers:
      - name: httpd
        image: strm/helloworld-http
        ports:
          - containerPort: 80
---
apiVersion: apps/v1
kind: Deployment
metadata:
  labels:
    app: nginx
  name: nginx-server
spec:
  replicas: 1
  selector:
    matchLabels:
      app: nginx
  template:
    metadata:
      labels:
        app: nginx
    spec:
      containers:
      - name: nginx
        image: nginxdemos/hello
        ports:
          - containerPort: 80
EOF
You should receive confirmation that the deployments are created:
deployment.apps/httpd-server created
deployment.apps/nginx-server created
Next, we will create ClusterIP services for each deployment:
cat << EOF | kubectl apply -f -
apiVersion: v1
kind: Service
metadata:
  name: clusterip-httpd
spec:
  selector:
    app: httpd
  ports:
    - protocol: TCP
      port: 3080
      targetPort: 80
---
apiVersion: v1
kind: Service
metadata:
  name: clusterip-nginx
spec:
  selector:
    app: nginx
  ports:
    - protocol: TCP
      port: 3080
      targetPort: 80
EOF
Up to this point, we haven’t created any Istio resources except sidecar containers that are injected automatically in our pods.
We can check our resources:
$ kubectl get pods
NAME                            READY   STATUS    RESTARTS   AGE
httpd-server-7c8c56766f-sd94z   2/2     Running   0          14s
nginx-server-6c46465cc6-6jw6j   2/2     Running   0          14s

$ kubectl get services
NAME              TYPE        CLUSTER-IP      EXTERNAL-IP   PORT(S)    AGE
clusterip-httpd   ClusterIP   10.108.248.17   <none>        3080/TCP   12m
clusterip-nginx   ClusterIP   10.111.166.92   <none>        3080/TCP   12m
From running pods, we can see that there are two pods with two containers running in each, meaning that in each pod we created, a sidecar container is injected.
ClusterIP services are listening on port 3080 internally and at this moment we don’t have communication with servers from outside the cluster.
Istio Routing
Istio Gateway
Istio gateway is used to control inbound and outbound traffic for the mesh.
cat << EOF | kubectl apply -f -
apiVersion: networking.istio.io/v1beta1
kind: Gateway
metadata:
  name: server-gateway
spec:
  selector:
    istio: ingressgateway
  servers:
  - port:
      number: 80
      name: http
      protocol: HTTP
    hosts:
    - "*"
EOF
From the configuration, you can see that selector is “Istio: ingressgateway”. It is one of the labels of the LoadBalancer service created with Istio installation.
You can show labels of the service and see that “Istio: ingressgateway” is one of them.
kubectl get service istio-ingressgateway -n istio-system --show-labels
This gateway will allow all HTTP traffic coming from istio-ingressgateway on port 80 for any host in the cluster.
Actual routing rules for traffic allowed by the gateway are defined in Istio virtual service.
Istio Virtual Service
In Istio virtual service we are defining routing rules for data allowed by a particular gateway. Request properties can be matched with defined values and traffic that matches is routed to a specified destination. Matches are evaluated in sequential order as they are defined.
Virtual service has http section for defining rules for HTTP/1.1, HTTP2, and gRPC traffic, tcp section for TCP rules and tls section for unterminated TLS traffic.
HTTP traffic can be matched by the following properties:
- Authority
- Headers
- Method
- queryParams
- Scheme
- Uri
Match type can be exact, prefix, or regex. More info about HTTP matches can be found in Istio documentation.
Path-Based Routing
We will create a virtual service that will route ingress traffic based on the request path. If the path is /nginx, traffic will be routed to clusterip-nginx service and if it is /apache, it will be routed to clusterip-httpd service.
cat << EOF | kubectl apply -f -
apiVersion: networking.istio.io/v1beta1
kind: VirtualService
metadata:
  name: web-server
spec:
  hosts:
  - "*"
  gateways:
  - server-gateway
  http:
    - match:
      - uri:
          prefix: /nginx
      rewrite:
        uri: /
      route:
      - destination:
          host: clusterip-nginx
          port:
            number: 3080
    - match:
      - uri:
          prefix: /apache
      rewrite:
        uri: /
      route:
      - destination:
          host: clusterip-httpd
          port:
            number: 3080
EOF
We are using the server-gateway we created in the previous step to receive traffic on port 80, make a routing decision based on URI prefix and redirect traffic to port 3080 of the corresponding service.
Additionally, we are rewriting URI to “/”, because neither of the servers has resources for serving at /nginx or /apache path and both of them will serve only from the root.
In this example, we are using a short name for destination and it works because virtual service and destination are in the same namespace. For the production environment, it is recommended to use fully qualified host names.
After creating a virtual service, you can open your browser at http://localhost/apache and http://localhost/nginx (if you are not using Docker Desktop, look for the external IP address for the LoadBalancer service and use it instead of localhost). You should see different responses depending on the path in the request.

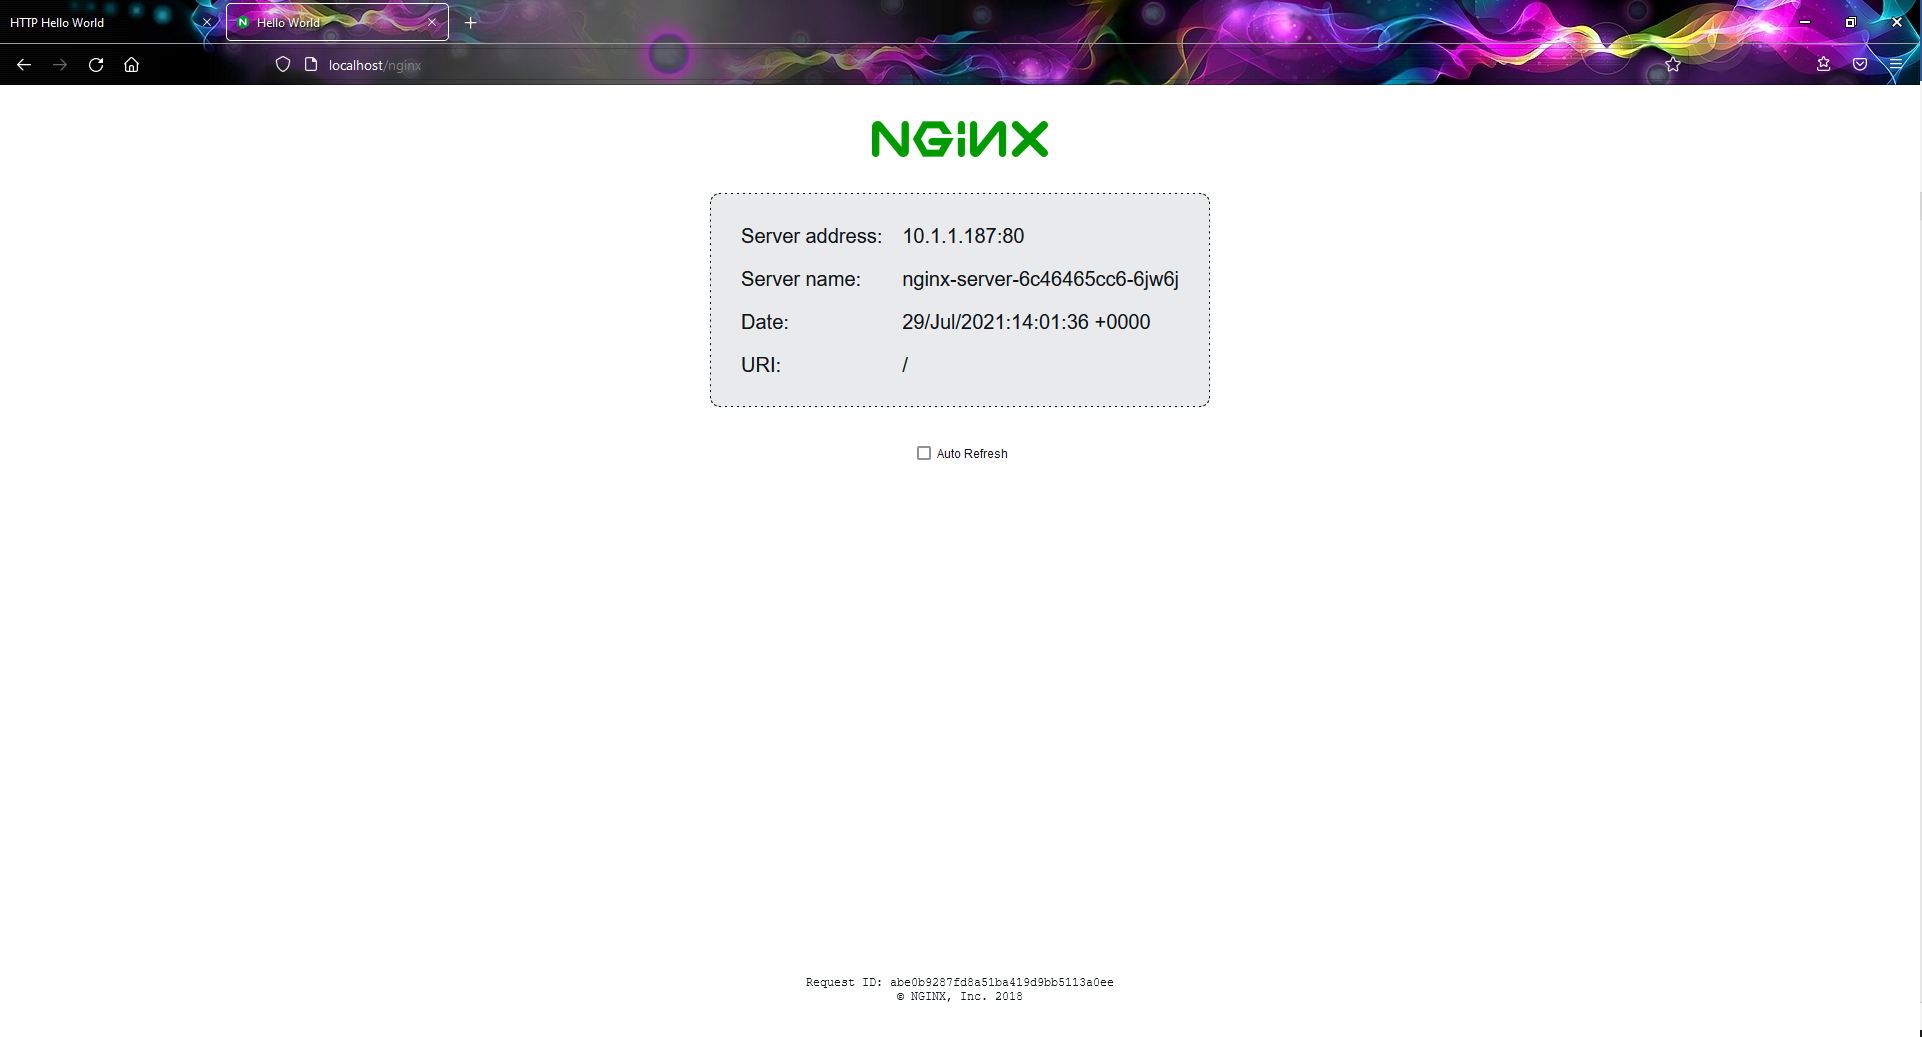
Routing Based on Request Headers
To demonstrate routing based on headers, we will use a “user-agent” header and route traffic to a different server depending on which browser sent the request. If we open the URL from Chrome, the apache web page will be presented for the Firefox – Nginx page.
cat << EOF | kubectl apply -f -
apiVersion: networking.istio.io/v1beta1
kind: VirtualService
metadata:
  name: web-server
spec:
  hosts:
  - "*"
  gateways:
  - server-gateway
  http:
    - match:
      - headers:
          user-agent:
             regex: '.*Firefox.*'
      route:
      - destination:
          host: clusterip-nginx
          port:
            number: 3080
    - match:
      - headers:
          user-agent:
             regex: '.*Chrome.*'
      route:
      - destination:
          host: clusterip-httpd
          port:
            number: 3080
EOF
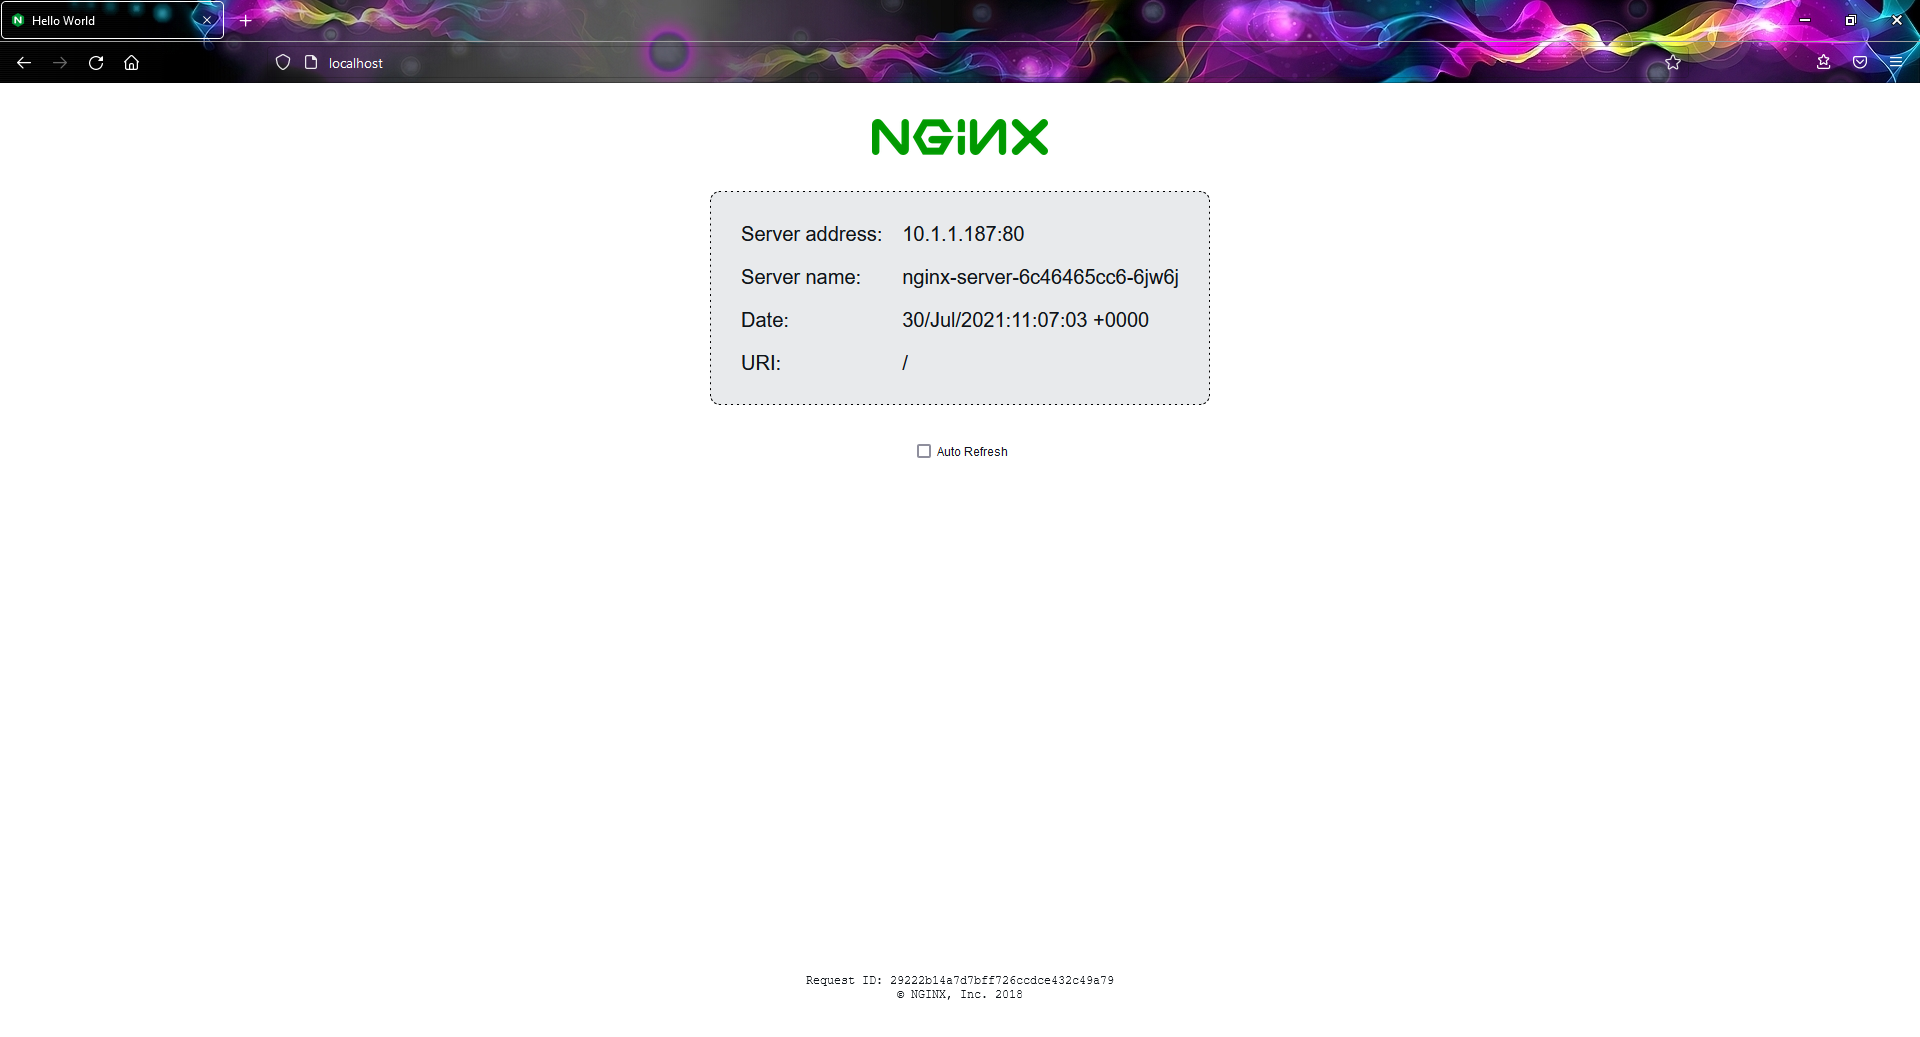
If you try to open the same http://localhost/ from Chrome and Firefox, you should see different pages.
Note that this time we don’t need to rewrite the URI because the path is “/”.
(Image 3 – Httpd is serving the responses for requests from Chrome)
Conclusion
In this article, we demonstrated basic routing rules in Istio Virtual service, based on HTTP properties. Once you understand the basic principles of writing routing rules, you can use Istio virtual service for much more complex scenarios.
This is just part of Istio’s capabilities. Besides traffic management, Istio has security features that enable authentication and authorization. It also generates detailed telemetry for service communication which provides observability of the mesh. More detailed information about Istio can be found in its official documentation.