What is a Jira workflow?
A Jira workflow is a basic part of Jira since it describes a process. All the statuses and transitions in a workflow in fact describe the path that an issue goes through from its creation to its closing. Except for its basic meaning, the workflow is where we can set some limitations, include phases of approvals, create automatic links, or even be in synchronization with development tools.
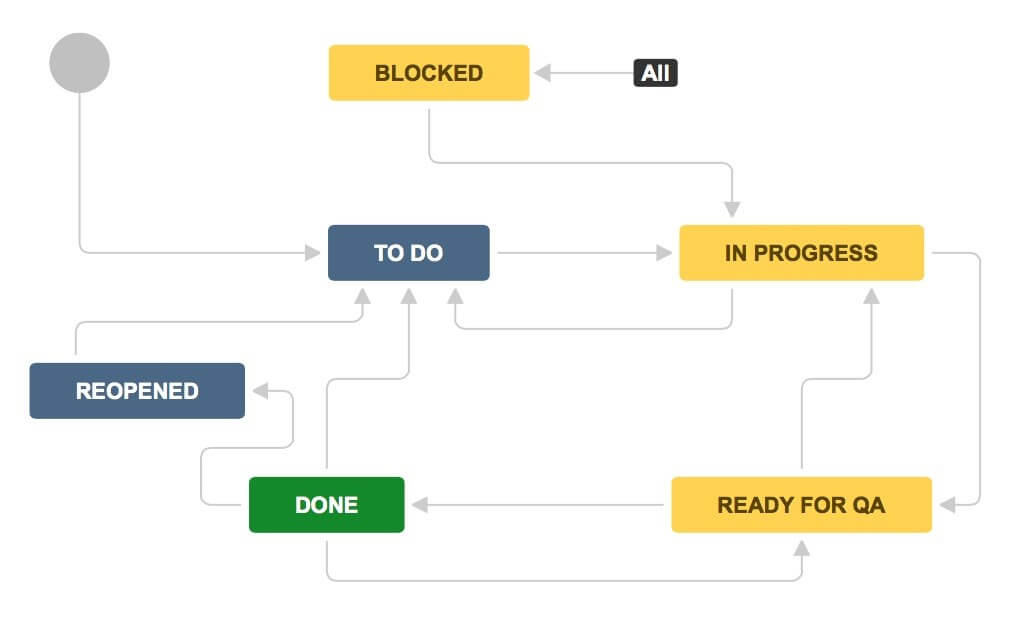
There is a lot to be said if we want to explain one workflow in all its aspects. In this blog we are going to describe one part of the workflow, in face we are going to talk about adding a post function to a workflow’s transition.
In an extremely basic workflow that means:
- Creating an Issue, to reflect a new task. This will have a “To Do” status.
- Marking it as “In progress” once the work is begun.
- Then, when the task is finished, you can mark it as being “Done”. And you’ve already gone from one end of the workflow to the other.

Workflow Statuses and Transitions
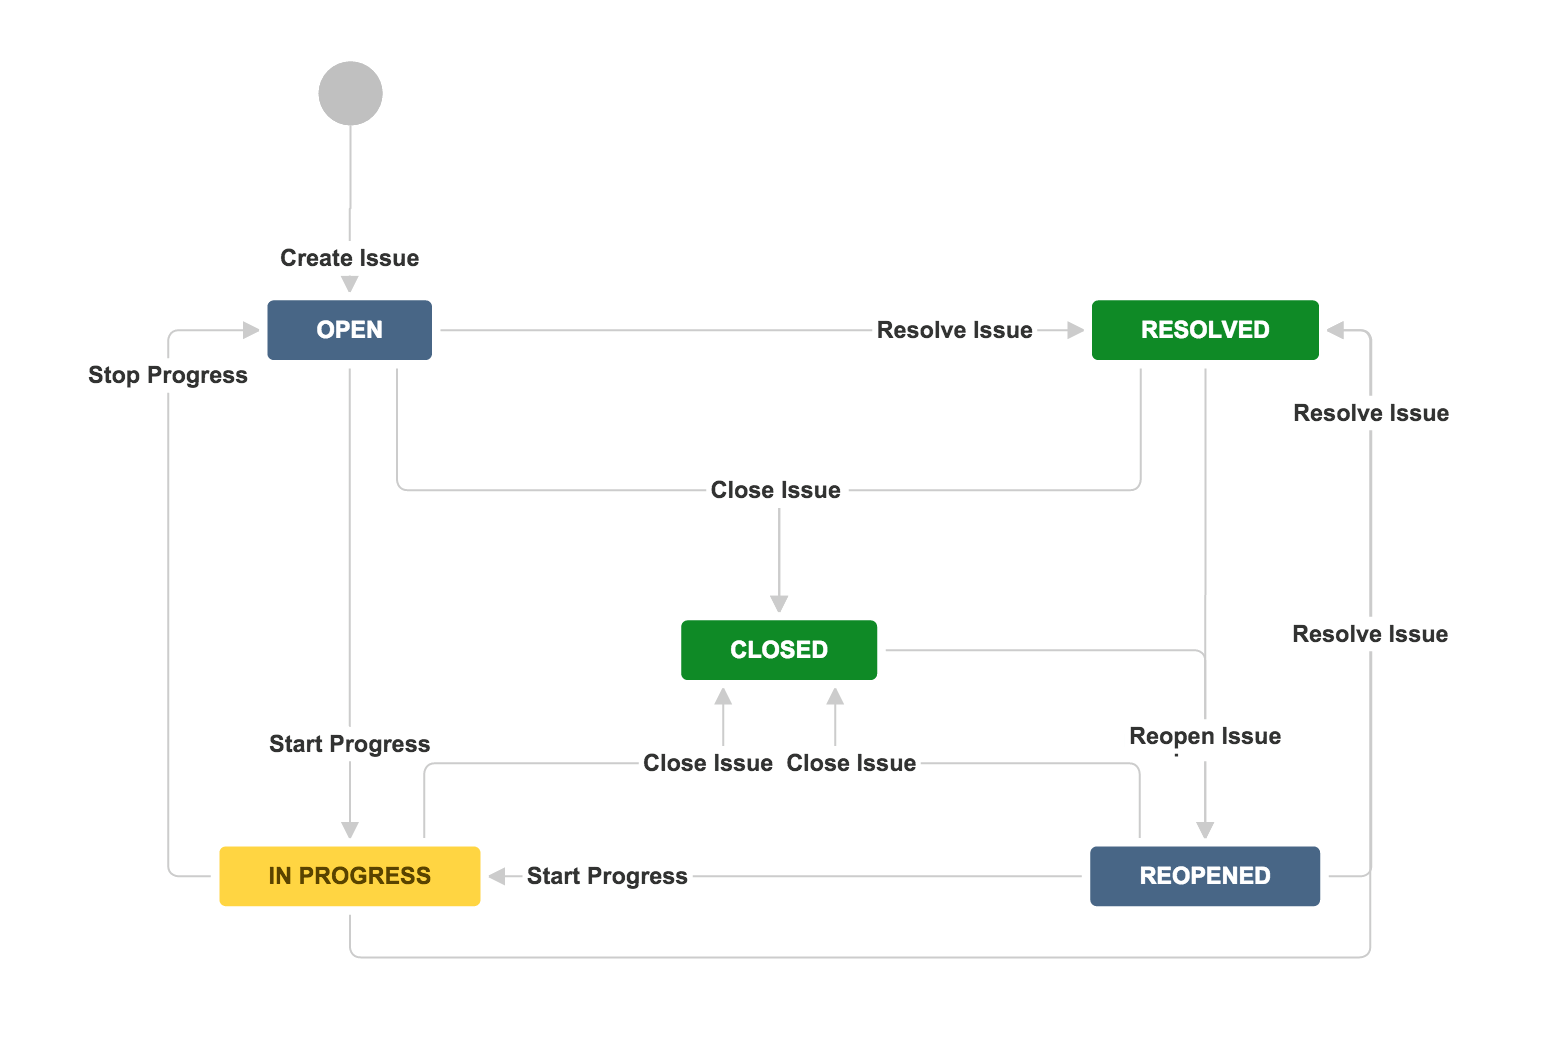
A status represents the state of an issue at a specific point in your workflow. A transition is a link between two statuses that enables an issue to move from one status to another. In order for an issue to move between two statuses, a transition must exist. A transition is a one-way link, so if an issue needs to move back and forth between two statuses, two transitions should be created.
Workflow post functions
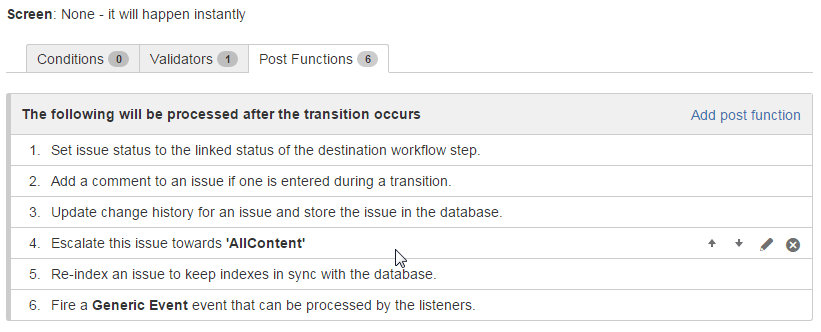
Every Jira transition has the following essential post functions performed in this order:
- Set an issue status to the linked status of the destination workflow step
- Add a comment to an issue if one is entered during a transition
- Update change history for an issue and store the issue in the database
- Re-index an issue to keep indexes in sync with the database
- Fire a Generic Event that can be processed by the listeners
These essential post functions cannot be deleted from a transition or reordered.
Adding a post function on transition
Jira includes several optional post functions that can be added to transitions.
- Assign to Current User
- Assign to Lead Developer
- Assign to Reporter
- Create a Perforce Job Function
- Notify Hipchat
- Trigger a Webhook
- Update Issue Field
To add a post function to a transition, edit the workflow that contains the transition, select the transition, then click Post functions in the properties panel for the transition.
Add a post function to a transition:
- Click Workflows and then Edit for the relevant workflow.
- In diagram mode, select the transition arrow. In text mode, select the transition’s name from the Transitions (id) column.
- In diagram mode, click Post functions in the properties panel to show the triggers configured for the transition. In text mode, select the Post functions tab.
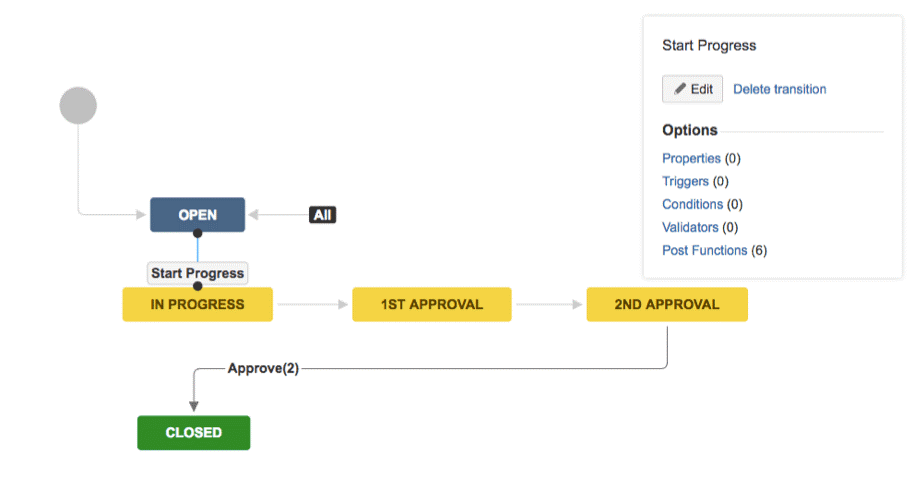
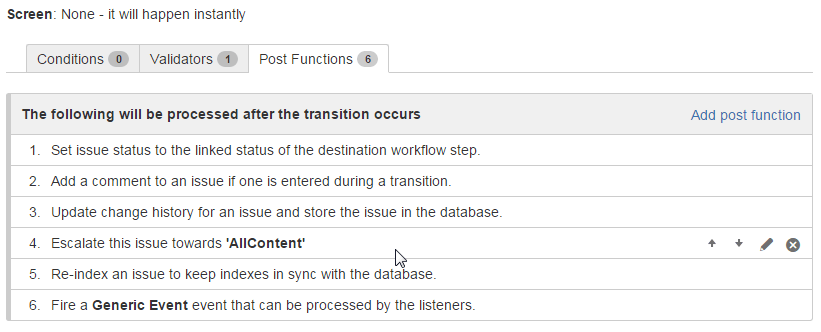
When you click Add post function you can choose from the available post functions, and set any necessary parameters.
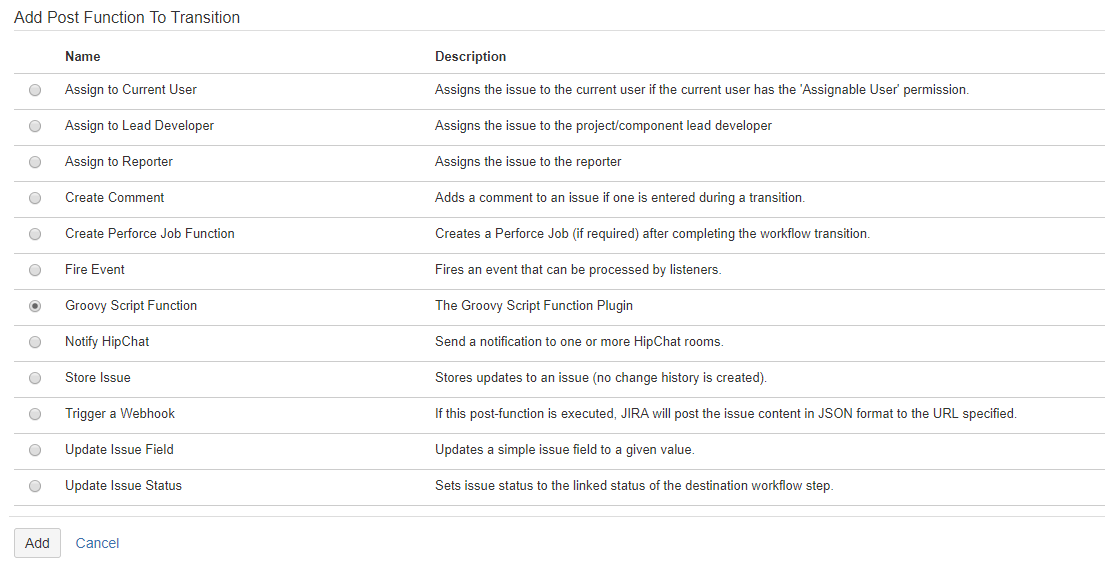
Using a custom Groovy post functions
The list of additional post functions can be enriched by installing different plugins. It is possible to develop and implement Jira plugin that will support definition of Workflow Post Functions based on Dynamic Groovy Script specified in the Jira user interface (something we have done in our company). In the following text we will explain how to add post function of type Groovy Script Function to a transition (the presumption is that the plugin is already developed and installed on the JIRA instance).
When the workflow we want to make changes in is in Edit mode, first we select the transition (for example transition Create tasks) and then we click Post functions in the properties panel for the transition.
This takes us to a window that represents all the Triggers, Conditions, Validators and Post Functions (if any) defined for the transition. In the Post Functions part besides the essential five post functions mentioned previously, the Add post function button is in the right upper corner enabling us to add an additional post function to the transition.
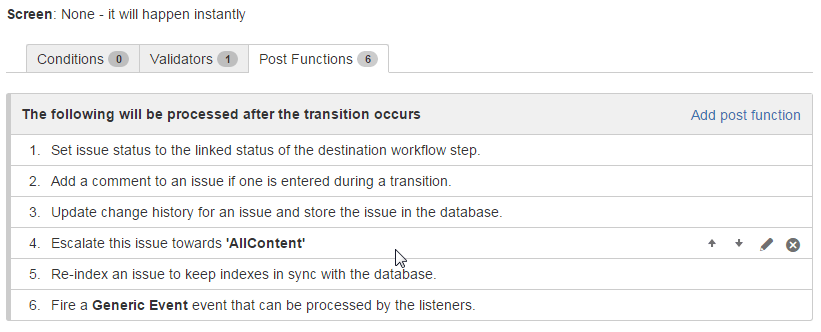
By clicking this button, we go to the Add Post Function To Transition window, where one of the options to choose is Groovy Script Function (The Groovy Script Function Plugin).
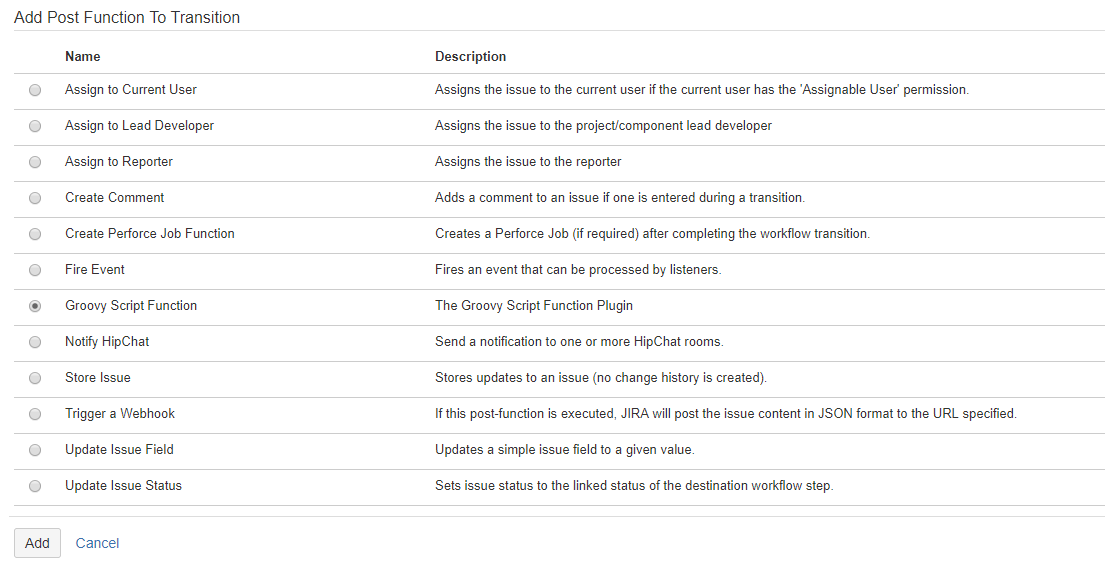
When selected by clicking Add button we get this window:
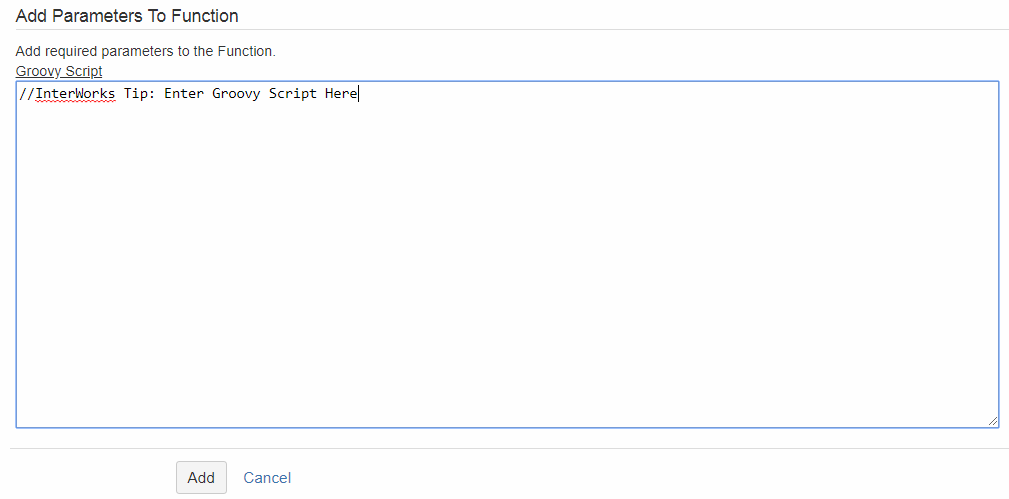
Here is where we specify the Groovy code that will make the needed changes. The code below will show the adding or removing watchers from a ticket.
Adding watchers using custom Groovy post function
//Add WATCHERS to the ticket - all members from the group "Arhiva"

import com.atlassian.jira.component.ComponentAccessor
import com.atlassian.jira.issue.Issue
def userManager = ComponentAccessor.getUserManager()
def groupManager = ComponentAccessor.getGroupManager()
def issueManager = ComponentAccessor.getIssueManager()
def watcherManager = ComponentAccessor.getWatcherManager()
groupManager.getUsersInGroup("Arhiva").each {
	def issue = issueManager.getIssueObject(issue.id)
	watcherManager.startWatching(it, issue)
Removing watchers using custom Groovy post function
//Remove watchers from ticket

import com.atlassian.jira.component.ComponentAccessor
def watcherManager = ComponentAccessor.getWatcherManager()
def userUtil = ComponentAccessor.getUserUtil()
watcherManager.getCurrentWatcherUsernames(issue).each {
    watcherManager.stopWatching(userUtil.getUser(it), issue)
}
Assign issue to the user selected form the custom list
//Assign issue to a user (by FullName) selected in a List

import com.atlassian.jira.component.ComponentAccessor
import com.atlassian.jira.bc.user.search.UserSearchService;
def customFieldManager = ComponentAccessor.getCustomFieldManager()
def direktor = issue.getCustomFieldValue(customFieldManager.getCustomFieldObject(10300)).getValue()
UserSearchService userSearchService = ComponentAccessor.getComponent(UserSearchService.class);
def users = userSearchService.findUsersByFullName(direktor)
if (users) {
    issue.setAssignee(users.first())         // an ApplicationUser
}
Conclusion
Jira provides a wide range of functionalities to realize lots of different use cases, but especially in business workflows requirements where the customers want to simplify and automate their processes, the implementation of the custom post functions is necessary.

