
Technology has become widely ingrained in our everyday lives increasing the threat of having your personal information or company’s data hacked, so quality assurance engineers are more than important. Due to this, many of the companies known worldwide are even hiring hackers to detect the security vulnerabilities in their websites and software products. This means that cyber security has become to be a major concern not only for individuals but businesses as well because data is the new currency. Having this in mind, it is crucial for companies to implement security testing for their websites, applications, and any digital products that they might have.
There are various tools already available on the internet that you can use for security testing. One of them is OWASP ZAP and in the following blog post, we are going to elaborate on what is it, how to set it up and use it, including some of the benefits of using it.
What is OWASP ZAP?
Zed Attack Proxy (or ZAP for short) is a free, open-source penetration testing tool being maintained under the umbrella of the Open Web Application Security Project (or OWASP). ZAP is designed specifically for web application pen-testing and is both flexible and extensible. [Source: www.zaproxy.org]
Setup
Let’s start with the installation of the application. We can download OWASP ZAP from https://www.zaproxy.org/download/ and run the installation. Note that ZAP requires Java 8 or higher in order to run. ZAP also has versions for Windows, Linux, Mac and has Docker images available.
Usage
When you start ZAP, you will be asked if you want to persist the session. Usually, we don’t want to, but when on a project, we’ll want to continue where we left off the previous day.
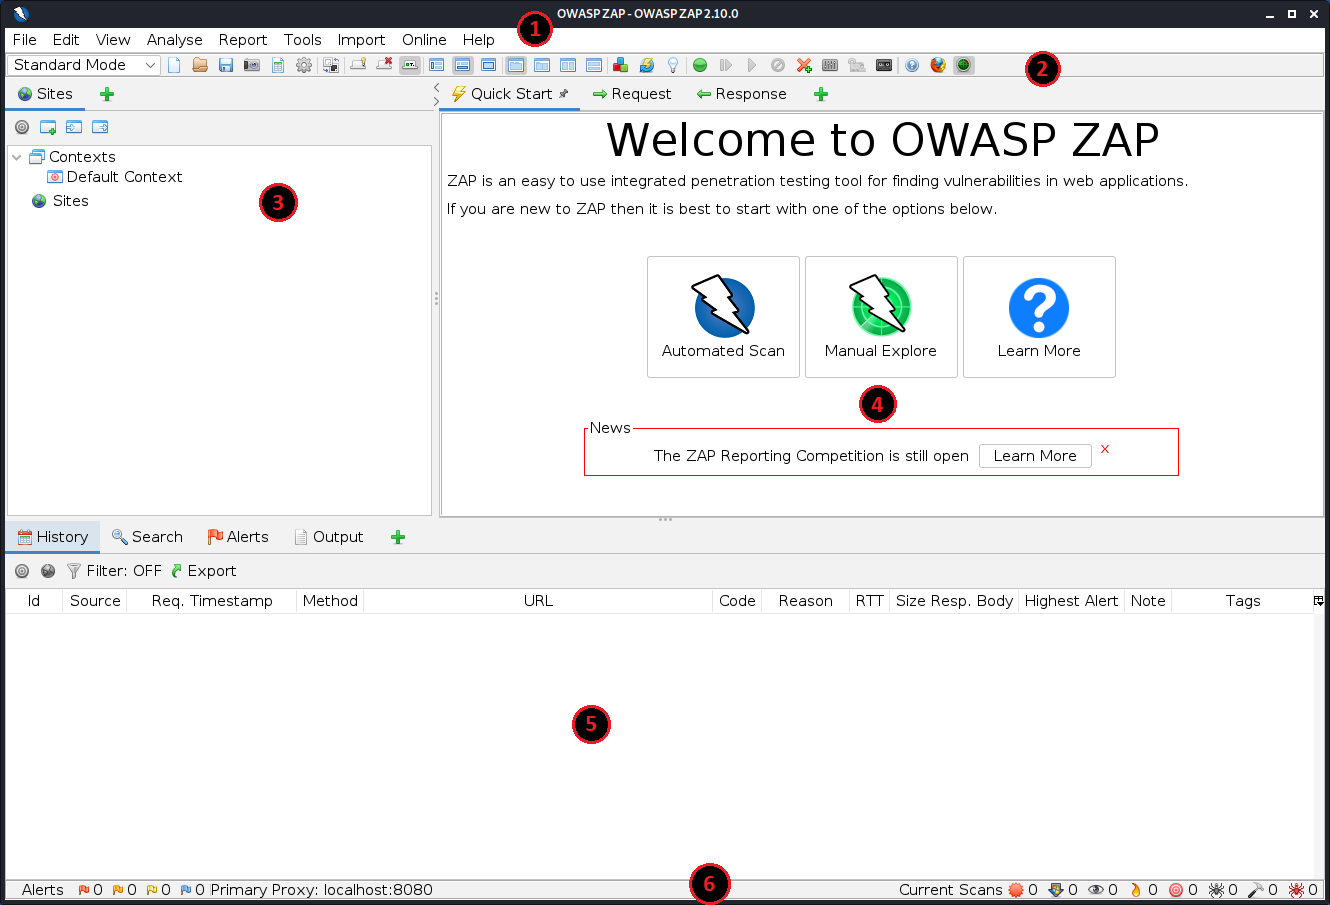
ZAP Desktop UI is composed of:
- Standard Menu Bar which provides access to the tools.
- Toolbar – This includes buttons that provide easier access to the most commonly used features.
- Tree Window – Displays the Sites tree and the Scripts tree.
- Workspace Window – Displays requests, responses, and scripts and allows you to edit them.
- Information Window – Displays details of the automated and manual tools.
- And the Footer – which displays a summary of the alerts and the status of the main automated tools.
While using ZAP, you can click ‘Help’ on most of the screens. There is also ‘Options’ icon on many screens. The great power of this tool is in the right-click menu, but more about that later…
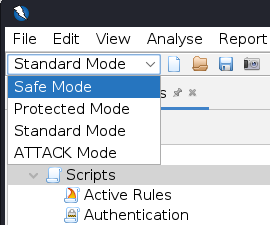
VERY IMPORTANT: You should only use ZAP to attack an application you have permission to test with an active attack. Because this is a simulation that acts like a real attack, actual damage can be done to a site’s functionality, data, etc. If you are worried about using ZAP, you can switch ZAP to safe mode in the dropdown on the main toolbar and select Safe Mode.
The easiest way to start using ZAP is the Quick Start tab. Just click Automated Scan button, enter a full URL (https://demo.owasp-juice.shop/) of the web app to attack, click the Attack button and the attack begins.
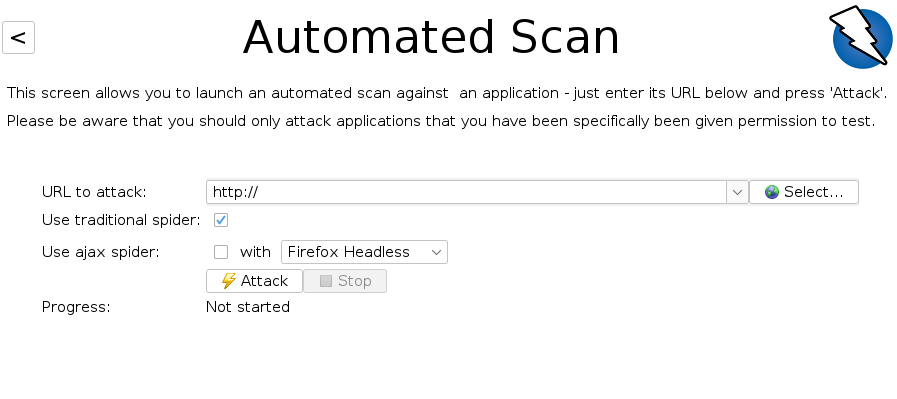
So, now ZAP will crawl the web application with its spider (ZAP scanners are called spiders) and it will passively scan each page it finds. This is mainly for finding the active links the page has by examining the HTML. Then, ZAP will use the active scanner to attack all of the discovered pages, functionality and parameters found by the passive spider. ZAP provides 2 spiders for crawling web applications, you can use either or both of them from the welcome screen.
The traditional ZAP spider is fast, but it is not always effective when exploring an AJAX web application. For AJAX applications, ZAP has a slower, AJAX spider that explores the web application by invoking browsers (web driver of course) which then follows the AJAX links.
ZAP will passively scan all of the requests and responses proxied through it. Passive scanning does not change responses in any way and is considered safe (just looking – not touching). Scanning is also performed in a background thread to not slow down exploration. Active scanning, however, attempts to find other vulnerabilities by using known attacks against the selected targets. Active scanning is the real attack and can put the targets at risk, so, again – NEVER use active scanning against targets you do not have permission to test.
Dangers aside, as ZAP spiders your web application, it constructs a map of your web applications’ pages and the resources used to render those pages. Then it records the requests and responses sent to each page and creates alerts if there is something potentially wrong with a request or response. By expanding the nodes, we can see the individual URLs accessed in the Sites from the Tree Window.
In the left side of the Footer, Alerts – contains a count of the Alerts found during your test, broken out into risk categories. These risk categories are:
- RED means the highest risk,
- ORANGE for medium,
- YELLOW is low,
- BLUE is informational
- and GREEN means it might be a false positive.
Expanding these risks (for example Cross-Domain JavaScript Source File Inclusion), we can see that in the request or the response tab, we have the compromised part highlighted with gray color. This is also a very dangerous thing to forget: Private IP Disclosure… You can see the IP address of the person that developed this. With a bit of luck and brute force, you can even access his personal data, or a local server at least.
Let’s get back to the Manual Explore. Click the Manual Explore button.
The passive scanning functionality is a great way to begin a vulnerability assessment of your web application, but it has some limitations. Pages protected by a login are not discoverable during a passive scan, unless you’ve configured ZAP’s authentication functionality. You don’t have a lot of control over the sequence of exploration in a passive scan, but ZAP provides many additional options for exploration and attacks outside of passive scanning.
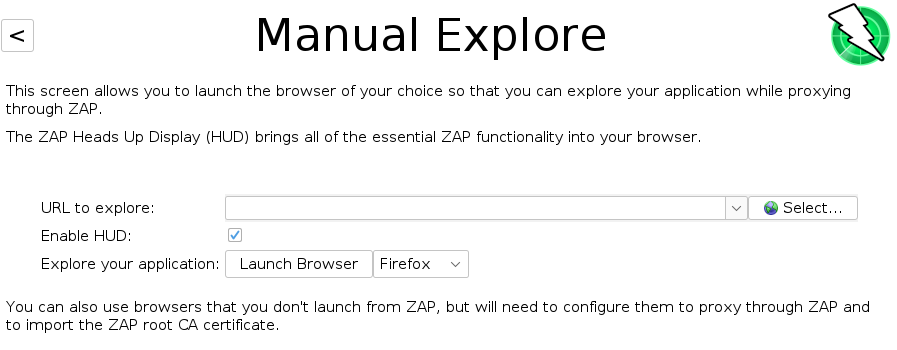

Again, enter the full URL of the web application you want to explore. By default, the Heads-Up-Display (or HUD) is enabled.
The HUD is an innovative interface that provides access to ZAP functionality directly in the browser. It’s highly recommended that anyone who wants to use the HUD goes through the tutorial since the HUD looks quite complex if you don’t know what it does.
Press the Launch Browser button and you’re off again.
ZAP has a lot of advanced features that are not immediately apparent, so that new users are not overwhelmed or scared by the vastness.
The right-click menu (that was promised previously), has so many options, for example, if you right click on any resource you can Attack just that resource or try different type of attack for a more thorough information. For example, you can choose to do it using AJAX Spider, which is also very configurable. By selecting Advanced Options, you can fine-tune number of browsers to use, the depth, or duration of the attack.
You can Flag as Context, for logging in, if configured, for testing while logged in, etc. you can Open URL in browser, a new session, you can see the Alerts for This Node… save, and many more features.
Also, there are additional options for the passive scanning. If you go to Options -> Passive Scan Rules You can fine-tune (or configure) the threshold or Quality of the add-on. There are beta or alpha versions and these plugins have slightly different types of rules.
ZAP is very highly configurable, it only does what you tell it to do. If you forget to turn a feature on, it won’t execute.
There are many tabs that are not shown. Some of the tabs are hidden by default, but will appear when relevant. Everywhere you see a green + there is something that can be added. You can add Scripting, or Spiders in the Info Window.
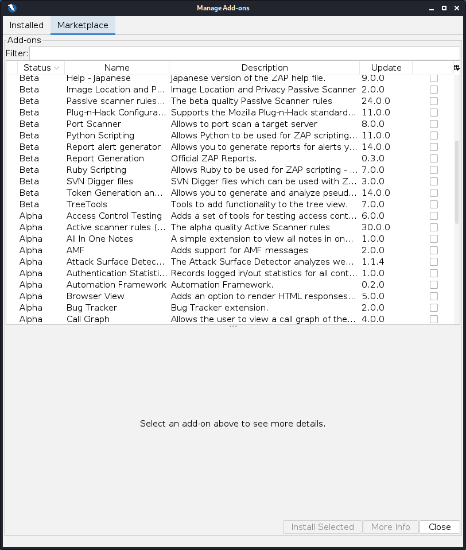
The ZAP desktop has a plugin architecture (much like JMeter has) in the so-called ZAP Marketplace, which can be accessed via this Manage Add-ons button on the toolbar.
This means that new functionalities can be added dynamically on the fly. Unlike JMeter, these add-ons are limited to only pentesting helpers.
ZAP is an ideal tool to use in automation with libraries for Java, Python, Node.js, PHP, Ruby & more. It can be combined with Selenium, so while the Selenium tests are running – ZAP collects the data! This is one of the most useful features we’ve seen in automating with this application. It can run in a headless mode and has a powerful API which allows you to control nearly all of the features available via the ZAP desktop. API can be accessed via http://localhost:8080/.
Scripting is also one of the more useful features in ZAP. It can be accessed via the + in the Tree section. There are many different types and there are even more Templates (at the bottom of the list) to start you up on the scripting.
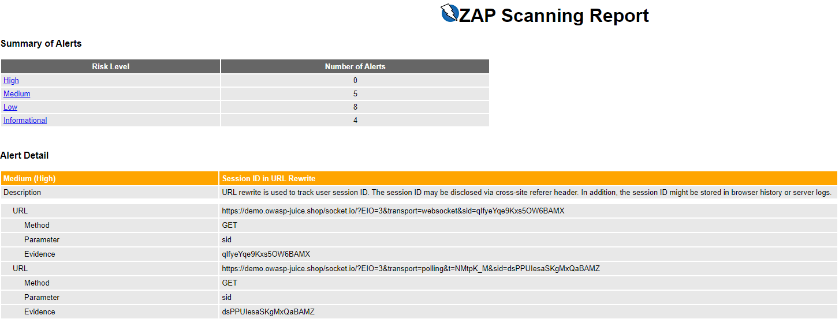
Reporting is also very easy and another powerful feature of ZAP. Just go to the Report Menu Item, and select your favorite format.
The report is divided by the same sections and color coding as the risk categories mentioned above.
All that’s left for us, is to interpret the results, relay them to the developer and hope they’re fixed soon so we can have a safer web application.
Why you should use OWASP ZAP & Summary
To sum up, in the last few years, security attacks and breaches, especially targeting bigger companies are on the rise. The main goal of Security Testing is to identify the threats in the system and measure its potential vulnerabilities, so the security threats, risks and vulnerabilities can be fixed in advance, so the system does not stop functioning or cannot be exploited when in production.
OWASP ZAP is the most commonly used tool for web application assessment, but also, many other tools can be used as a kind of a support as well.
How it works:
- ZAP creates a proxy server – what is known as a “man-in-the-middle proxy”
- All of the website traffic passes through that proxy server
- Once it’s running, it checks all web pages for vulnerabilities, risks, or threats
Benefits of using it:
- It can run in the background while manual testing the application
- It can be run to automatically crawl through all the pages in the application
- It can be integrated in automation tests
In addition, ZAP is very robust and has so many advanced features that are just waiting to be explored and used. We hope you have a chance to try it.